Difference between revisions of "Control Point (game mode)"
(→Strategy: Added a Strategy for Control Point) |
m (→Update history) |
||
| (9 intermediate revisions by 5 users not shown) | |||
| Line 2: | Line 2: | ||
[[File:Dustbowl s2c2.jpg|thumb|right|300px|[[Dustbowl]]]] | [[File:Dustbowl s2c2.jpg|thumb|right|300px|[[Dustbowl]]]] | ||
| − | {{Quotation|'''The Engineer'''|This point ain't gonna cap itself! Get over here!|sound= | + | {{Quotation|'''The Engineer'''|This point ain't gonna cap itself! Get over here!|sound=Engineer helpmecapture02.wav}} |
| − | '''Control Point''' ('''CP''') is a | + | '''Control Point''' ('''CP''') is a core [[List of game modes|game mode]], featured in four of the original six maps released with the game's launch. The game mode includes various formats which revolve around capturing and/or defending various [[Control Point (objective)|control points]]. |
== Gameplay == | == Gameplay == | ||
| Line 79: | Line 79: | ||
== Strategy == | == Strategy == | ||
{{main|Community Control Point strategy}} | {{main|Community Control Point strategy}} | ||
| − | |||
| − | |||
| − | |||
| − | |||
| − | |||
| − | |||
| − | |||
| − | |||
| − | |||
| − | |||
| − | |||
| − | |||
| − | |||
| − | |||
| − | |||
| − | |||
| − | |||
| − | |||
| − | |||
| − | |||
| − | |||
| − | |||
| − | |||
| − | |||
| − | |||
| − | |||
| − | |||
| − | |||
| − | |||
| − | |||
| − | |||
| − | |||
| − | |||
| − | |||
| − | |||
| − | |||
| − | |||
| − | |||
| − | |||
| − | |||
| − | |||
| − | |||
| − | |||
| − | |||
| − | |||
| − | |||
| − | |||
| − | |||
| − | |||
| − | |||
| − | |||
| − | |||
| − | |||
| − | |||
| − | |||
| − | |||
| − | |||
| − | |||
| − | |||
| − | |||
| − | |||
| − | |||
| − | |||
== Maps == | == Maps == | ||
| − | {{ | + | {{main|List of maps}} |
Control point maps carry the '''cp_''' prefix; community maps are identified with an italic font. | Control point maps carry the '''cp_''' prefix; community maps are identified with an italic font. | ||
| − | + | {{Maps table|Control Point}} | |
| − | {{Control | ||
== Update history == | == Update history == | ||
| Line 234: | Line 170: | ||
'''{{Patch name|12|5|2022}}''' ([[Smissmas 2022]]) | '''{{Patch name|12|5|2022}}''' ([[Smissmas 2022]]) | ||
* Added maps: Coal Pit and Frostwatch. | * Added maps: Coal Pit and Frostwatch. | ||
| + | |||
| + | '''{{Patch name|7|12|2023}}''' ([[Summer 2023]]) | ||
| + | * Added maps: Hardwood, Reckoner, and Sulfur. | ||
| + | |||
| + | '''{{Patch name|10|9|2023}} #1''' ([[Scream Fortress 2023]]) | ||
| + | * Added maps: Lava Pit and Sandcastle | ||
| + | |||
| + | '''{{Patch name|12|7|2023}}''' ([[Smissmas 2023]]) | ||
| + | * Added maps: Brew and Carrier. | ||
}} | }} | ||
Latest revision as of 01:44, 11 December 2023

| “ | This point ain't gonna cap itself! Get over here!
Click to listen
— The Engineer
|
” |
Control Point (CP) is a core game mode, featured in four of the original six maps released with the game's launch. The game mode includes various formats which revolve around capturing and/or defending various control points.
Contents
Gameplay
Offense
Control points are captured by standing on top of them. The speed at which a control point is captured depends on how many players from the capturing team are present on the point: two BLU players capturing a RED point capture that point faster than only one BLU player would. Scouts count as two players, as do Soldiers and Demomen wielding the Pain Train. There is a limit on how fast a Control Point can be captured (see Control point timing).
Defense
If players from both teams are on the same, unlocked control point, that point is said to be contested, which means no progress is made toward the point changing team control. When players from the offensive team are removed from the point, all of their progress is lost gradually over time, not immediately.
Reverting capture
When both teams are trying to capture a neutral point, captures can be reverted. If a team begins to capture a neutral point and then is driven off before capture is completed, the other team must first "revert" the progress that the first team had made before they can begin to make progress of their own.
Limitations
- Disguised Spies can only capture control points while disguised as their own team.
- Cloaked Spies cannot defend or capture a control point.
- ÜberCharged players cannot capture points but can block enemy captures.
- Scouts under the effects of the Bonk! Atomic Punch can neither block enemy captures nor capture points themselves.
Game modes

Symmetric
Symmetric Control Point maps play symmetrically. Both teams start with an equal number of controlled points and must capture all the points on the map to win. Due to its wide range of action, Symmetric Control Point maps place an emphasis on team movement and may be difficult for inexperienced players and those not used to playing in a coordinated group.
Symmetric maps come in two styles:
| Style | Description | Examples |
|---|---|---|
| Linear | Both teams start with an equal number of two controlled points and a central point that starts out controlled by neither team. At the beginning of the round, each team's control points are locked while the center point is unlocked and can be taken. Once a team takes the center point, the opponent's nearest point unlocks and can now be taken as well. From then on, no more than two points can be unlocked at a time; taking a point locks the point behind it and unlocks the one in front of it if it exists. Control points close to a team's spawn point are captured more quickly by the enemy team. Symmetric control point maps go into Sudden Death (or Stalemate) if no team captures all the points before time runs out, but if time runs out with a capture in progress, Overtime occurs, allowing play to extend should a capture be completed. | Badlands, Granary, Process, Foundry |
| Domination | Both teams start with no controlled points; all points are neutral and unlocked for capture. Once a point is taken by a team, the other team can attempt to take it back; all points are available for capture at any time and have equivalent capture times. Domination maps enter Sudden Death or Stalemate if time runs out before a team has taken all the points. They do not enter Overtime; once a team has all three points, they win regardless of how much capture progress the other team has. | Standin |
Attack/Defend
Attack/Defend maps, also known as Asymmetric Control Point maps, play asymmetrically, with BLU attacking and RED defending. RED begins with control of all of the points. BLU wins if they capture all of RED's points; RED wins if they prevent BLU from capturing all of the points before the timer expires. Control points may only be captured in a set order (with the exception of some maps, such as Gravel Pit and Steel). Points captured by BLU are locked and cannot be taken back by RED, and time is added after each capture. Because of its simpler format that concentrates on one point at a time, Attack/Defend is easier for newcomers to play.
Attack/Defend maps can come in various styles:
| Style | Description | Examples |
|---|---|---|
| Linear single-stage | BLU must capture all control points in a set order. | Gorge, Mountain Lab, Mann Manor |
| Linear multi-stage | BLU must capture a group of control points in a set order to move to the next stage. Reaching the final stage and succeeding is required to ultimately win the map. If BLU fails to win a stage, then the map is reset to stage 1 and the teams switch. | Dustbowl, Egypt, Snowplow |
| Pyramid-style | BLU must capture three points. The first two points may be captured in either order. Once both points are captured, the final point is unlocked. | Gravel Pit, Junction |
| Centralized-style | BLU's objective is to capture the central control point, which can be done at any time. There is another set of control points available, one of which is open for capture at a time in a set order. Capturing these auxiliary points makes it easier to capture the final point. | Steel |
| Medieval-style | Similar in principle to pyramid-style, with the main difference being that once the final point is unlocked, it must be taken within a specific time limit; otherwise, the final point relocks and the initial points reset to RED's ownership. Time is not awarded upon recapturing the initial points. | DeGroot Keep |
Strategy
Maps
Control point maps carry the cp_ prefix; community maps are identified with an italic font.
Symmetric
| Name | Picture | File name |
|---|---|---|
| 5Gorge | 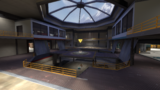
|
cp_5gorge
|
| Badlands | 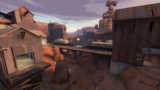
|
cp_badlands
|
| Coldfront | 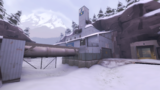
|
cp_coldfront
|
| Fastlane | 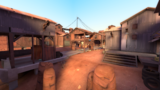
|
cp_fastlane
|
| Foundry | 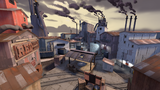
|
cp_foundry
|
| Freight | 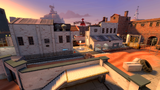
|
cp_freight_final1
|
| Granary | 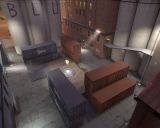
|
cp_granary
|
| Gullywash | 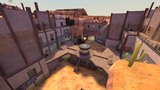
|
cp_gullywash_final1
|
| Metalworks | 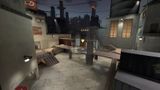
|
cp_metalworks
|
| Powerhouse | 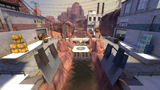
|
cp_powerhouse
|
| Process | 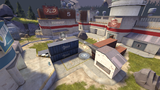
|
cp_process_final
|
| Reckoner | 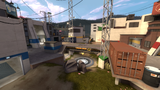
|
cp_reckoner
|
| Sinshine | 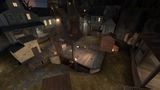
|
cp_sunshine_event
|
| Sunshine | 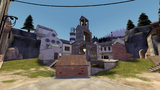
|
cp_sunshine
|
| Snakewater | 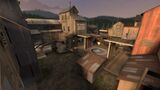
|
cp_snakewater_final1
|
| Standin | 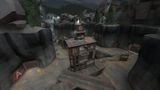
|
cp_standin_final
|
| Vanguard | 
|
cp_vanguard
|
| Well | 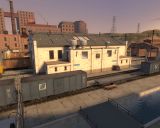
|
cp_well
|
| Yukon | 
|
cp_yukon_final
|
Attack/Defend
| Name | Picture | File name | Type |
|---|---|---|---|
| Altitude | 
|
cp_altitude
|
Linear single-stage |
| Brew | 
|
cp_brew
|
Linear single-stage |
| Carrier | 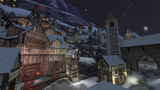
|
cp_carrier
|
Linear single-stage |
| Coal Pit | 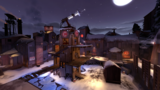
|
cp_gravelpit_snowy
|
Pyramid |
| DeGroot Keep | 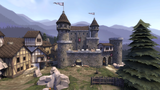
|
cp_degrootkeep
|
Medieval |
| Dustbowl | 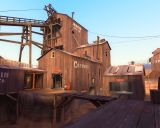
|
cp_dustbowl
|
Linear multi-stage |
| Egypt | 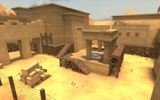
|
cp_egypt_final
|
Linear multi-stage |
| Erebus | 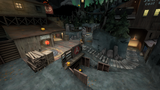
|
cp_ambush_event
|
Linear multi-stage |
| Frostwatch | 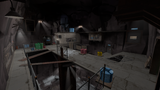
|
cp_frostwatch
|
Linear multi-stage |
| Gorge | 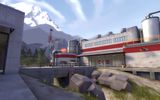
|
cp_gorge
|
Linear single-stage |
| Gorge Event | 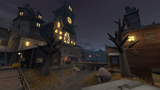
|
cp_gorge_event
|
Linear single-stage |
| Gravel Pit | 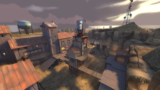
|
cp_gravelpit
|
Pyramid |
| Hardwood | 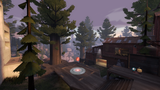
|
cp_hardwood_final
|
Linear single-stage |
| Junction | 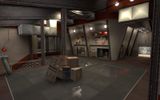
|
cp_junction_final
|
Pyramid |
| Lava Pit | 
|
cp_lavapit_final
|
Pyramid |
| Mann Manor | 
|
cp_manor_event
|
Linear single-stage |
| Mercenary Park | 
|
cp_mercenarypark
|
Linear single-stage |
| Mossrock | 
|
cp_mossrock
|
Linear single-stage |
| Mountain Lab | 
|
cp_mountainlab
|
Linear single-stage |
| Sandcastle | 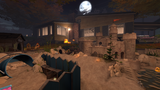
|
cp_degrootkeep_rats
|
Medieval |
| Snowplow | 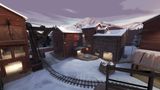
|
cp_snowplow
|
Linear multi-stage |
| Spookeyridge | 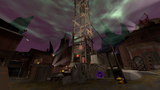
|
cp_spookeyridge
|
Linear single-stage |
| Steel | 
|
cp_steel
|
Centralized |
| Sulfur | 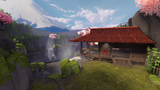
|
cp_sulfur
|
Centralized |
Update history
- Added Control Point mode.
- Added maps: Granary, Well, Dustbowl, and Gravel Pit.
- Added map: Badlands.
April 29, 2008 Patch (Gold Rush Update)
- Added Stopwatch Mode to Tournament Mode which is automatically used on Attack/Defense maps.
- Fixed rare client crash on level change during control point capturing.
June 19, 2008 Patch (Pyro Update)
- Added map: Fastlane.
August 19, 2008 Patch (Heavy Update)
- Added map: Steel.
February 24, 2009 Patch (Scout Update)
- Added map: Egypt and Junction.
August 13, 2009 Patch (Classless Update)
- Added map: Yukon.
December 17, 2009 Patch (WAR! Update)
- Added map: Gorge.
- Added map: Freight.
July 8, 2010 Patch (Engineer Update)
- Added map: Coldfront.
October 27, 2010 Patch (Scream Fortress Update)
- Added maps: Mann Manor and Mountain Lab.
December 17, 2010 Patch (Australian Christmas)
- Added map: DeGroot Keep.
- Added map: 5Gorge.
October 13, 2011 Patch (Manniversary Update & Sale)
- Added map: Gullywash.
December 15, 2011 Patch (Australian Christmas 2011)
- Added map: Foundry.
- Fixed missing materials in the control point HUD on attack/defend maps.
- Fixed a client crash related to the HUD control point maps.
- Added maps: Standin and Process.
July 2, 2015 Patch (Gun Mettle Update)
- Added maps: Powerhouse and Snowplow.
October 28, 2015 Patch (Scream Fortress 2015)
- Added maps: Gorge Event and Sinshine.
December 17, 2015 Patch (Tough Break Update)
- Added map: Vanguard.
July 7, 2016 Patch (Meet Your Match Update)
- Added maps: Sunshine and Metalworks.
October 20, 2017 Patch (Jungle Inferno Update)
- Added maps: Mercenary Park and Mossrock.
October 5, 2021 Patch (Scream Fortress 2021)
- Added map: Erebus.
December 2, 2021 Patch (Smissmas 2021)
- Added map: Altitude.
October 5, 2022 Patch (Scream Fortress 2022)
- Added map: Spookeyridge.
December 5, 2022 Patch (Smissmas 2022)
- Added maps: Coal Pit and Frostwatch.
July 12, 2023 Patch (Summer 2023)
- Added maps: Hardwood, Reckoner, and Sulfur.
October 9, 2023 Patch #1 (Scream Fortress 2023)
- Added maps: Lava Pit and Sandcastle
December 7, 2023 Patch (Smissmas 2023)
- Added maps: Brew and Carrier.