Soldier match-ups
| “ | I am going to enjoy killing each and every one of you sorry sacks of scum!
Click to listen
— The Soldier on class match-ups
|
” |
| Class | Strategy | ||
|---|---|---|---|
 Soldier |
vs. | 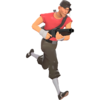 Scout |
Relative merits: Both you and the Scout are strong close-quarters combatants. You have an advantage if you can utilize your rockets' splash damage, especially when you have the high ground, but the Scout will typically try to initiate the fight with that in mind.
Tactics: Anticipate the Scout's movements when aiming your rockets. Try to aim at the ground or nearby walls to inflict splash damage, as the Scout's high movement speed makes it difficult to hit him directly. If he double jumps to dodge one of your shots, the arc of his jump should be predictable enough to aim a rocket where he will land. If possible, attempt to fight the Scout in tight spaces where he can't maneuver, or rocket jump to high ground that is beyond the reach of his double jump. Because of the Scout's extreme speed, it is difficult for you to retreat. If you have enough health, it is usually better to attempt to rocket jump somewhere out of his reach, such as a distant ledge or through a window, than it is to try to outrun him on the ground. Useful weapons:
|
Soldier |
vs. | Soldier |
Mirror match-up: In a duel against an equally skilled Soldier, positioning and weapon management are key. Observe which weapons your opponent has chosen and adapt your strategy accordingly. Tracking the number of rockets you both have loaded can help you decide whether to approach or take cover.
Tactics: Both you and your opponent are relatively slow on the ground; try to go for direct hits to maximize the damage of each rocket you fire, and move unpredictably to make it difficult for your opponent to do the same. Try to reach high ground, as that will make it easier to both deal and avoid splash damage. If your opponent is too predictable with his rocket jumps, you can fire a rocket where he will land, use precise aim to land an airshot, or chase after him with your own rocket jump and attack from above. If you run out of rockets, switch to a different weapon or take cover and reload. If you think that he is out of rockets himself, approach him or move to a stronger position while he's unable to attack you. Useful weapons:
|
Soldier |
vs. | 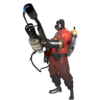 Pyro |
Relative merits: Your weapons outrange the Pyro's Flame Thrower, giving you a significant advantage at medium range. However, the Pyro's compression blast can reflect your rockets. Fighting a Pyro is largely about making it as hard for them to reflect your rockets as possible.
Tactics: Avoid firing rockets carelessly, as a skilled Pyro will use them against you. Try to stagger your rate of fire to make it more difficult for the Pyro to predict when you will shoot, and aim at the floor or nearby surfaces to make it more difficult for them to aim a rocket that does get reflected. Attempt to keep the high ground to make it harder for your opponent to hit you with splash damage. If you close the distance on the Pyro, they will have less time to react to and subsequently reflect a rocket; however, avoid getting so close that you can be hit by the Flame Thrower. Aside from the Pyro's ability to reflect rockets, the fight is relatively straightforwards. Stay outside of Flame Thrower range entirely if possible to minimize the damage you will take. Afterburn damage can lower your health to the point that you cannot rocket jump, or can just kill you directly. Keep in mind that airblast can not only reflect rockets, but push you around as well; try to avoid being airblasted, as the Pyro will likely try to take advantage of your predictable trajectory and hit you with a secondary weapon such as a Shotgun or Flare Gun. Useful weapons:
|
Soldier |
vs. | 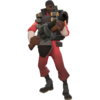 Demoman |
Relative merits: You and the Demoman both specialize in explosives. You are better at close range duels and can roam the map faster, while the Demoman can spread damage over a wide area and attack without direct line of sight. You can both use explosive jumps to travel quickly, but sticky jumping is slower and costs more health.
Tactics: Unlike your rockets, the Demoman's grenades do not have any damage falloff, but they also do not explode immediately on contact with the environment. Stay at medium range, where you'll have an easier time avoiding direct hits, and steer clear of grenades that have bounced onto the ground. If the Demoman is using the Stickybomb Launcher instead, move to close range, as stickybombs need time to arm and the Demoman will not be able to hit you without blowing himself up as well. If the Demoman has placed a Stickybomb trap, use the Shotgun to destroy the stickies or a well placed rocket to scatter them. Try to avoid pushing the stickybombs towards you or your team. It is possible, albeit unlikely, to push the stickies towards the Demoman and trick him into blowing himself up. A Demoknight using a shield secondary such as the Chargin' Targe does not have a Stickybomb Launcher, but will likely be using a melee weapon with increased melee range, such as the Eyelander, and attempt to charge you with it. If he does, shoot the ground in front of him to pop him into the air and cause him to miss you, or quickly rocket jump out of the way. Useful weapons:
|
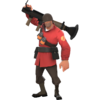
Soldier |
vs. | 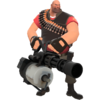 Heavy |
Relative merits: You and the Heavy are both among the tankiest classes in the game. Compared to your rockets, the Minigun fires bullets that travel instantly and have a higher damage-per-second, but deal their damage gradually instead of in bursts. The Heavy is also much less mobile than you; he will usually be carefully defending an area, or slowly advancing forwards, allowing you to decide when you engage him.
Tactics: Attempt to catch the Heavy unaware - when his Minigun isn't spun up, from behind, or both. If he's spun up and trying to shoot you, peek in and out of cover to fire rockets, minimizing your exposure to his Minigun while still dealing constant damage yourself. Because he is a big, slow target, it is very easy to hit him with direct shots, especially when he's spun up. Try to keep a modest distance, as the Minigun is deadliest at close range; attacking from high ground both increases your distance from him and gives you more cover from Minigun fire. Useful weapons:
|
Soldier |
vs. |  Engineer |
Relative merits: Your Rocket Launcher is one of the better anti-Sentry Gun weapons - its high base damage can make short work of buildings, and the splash damage of rockets can damage multiple targets at once, including the Engineer.
Tactics: Aim your rockets so they damage both Engineer and Sentry Gun via splash damage. Unless you are being pressured by the enemy team, you can freely stay out of range or peek in and out of cover, spamming rockets at buildings. Take cover between shots to minimize the damage the Sentry Gun deals to you, especially if Engineer is using the Wrangler. Even if you do not destroy the Engineer's buildings immediately, you will quickly drain his metal supply and soften up his buildings for your team to finish the job. Useful weapons:
|
Soldier |
vs. | 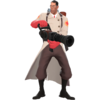 Medic |
Relative merits: A lone Medic is an easy target and should flee from you, but will typically be guarded by his teammates. Because a Medic's healing abilities make his entire team stronger, it is important to shoot him first when possible to deprive his team of their main source of healing.
Tactics: In a direct fight against both a Medic and one of his patients, try to use your Rocket Launcher’s splash damage to attack both of them simultaneously. Alternatively, you can rocket jump past the Medic's allies and dive-bomb him before he has time to react. If a Medic is retreating, you may be able to pursue him with a rocket jump and cut off his escape. Useful weapons:
|
Soldier |
vs. | 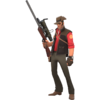 Sniper |
Relative merits: The Sniper tends to oversee wide, open areas that you might rocket jump through.
Tactics: If you can navigate to the high ground where a Sniper typically nests, you make short work of him. For a direct approach, move erratically, fire rockets to force him behind cover, and aim at nearby objects to deal splash damage. You can rocket jump to quickly close the distance, but air-strafe to keep your trajectory inconsistent and avoid being shot out of the air. Useful weapons:
|
Soldier |
vs. | 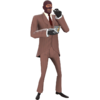 Spy |
Relative merits: Your slow speed and heavy damage make you a prime target for any enemy Spy. You are more likely to encounter an enemy Spy when directly fighting alongside your team rather than roaming around with rocket jumps.
Tactics: Identify the Spy before he strikes. Use the Rocket Launcher to Spy-check suspicious teammates, or the Shotgun to avoid self-damage if they're too close, then splash the area with your Rocket Launcher if he tries to escape by cloaking. To reduce the risk of self-damage or accidentally being backstabbed, keep the fight outside of melee range. Useful weapons:
|
See also
|