Difference between revisions of "Sniper match-ups"
| Line 7: | Line 7: | ||
| demoman-strategy = Over long distances, an enemy Demoman can only lob inaccurate [[Grenade Launcher|grenades]] and [[Stickybombs]] at your position. Keep moving in between your own shots to avoid the wide splash damage. If he tries to [[sticky jump]] or use the [[Chargin’ Targe]] to approach you, hide behind cover or take advantage of his predictable trajectory to land an easy headshot. At medium range, his explosives can easily make short work of you. If he gets too close, backpedal while firing your [[Submachine Gun]] or uncharged shots from your primary weapon. The Demoman, with his indirect weaponry, is one of the only classes capable of attacking you from outside your line of sight; well placed explosives can turn your sniping spot into a deathtrap. Keep an eye out for traps and use your Sniper Rifle or Submachine Gun to remove Stickybombs if needed. | | demoman-strategy = Over long distances, an enemy Demoman can only lob inaccurate [[Grenade Launcher|grenades]] and [[Stickybombs]] at your position. Keep moving in between your own shots to avoid the wide splash damage. If he tries to [[sticky jump]] or use the [[Chargin’ Targe]] to approach you, hide behind cover or take advantage of his predictable trajectory to land an easy headshot. At medium range, his explosives can easily make short work of you. If he gets too close, backpedal while firing your [[Submachine Gun]] or uncharged shots from your primary weapon. The Demoman, with his indirect weaponry, is one of the only classes capable of attacking you from outside your line of sight; well placed explosives can turn your sniping spot into a deathtrap. Keep an eye out for traps and use your Sniper Rifle or Submachine Gun to remove Stickybombs if needed. | ||
| heavy-strategy = The Heavy’s slow speed and large size make him a juicy target. At a distance, his [[Minigun]] fire suffers from bullet spread and will do minimal damage, allowing you to snipe freely. Even with his large health pool, it will take only a few headshots to take him out. At close range, however, his weaponry will shred you to bits. If a Heavy somehow maneuvers to your sniping location, just run; both uncharged shots from your primary weapon and your Submachine Gun will deal pitiful damage. | | heavy-strategy = The Heavy’s slow speed and large size make him a juicy target. At a distance, his [[Minigun]] fire suffers from bullet spread and will do minimal damage, allowing you to snipe freely. Even with his large health pool, it will take only a few headshots to take him out. At close range, however, his weaponry will shred you to bits. If a Heavy somehow maneuvers to your sniping location, just run; both uncharged shots from your primary weapon and your Submachine Gun will deal pitiful damage. | ||
| − | | engineer-strategy = | + | | engineer-strategy = An Engineer is usually encamped in a defensive position that makes it too dangerous to approach with just your Sniper Rifle. Unless the two of you are away from his Sentry Gun, you are unlikely to face each other in direct combat. His [[Shotgun]] and possibly [[Combat Mini-Sentry]] give him the advantage in close range combat, so don’t seek him out yourself. However, an exposed Sentry Gun can be picked off with a few charged shots from your primary weapon, forcing the Engineer to expose himself to repair or abandon it. If the Engineer is actively repairing the Sentry Gun or harassing you with the [[Wrangler]], target him first; he can’t repair his buildings if he’s dead. |
| medic-strategy = When you see an enemy Medic, he should become one of your top priority targets. Do your best to land a headshot or fully charged bodyshot to instantly eliminate his team’s source of healing. His Syringe Gun is ineffective over longer distances; if he is alone, you should be able to fire at him without any problems. However, even a Medic can easily take you down at close range, where his Syringe Gun will outperform your Submachine Gun. His relatively high speed will allow him to easily chase you, so it might be best to stand your ground anyway. | | medic-strategy = When you see an enemy Medic, he should become one of your top priority targets. Do your best to land a headshot or fully charged bodyshot to instantly eliminate his team’s source of healing. His Syringe Gun is ineffective over longer distances; if he is alone, you should be able to fire at him without any problems. However, even a Medic can easily take you down at close range, where his Syringe Gun will outperform your Submachine Gun. His relatively high speed will allow him to easily chase you, so it might be best to stand your ground anyway. | ||
| − | | sniper-strategy = One of your main jobs is to eliminate the pesky enemy Sniper that’s constantly picking off your own teammates. In this matchup, unpredictability is key; prediction of movement is crucial in a Sniper duel. Aim for the head when facing your counterpart; a Sniper duel can be decided in just one shot, and a headshot will almost always beat out a bodyshot. However, don't be afraid to use bodyshots if you know your enemy is low on health. Don’t stay exposed for too long; if you fail to kill him, there will be a small window of time where he can freely fire at you. Never stand still! A standing target is extremely easy to hit - even when aiming, keep moving by strafing so you are more difficult to hit, adjusting your crosshair as needed. If an enemy team's Sniper dot is visible, it may be prudent to move to another area to approach the enemy, as the dot indicates a Sniper is watching that area. After firing a shot in a Sniper duel, it is often better to crouch and continue strafing unpredictably instead of jumping to cancel the scope, as jumping will stop you from controlling your movement, giving you a predictable path and a landing place which a good Sniper will easily be able to anticipate. A Sniper with the Huntsman will have to fight considerably closer to the frontlines and is thus at a disadvantage when facing a Sniper with the default Sniper Rifle. | + | | sniper-strategy = One of your main jobs is to eliminate the pesky enemy Sniper that’s constantly picking off your own teammates. |
| + | |||
| + | In this matchup, unpredictability is key; prediction of movement is crucial in a Sniper duel. Aim for the head when facing your counterpart; a Sniper duel can be decided in just one shot, and a headshot will almost always beat out a bodyshot. However, don't be afraid to use bodyshots if you know your enemy is low on health. Don’t stay exposed for too long; if you fail to kill him, there will be a small window of time where he can freely fire at you. Never stand still! A standing target is extremely easy to hit - even when aiming, keep moving by strafing so you are more difficult to hit, adjusting your crosshair as needed. If an enemy team's Sniper dot is visible, it may be prudent to move to another area to approach the enemy, as the dot indicates a Sniper is watching that area. After firing a shot in a Sniper duel, it is often better to crouch and continue strafing unpredictably instead of jumping to cancel the scope, as jumping will stop you from controlling your movement, giving you a predictable path and a landing place which a good Sniper will easily be able to anticipate. A Sniper with the Huntsman will have to fight considerably closer to the frontlines and is thus at a disadvantage when facing a Sniper with the default Sniper Rifle. | ||
The [[Croc-o-Style Kit]] can remarkably change the dynamics of a Sniper duel. Because neither the user nor his Sniper opponent will be able to kill the other with a headshot, being able to charge up a strong bodyshot first will decide the victor. This is where zone control is most important; being in a position to land a fully charged shot on your enemy as soon as they step out from behind cover will give you a great advantage in any Sniper duel. | The [[Croc-o-Style Kit]] can remarkably change the dynamics of a Sniper duel. Because neither the user nor his Sniper opponent will be able to kill the other with a headshot, being able to charge up a strong bodyshot first will decide the victor. This is where zone control is most important; being in a position to land a fully charged shot on your enemy as soon as they step out from behind cover will give you a great advantage in any Sniper duel. | ||
| − | | spy-strategy = The Spy is your nemesis. Because you will frequently be focused on aiming at targets that are far away, you might not notice that he’s behind you with his | + | | spy-strategy = The Spy is your nemesis. Because you will frequently be focused on aiming at targets that are far away, you might not notice that he’s behind you with his [[Knife]]. As a Sniper, you generally work alone, so stay aware of your surroundings and [[Spy check]] any suspicious teammates that get too close. To discourage a Spy from picking you off, carry items such as the [[Razorback]] or [[Jarate]]. Stay relatively close to teammates, as an experienced Spy will gun you down from a distance upon seeing one of those items. Although the Spy's [[Revolver]] gives him the advantage in a straight brawl, Jarate and the [[Tribalman's Shiv]] can inflict debuffs that nullify the Spy's [[Cloak]] and [[disguise]], making him easy for your teammates to track down. |
}} | }} | ||
Revision as of 20:49, 1 July 2013
| “ | Be polite. Be efficient. Have a plan to kill everyone you meet.
— The Sniper on exemplary battlefield etiquette
|
” |
| Class | Strategy | ||
|---|---|---|---|
 Sniper |
vs. | 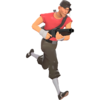 Scout |
Although an enemy Scout is difficult to hit, he’ll only be able to harass you with his Pistol at longer ranges. He dominates you at close range, so try to take him out before he gets too close. His head is a rather small target, so don’t be afraid to take your time to land a fully charged bodyshot instead of going for a quick headshot. If a Scout runs in a straight path towards you, he’ll be easy to headshot, no matter how close he already is. If he does manage to close the distance, he’ll have a huge advantage. At close range, backpedal while firing your Submachine Gun or uncharged shots from your primary weapon. |
Sniper |
vs. | 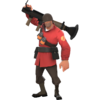 Soldier |
An enemy Soldier will typically be fighting at the frontlines, far away from you. He is a slow, bulky target and is easy to hit when grounded. If he sees you, he’ll probably fire rockets at your position to force you behind cover. In this situation, you can just take quick shots between his barrages. If he tries to approach you by rocket jumping , you’ll have to either shoot him out of the air or simply retreat. It is suicide to go toe-to-toe with a Soldier at close range, where he can easily land rockets and Shotgun blasts. |
Sniper |
vs. | 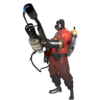 Pyro |
Unless an enemy Pyro is using the Flare Gun, Detonator, Scorch Shot, or Manmelter, he has no way to fight back at long range. If he is out in the open, you can attack without fear of retaliation. However, at close range, his Flamethrower will devastate you. If stuck in this sort of situation, backpedal while firing your Submachine Gun or uncharged shots from your primary weapon. The effects of afterburn will negatively affect your aim but can be extinguished by Jarate. |
Sniper |
vs. | 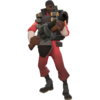 Demoman |
Over long distances, an enemy Demoman can only lob inaccurate grenades and Stickybombs at your position. Keep moving in between your own shots to avoid the wide splash damage. If he tries to sticky jump or use the Chargin’ Targe to approach you, hide behind cover or take advantage of his predictable trajectory to land an easy headshot. At medium range, his explosives can easily make short work of you. If he gets too close, backpedal while firing your Submachine Gun or uncharged shots from your primary weapon. The Demoman, with his indirect weaponry, is one of the only classes capable of attacking you from outside your line of sight; well placed explosives can turn your sniping spot into a deathtrap. Keep an eye out for traps and use your Sniper Rifle or Submachine Gun to remove Stickybombs if needed. |
Sniper |
vs. | 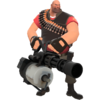 Heavy |
The Heavy’s slow speed and large size make him a juicy target. At a distance, his Minigun fire suffers from bullet spread and will do minimal damage, allowing you to snipe freely. Even with his large health pool, it will take only a few headshots to take him out. At close range, however, his weaponry will shred you to bits. If a Heavy somehow maneuvers to your sniping location, just run; both uncharged shots from your primary weapon and your Submachine Gun will deal pitiful damage. |
Sniper |
vs. |  Engineer |
An Engineer is usually encamped in a defensive position that makes it too dangerous to approach with just your Sniper Rifle. Unless the two of you are away from his Sentry Gun, you are unlikely to face each other in direct combat. His Shotgun and possibly Combat Mini-Sentry give him the advantage in close range combat, so don’t seek him out yourself. However, an exposed Sentry Gun can be picked off with a few charged shots from your primary weapon, forcing the Engineer to expose himself to repair or abandon it. If the Engineer is actively repairing the Sentry Gun or harassing you with the Wrangler, target him first; he can’t repair his buildings if he’s dead. |
Sniper |
vs. | 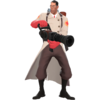 Medic |
When you see an enemy Medic, he should become one of your top priority targets. Do your best to land a headshot or fully charged bodyshot to instantly eliminate his team’s source of healing. His Syringe Gun is ineffective over longer distances; if he is alone, you should be able to fire at him without any problems. However, even a Medic can easily take you down at close range, where his Syringe Gun will outperform your Submachine Gun. His relatively high speed will allow him to easily chase you, so it might be best to stand your ground anyway. |
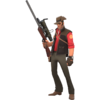
Sniper |
vs. | Sniper |
One of your main jobs is to eliminate the pesky enemy Sniper that’s constantly picking off your own teammates.
In this matchup, unpredictability is key; prediction of movement is crucial in a Sniper duel. Aim for the head when facing your counterpart; a Sniper duel can be decided in just one shot, and a headshot will almost always beat out a bodyshot. However, don't be afraid to use bodyshots if you know your enemy is low on health. Don’t stay exposed for too long; if you fail to kill him, there will be a small window of time where he can freely fire at you. Never stand still! A standing target is extremely easy to hit - even when aiming, keep moving by strafing so you are more difficult to hit, adjusting your crosshair as needed. If an enemy team's Sniper dot is visible, it may be prudent to move to another area to approach the enemy, as the dot indicates a Sniper is watching that area. After firing a shot in a Sniper duel, it is often better to crouch and continue strafing unpredictably instead of jumping to cancel the scope, as jumping will stop you from controlling your movement, giving you a predictable path and a landing place which a good Sniper will easily be able to anticipate. A Sniper with the Huntsman will have to fight considerably closer to the frontlines and is thus at a disadvantage when facing a Sniper with the default Sniper Rifle. The Croc-o-Style Kit can remarkably change the dynamics of a Sniper duel. Because neither the user nor his Sniper opponent will be able to kill the other with a headshot, being able to charge up a strong bodyshot first will decide the victor. This is where zone control is most important; being in a position to land a fully charged shot on your enemy as soon as they step out from behind cover will give you a great advantage in any Sniper duel. |
Sniper |
vs. | 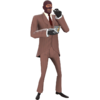 Spy |
The Spy is your nemesis. Because you will frequently be focused on aiming at targets that are far away, you might not notice that he’s behind you with his Knife. As a Sniper, you generally work alone, so stay aware of your surroundings and Spy check any suspicious teammates that get too close. To discourage a Spy from picking you off, carry items such as the Razorback or Jarate. Stay relatively close to teammates, as an experienced Spy will gun you down from a distance upon seeing one of those items. Although the Spy's Revolver gives him the advantage in a straight brawl, Jarate and the Tribalman's Shiv can inflict debuffs that nullify the Spy's Cloak and disguise, making him easy for your teammates to track down. |
See also
|