Difference between revisions of "Jungle Inferno Update/tr"
m (categories) |
m (→Savaş Boyaları) |
||
| (8 intermediate revisions by 5 users not shown) | |||
| Line 1: | Line 1: | ||
{{Trans}} | {{Trans}} | ||
| − | {{DISPLAYTITLE:Jungle Inferno | + | {{DISPLAYTITLE:Jungle Inferno Güncellemesi}} |
{{patch info|10|20|2017}} | {{patch info|10|20|2017}} | ||
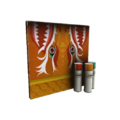
[[File:Jungle Inferno Update.jpg|frameless|right|290px|link=http://www.teamfortress.com/jungleinferno/]] | [[File:Jungle Inferno Update.jpg|frameless|right|290px|link=http://www.teamfortress.com/jungleinferno/]] | ||
| Line 6: | Line 6: | ||
{{Quotation|'''TF2 Official Website'''|Eğer Jurassic Park bize bir şey öğrettiyse, o hayatın her zaman bir yol bulduğudur. Eğer Jurassic Park bize iki şey öğrettiyse, o hayatın her zaman bir şeyin yaşanması için bir yol bulduğu ve bir güncelleme için Jurassic Park temasını çalmak iyi bir fikir olduğudur. Ve eğer Valve'ın yasal takımı bize bir şey öğrettiyse, o da bize Jurassic Park'ın bize öğrettiği ikinci şeyi size söylemem gerektiği hakkında bana bağırmalarıdır.<br><br>Eğer insanların bize bağırması bize bir şey öğrettiyse, bu gürültü sesler bizi mutsuz ediyor ve bize boşluk tuşunun nerede olduğunu unutturuyor, o yüzden biz sadece ötede duruyoruz ve ölümcül hayvanların parktan kaçması temalı tamamen orijinal güncellememizi yayınlamaktan mutluluk duyuyoruz. Çünkü hayat bir yol bulur, ki bu da bizim <s>çaldığımız</s> Jurassic Park'tan öğrendiğimiz şeydir.}} | {{Quotation|'''TF2 Official Website'''|Eğer Jurassic Park bize bir şey öğrettiyse, o hayatın her zaman bir yol bulduğudur. Eğer Jurassic Park bize iki şey öğrettiyse, o hayatın her zaman bir şeyin yaşanması için bir yol bulduğu ve bir güncelleme için Jurassic Park temasını çalmak iyi bir fikir olduğudur. Ve eğer Valve'ın yasal takımı bize bir şey öğrettiyse, o da bize Jurassic Park'ın bize öğrettiği ikinci şeyi size söylemem gerektiği hakkında bana bağırmalarıdır.<br><br>Eğer insanların bize bağırması bize bir şey öğrettiyse, bu gürültü sesler bizi mutsuz ediyor ve bize boşluk tuşunun nerede olduğunu unutturuyor, o yüzden biz sadece ötede duruyoruz ve ölümcül hayvanların parktan kaçması temalı tamamen orijinal güncellememizi yayınlamaktan mutluluk duyuyoruz. Çünkü hayat bir yol bulur, ki bu da bizim <s>çaldığımız</s> Jurassic Park'tan öğrendiğimiz şeydir.}} | ||
| − | '''Jungle Inferno Güncellemesi''' | + | '''Jungle Inferno Güncellemesi''' ''[[Team Fortress 2/tr|Team Fortress 2]]'' için [[Patches#Major updates|büyük içerik güncellemelerinden]] biridir. 4 gün sürmüştür, 16 Ekim 2017'de başlayıp ve soununda 20 Ekim 2017'de bir günlük ertelemeden sonra yayınlanmıştır. 5 yeni silah, 5 yeni topluluk yapımı haritalar, 1 yeni Valve yapımı harita, 7 yeni alay hareketleri, 1 yeni öldürme alay hareketi, 40'dan fazla kozmetik eşyası ve Pyro sınıfı da dahil olmak üzere birçok silah dengelemesi tanıtmıştır. Ayrıca kontrat sistemine de süslü silahlar yerine [[War Paint/tr|Savaş Boyası]] veren [[ConTracker/tr|Sözleyici]] ile bir el atmıştır. |
== Video == | == Video == | ||
{{youtube|YHf7e67T54Y}} | {{youtube|YHf7e67T54Y}} | ||
| − | == | + | == Duyurular == |
Jungle Inferno güncellemesi sayfası resmi olarak 16 Ekim 2017'de[[TF2 Official Blog/tr|TF2 Resmi Blog'undaki ]] gönderiyle"[http://www.teamfortress.com/post.php?id=33662 Welcome to... Mercenary Park!]" başladı. | Jungle Inferno güncellemesi sayfası resmi olarak 16 Ekim 2017'de[[TF2 Official Blog/tr|TF2 Resmi Blog'undaki ]] gönderiyle"[http://www.teamfortress.com/post.php?id=33662 Welcome to... Mercenary Park!]" başladı. | ||
| − | == | + | == Güncelleme İşleyişi == |
| − | + | Jungle Inferno Güncellemesi 4 gün süren bir güncellemeydi. | |
| − | * | + | * Gün 1 7 yeni alay hareketi, 6 yeni harita ve kısa bir SFM fragmanı içerdi. |
| − | * | + | * Gün 2 Savaş Boyaları ve yeni bir kontrat PDA ile bedava ve paralı kontratlar içerdi. Bedava olanlar yeni silahları, paralı olanlar ise kan paralarını ve savaş boyaları ile bazı yeni kozmetikleri içerdi. |
| − | * | + | * Gün 3 yeni silahları gösterdi: Ejderha'nın Öfkesi (Bir alev silahı/birincil), Termal İtici (Bir jetçantası/ikincil ki, "Basınçlı Hava Patlaması" adında eşsiz bir öldürücü alay hareketine sahip), Gaz Kaçağı (Zehirli, yaanabilen gaz bulutu/ikincil), ve Sıcak El (Bir hız arttıran eldiven/yakın dövüş). |
| − | * | + | * Gün 4 son gündü, blog yazısı eşliğinde güncellemenin getirdiği bütün yama notları ve 1 günlük erteleme getirdi. |
| − | === | + | === Gün 1 === |
Jungle Inferno güncellemesinin 1. gününde 1 yeni Valve [[map/tr|haritası]] ve 5 yeni [[Steam Workshop/tr|topluluk yapımı]] haritalar ile birlike 2 yeni Valve [[taunt/tr|alay hareketi]] ve 5 yeni topluluk yapımı alay hareketi duyuruldu. | Jungle Inferno güncellemesinin 1. gününde 1 yeni Valve [[map/tr|haritası]] ve 5 yeni [[Steam Workshop/tr|topluluk yapımı]] haritalar ile birlike 2 yeni Valve [[taunt/tr|alay hareketi]] ve 5 yeni topluluk yapımı alay hareketi duyuruldu. | ||
| − | ==== Maps ==== | + | ==== {{common string|Maps}} ==== |
| + | {{main|List of maps/tr|l1={{common string|List of maps}}}} | ||
{{hatnote|Community maps are identified in italics.}} | {{hatnote|Community maps are identified in italics.}} | ||
{| class="wikitable" cellpadding=2 style="text-align:center;" | {| class="wikitable" cellpadding=2 style="text-align:center;" | ||
|- style="height: 20px;" | |- style="height: 20px;" | ||
| − | ! class="header" style="background-color:#748c41;color:white;" |Name | + | ! class="header" style="background-color:#748c41;color:white;" |{{common string|Name}} |
| − | ! class="header" style="background-color:#748c41;color:white;" |Picture | + | ! class="header" style="background-color:#748c41;color:white;" |{{common string|Picture}} |
| − | ! class="header" style="background-color:#748c41;color:white;" |Game | + | ! class="header" style="background-color:#748c41;color:white;" |{{common string|Game mode}} |
| − | ! class="header" style="background-color:#748c41;color:white;" |File | + | ! class="header" style="background-color:#748c41;color:white;" |{{common string|File name}} |
|- | |- | ||
| − | | style="background-color:#b5b85c;" |'''''[[Banana Bay]]''''' | + | | style="background-color:#b5b85c;" | '''''[[Banana Bay{{if lang}}|<span style="color:#000;">Banana Bay</span>]]''''' |
| − | | style="background-color:#f8d28c;" | + | | style="background-color:#f8d28c;" | [[File:Bananabay_main.jpg|160px|link=Banana Bay{{if lang}}]] |
| − | | style="background-color:#f8d28c; | + | | style="background-color:#f8d28c;" | '''[[Payload{{if lang}}|{{common string|Payload Race}}]]'''<br>[[File:RED Bombcart.png|30px|link=Payload Race{{if lang}}]][[File:BLU Bombcart.png|30px|link=Payload Race]] |
| − | | style="background-color:#f8e2a1;" | + | | style="background-color:#f8e2a1;" | {{code|plr_bananabay}} |
|- | |- | ||
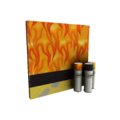
| − | | style="background-color:#b5b85c;" |'''''[[Brazil]]''''' | + | | style="background-color:#b5b85c;" | '''''[[Brazil{{if lang}}|<span style="color:#000;">Brazil</span>]]''''' |
| − | | style="background-color:#f8d28c;" | + | | style="background-color:#f8d28c;" | [[File:Brazil_main.jpg|160px|link=Brazil{{if lang}}]] |
| − | | style="background-color:#f8d28c; | + | | style="background-color:#f8d28c;" | '''[[King of the Hill{{if lang}}|{{common string|King of the Hill}}]]'''<br>[[File:Controlpoint.png|50px|link=King of the Hill{{if lang}}]] |
| − | | style="background-color:#f8e2a1;" | + | | style="background-color:#f8e2a1;" | {{code|koth_brazil}} |
|- | |- | ||
| − | | style="background-color:#b5b85c;" |'''''[[Enclosure]]''''' | + | | style="background-color:#b5b85c;" | '''''[[Enclosure{{if lang}}|<span style="color:#000;">Enclosure</span>]]''''' |
| − | | style="background-color:#f8d28c;" | + | | style="background-color:#f8d28c;" | [[File:Enclosure_main.jpg|160px|link=Enclosure{{if lang}}]] |
| − | | style="background-color:#f8d28c; | + | | style="background-color:#f8d28c;" | '''[[Payload{{if lang}}|{{common string|Payload}}]]'''<br>[[File:BLU_Bombcart.png|50px|link=Payload{{if lang}}]] |
| − | | style="background-color:#f8e2a1;" | + | | style="background-color:#f8e2a1;" | {{code|pl_enclosure_final}} |
|- | |- | ||
| − | | style="background-color:#b5b85c;" |'''''[[Lazarus]]''''' | + | | style="background-color:#b5b85c;" | '''''[[Lazarus{{if lang}}|<span style="color:#000;">Lazarus</span>]]''''' |
| − | | style="background-color:#f8d28c;" | + | | style="background-color:#f8d28c;" | [[File:Lazarus_main.jpg|160px|link=Lazarus{{if lang}}]] |
| − | | style="background-color:#f8d28c; | + | | style="background-color:#f8d28c;" | '''[[King of the Hill{{if lang}}|{{common string|King of the Hill}}]]'''<br>[[File:Controlpoint.png|50px|link=King of the Hill{{if lang}}]] |
| − | | style="background-color:#f8e2a1;" | + | | style="background-color:#f8e2a1;" | {{code|koth_lazarus}} |
|- | |- | ||
| − | | style="background-color:#b5b85c;" |'''[[Mercenary Park | + | | style="background-color:#b5b85c;" | '''[[Mercenary Park{{if lang}}|<span style="color:#000;">Mercenary Park</span>]]''' |
| − | | style="background-color:#f8d28c;" | + | | style="background-color:#f8d28c;" | [[File:Yetipark 5.png|160px|link=Mercenary Park (map){{if lang}}]] |
| − | | style="background-color:#f8d28c; | + | | style="background-color:#f8d28c;" | '''[[Control Point (game mode){{if lang}}|{{common string|Attack/Defend}}]]'''<br>[[File:Controlpoint.png|50px|link=Control Point (game mode){{if lang}}]] |
| − | | style="background-color:#f8e2a1;" | + | | style="background-color:#f8e2a1;" | {{code|cp_mercenarypark}} |
|- | |- | ||
| − | | style="background-color:#b5b85c;" |'''''[[Mossrock]]''''' | + | | style="background-color:#b5b85c;" | '''''[[Mossrock{{if lang}}|<span style="color:#000;">Mossrock</span>]]''''' |
| − | | style="background-color:#f8d28c;" | + | | style="background-color:#f8d28c;" | [[File:Mossrock_main.jpg|160px|link=Mossrock{{if lang}}]] |
| − | | style="background-color:#f8d28c; | + | | style="background-color:#f8d28c;" | '''[[Control Point (game mode){{if lang}}|{{common string|Attack/Defend}}]]'''<br>[[File:Controlpoint.png|50px|link=Control Point (game mode){{if lang}}]] |
| − | | style="background-color:#f8e2a1;" | + | | style="background-color:#f8e2a1;" | {{code|cp_mossrock}} |
|} | |} | ||
| − | ==== Taunts ==== | + | ==== {{common string|Taunts}} ==== |
| + | {{main|Taunts/tr|l1=Alay Hareketleri}} | ||
{| class="wikitable collapsible" cellpadding=2 style="text-align:center;" | {| class="wikitable collapsible" cellpadding=2 style="text-align:center;" | ||
|- | |- | ||
| − | | style="background: #b5b85c | + | | width="90px" style="background:#b5b85c;" rowspan="1" | '''{{class link|Pyro|br=yes|color=black}}''' |
| − | | | + | | style="background:#f8d28c;" | {{Icon item|Headcase|75px}} |
| − | | style="background: #f8e2a1 "| '''{{item link|Headcase}}''' | + | | style="background:#f8e2a1;" | '''{{item link|Headcase}}''' |
|- | |- | ||
| − | | style="background: #b5b85c | + | | style="background:#b5b85c;" rowspan="2" | '''{{class link|Heavy|br=yes|color=black}}''' |
| − | | | + | | style="background:#f8d28c;" | {{Icon item|Russian Arms Race|75px}} |
| − | | style="background: #f8e2a1 "| '''{{item link|Russian Arms Race}}''' | + | | style="background:#f8e2a1;" | '''{{item link|Russian Arms Race}}''' |
|- | |- | ||
| − | | | + | | style="background:#f8d28c;" | {{Icon item|Soviet Strongarm|75px}} |
| − | | style="background: #f8e2a1 "| '''{{item link|Soviet Strongarm}}''' | + | | style="background:#f8e2a1;" | '''{{item link|Soviet Strongarm}}''' |
|- | |- | ||
| − | | style="background: #b5b85c | + | | style="background:#b5b85c;" rowspan="2" | '''{{class link|Engineer|br=yes|color=black}}''' |
| − | | | + | | style="background:#f8d28c;" | {{Icon item|Dueling Banjo|75px}} |
| − | | style="background: #f8e2a1 "| '''{{item link|Dueling Banjo}}''' | + | | style="background:#f8e2a1;" | '''{{item link|Dueling Banjo}}''' |
|- | |- | ||
| − | | | + | | style="background:#f8d28c;" | {{Icon item|Jumping Jack|75px}} |
| − | | style="background: #f8e2a1 "| '''{{item link|Jumping Jack}}''' | + | | style="background:#f8e2a1;" | '''{{item link|Jumping Jack}}''' |
|- | |- | ||
| − | | style="background: #b5b85c | + | | style="background:#b5b85c;" rowspan="2" | '''{{class link|All Classes|br=yes|color=black}}''' |
| − | | | + | | style="background:#f8d28c;" | {{Icon item|Yeti Punch|75px}} |
| − | | style="background: #f8e2a1 "| '''{{item link|Yeti Punch}}''' | + | | style="background:#f8e2a1;" | '''{{item link|Yeti Punch}}''' |
|- | |- | ||
| − | | | + | | style="background:#f8d28c;" | {{Icon item|Yeti Smash|75px}} |
| − | | style="background: #f8e2a1 "| '''{{item link|Yeti Smash}}''' | + | | style="background:#f8e2a1;" | '''{{item link|Yeti Smash}}''' |
|} | |} | ||
| Line 100: | Line 102: | ||
Jungle Inferno Seferi [[Jungle Inferno Campaign Pass/tr|Jungle Inferno Seferi Bileti]]'nin satın alımını gerektirir. [[ConTracker/tr|Contracker]] PDA da duyuruldu, ki özelleştirilmiş sözleşme ilerlemesi ve Mercenary Park Hediyelik Eşya Mağazası'na erişim sağlar. Ayrıca Dost Ateşi şimdi mümkün, sözleşmeleri tamamlarken oyunculara kendi arkadaşlarına karşı oynamalarına ve birbirlerine yardım etmeye imkan veriyor eğer partide de sözleşmeler tamamlayan iki oyuncu varsa. | Jungle Inferno Seferi [[Jungle Inferno Campaign Pass/tr|Jungle Inferno Seferi Bileti]]'nin satın alımını gerektirir. [[ConTracker/tr|Contracker]] PDA da duyuruldu, ki özelleştirilmiş sözleşme ilerlemesi ve Mercenary Park Hediyelik Eşya Mağazası'na erişim sağlar. Ayrıca Dost Ateşi şimdi mümkün, sözleşmeleri tamamlarken oyunculara kendi arkadaşlarına karşı oynamalarına ve birbirlerine yardım etmeye imkan veriyor eğer partide de sözleşmeler tamamlayan iki oyuncu varsa. | ||
| − | ==== | + | ==== {{common string|Cosmetic items}} ==== |
| − | {{main|Cosmetic items}} | + | {{main|Cosmetic items{{if lang}}|l1={{common string|Cosmetic items}}}} |
{| class="wikitable collapsible" cellpadding=2 style="text-align:center;" | {| class="wikitable collapsible" cellpadding=2 style="text-align:center;" | ||
| + | | width="90px" style="background:#b5b85c;" rowspan="3" | '''{{class link|Scout|br=yes|color=black}}''' | ||
| + | | style="background:#4B69FF;" | {{Icon item|Forest Footwear|75px}} | ||
| + | | style="background:#f8e2a1;" | '''{{item link|Forest Footwear}}''' | ||
|- | |- | ||
| − | | style="background: # | + | | style="background:#D32CE6;" | {{Icon item|Jungle Jersey|75px}} |
| − | + | | style="background:#f8e2a1;" | '''{{item link|Jungle Jersey}}''' | |
| − | | style="background: #f8e2a1 "| '''{{item link| | ||
|- | |- | ||
| − | | | + | | style="background:#8847FF;" | {{Icon item|Transparent Trousers|75px}} |
| − | | style="background: #f8e2a1 "| '''{{item link| | + | | style="background:#f8e2a1;" | '''{{item link|Transparent Trousers}}''' |
|- | |- | ||
| − | | | + | | style="background:#b5b85c;" rowspan="4" | '''{{class link|Soldier|br=yes|color=black}}''' |
| − | | style="background: #f8e2a1 "| '''{{item link| | + | | style="background:#4B69FF;" | {{Icon item|Attack Packs|75px}} |
| + | | style="background:#f8e2a1;" | '''{{item link|Attack Packs}}''' | ||
|- | |- | ||
| − | | style="background: # | + | | style="background:#8847FF;" | {{Icon item|Crit Cloak|75px}} |
| − | + | | style="background:#f8e2a1;" | '''{{item link|Crit Cloak}}''' | |
| − | | style="background: #f8e2a1 "| '''{{item link| | ||
|- | |- | ||
| − | | | + | | style="background:#4B69FF;" | {{Icon item|Sharp Chest Pain|75px}} |
| − | | style="background: #f8e2a1 "| '''{{item link| | + | | style="background:#f8e2a1;" | '''{{item link|Sharp Chest Pain}}''' |
|- | |- | ||
| − | | | + | | style="background:#4B69FF;" | {{Icon item|Shellmet|75px}} |
| − | | style="background: #f8e2a1 "| '''{{item link| | + | | style="background:#f8e2a1;" | '''{{item link|Shellmet}}''' |
|- | |- | ||
| − | | | + | | style="background:#b5b85c;" rowspan="6" | '''{{class link|Pyro|br=yes|color=black}}''' |
| − | | style="background: #f8e2a1 "| '''{{item link| | + | | style="background:#4B69FF;" | {{Icon item|Deity's Dress|75px}} |
| + | | style="background:#f8e2a1;" | '''{{item link|Deity's Dress}}''' | ||
|- | |- | ||
| − | | style="background: # | + | | style="background:#8847FF;" | {{Icon item|D-eye-monds|75px}} |
| − | + | | style="background:#f8e2a1;" | '''{{item link|D-eye-monds}}''' | |
| − | | style="background: #f8e2a1 "| '''{{item link| | ||
|- | |- | ||
| − | | | + | | style="background:#8847FF;" | {{Icon item|Feathered Fiend|75px}} |
| − | | style="background: #f8e2a1 "| '''{{item link| | + | | style="background:#f8e2a1;" | '''{{item link|Feathered Fiend}}''' |
|- | |- | ||
| − | | | + | | style="background:#4B69FF;" | {{Icon item|Fireman's Essentials|75px}} |
| − | | style="background: #f8e2a1 "| '''{{item link| | + | | style="background:#f8e2a1;" | '''{{item link|Fireman's Essentials}}''' |
|- | |- | ||
| − | | | + | | style="background:#8847FF;" | {{Icon item|Hot Huaraches|75px}} |
| − | | style="background: #f8e2a1 "| '''{{item link| | + | | style="background:#f8e2a1;" | '''{{item link|Hot Huaraches}}''' |
|- | |- | ||
| − | | | + | | style="background:#D32CE6;" | {{Icon item|Sacrificial Stone|75px}} |
| − | | style="background: #f8e2a1 "| '''{{item link| | + | | style="background:#f8e2a1;" | '''{{item link|Sacrificial Stone}}''' |
|- | |- | ||
| − | | | + | | style="background:#b5b85c;" rowspan="5" | '''{{class link|Heavy|br=yes|color=black}} |
| − | | style="background: #f8e2a1 "| '''{{item link| | + | | style="background:#D32CE6;" | {{Icon item|Aztec Aggressor|75px}} |
| + | | style="background:#f8e2a1;" | '''{{item link|Aztec Aggressor}}''' | ||
|- | |- | ||
| − | | style="background: # | + | | style="background:#4B69FF;" | {{Icon item|Commando Elite|75px}} |
| − | + | | style="background:#f8e2a1;" | '''{{item link|Commando Elite}}''' | |
| − | | style="background: #f8e2a1 "| '''{{item link| | ||
|- | |- | ||
| − | | | + | | style="background:#4B69FF;" | {{Icon item|Fat Man's Field Cap|75px}} |
| − | | style="background: #f8e2a1 "| '''{{item link| | + | | style="background:#f8e2a1;" | '''{{item link|Fat Man's Field Cap}}''' |
|- | |- | ||
| − | | | + | | style="background:#4B69FF;" | {{Icon item|Heavy Harness|75px}} |
| − | | style="background: #f8e2a1 "| '''{{item link| | + | | style="background:#f8e2a1;" | '''{{item link|Heavy Harness}}''' |
|- | |- | ||
| − | | | + | | style="background:#4B69FF;" | {{Icon item|Siberian Tigerstripe|75px}} |
| − | | style="background: #f8e2a1 "| '''{{item link| | + | | style="background:#f8e2a1;" | '''{{item link|Siberian Tigerstripe}}''' |
|- | |- | ||
| − | | | + | | style="background:#b5b85c;" rowspan="2" | '''{{class link|Engineer|br=yes|color=black}}''' |
| − | | style="background: #f8e2a1 "| '''{{item link| | + | | style="background:#4B69FF;" | {{Icon item|Conaghers' Utility Idol|75px}} |
| + | | style="background:#f8e2a1;" | '''{{item link|Conaghers' Utility Idol}}''' | ||
|- | |- | ||
| − | | | + | | style="background:#D32CE6;" | {{Icon item|Tropical Toad|75px}} |
| − | | style="background: #f8e2a1 "| '''{{item link| | + | | style="background:#f8e2a1;" | '''{{item link|Tropical Toad}}''' |
|- | |- | ||
| − | | | + | | style="background:#b5b85c;" rowspan="2" | '''{{class link|Medic|br=yes|color=black}}''' |
| − | | style="background: #f8e2a1 "| '''{{item link| | + | | style="background:#4B69FF;" | {{Icon item|Battle Boonie|75px}} |
| + | | style="background:#f8e2a1;" | '''{{item link|Battle Boonie}}''' | ||
|- | |- | ||
| − | | | + | | style="background:#4B69FF;" | {{Icon item|Vitals Vest|75px}} |
| − | | style="background: #f8e2a1 "| '''{{item link| | + | | style="background:#f8e2a1;" | '''{{item link|Vitals Vest}}''' |
|- | |- | ||
| − | | style="background: #b5b85c | + | | style="background:#b5b85c;" rowspan="6" | '''{{class link|Sniper|br=yes|color=black}}''' |
| − | | | + | | style="background:#4B69FF;" | {{Icon item|Bait and Bite|75px}} |
| − | | style="background: #f8e2a1 "| '''{{item link| | + | | style="background:#f8e2a1;" | '''{{item link|Bait and Bite}}''' |
|- | |- | ||
| − | | | + | | style="background:#4B69FF;" | {{Icon item|Cammy Jammies|75px}} |
| − | | style="background: #f8e2a1 "| '''{{item link| | + | | style="background:#f8e2a1;" | '''{{item link|Cammy Jammies}}''' |
|- | |- | ||
| − | | style="background: # | + | | style="background:#4B69FF;" | {{Icon item|Classy Capper|75px}} |
| − | + | | style="background:#f8e2a1;" | '''{{item link|Classy Capper}}''' | |
| − | | style="background: #f8e2a1 "| '''{{item link| | ||
|- | |- | ||
| − | | | + | | style="background:#8847FF;" | {{Icon item|Conspicuous Camouflage|75px}} |
| − | | style="background: #f8e2a1 "| '''{{item link| | + | | style="background:#f8e2a1;" | '''{{item link|Conspicuous Camouflage}}''' |
|- | |- | ||
| − | | style="background: # | + | | style="background:#4B69FF;" | {{Icon item|Most Dangerous Mane|75px}} |
| − | + | | style="background:#f8e2a1;" | '''{{item link|Most Dangerous Mane}}''' | |
| − | | style="background: #f8e2a1 "| '''{{item link| | ||
|- | |- | ||
| − | | | + | | style="background:#8847FF;" | {{Icon item|Rifleman's Regalia|75px}} |
| − | | style="background: #f8e2a1 "| '''{{item link| | + | | style="background:#f8e2a1;" | '''{{item link|Rifleman's Regalia}}''' |
|- | |- | ||
| − | | align=" | + | | align="left" style="background:#b5b85c;" | '''{{Class link|Scout|color=black}}'''<br/>'''{{Class link|Engineer|color=black}}'''<br/>'''{{Class link|Spy|color=black}}''' |
| − | | style="background: #f8e2a1 "| '''{{item link| | + | | style="background:#4B69FF;" | {{Icon item|Aloha Apparel|75px}} |
| + | | style="background:#f8e2a1;" | '''{{item link|Aloha Apparel}}''' | ||
|- | |- | ||
| − | | align=" | + | | align="left" style="background:#b5b85c;"| '''{{Class link|Soldier|color=black}}'''<br/>'''{{Class link|Pyro|color=black}}'''<br/>'''{{Class link|Demoman|color=black}}''' |
| − | | style="background: #f8e2a1 "| '''{{item link| | + | | style="background:#D32CE6;" | {{Icon item|Bananades|75px}} |
| + | | style="background:#f8e2a1;" | '''{{item link|Bananades}}''' | ||
|- | |- | ||
| − | | align=" | + | | align="left" style="background:#b5b85c;" | '''{{Class link|Soldier|color=black}}'''<br/>'''{{Class link|Demoman|color=black}}'''<br/>'''{{Class link|Heavy|color=black}}''' |
| − | | style="background: #f8e2a1 "| '''{{item link| | + | | style="background:#EB4B4B;" | {{Icon item|War Eagle|75px}} |
| + | | style="background:#f8e2a1;" | '''{{item link|War Eagle}}''' | ||
|- | |- | ||
| − | | align=" | + | | align="left" style="background:#b5b85c;" | '''{{Class link|Soldier|color=black}}'''<br/>'''{{Class link|Heavy|color=black}}''' |
| − | | style="background: #f8e2a1 "| '''{{item link| | + | | style="background:#4B69FF;" | {{Icon item|Nuke|75px}} |
| + | | style="background:#f8e2a1;" | '''{{item link|Nuke}}''' | ||
|- | |- | ||
| − | | style="background: #b5b85c; | + | | style="background:#b5b85c;" rowspan="14" | '''{{class link|All Classes|br=yes|color=black}}''' |
| − | | | + | | style="background:#EB4B4B;" | {{Icon item|Aztec Warrior|75px}} |
| − | | style="background: #f8e2a1; " | '''{{item link| | + | | style="background:#f8e2a1;" | '''{{item link|Aztec Warrior}}''' |
|- | |- | ||
| − | | style="background: # | + | | style="background:#8847FF;" | {{Icon item|Croaking Hazard|75px}} |
| − | + | | style="background:#f8e2a1;" | '''{{item link|Croaking Hazard}}''' | |
| − | | style="background: #f8e2a1; " | '''{{item link| | ||
|- | |- | ||
| − | | style="background: # | + | | style="background:#8847FF;" | {{Icon item|Hunter in Darkness|75px}} |
| − | + | | style="background:#f8e2a1;" | '''{{item link|Hunter in Darkness}}''' | |
| − | | style="background: #f8e2a1; " | '''{{item link| | ||
|- | |- | ||
| − | | style="background: # | + | | style="background:#D32CE6;" | {{Icon item|Jungle Wreath|75px}} |
| − | + | | style="background:#f8e2a1;" | '''{{item link|Jungle Wreath}}''' | |
| − | | style="background: #f8e2a1; " | '''{{item link| | ||
|- | |- | ||
| − | | style="background: # | + | | style="background:#FFD700;" | {{Icon item|Mannanas Hat|75px}} |
| − | + | | style="background:#f8e2a1;" | '''{{item link|Mannanas Hat}}''' | |
| − | | style="background: #f8e2a1 "| '''{{item link| | ||
|- | |- | ||
| − | | | + | | style="background:#FFD700;" | {{Icon item|Mercenary Park|75px}} |
| − | | style="background: #f8e2a1 "| '''{{item link| | + | | style="background:#f8e2a1;" | '''{{item link|Mercenary Park (hat)}}''' |
|- | |- | ||
| − | | | + | | style="background:#FFD700;" | {{Icon item|Monstrous Memento|75px}} |
| − | | style="background: #f8e2a1 "| '''{{item link| | + | | style="background:#f8e2a1;" | '''{{item link|Monstrous Memento}}''' |
|- | |- | ||
| − | | | + | | style="background:#FFD700;" | {{Icon item|Never Forget Hat|75px}} |
| − | | style="background: #f8e2a1 "| '''{{item link| | + | | style="background:#f8e2a1;" | '''{{item link|Never Forget Hat}}''' |
|- | |- | ||
| − | | | + | | style="background:#4B69FF;" | {{Icon item|Pithy Professional|75px}} |
| − | | style="background: #f8e2a1 "| '''{{item link| | + | | style="background:#f8e2a1;" | '''{{item link|Pithy Professional}}''' |
|- | |- | ||
| − | | | + | | style="background:#8847FF;" | {{Icon item|Pocket Saxton|75px}} |
| − | | style="background: #f8e2a1 "| '''{{item link| | + | | style="background:#f8e2a1;" | '''{{item link|Pocket Saxton}}''' |
|- | |- | ||
| − | | | + | | style="background:#EB4B4B;" | {{Icon item|Quizzical Quetzal|75px}} |
| − | | style="background: #f8e2a1 "| '''{{item link| | + | | style="background:#f8e2a1;" | '''{{item link|Quizzical Quetzal}}''' |
|- | |- | ||
| − | | | + | | style="background:#FFD700;" | {{Icon item|Saxton|75px}} |
| − | | style="background: #f8e2a1 "| '''{{item link| | + | | style="background:#f8e2a1;" | '''{{item link|Saxton}}''' |
|- | |- | ||
| − | | | + | | style="background:#EB4B4B;" | {{Icon item|Slithering Scarf|75px}} |
| − | | style="background: #f8e2a1 "| '''{{item link| | + | | style="background:#f8e2a1;" | '''{{item link|Slithering Scarf}}''' |
|- | |- | ||
| − | | | + | | style="background:#FFD700;" | {{Icon item|Yeti Park Hardhat|75px}} |
| − | | style="background: #f8e2a1 "| '''{{item link| | + | | style="background:#f8e2a1;" | '''{{item link|Yeti Park Hardhat}}''' |
|} | |} | ||
| − | ==== | + | ==== Setler ==== |
| + | {{main|Item sets/tr|l1=Eşya setleri}} | ||
{| class="wikitable collapsible" cellpadding="2" style="text-align:center;" | {| class="wikitable collapsible" cellpadding="2" style="text-align:center;" | ||
| − | | style="background: #b5b85c | + | | width="90px" style="background:#b5b85c;" rowspan="3" | '''{{class link|Heavy|br=yes|color=black}}''' |
| − | | style="background: #f8e2a1;" rowspan="3" | ''' | + | | style="background:#f8e2a1;" rowspan="3" | '''{{item link|Monster Mash-Up Pack}}'''<br/> |
| − | | | + | | style="background:#f8d28c;" | {{icon item|Kathman-Hairdo|80px}} |
| − | | style="background: #f8e2a1;" | '''{{item link|Kathman-Hairdo}}''' | + | | style="background:#f8e2a1;" | '''{{item link|Kathman-Hairdo}}''' |
|- | |- | ||
| − | | | + | | style="background:#f8d28c;" | {{item icon|Himalayan Hair Shirt|80px}} |
| − | | style="background: #f8e2a1;" | '''{{item link|Himalayan Hair Shirt | + | | style="background:#f8e2a1;" | '''{{item link|Himalayan Hair Shirt}}''' |
| − | |||
| − | |||
| − | |||
|- | |- | ||
| + | | style="background:#f8d28c;" | {{item icon|Abominable Snow Pants|80px}} | ||
| + | | style="background:#f8e2a1;" | '''{{item link|Abominable Snow Pants}}''' | ||
|} | |} | ||
| − | ==== | + | ==== Araçlar ==== |
| − | {{main|Tools}} | + | {{main|Tools/tr|l1={{common string|Tools}}}} |
{| class="wikitable collapsible" cellpadding="3" style="text-align:center;" | {| class="wikitable collapsible" cellpadding="3" style="text-align:center;" | ||
| − | | | + | | width="90px" style="background:#f8d28c;" | {{Icon item|Abominable Cosmetic Case|75px}} |
| − | | style="background: #f8e2a1 "| '''{{item link|Abominable Cosmetic Case}}''' | + | | style="background:#f8e2a1;" | '''{{item link|Abominable Cosmetic Case}}''' |
|- | |- | ||
| − | | | + | | style="background:#f8d28c;" | {{Icon item|Abominable Cosmetic Key|75px}} |
| − | | style="background: #f8e2a1 "| '''{{item link|Unleash the Beast Cosmetic Case}}''' | + | | style="background:#f8e2a1;" | '''{{item link|Abominable Cosmetic Key}}''' |
| + | |- | ||
| + | | style="background:#f8d28c;" | {{Icon item|Unleash the Beast Cosmetic Case|75px}} | ||
| + | | style="background:#f8e2a1;" | '''{{item link|Unleash the Beast Cosmetic Case}}''' | ||
| + | |- | ||
| + | | style="background:#f8d28c;" | {{Icon item|Unleash the Beast Cosmetic Key|75px}} | ||
| + | | style="background:#f8e2a1;" | '''{{item link|Unleash the Beast Cosmetic Key}}''' | ||
|- | |- | ||
| − | | | + | | style="background:#f8d28c;" | {{Icon item|Jungle Inferno Campaign Pass|75px}} |
| − | | style="background: #f8e2a1 "| '''{{item link|Jungle Inferno Campaign Pass}}''' | + | | style="background:#f8e2a1;" | '''{{item link|Jungle Inferno Campaign Pass}}''' |
|- | |- | ||
| − | | align=" | + | | style="background:#f8d28c;" | {{Icon item|Infernal Reward War Paint Case|75px}} |
| − | | style="background: #f8e2a1 "| '''{{item link|Jungle Inferno ConTracker}}''' | + | | style="background:#f8e2a1;" | '''{{item link|Infernal Reward War Paint Case}}''' |
| + | |- | ||
| + | | style="background:#f8d28c;" | {{Icon item|Infernal Reward War Paint Key|75px}} | ||
| + | | style="background:#f8e2a1;" | '''{{item link|Infernal Reward War Paint Key}}''' | ||
| + | |- | ||
| + | | style="background:#f8d28c;" | {{Icon item|Jungle Jackpot War Paint Case|75px}} | ||
| + | | style="background:#f8e2a1;" | '''{{item link|Jungle Jackpot War Paint Case}}''' | ||
| + | |- | ||
| + | | style="background:#f8d28c;" | {{Icon item|Jungle Jackpot War Paint Key|75px}} | ||
| + | | style="background:#f8e2a1;" | '''{{item link|Jungle Jackpot War Paint Key}}''' | ||
| + | |} | ||
| + | |||
| + | ==== {{item name|Action items}} ==== | ||
| + | {{main|Action items/tr|l1={{item name|Action items}}}} | ||
| + | {| class="wikitable collapsible" cellpadding="3" style="text-align:center;" | ||
| + | | width="90px" style="background:#f8d28c;" | {{Icon item|Jungle Inferno ConTracker|75px}} | ||
| + | | style="background:#f8e2a1;" | '''{{item link|Jungle Inferno ConTracker}}''' | ||
|} | |} | ||
| + | |||
| + | ==== {{item name|War Paints}} ==== | ||
| + | {{main|War Paint{{if lang}}|l1={{item name|War Paint}}}} | ||
| + | |||
| + | ===== {{decorated name|Jungle Jackpot Collection}} ===== | ||
| + | <gallery> | ||
| + | File:Backpack Park Pigmented War Paint Factory New.png|<div class="warpaint item-grade elite">{{Decorated name|park pigmented}}</div> | ||
| + | File:Backpack Sax Waxed War Paint Factory New.png|<div class="warpaint item-grade assassin">{{Decorated name|sax waxed}}</div> | ||
| + | File:Backpack Yeti Coated War Paint Factory New.png|<div class="warpaint item-grade assassin">{{Decorated name|yeti coated}}</div> | ||
| + | File:Backpack Croc Dusted War Paint Factory New.png|<div class="warpaint item-grade commando">{{Decorated name|croc dusted}}</div> | ||
| + | File:Backpack Macaw Masked War Paint Factory New.png|<div class="warpaint item-grade commando">{{Decorated name|macaw masked}}</div> | ||
| + | File:Backpack Piña Polished War Paint Factory New.png|<div class="warpaint item-grade commando">{{Decorated name|piña polished}}</div> | ||
| + | File:Backpack Anodized Aloha War Paint Factory New.png|<div class="warpaint item-grade mercenary">{{Decorated name|anodized aloha}}</div> | ||
| + | File:Backpack Bamboo Brushed War Paint Factory New.png|<div class="warpaint item-grade mercenary">{{Decorated name|bamboo brushed}}</div> | ||
| + | File:Backpack Leopard Printed War Paint Factory New.png|<div class="warpaint item-grade mercenary">{{Decorated name|leopard printed}}</div> | ||
| + | File:Backpack Mannana Peeled War Paint Factory New.png|<div class="warpaint item-grade mercenary">{{Decorated name|mannana peeled}}</div> | ||
| + | File:Backpack Tiger Buffed War Paint Factory New.png|<div class="warpaint item-grade mercenary">{{Decorated name|tiger buffed}}</div> | ||
| + | </gallery> | ||
| + | |||
| + | ===== {{decorated name|Infernal Reward Collection}} ===== | ||
| + | <gallery> | ||
| + | File:Backpack Fire Glazed War Paint Factory New.png|<div class="warpaint item-grade elite">{{Decorated name|fire glazed}}</div> | ||
| + | File:Backpack Bonk Varnished War Paint Factory New.png|<div class="warpaint item-grade assassin">{{Decorated name|bonk varnished}}</div> | ||
| + | File:Backpack Dream Piped War Paint Factory New.png|<div class="warpaint item-grade assassin">{{Decorated name|dream piped}}</div> | ||
| + | File:Backpack Freedom Wrapped War Paint Factory New.png|<div class="warpaint item-grade assassin">{{Decorated name|freedom wrapped}}</div> | ||
| + | File:Backpack Bank Rolled War Paint Factory New.png|<div class="warpaint item-grade commando">{{Decorated name|bank rolled}}</div> | ||
| + | File:Backpack Clover Camo'd War Paint Factory New.png|<div class="warpaint item-grade commando">{{Decorated name|clover camo'd}}</div> | ||
| + | File:Backpack Kill Covered War Paint Factory New.png|<div class="warpaint item-grade commando">{{Decorated name|kill covered}}</div> | ||
| + | File:Backpack Pizza Polished War Paint Factory New.png|<div class="warpaint item-grade commando">{{Decorated name|pizza polished}}</div> | ||
| + | File:Backpack Bloom Buffed War Paint Factory New.png|<div class="warpaint item-grade mercenary">{{Decorated name|bloom buffed}}</div> | ||
| + | File:Backpack Cardboard Boxed War Paint Factory New.png|<div class="warpaint item-grade mercenary">{{Decorated name|cardboard boxed}}</div> | ||
| + | File:Backpack Merc Stained War Paint Factory New.png|<div class="warpaint item-grade mercenary">{{Decorated name|merc stained}}</div> | ||
| + | File:Backpack Quack Canvassed War Paint Factory New.png|<div class="warpaint item-grade mercenary">{{Decorated name|quack canvassed}}</div> | ||
| + | File:Backpack Star Crossed War Paint Factory New.png|<div class="warpaint item-grade mercenary">{{Decorated name|star crossed}}</div> | ||
| + | </gallery> | ||
| + | |||
| + | ===== {{decorated name|Decorated War Hero Collection}} ===== | ||
| + | <gallery> | ||
| + | File:Backpack Carpet Bomber Mk.II War Paint Factory New.png|<div class="warpaint item-grade commando">{{Decorated name|carpet bomber mk.ii}}</div> | ||
| + | File:Backpack Woodland Warrior Mk.II War Paint Factory New.png|<div class="warpaint item-grade commando">{{Decorated name|woodland warrior mk.ii}}</div> | ||
| + | File:Backpack Wrapped Reviver Mk.II War Paint Factory New.png|<div class="warpaint item-grade commando">{{Decorated name|wrapped reviver mk.ii}}</div> | ||
| + | File:Backpack Forest Fire Mk.II War Paint Factory New.png|<div class="warpaint item-grade mercenary">{{Decorated name|forest fire mk.ii}}</div> | ||
| + | File:Backpack Night Owl Mk.II War Paint Factory New.png|<div class="warpaint item-grade mercenary">{{Decorated name|night owl mk.ii}}</div> | ||
| + | File:Backpack Woodsy Widowmaker Mk.II War Paint Factory New.png|<div class="warpaint item-grade mercenary">{{Decorated name|woodsy widowmaker mk.ii}}</div> | ||
| + | File:Backpack Autumn Mk.II War Paint Factory New.png|<div class="warpaint item-grade freelance">{{Decorated name|autumn mk.ii}}</div> | ||
| + | File:Backpack Plaid Potshotter Mk.II War Paint Factory New.png|<div class="warpaint item-grade freelance">{{Decorated name|plaid potshotter mk.ii}}</div> | ||
| + | File:Backpack Civil Servant Mk.II War Paint Factory New.png|<div class="warpaint item-grade civilian">{{Decorated name|civil servant mk.ii}}</div> | ||
| + | File:Backpack Civic Duty Mk.II War Paint Factory New.png|<div class="warpaint item-grade civilian">{{Decorated name|civic duty mk.ii}}</div> | ||
| + | </gallery> | ||
| + | |||
| + | ===== {{decorated name|Contract Campaigner Collection}} ===== | ||
| + | <gallery> | ||
| + | File:Backpack Bovine Blazemaker Mk.II War Paint Factory New.png|<div class="warpaint item-grade commando">{{Decorated name|bovine blazemaker mk.ii}}</div> | ||
| + | File:Backpack Dead Reckoner Mk.II War Paint Factory New.png|<div class="warpaint item-grade commando">{{Decorated name|dead reckoner mk.ii}}</div> | ||
| + | File:Backpack Backwoods Boomstick Mk.II War Paint Factory New.png|<div class="warpaint item-grade mercenary">{{Decorated name|backwoods boomstick mk.ii}}</div> | ||
| + | File:Backpack Masked Mender Mk.II War Paint Factory New.png|<div class="warpaint item-grade mercenary">{{Decorated name|masked mender mk.ii}}</div> | ||
| + | File:Backpack Iron Wood Mk.II War Paint Factory New.png|<div class="warpaint item-grade freelance">{{Decorated name|iron wood mk.ii}}</div> | ||
| + | File:Backpack Macabre Web Mk.II War Paint Factory New.png|<div class="warpaint item-grade freelance">{{Decorated name|macabre web mk.ii}}</div> | ||
| + | File:Backpack Nutcracker Mk.II War Paint Factory New.png|<div class="warpaint item-grade civilian">{{Decorated name|nutcracker mk.ii}}</div> | ||
| + | File:Backpack Smalltown Bringdown Mk.II War Paint Factory New.png|<div class="warpaint item-grade civilian">{{Decorated name|smalltown bringdown mk.ii}}</div> | ||
| + | </gallery> | ||
| + | |||
| + | ===== {{decorated name|Saxton Select Collection}} ===== | ||
| + | <gallery> | ||
| + | File:Backpack Dragon Slayer War Paint Factory New.png|<div class="warpaint item-grade elite">{{Decorated name|dragon slayer}}</div> | ||
| + | </gallery> | ||
=== Gün 3 === | === Gün 3 === | ||
| Line 287: | Line 379: | ||
==== Silahlar ==== | ==== Silahlar ==== | ||
| + | {{main|Weapons/tr|l1=Silahlar}} | ||
{| class="wikitable collapsible" cellpadding=2 style="text-align:center;" | {| class="wikitable collapsible" cellpadding=2 style="text-align:center;" | ||
| + | | width="90px" style="background:#b5b85c;" rowspan="4" | '''{{class link|Pyro|br=yes|color=black}}''' | ||
| + | | style="background:#f8d28c;" | {{Icon item|Dragon's Fury|75px}} | ||
| + | | style="background:#f8e2a1;" | '''{{item link|Dragon's Fury}}''' | ||
|- | |- | ||
| − | | style="background: # | + | | style="background:#f8d28c;" | {{Icon item|Gas Passer|75px}} |
| − | + | | style="background:#f8e2a1;" | '''{{item link|Gas Passer}}''' | |
| − | | style="background: #f8e2a1 "| '''{{item link| | ||
|- | |- | ||
| − | | | + | | style="background:#f8d28c;" | {{Icon item|Hot Hand|75px}} |
| − | | style="background: #f8e2a1 "| '''{{item link| | + | | style="background:#f8e2a1;" | '''{{item link|Hot Hand}}''' |
|- | |- | ||
| − | | | + | | style="background:#f8d28c;" | {{Icon item|Thermal Thruster|75px}} |
| − | | style="background: #f8e2a1 "| '''{{item link| | + | | style="background:#f8e2a1;" | '''{{item link|Thermal Thruster}}''' |
|- | |- | ||
| − | | | + | | style="background:#b5b85c;" rowspan="1" | '''{{class link|Heavy|br=yes|color=black}}''' |
| − | + | | style="background:#f8d28c;" | {{Icon item|Second Banana|75px}} | |
| − | | | + | | style="background:#f8e2a1;" | '''{{item link|Second Banana}}''' |
| − | | | ||
| − | | | ||
| − | | style="background: #f8e2a1 "| '''{{item link|Second Banana}}''' | ||
| − | |||
|} | |} | ||
==== Tweaked Classes ==== | ==== Tweaked Classes ==== | ||
{| class="wikitable" | {| class="wikitable" | ||
| − | ! style="background: #748c41;" class="header" | <span style="color: white;"> Class | + | ! style="background:#748c41;" class="header" | <span style="color: white;"> Class |
| − | ! style="background: #748c41;" class="header" | <span style="color: white;"> Changes | + | ! style="background:#748c41;" class="header" | <span style="color: white;"> Changes |
| − | |||
| − | |||
| − | |||
|- | |- | ||
| − | | style="background: #f8e2a1" | {{c|+|Changed:}} Airblast | + | ! width="90px" style="background:#b5b85c;" rowspan="6" | {{class link|Pyro|br=yes|color=black}} |
| + | | style="background:#f8e2a1;" | {{c|+|Changed:}} Airblast hit detection for both players and projectiles is now a consistent cone | ||
|- | |- | ||
| − | | style="background: #f8e2a1" | {{c| | + | | style="background:#f8e2a1;" | {{c|+|Changed:}} Airblast strength increased |
|- | |- | ||
| − | | style="background: #f8e2a1" | {{c| | + | | style="background:#f8e2a1;" | {{c|-|Changed:}} Airblast now causes the target player to have reduced footing and air control for a short period, rather than losing all control |
|- | |- | ||
| − | | style="background: #f8e2a1" | {{c|=|Changed:}} Airblast now factors in the | + | | style="background:#f8e2a1;" | {{c|=|Changed:}} Airblast now factors in the momentum of the Pyro and target, giving both more control over the interaction |
|- | |- | ||
| − | | style="background: #f8e2a1" | {{c|=|Changed:}} | + | | style="background:#f8e2a1;" | {{c|=|Changed:}} Airblast now factors in the upward angle of the airblast, rather than having a fixed upward force |
|- | |- | ||
| + | | style="background:#f8e2a1;" | {{c|=|Changed:}} Afterburn duration now based on how long the flamethrower was actively hitting an enemy | ||
|} | |} | ||
==== İyileştirilmiş Silahlar ==== | ==== İyileştirilmiş Silahlar ==== | ||
{| class="wikitable" | {| class="wikitable" | ||
| − | ! style="background: #748c41;" class="header" | <span style="color: white;"> Class | + | ! style="background:#748c41;" class="header" | <span style="color: white;"> Class |
| − | ! style="background: #748c41;" class="header" | <span style="color: white;"> Weapon | + | ! style="background:#748c41;" class="header" | <span style="color: white;"> Weapon |
| − | ! style="background: #748c41;" class="header" | <span style="color: white;"> Changes | + | ! style="background:#748c41;" class="header" | <span style="color: white;"> Changes |
|- | |- | ||
| − | ! style="background: #b5b85c;" rowspan=7| {{ | + | ! width="90px" style="background:#b5b85c;" rowspan=7 | {{class link|Pyro|br=yes|color=black}} |
| − | ! style="background: #f8d28c;" rowspan=2 | {{Icon item|Flame Thrower|icon-size=75px}} <br /> {{item link|Flame Thrower}} + Variants | + | ! style="background:#f8d28c;" rowspan=2 | {{Icon item|Flame Thrower|icon-size=75px}} <br /> {{item link|Flame Thrower}} + Variants |
| − | | style="background: #f8e2a1;" | {{c|=|Changed:}} Daha iyi görülebilir senkronize alevler, daha tutarlı (no visuals/damage mismatch) | + | | style="background:#f8e2a1;" | {{c|=|Changed:}} Daha iyi görülebilir senkronize alevler, daha tutarlı (no visuals/damage mismatch) |
|- | |- | ||
| − | | style="background: #f8e2a1;" | {{c|=|Changed:}} Yeni parçacık efektleri | + | | style="background:#f8e2a1;" | {{c|=|Changed:}} Yeni parçacık efektleri |
|} | |} | ||
| − | === | + | === Gün 4 === |
Gün 4 Jungle Inferno Güncellemesi için yama notlarını (Silah iyileştirmelerinide içeriyor), yeni silahlar hakkında bilgi, çoklu hata düzeltmelerini ve maç yapma sistemindeki değişiklikleri yayınladı. Birde birincil şahıs silah inceleme mekaniğini bütün silahlara geldiğini duyurdu. | Gün 4 Jungle Inferno Güncellemesi için yama notlarını (Silah iyileştirmelerinide içeriyor), yeni silahlar hakkında bilgi, çoklu hata düzeltmelerini ve maç yapma sistemindeki değişiklikleri yayınladı. Birde birincil şahıs silah inceleme mekaniğini bütün silahlara geldiğini duyurdu. | ||
====İyileştirilmiş Silahlar==== | ====İyileştirilmiş Silahlar==== | ||
{| class="wikitable" | {| class="wikitable" | ||
| − | ! style="background: #748c41;" class="header" | <span style="color: white;"> Class | + | ! style="background:#748c41;" class="header" | <span style="color: white;"> Class |
| − | ! style="background: #748c41;" class="header" | <span style="color: white;"> Changes | + | ! style="background:#748c41;" class="header" | <span style="color: white;"> Changes |
|- | |- | ||
| − | ! style="background: #b5b85c;" rowspan="2" | {{ | + | ! width="90px" style="background:#b5b85c;" rowspan="2" | {{class link|Heavy|br=yes|color=black}} |
| − | | style="background: #f8e2a1;" | {{c|+|Changed:}} 1-saniye hasar ve isabet cezası şimdi silahın namlusunu döndürürken ki ilk saniyesini etkiliyor, Heavy'nin ateş edip etmemesini ilgilendirmiyor. Önceden, 1-saniye hasar cezası sadece 1 saniye ateş edildikten sonra ortadan kalkıyordu. | + | | style="background:#f8e2a1;" | {{c|+|Changed:}} 1-saniye hasar ve isabet cezası şimdi silahın namlusunu döndürürken ki ilk saniyesini etkiliyor, Heavy'nin ateş edip etmemesini ilgilendirmiyor. Önceden, 1-saniye hasar cezası sadece 1 saniye ateş edildikten sonra ortadan kalkıyordu. |
|- | |- | ||
| − | | style="background: #f8e2a1;" | {{c|+|Changed:}} İsabet ve hasar cezaları şimdi Heavy namluyu döndürmeyi bırakınca sıfırlanıyor(Heavy ateş etmeyi bırakınca böyle olması yerine). Bu şu anlamına geliyor, eğer 1 saniyeden fazla döndürürsen ve hasar, ateş ve isabet 100%'de kalacak. | + | | style="background:#f8e2a1;" | {{c|+|Changed:}} İsabet ve hasar cezaları şimdi Heavy namluyu döndürmeyi bırakınca sıfırlanıyor(Heavy ateş etmeyi bırakınca böyle olması yerine). Bu şu anlamına geliyor, eğer 1 saniyeden fazla döndürürsen ve hasar, ateş ve isabet 100%'de kalacak. |
|- | |- | ||
| − | ! style="background: #b5b85c;" | {{ | + | ! style="background:#b5b85c;" | {{class link|Engineer|br=yes|color=black}} |
| − | | style="background: #f8e2a1;" | {{c|+|Added:}} Doubled the amount of metal applied (per {{botignore|wrench}} hit) when upgrading buildings during the "Setup" period | + | | style="background:#f8e2a1;" | {{c|+|Added:}} Doubled the amount of metal applied (per {{botignore|wrench}} hit) when upgrading buildings during the "Setup" period |
|- | |- | ||
|} | |} | ||
| Line 361: | Line 451: | ||
==== Tweaked Weapons ==== | ==== Tweaked Weapons ==== | ||
{| class="wikitable" | {| class="wikitable" | ||
| − | ! style="background: #748c41;" class="header" | <span style="color: white;"> Class | + | ! style="background:#748c41;" class="header" | <span style="color: white;"> Class |
| − | ! style="background: #748c41;" class="header" colspan=2 | <span style="color: white;"> Weapon | + | ! style="background:#748c41;" class="header" colspan=2 | <span style="color: white;"> Weapon |
| − | ! style="background: #748c41;" class="header" | <span style="color: white;"> Changes | + | ! style="background:#748c41;" class="header" | <span style="color: white;"> Changes |
| − | |||
| − | |||
| − | |||
| − | |||
|- | |- | ||
| − | | style="background: #f8e2a1;" | {{c| | + | ! width="90px" style="background:#b5b85c;" rowspan=25 | {{class link|Scout|br=yes|color=black}} |
| + | ! style="background:#f8d28c;" colspan=2 rowspan=2 | {{Icon item|Bonk! Atomic Punch|icon-size=75px}} <br /> {{item link|Bonk! Atomic Punch}} | ||
| + | | style="background:#f8e2a1;" | {{c|-|Added:}} Apply a slow effect to the player after phasing wears off, based on the amount of damage they absorbed, from -25% at low damage, to -50% at 200+ damage. | ||
|- | |- | ||
| − | + | | style="background:#f8e2a1;" | {{c|=|Note:}} The slow effect lasts 5 seconds | |
| − | | style="background: #f8e2a1;" | {{c| | ||
|- | |- | ||
| − | | style="background: #f8e2a1;" | {{c|+|Removed:}} Marked-For-Death when effect expires | + | ! style="background:#f8d28c;" colspan=2 rowspan=4 | {{Icon item|Crit-A-Cola|icon-size=75px}} <br /> {{item link|Crit-A-Cola}} |
| + | | style="background:#f8e2a1;" | {{c|+|Removed:}} Marked-For-Death when effect expires | ||
|- | |- | ||
| − | | style="background: #f8e2a1;" | {{c|+|Removed:}} +10% damage taken | + | | style="background:#f8e2a1;" | {{c|+|Removed:}} +10% damage taken penalty |
|- | |- | ||
| − | | style="background: #f8e2a1;" | {{c|-| | + | | style="background:#f8e2a1;" | {{c|-|Added:}} Each attack while active adds Marked-For-Death debuff for 5 seconds (does not stack) |
|- | |- | ||
| − | + | | style="background:#f8e2a1;" | {{c|-|Removed:}} +25% move speed bonus | |
| − | | style="background: #f8e2a1;" | {{c|-| | ||
|- | |- | ||
| − | | style="background: #f8e2a1;" | {{c|+|Changed:}} +15% firing speed (from 25% slower firing speed) | + | ! style="background:#f8d28c;" colspan=2 rowspan=5 | {{Icon item|Pretty Boy's Pocket Pistol|icon-size=75px}} <br /> {{item link|Pretty Boy's Pocket Pistol}} |
| + | | style="background:#f8e2a1;" | {{c|+|Changed:}} +15% firing speed (from 25% slower firing speed) | ||
|- | |- | ||
| − | | style="background: #f8e2a1;" | {{c|+|Changed:}} | + | | style="background:#f8e2a1;" | {{c|+|Changed:}} Increased max health on hit to +7 (from +5) |
|- | |- | ||
| − | | style="background: #f8e2a1;" | {{c|+|Removed:}} 20% damage vulnerability on wearer | + | | style="background:#f8e2a1;" | {{c|+|Removed:}} 20% damage vulnerability on wearer |
|- | |- | ||
| − | | style="background: #f8e2a1;" | {{c|-|Removed:}} Wearer never takes falling damage | + | | style="background:#f8e2a1;" | {{c|-|Removed:}} Wearer never takes falling damage |
|- | |- | ||
| − | + | | style="background:#f8e2a1;" | {{c|-|Added:}} -25% clip size penalty | |
| − | | style="background: #f8e2a1;" | {{c| | ||
|- | |- | ||
| − | | style="background: #f8e2a1;" | {{c|+| | + | ! style="background:#f8d28c;" colspan=2 rowspan=4 | {{Icon item|Flying Guillotine|icon-size=75px}} <br /> {{item link|Flying Guillotine}} |
| + | | style="background:#f8e2a1;" | {{c|+|Added:}} Long range hits reduce recharge time (by 1.5 seconds) | ||
|- | |- | ||
| − | | style="background: #f8e2a1;" | {{c| | + | | style="background:#f8e2a1;" | {{c|+|Changed:}} Distance considered "long range" reduced by half of the previous value when determining mini-crits |
|- | |- | ||
| − | | style="background: #f8e2a1;" | {{c|-|Removed:}} | + | | style="background:#f8e2a1;" | {{c|-|Removed:}} Crit vs stunned players |
|- | |- | ||
| − | + | | style="background:#f8e2a1;" | {{c|-|Removed:}} Mini-crits at long range | |
| − | | style="background: #f8e2a1;" | {{c| | ||
|- | |- | ||
| − | | style="background: #f8e2a1;" | {{c|+|Changed:}} | + | ! style="background:#f8d28c;" colspan=2 rowspan=4 | {{Icon item|Sandman|icon-size=75px}} <br /> {{item link|Sandman}} |
| + | | style="background:#f8e2a1;" | {{c|+|Changed:}} Max range balls now do 50% increased damage (from a base of 15) | ||
|- | |- | ||
| − | | style="background: #f8e2a1;" | {{c|+|Changed:}} | + | | style="background:#f8e2a1;" | {{c|+|Changed:}} The flight time required to trigger the "max" effect has been reduced by 20% |
|- | |- | ||
| − | | style="background: #f8e2a1;" | {{c| | + | | style="background:#f8e2a1;" | {{c|+|Changed:}} Ball regeneration time reduced to 10 seconds (from 15) |
|- | |- | ||
| − | + | | style="background:#f8e2a1;" | {{c|-|Changed:}} Long-range ball impacts no longer remove the victim's ability to fire their weapons (but the victim is still slowed) | |
| − | | style="background: #f8e2a1;" | {{c| | ||
|- | |- | ||
| − | | style="background: #f8e2a1;" | {{c| | + | ! style="background:#f8d28c;" colspan=2 rowspan=6 | {{Icon item|Atomizer|icon-size=75px}} <br /> {{item link|Atomizer}} |
| + | | style="background:#f8e2a1;" | {{c|+|Added:}} Melee attacks done while airborne mini-crit | ||
|- | |- | ||
| − | | style="background: #f8e2a1;" | {{c|+|Changed:}} Reduce damage penalty vs players to -15% (from -20%) | + | | style="background:#f8e2a1;" | {{c|+|Changed:}} Reduce damage penalty vs players to -15% (from -20%) |
|- | |- | ||
| − | | style="background: #f8e2a1;" | {{c| | + | | style="background:#f8e2a1;" | {{c|+|Removed:}} Self-inflicted damage when performing a triple jump |
|- | |- | ||
| − | | style="background: #f8e2a1;" | {{c|+|Removed:}} | + | | style="background:#f8e2a1;" | {{c|+|Removed:}} Attack speed penalty |
|- | |- | ||
| − | | style="background: #f8e2a1;" | {{c| | + | | style="background:#f8e2a1;" | {{c|-|Added:}} 50% slower deploy speed penalty |
|- | |- | ||
| − | + | | style="background:#f8e2a1;" | {{c|-|Changed:}} Triple-jump is now only possible while the {{botignore|bat}} is deployed | |
| − | |||
| − | |||
|- | |- | ||
| − | | style="background: #f8e2a1;" | {{c|+|Removed:}} Cannot be | + | ! style="background:#b5b85c;" rowspan=8 | {{class link|Soldier|br=yes|color=black}} |
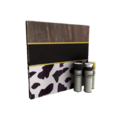
| + | ! style="background:#f8d28c;" colspan=2 rowspan=2 | {{Icon item|Cow Mangler 5000|icon-size=75px}} <br /> {{item link|Cow Mangler 5000}} | ||
| + | | style="background:#f8e2a1;" | {{c|+|Removed:}} Cannot be crit boosted | ||
|- | |- | ||
| − | + | | style="background:#f8e2a1;" | {{c|-|Added:}} Granted/earned crits will converted to mini-crits instead | |
| − | | style="background: #f8e2a1;" | {{c| | ||
|- | |- | ||
| − | | style="background: #f8e2a1;" | {{c|+| | + | ! style="background:#f8d28c;" colspan=2 rowspan=2 | {{Icon item|Mantreads|icon-size=75px}} <br /> {{item link|Mantreads}} |
| + | | style="background:#f8e2a1;" | {{c|+|Added:}} +200% air control when blast jumping | ||
|- | |- | ||
| − | + | | style="background:#f8e2a1;" | {{c|+|Changed:}} +75% push-force reduction now includes airblast | |
| − | | style="background: #f8e2a1;" | {{c| | ||
|- | |- | ||
| − | | style="background: #f8e2a1;" | {{c| | + | ! style="background:#f8d28c;" colspan=2 rowspan=4 | {{Icon item|Righteous Bison|icon-size=75px}} <br /> {{item link|Righteous Bison}} |
| + | | style="background:#f8e2a1;" | {{c|=|Note:}} This weapon has been reverted to its previous design | ||
|- | |- | ||
| − | | style="background: #f8e2a1;" | {{c|+|Changed:}} | + | | style="background:#f8e2a1;" | {{c|+|Changed:}} Projectiles are no longer limited on the number of times they can hit the same target(s) |
|- | |- | ||
| − | | style="background: #f8e2a1;" | {{c| | + | | style="background:#f8e2a1;" | {{c|+|Changed:}} Projectile velocity increased to 1200hu (from 840hu) |
|- | |- | ||
| − | + | | style="background:#f8e2a1;" | {{c|-|Changed:}} Reduced damage per tick to 20 (from 45) | |
| − | |||
| − | | style="background: #f8e2a1;" | {{c| | ||
|- | |- | ||
| − | | style="background: #f8e2a1;" | {{c| | + | ! style="background:#b5b85c;" rowspan=3 | {{class link|Demoman|br=yes|color=black}} |
| + | ! style="background:#f8d28c;" colspan=2 rowspan=3 | {{Icon item|Claidheamh Mòr|icon-size=75px}} <br /> {{item link|Claidheamh Mòr}} | ||
| + | | style="background:#f8e2a1;" | {{c|=|Note:}} This weapon has been reverted to its previous design | ||
|- | |- | ||
| − | | style="background: #f8e2a1;" | {{c| | + | | style="background:#f8e2a1;" | {{c|+|Added:}} 0.5 second increase in charge duration |
|- | |- | ||
| − | + | | style="background:#f8e2a1;" | {{c|-|Removed:}} +25 health on kill | |
| − | |||
| − | |||
| − | | style="background: #f8e2a1;" | {{c|-| | ||
|- | |- | ||
| − | | style="background: #f8e2a1;" | {{c| | + | ! style="background:#b5b85c;" rowspan=11 | {{class link|Heavy|br=yes|color=black}} |
| + | ! style="background:#f8d28c;" rowspan=5 width=128px | {{Icon item|Gloves of Running Urgently|icon-size=75px}} <br /> {{item link|Gloves of Running Urgently}} | ||
| + | ! style="background:#f8d28c;" rowspan=5 width=128px | {{Icon item|Bread Bite|icon-size=75px}} <br /> {{item link|Bread Bite}} | ||
| + | | style="background:#f8e2a1;" | {{c|+|Removed:}} Marked-For-Death effect while active | ||
|- | |- | ||
| − | | style="background: #f8e2a1;" | {{c| | + | | style="background:#f8e2a1;" | {{c|+|Removed:}} 25% damage penalty |
|- | |- | ||
| − | | style="background: #f8e2a1;" | {{c| | + | | style="background:#f8e2a1;" | {{c|-|Added:}} Max health is drained while item is active (-10/sec), and regenerated while holstered |
|- | |- | ||
| − | | style="background: #f8e2a1;" | {{c| | + | | style="background:#f8e2a1;" | {{c|=|Note:}} Health will regenerate only the amount drained while active - minus any damage taken during that time |
|- | |- | ||
| − | + | | style="background:#f8e2a1;" | {{c|=|Note:}} Each time the gloves are deployed, the drain rate is accelerated for a brief period of time. | |
| − | | style="background: #f8e2a1;" | {{c| | ||
|- | |- | ||
| − | | style="background: #f8e2a1;" | {{c|-|Added:}} 40% | + | ! style="background:#f8d28c;" colspan=2 rowspan=2 | {{Icon item|Fists of Steel|icon-size=75px}} <br /> {{item link|Fists of Steel}} |
| + | | style="background:#f8e2a1;" | {{c|-|Added:}} 40% overheal reduction while active | ||
|- | |- | ||
| − | + | | style="background:#f8e2a1;" | {{c|-|Added:}} 40% healing rate penalty while active | |
| − | | style="background: #f8e2a1;" | {{c|-|Added:}} | ||
|- | |- | ||
| − | | style="background: #f8e2a1;" | {{c| | + | ! style="background:#f8d28c;" colspan=2 rowspan=4 | {{Icon item|Eviction Notice|icon-size=75px}} <br /> {{item link|Eviction Notice}} |
| + | | style="background:#f8e2a1;" | {{c|+|Removed:}} 20% damage vulnerability | ||
|- | |- | ||
| − | | style="background: #f8e2a1;" | {{c| | + | | style="background:#f8e2a1;" | {{c|-|Added:}} Max health is drained while item is active (-5/sec), and regenerated while holstered |
|- | |- | ||
| − | | style="background: #f8e2a1;" | {{c| | + | | style="background:#f8e2a1;" | {{c|=|Note:}} Health will regenerate only the amount drained while active - minus any damage taken during that time |
|- | |- | ||
| − | + | | style="background:#f8e2a1;" | {{c|=|Note:}} Each time the gloves are deployed, the drain rate is accelerated for a brief period of time. | |
| − | |||
| − | | style="background: #f8e2a1;" | {{c| | ||
|- | |- | ||
| − | ! style="background: #b5b85c;" | + | ! style="background:#b5b85c;" | {{class link|Engineer|br=yes|color=black}} |
| − | ! style="background: #f8d28c;" colspan | + | ! style="background:#f8d28c;" colspan=2 | {{Icon item|Rescue Ranger|icon-size=75px}} <br /> {{item link|Rescue Ranger}} |
| − | | style="background: #f8e2a1;" | {{c|-|Changed:}} | + | | style="background:#f8e2a1;" | {{c|-|Changed:}} Ranged repairs now consume metal (at a 4-to-1 health-to-metal ratio) |
|- | |- | ||
| − | | style="background: #f8e2a1;" | {{c| | + | ! style="background:#b5b85c;" rowspan=5 | {{class link|Medic|br=yes|color=black}} |
| + | ! style="background:#f8d28c;" colspan=2 rowspan=2 | {{Icon item|Crusader's Crossbow|icon-size=75px}} <br /> {{item link|Crusader's Crossbow}} | ||
| + | | style="background:#f8e2a1;" | {{c|-|Changed:}} ÜberCharge gain rate reduced in the same way that the Medi Gun's healing (and therefore, ÜberCharge build rate) is - based on the last time the target was in combat | ||
|- | |- | ||
| − | + | | style="background:#f8e2a1;" | {{c|=|Note:}} Reduced by a third when 1 - 10 seconds outside of combat, and scales up to normal over 10 - 15 seconds | |
| − | | style="background: #f8e2a1;" | {{c| | ||
|- | |- | ||
| − | | style="background: #f8e2a1;" | {{c|+|Added:}} | + | ! style="background:#f8d28c;" colspan=2 rowspan=3 | {{Icon item|Vita-Saw|icon-size=75px}} <br /> {{item link|Vita-Saw}} |
| + | | style="background:#f8e2a1;" | {{c|+|Added:}} Each hit with the Vita-Saw harvests the victim's organs (shown on the HUD) | ||
|- | |- | ||
| − | | style="background: #f8e2a1;" | {{c| | + | | style="background:#f8e2a1;" | {{c|+|Added:}} On-death, preserve 15% ÜberCharge per Organ harvested. This effect caps at 60%. |
|- | |- | ||
| − | + | | style="background:#f8e2a1;" | {{c|-|Removed:}} On death up to 20% of your stored ÜberCharge is retained | |
| − | |||
| − | | style="background: #f8e2a1;" | {{c| | ||
|- | |- | ||
| − | | style="background: #f8e2a1;" | {{c| | + | ! style="background:#b5b85c;" rowspan=7 | {{class link|Sniper|br=yes|color=black}} |
| + | ! style="background:#f8d28c;" colspan=2 rowspan=2 | {{Icon item|Razorback|icon-size=75px}} <br /> {{item link|Razorback}} | ||
| + | | style="background:#f8e2a1;" | {{c|+|Added:}} Shield regenerated after 30 seconds | ||
|- | |- | ||
| − | + | | style="background:#f8e2a1;" | {{c|-|Added:}} -100% overheal penalty | |
| − | | style="background: #f8e2a1;" | {{c| | ||
|- | |- | ||
| − | | style="background: #f8e2a1;" | {{c|+|Added:}} | + | ! style="background:#f8d28c;" colspan=2 rowspan=5 | {{Icon item|Darwin's Danger Shield|icon-size=75px}} <br /> {{item link|Darwin's Danger Shield}} |
| + | | style="background:#f8e2a1;" | {{c|+|Added:}} Afterburn immunity on wearer | ||
|- | |- | ||
| − | | style="background: #f8e2a1;" | {{c|+| | + | | style="background:#f8e2a1;" | {{c|+|Added:}} +50% fire resistance on wearer |
|- | |- | ||
| − | | style="background: #f8e2a1;" | {{c| | + | | style="background:#f8e2a1;" | {{c|+|Removed:}} 20% explosive damage vulnerability on wearer |
|- | |- | ||
| − | | style="background: #f8e2a1;" | {{c|-|Removed:}} + | + | | style="background:#f8e2a1;" | {{c|-|Removed:}} +25 max health on wearer |
|- | |- | ||
| − | + | | style="background:#f8e2a1;" | {{c|-|Removed:}} +15% bullet damage resistance on wearer | |
| − | |||
| − | | style="background: #f8e2a1;" | {{c|-| | ||
|- | |- | ||
| − | | style="background: #f8e2a1;" | {{c|-|Changed:}} | + | ! style="background:#b5b85c;" rowspan=8 | {{class link|Spy|br=yes|color=black}} |
| + | ! style="background:#f8d28c;" colspan=2 rowspan=2 | {{Icon item|Ambassador|icon-size=75px}} <br /> {{item link|Ambassador}} | ||
| + | | style="background:#f8e2a1;" | {{c|-|Changed:}} Headshot damage is now subjected to distance falloff effects | ||
|- | |- | ||
| − | + | | style="background:#f8e2a1;" | {{c|-|Changed:}} Headshots beyond 1200 world units do normal (non-crit) damage | |
| − | |||
| − | | style="background: #f8e2a1;" | {{c|-| | ||
|- | |- | ||
| − | | style="background: #f8e2a1;" | {{c| | + | ! style="background:#f8d28c;" rowspan=3 | {{Icon item|Your Eternal Reward|icon-size=75px}} <br /> {{item link|Your Eternal Reward}} |
| + | ! style="background:#f8d28c;" rowspan=3 | {{Icon item|Wanga Prick|icon-size=75px}} <br /> {{item link|Wanga Prick}} | ||
| + | | style="background:#f8e2a1;" | {{c|+|Removed:}} Cannot disguise penalty | ||
|- | |- | ||
| − | | style="background: #f8e2a1;" | {{c| | + | | style="background:#f8e2a1;" | {{c|-|Added:}} Non-kill disguises require (and consume) a full cloak meter |
|- | |- | ||
| − | + | | style="background:#f8e2a1;" | {{c|-|Added:}} +33% faster cloak drain rate | |
| − | | style="background: #f8e2a1;" | {{c|-|Added:}} | ||
|- | |- | ||
| − | | style="background: #f8e2a1;" | {{c|+|Removed:}} No cloak meter from ammo boxes when invisible | + | ! style="background:#f8d28c;" colspan=2 rowspan=3 | {{Icon item|Dead Ringer|icon-size=75px}} <br /> {{item link|Dead Ringer}} |
| + | | style="background:#f8e2a1;" | {{c|+|Removed:}} No cloak meter from ammo boxes when invisible | ||
|- | |- | ||
| − | | style="background: #f8e2a1;" | {{c|+|Removed:}} -35% cloak meter from ammo boxes | + | | style="background:#f8e2a1;" | {{c|+|Removed:}} -35% cloak meter from ammo boxes |
|- | |- | ||
| − | + | | style="background:#f8e2a1;" | {{c|-|Added:}} Ammo kits and Dispensers no longer refill the Spy's cloak meter | |
| − | |||
| − | | style="background: #f8e2a1;" | {{c| | ||
|- | |- | ||
| − | | style="background: #f8e2a1;" | {{c| | + | ! style="background:#b5b85c; text-align:left;" rowspan=2 | {{class link|Soldier|color=black}}<br />{{class link|Pyro|color=black}} |
| + | ! style="background:#f8d28c;" colspan=2 rowspan=2 | {{Icon item|Reserve Shooter|icon-size=75px}} <br /> {{item link|Reserve Shooter}} | ||
| + | | style="background:#f8e2a1;" | {{c|+|Added:}} Attacks on targets flying via the Thermal Thruster mini-crit | ||
|- | |- | ||
| − | + | | style="background:#f8e2a1;" | {{c|-|Changed:}} Attacks on targets knocked into the air by Pyro airblast no longer mini-crit | |
| − | |||
| − | | style="background: #f8e2a1;" | {{c|-| | ||
|- | |- | ||
| − | | style="background: #f8e2a1;" | {{c|-|Changed:}} | + | ! style="background:#b5b85c; text-align:left;" rowspan=2 | {{class link|Soldier|color=black}}<br />{{class link|Demoman|color=black}} |
| + | ! style="background:#f8d28c;" colspan=2 rowspan=2 | {{Icon item|B.A.S.E. Jumper|icon-size=75px}} <br /> {{item link|B.A.S.E. Jumper}} | ||
| + | | style="background:#f8e2a1;" | {{c|-|Changed:}} Reduced amount of air control while deployed by 50% | ||
|- | |- | ||
| − | + | | style="background:#f8e2a1;" | {{c|-|Changed:}} Removed the ability to re-deploy the parachute once retracted (until the player lands on the ground again) | |
| − | |||
| − | | style="background: #f8e2a1;" | {{c| | ||
|- | |- | ||
| − | | style="background: #f8e2a1;" | {{c| | + | ! style="background:#b5b85c; text-align:left;" rowspan=8 | {{class link|Soldier|color=black}}<br />{{class link|Pyro|color=black}}<br />{{class link|Heavy|color=black}}<br />{{class link|Engineer|color=black}} |
| + | ! style="background:#f8d28c;" colspan=2 rowspan=8 | {{Icon item|Panic Attack|icon-size=75px}} <br /> {{item link|Panic Attack}} | ||
| + | | style="background:#f8e2a1;" | {{c|+|Added:}} +50% more pellets per shot | ||
|- | |- | ||
| − | | style="background: #f8e2a1;" | {{c|+|Added:}} Fires a wide, fixed shot pattern (regardless of server settings) | + | | style="background:#f8e2a1;" | {{c|+|Added:}} Fires a wide, fixed shot pattern (regardless of server settings) |
|- | |- | ||
| − | | style="background: #f8e2a1;" | {{c| | + | | style="background:#f8e2a1;" | {{c|-|Removed:}} 50% faster reload speed |
|- | |- | ||
| − | | style="background: #f8e2a1;" | {{c| | + | | style="background:#f8e2a1;" | {{c|-|Added:}} -30% damage penalty |
|- | |- | ||
| − | | style="background: #f8e2a1;" | {{c|-|Removed:}} | + | | style="background:#f8e2a1;" | {{c|-|Removed:}} Fire rate increases as health decreases |
|- | |- | ||
| − | | style="background: #f8e2a1;" | {{c|=| | + | | style="background:#f8e2a1;" | {{c|=|Changed:}} Shot pattern grows with successive shots, but resets after you stop firing or reload (previously, weapon spread increased as health decreased) |
| − | |||
| − | |||
|- | |- | ||
| + | | style="background:#f8e2a1;" | {{c|=|Removed:}} Hold fire to load up to 4 shells | ||
|} | |} | ||
| − | ==== | + | ==== Güncellemenin Ertelenmesi ==== |
| − | + | Güncellemenin öngörüldüğü yayınlanacağı gün, Gün 4, bir [http://www.teamfortress.com/post.php?id=33776 blog yazısı] ile güncellemenin stres testi için bir gün ertelendiği duyuruldu. | |
| − | == | + | == Ek Bilgiler == |
| − | |||
| − | |||
* Several new weapons were teased in the days prior to their reveal: | * Several new weapons were teased in the days prior to their reveal: | ||
** At the bottom of the Day 1 Update Page, there is a [[Gas Passer]] lying on the ground, and in the background, the Pyro can be seen flying with the [[Thermal Thruster]]. | ** At the bottom of the Day 1 Update Page, there is a [[Gas Passer]] lying on the ground, and in the background, the Pyro can be seen flying with the [[Thermal Thruster]]. | ||
| Line 585: | Line 670: | ||
</gallery> | </gallery> | ||
| − | == External links == | + | == Ayrıca Bakınız == |
| − | * [http://www.teamfortress.com/post.php?id=33662 Welcome to... Mercenary Park!] | + | * {{item link|Jungle Inferno Contracts Pass}} |
| − | * [http://www.teamfortress.com/jungleinferno/ Jungle Inferno Update Day 1] | + | |
| − | * [http://www.teamfortress.com/post.php?id=33689 Hit the Campaign Trail!] | + | == {{common string|External links}} == |
| − | * [http://www.teamfortress.com/jungleinferno/campaign.php Update Day 2] | + | * [http://www.teamfortress.com/post.php?id=33662 Welcome to... Mercenary Park!] {{lang icon|en}} |
| − | * [http://www.teamfortress.com/post.php?id=33731 Hot Stuff!] | + | * [http://www.teamfortress.com/jungleinferno/ Jungle Inferno Update Day 1] {{lang icon|en}} |
| − | * [http://www.teamfortress.com/jungleinferno/pyro.php Update Day 3] | + | * [http://www.teamfortress.com/post.php?id=33689 Hit the Campaign Trail!] {{lang icon|en}} |
| − | * [http://www.teamfortress.com/post.php?id=33776 We're Almost Live!] | + | * [http://www.teamfortress.com/jungleinferno/campaign.php Update Day 2] {{lang icon|en}} |
| − | * [http://www.teamfortress.com/jungleinferno/notes.php Update Day 4] | + | * [http://www.teamfortress.com/post.php?id=33731 Hot Stuff!] {{lang icon|en}} |
| − | * [http://www.teamfortress.com/post.php?id=33847 Jungle Inferno is Live!] | + | * [http://www.teamfortress.com/jungleinferno/pyro.php Update Day 3] {{lang icon|en}} |
| + | * [http://www.teamfortress.com/post.php?id=33776 We're Almost Live!] {{lang icon|en}} | ||
| + | * [http://www.teamfortress.com/jungleinferno/notes.php Update Day 4] {{lang icon|en}} | ||
| + | * [http://www.teamfortress.com/post.php?id=33847 Jungle Inferno is Live!] {{lang icon|en}} | ||
{{Jungle Inferno Update Nav}} | {{Jungle Inferno Update Nav}} | ||
{{Major updates nav}} | {{Major updates nav}} | ||
| + | {{Pyro Nav}} | ||
[[Category:Events/tr]] | [[Category:Events/tr]] | ||
[[Category:Major updates/tr]] | [[Category:Major updates/tr]] | ||
Latest revision as of 03:26, 25 October 2021
 | Bu sayfa şu anda Türkçeye tercüme edilme aşamasında. Eğer Türkçe biliyorsanız, konuşma sayfasına yazın ya da daha önceden sayfaya katkıda bulunanlarla konuşun (sayfa geçmişinden isimlerini bularak). |

| “ | Eğer Jurassic Park bize bir şey öğrettiyse, o hayatın her zaman bir yol bulduğudur. Eğer Jurassic Park bize iki şey öğrettiyse, o hayatın her zaman bir şeyin yaşanması için bir yol bulduğu ve bir güncelleme için Jurassic Park temasını çalmak iyi bir fikir olduğudur. Ve eğer Valve'ın yasal takımı bize bir şey öğrettiyse, o da bize Jurassic Park'ın bize öğrettiği ikinci şeyi size söylemem gerektiği hakkında bana bağırmalarıdır.
Eğer insanların bize bağırması bize bir şey öğrettiyse, bu gürültü sesler bizi mutsuz ediyor ve bize boşluk tuşunun nerede olduğunu unutturuyor, o yüzden biz sadece ötede duruyoruz ve ölümcül hayvanların parktan kaçması temalı tamamen orijinal güncellememizi yayınlamaktan mutluluk duyuyoruz. Çünkü hayat bir yol bulur, ki bu da bizim — TF2 Official Website
|
” |
Jungle Inferno Güncellemesi Team Fortress 2 için büyük içerik güncellemelerinden biridir. 4 gün sürmüştür, 16 Ekim 2017'de başlayıp ve soununda 20 Ekim 2017'de bir günlük ertelemeden sonra yayınlanmıştır. 5 yeni silah, 5 yeni topluluk yapımı haritalar, 1 yeni Valve yapımı harita, 7 yeni alay hareketleri, 1 yeni öldürme alay hareketi, 40'dan fazla kozmetik eşyası ve Pyro sınıfı da dahil olmak üzere birçok silah dengelemesi tanıtmıştır. Ayrıca kontrat sistemine de süslü silahlar yerine Savaş Boyası veren Sözleyici ile bir el atmıştır.
Konu başlıkları
Video
Duyurular
Jungle Inferno güncellemesi sayfası resmi olarak 16 Ekim 2017'deTF2 Resmi Blog'undaki gönderiyle"Welcome to... Mercenary Park!" başladı.
Güncelleme İşleyişi
Jungle Inferno Güncellemesi 4 gün süren bir güncellemeydi.
- Gün 1 7 yeni alay hareketi, 6 yeni harita ve kısa bir SFM fragmanı içerdi.
- Gün 2 Savaş Boyaları ve yeni bir kontrat PDA ile bedava ve paralı kontratlar içerdi. Bedava olanlar yeni silahları, paralı olanlar ise kan paralarını ve savaş boyaları ile bazı yeni kozmetikleri içerdi.
- Gün 3 yeni silahları gösterdi: Ejderha'nın Öfkesi (Bir alev silahı/birincil), Termal İtici (Bir jetçantası/ikincil ki, "Basınçlı Hava Patlaması" adında eşsiz bir öldürücü alay hareketine sahip), Gaz Kaçağı (Zehirli, yaanabilen gaz bulutu/ikincil), ve Sıcak El (Bir hız arttıran eldiven/yakın dövüş).
- Gün 4 son gündü, blog yazısı eşliğinde güncellemenin getirdiği bütün yama notları ve 1 günlük erteleme getirdi.
Gün 1
Jungle Inferno güncellemesinin 1. gününde 1 yeni Valve haritası ve 5 yeni topluluk yapımı haritalar ile birlike 2 yeni Valve alay hareketi ve 5 yeni topluluk yapımı alay hareketi duyuruldu.
Haritalar
| İsim | Resim | Oyun modu | Dosya adı |
|---|---|---|---|
| Banana Bay | 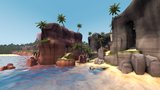
|
Yük Vagonu Yarışı |
plr_bananabay
|
| Brazil | 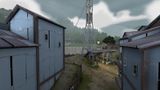
|
Tepenin Hâkimi |
koth_brazil
|
| Enclosure | 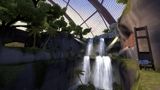
|
Yük Vagonu
|
pl_enclosure_final
|
| Lazarus | 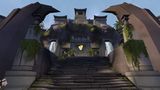
|
Tepenin Hâkimi |
koth_lazarus
|
| Mercenary Park | 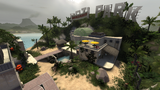
|
Saldırı/Savunma |
cp_mercenarypark
|
| Mossrock | 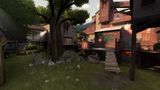
|
Saldırı/Savunma |
cp_mossrock
|
Alaylar
| Servis | ||
| Rus Şınavı | ||
| Sovyet Kabalığı | ||
| Hareketli Banjo | ||
| Ekskavatör | ||
| Yeti Yumruğu | ||
| Yeti Çarpması |
Gün 2
Gün 2 Jungle Inferno seferini ve Savaş Boyası kasalarını ,ki sözleşmelerdeki/seferlerdeki silah düşüşlerinin yerine getirilecek, ve silah kasalarını, 2 yeni kozmetik kasasını, ve yeni sefer sistemini duyurdu. Bu sefer toplam 36 sözleşmeden oluşuyor ve kooperatifle ("Co-op"la) tamamlanılabilir. Sözleşmelerin tamamlanması o sözleşmeye ait özel bir eşya veya "Kan Parası" kazandırabilir, ki bunlarla Savaş Boyası veya kasa alınabilir.
Sefer
Jungle Inferno Seferi Jungle Inferno Seferi Bileti'nin satın alımını gerektirir. Contracker PDA da duyuruldu, ki özelleştirilmiş sözleşme ilerlemesi ve Mercenary Park Hediyelik Eşya Mağazası'na erişim sağlar. Ayrıca Dost Ateşi şimdi mümkün, sözleşmeleri tamamlarken oyunculara kendi arkadaşlarına karşı oynamalarına ve birbirlerine yardım etmeye imkan veriyor eğer partide de sözleşmeler tamamlayan iki oyuncu varsa.
Kozmetik eşyalar
Setler
| Canavar Karışımı Paketi |
Katman-saçlı | ||
| Himalaya Saçı Gömleği | |||
| Berbat Kar Pantolonu |
Araçlar
Eylem eşyaları
| Orman Cehennemi SözLeyicisi |
Savaş Boyaları
Orman İkramiyesi Koleksiyonu
 Park Pigmentli
 Sax Boyalı
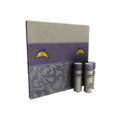 Yeti Boyalı
 Timsah Tozlu
 Papağan Maskeli
 Cilalı Piña
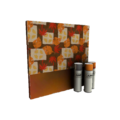 Andonize Alfa
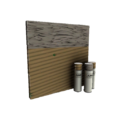 Fırçalanmış Bambu
 Leopar Baskılı
 Muz Kabuğu
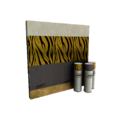 Kaplan Tüyü


Cehennem Ödülü Koleksiyonu
 Ateşle Cilalanmış
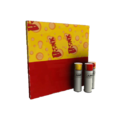 Vernikli Bonk
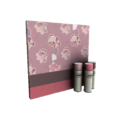 Hayali Boru
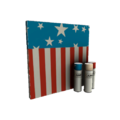 Özgürlük Kaplaması
 Nakit
Nakit Yonca Kamuflajı
 Leş Güvenli
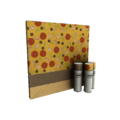 Pizza Kaplı
 Çiçek Açmış
 Karton Kutu
 Paralı Asker Lekeli
 Ördek Kaplı
 Yıldızlı


Süslü Savaş Kahramanı Koleksiyonu
 Halı Bombacısı Mk.II
 Orman Savaşçısı Mk.II
 Sargılı İyileştirici Mk.II
 Orman Yangını Mk.II
 Gece Kuşu Mk.II
 Odunsu Dulyapan Mk.II
 Sonbahar Mk.II
 Ekose Saydırıcı Mk.II
 Memur Mk.II
 Vatandaşlık Görevi Mk.II


Sözleşme Mücadelecisi Koleksiyonu
 Sığır Tutuşturucusu Mk.II
 Ölü Hesaplayıcı Mk.II
 Taşra Ateş Pompalısı Mk.II
 Maskeli Tamirci Mk.II
 Demir Odun Mk.II
 Ölümcül Ağ Mk.II
 Fıstık Kırıcı Mk.II
 Küçük Şehir Deviren Mk.II


Saxton'ın Seçimi Koleksiyonu
 Ejderha Katili

Gün 3
Gün 3 Pyro için 4 yeni silahı ve bu Pyro silahlarından (the Termal İtici)nin öldürücü aley hareketi, Heavy'e bir yemek eşyası ve alev silahında değişiklikler duyuruldu.
Silahlar
| Ejderhanın Öfkesi | ||
| Gaz Kaçağı | ||
| Sıcak El | ||
| Termal İtici | ||
| İkinci Muz |
Tweaked Classes
| Class | Changes |
|---|---|
İyileştirilmiş Silahlar
| Class | Weapon | Changes |
|---|---|---|
Alev Silahı + Variants |
||
Gün 4
Gün 4 Jungle Inferno Güncellemesi için yama notlarını (Silah iyileştirmelerinide içeriyor), yeni silahlar hakkında bilgi, çoklu hata düzeltmelerini ve maç yapma sistemindeki değişiklikleri yayınladı. Birde birincil şahıs silah inceleme mekaniğini bütün silahlara geldiğini duyurdu.
İyileştirilmiş Silahlar
| Class | Changes |
|---|---|
Tweaked Weapons
| Class | Weapon | Changes | |
|---|---|---|---|
Bonk! Atomik Kuvvet |
|||
Kritik Kola |
|||
Tatlı Oğlanın Cep Tabancası |
|||
Uçan Giyotin |
|||
Uyku Perisi |
|||
Püskürtücü |
|||
İnek Mengenesi 5000 |
|||
Tabanlar |
|||
Dürüst Bizon |
|||
Meşhur İskoç Kılıcı |
|||
Gerçek Randımana Ulaştırıcılar |
Isıran Ekmek |
||
Çelik Yumruk |
|||
Tahliye İhbarı |
|||
Hızır Polis |
|||
Akıncının Arbaleti |
|||
Vitatestere |
|||
Jiletsırt |
|||
Darwin'in Tehlike Kalkanı |
|||
Elçi |
|||
Ebedi Ödülün |
Wanga Dikeni |
||
Kusursuz Kopya |
|||
Yedek Atışçı |
|||
S.E.R.B.E.S.T. Atlayıcı |
|||
Panik Atak |
|||
Güncellemenin Ertelenmesi
Güncellemenin öngörüldüğü yayınlanacağı gün, Gün 4, bir blog yazısı ile güncellemenin stres testi için bir gün ertelendiği duyuruldu.
Ek Bilgiler
- Several new weapons were teased in the days prior to their reveal:
- At the bottom of the Day 1 Update Page, there is a Gas Passer lying on the ground, and in the background, the Pyro can be seen flying with the Thermal Thruster.
- On the Day 2 Update Page, in the pile of weapons shown that War Paint can be applied to, there is a Dragon's Fury in the background. Also, in the lineup of the team showing off new cosmetics, the Pyro is seen holding the Dragon's Fury and the Heavy is holding the Second Banana.
- At the bottom of the Day 2 Update Page, Saxton Hale is seen holding a ConTracker. On the screen, there are two names. One says "Mercenary Park", and the other says "Pyroland". It was later revealed that through the "Pyroland" option, players would be able to earn all of the four new Pyro weapons and the Heavy weapon via completing six free contracts.
- At the bottom of the page for Day 2, a parrot can be seen on Saxton Hale's shoulder. When its head is clicked or hovered over with the mouse cursor, it explodes.
Gallery

In-game notification about the release of the update.

Day 1. Maps and taunts.

Day 2. Campaign Pass and cosmetics.

Day 4. Final Patch-notes.

Ayrıca Bakınız
Dış Bağlantılar
- Welcome to... Mercenary Park! (İngilizce)
- Jungle Inferno Update Day 1 (İngilizce)
- Hit the Campaign Trail! (İngilizce)
- Update Day 2 (İngilizce)
- Hot Stuff! (İngilizce)
- Update Day 3 (İngilizce)
- We're Almost Live! (İngilizce)
- Update Day 4 (İngilizce)
- Jungle Inferno is Live! (İngilizce)
| ||||||||||||||||||||||||||||||||||||||||||||||||||||
| |||||||||||||||||||||||||||||||||||||||||||||||||||||||||||||||||||||||||||||||||||||||||||||||