Difference between revisions of "Demoman/es"
m (Auto: EnforceCapitalization(Demoman), WordFilter(Ingenieros -> Engineers) (Review RC#624742)) |
m |
||
| Line 2: | Line 2: | ||
{{DISPLAYTITLE:Demoman}} | {{DISPLAYTITLE:Demoman}} | ||
{{infobox class | {{infobox class | ||
| − | |image=Demoman.png | + | | image=Demoman.png |
| − | |class=[[Image:Leaderboard class demo.png|40px]] | + | | class=[[Image:Leaderboard class demo.png|40px]] |
| − | |type=[[Defensive/es|Defensiva]] | + | | type=[[Defensive/es|Defensiva]] |
| − | + | | health = '''175'''<small> / [[File:Medic_badge_RED.png|15px]]{{tooltip|260|Overhealed by a Medic}}</small><br /><small>(''Véase [[#Salud|Salud]] para más detalles'')</small> | |
| − | + | | speed = '''93%'''<small><br />(''Véase [[#Velocidad|Velocidad]] para más detalles'')</small></small> | |
| − | |health='''175'''<small> / | + | | avatar_main = Demomanava.jpg |
| − | + | | avatar_red = Buffed red demoman.jpg | |
| − | |speed='''93%''' < | + | | avatar_blu = Buffed blu demoman.jpg |
| − | |||
| − | |avatar_main=Demomanava.jpg | ||
| − | |avatar_red=Buffed red demoman.jpg | ||
| − | |avatar_blu=Buffed blu demoman.jpg | ||
}} | }} | ||
| Line 34: | Line 30: | ||
| image = Meethedemo1.PNG | | image = Meethedemo1.PNG | ||
}} | }} | ||
| + | |||
| + | == Salud == | ||
| + | {{main|Health/es|Overheal/es|l1=Salud|l2=Exceso de Curación}} | ||
| + | |||
| + | {| class="wikitable grid" | ||
| + | |- | ||
| + | ! class="header" | Modificación | ||
| + | ! class="header" | Salud Máx. | ||
| + | ! class="header" | Exceso Máx. | ||
| + | |- | ||
| + | | '''Estándar''' | ||
| + | | '''175''' | ||
| + | | '''260''' | ||
| + | |- | ||
| + | | [[Eyelander/es|Intuertal]], [[Horseless Headless Horsemann's Headtaker/es|DJDSM]] o [[Nessie's Nine Iron/es|Hierro del Nueve de Nessie]] equipado (sin cabezas recolectadas) | ||
| + | | 150 | ||
| + | | 225 | ||
| + | |- | ||
| + | | [[Eyelander/es|Intuertal]], [[Horseless Headless Horsemann's Headtaker/es|DJDSM]] o [[Nessie's Nine Iron/es|Hierro del Nueve de Nessie]] con 1 cabeza | ||
| + | | 165 | ||
| + | | 245 | ||
| + | |- | ||
| + | | [[Eyelander/es|Intuertal]], [[Horseless Headless Horsemann's Headtaker/es|DJDSM]] o [[Nessie's Nine Iron/es|Hierro del Nueve de Nessie]] con 2 cabezas | ||
| + | | 180 | ||
| + | | 270 | ||
| + | |- | ||
| + | | [[Eyelander/es|Intuertal]], [[Horseless Headless Horsemann's Headtaker/es|DJDSM]] o [[Nessie's Nine Iron/es|Hierro del Nueve de Nessie]] con 3 cabezas | ||
| + | | 195 | ||
| + | | 290 | ||
| + | |- | ||
| + | | [[Eyelander/es|Intuertal]], [[Horseless Headless Horsemann's Headtaker/es|DJDSM]] o [[Nessie's Nine Iron/es|Hierro del Nueve de Nessie]] totalmente cargado (4 o más cabezas recolectadas) | ||
| + | | 210 | ||
| + | | 315 | ||
| + | |- | ||
| + | | [[Claidheamh Mòr/es|Claidheamh Mòr]] equipado | ||
| + | | 160 | ||
| + | | 240 | ||
| + | |- | ||
| + | | [[Ali Baba's Wee Booties/es|Babuchas de Ali Baba]] equipado | ||
| + | | 200 | ||
| + | | 300 | ||
| + | |- | ||
| + | | [[Ali Baba's Wee Booties/es|Babuchas de Ali Baba]] y la [[Eyelander/es|Intuertal]], el [[Horseless Headless Horsemann's Headtaker/es|DJDSM]] o el [[Nessie's Nine Iron/es|Hierro del Nueve de Nessie]] equipado (sin cabezas recolectadas) | ||
| + | | 175 | ||
| + | | 260 | ||
| + | |- | ||
| + | | [[Ali Baba's Wee Booties/es|Babuchas de Ali Baba]] y la [[Eyelander/es|Intuertal]], el [[Horseless Headless Horsemann's Headtaker|DJDSM]] o el [[Nessie's Nine Iron/es|Hierro del Nueve de Nessie]] con 1 cabeza | ||
| + | | 190 | ||
| + | | 285 | ||
| + | |- | ||
| + | | [[Ali Baba's Wee Booties/es|Babuchas de Ali Baba]] y la [[Eyelander/es|Intuertal]], el [[Horseless Headless Horsemann's Headtaker/es|DJDSM]] o el [[Nessie's Nine Iron/es|Hierro del Nueve de Nessie]] con 2 cabeza | ||
| + | | 205 | ||
| + | | 305 | ||
| + | |- | ||
| + | | [[Ali Baba's Wee Booties/es|Babuchas de Ali Baba]] y la [[Eyelander/es|Intuertal]], el [[Horseless Headless Horsemann's Headtaker/es|DJDSM]] o el [[Nessie's Nine Iron/es|Hierro del Nueve de Nessie]] con 3 cabeza | ||
| + | | 220 | ||
| + | | 330 | ||
| + | |- | ||
| + | | [[Ali Baba's Wee Booties/es|Babuchas de Ali Baba]] y la [[Eyelander/es|Intuertal]], el [[Horseless Headless Horsemann's Headtaker/es|DJDSM]] o el [[Nessie's Nine Iron/es|Hierro del Nueve de Nessie]] totalmente cargado (4 o más cabezas recolectadas) | ||
| + | | 235 | ||
| + | | 350 | ||
| + | |- | ||
| + | | [[Ali Baba's Wee Booties/es|Babuchas de Ali Baba]] y [[Claidheamh Mòr/es|Claidheamh Mòr]] equipados | ||
| + | | 185 | ||
| + | | 275 | ||
| + | |- | ||
| + | |} | ||
| + | |||
| + | == Velocidad == | ||
| + | {{main|Speed|l1=Velocidad}} | ||
| + | |||
| + | {| class="wikitable grid" | ||
| + | |- | ||
| + | ! class="header" | Modificación | ||
| + | ! class="header" | Velocidad | ||
| + | |- | ||
| + | | '''Estándar''' | ||
| + | | '''93%''' | ||
| + | |- | ||
| + | | [[Scotsman's Skullcutter/es|Corta-cráneos Escocés]] equipado | ||
| + | | 79% | ||
| + | |- | ||
| + | | [[Eyelander/es|Intuertal]], [[Horseless Headless Horsemann's Headtaker/es|DJDSM]] o [[Nessie's Nine Iron/es|Hierro del Nueve de Nessie]] con 1 cabeza | ||
| + | | 100.67% | ||
| + | |- | ||
| + | | [[Eyelander/es|Intuertal]], [[Horseless Headless Horsemann's Headtaker/es|DJDSM]] o [[Nessie's Nine Iron/es|Hierro del Nueve de Nessie]] con 2 cabezas | ||
| + | | 108% | ||
| + | |- | ||
| + | | [[Eyelander/es|Intuertal]], [[Horseless Headless Horsemann's Headtaker/es|DJDSM]] o [[Nessie's Nine Iron/es|Hierro del Nueve de Nessie]] con 3 cabezas | ||
| + | | 115.67% | ||
| + | |- | ||
| + | | [[Eyelander/es|Intuertal]], [[Horseless Headless Horsemann's Headtaker/es|DJDSM]] o [[Nessie's Nine Iron/es|Hierro del Nueve de Nessie]] totalmente cargado (4 o más cabezas recolectadas) | ||
| + | | 123% | ||
| + | |- | ||
| + | |} | ||
== Estrategias Básicas == | == Estrategias Básicas == | ||
[[File:Demomanava.jpg|right]] | [[File:Demomanava.jpg|right]] | ||
| − | {{Main|Tips/es#Demoman|l1=Demoman | + | {{Main|Tips/es#Demoman|l1=Consejos del Demoman|Demoman strategy/es|l2=Estrategia con Demoman}} |
| − | |||
* Pulsa MOUSE1 para disparar bombas lapa y luego pulsa MOUSE2 para detonarlas. | * Pulsa MOUSE1 para disparar bombas lapa y luego pulsa MOUSE2 para detonarlas. | ||
* Con el Lanzabombas Lapa, cuanto más tiempo mantengas pulsado el botón de disparo, más lejos llegará el proyectil. | * Con el Lanzabombas Lapa, cuanto más tiempo mantengas pulsado el botón de disparo, más lejos llegará el proyectil. | ||
* Coloca bombas lapa debajo de tus pies para saltar y alcanzar grandes alturas. | * Coloca bombas lapa debajo de tus pies para saltar y alcanzar grandes alturas. | ||
* Dispara bombas lapa a las paredes y el techo, donde son difíciles de detectar. | * Dispara bombas lapa a las paredes y el techo, donde son difíciles de detectar. | ||
| − | |||
<br> | <br> | ||
== Armas == | == Armas == | ||
| + | {{main|Weapons/es|l1=Armas}} | ||
Nota: El daño de las armas es aproximado y listado a un valor base. Ver páginas individuales de armas para información adicional. | Nota: El daño de las armas es aproximado y listado a un valor base. Ver páginas individuales de armas para información adicional. | ||
| Line 54: | Line 144: | ||
! class="header" width="10%" | Arma | ! class="header" width="10%" | Arma | ||
! class="header" width="5%" | Icono de Muerte | ! class="header" width="5%" | Icono de Muerte | ||
| − | ! class="header" width="7%" | Munición<br/>Cargada | + | ! class="header" width="7%" | Munición<br/>Cargada |
! class="header" width="5%" | Munición<br/>Llevada | ! class="header" width="5%" | Munición<br/>Llevada | ||
| − | ! class="header" width="10%" | | + | ! class="header" width="10%" | Daño |
| − | ! class="header" width="30%" | | + | ! class="header" width="30%" | Notas / Atributos Especiales |
| + | |- | ||
| + | ! {{Table icon|Grenade Launcher|Por defecto}} | ||
| + | | align="center" | {{Icon killicon|weapon=Grenade Launcher}} | ||
| + | | 4 / {{tooltip|6|solo en la versión de PS3}} | ||
| + | | 16 / {{tooltip|30|en las versiones de PS3 y Xbox 360}} | ||
| + | | '''Por impacto directo''': | ||
| + | :'''Base''': 84–123<br/>'''[[Crit/es|Crítico]]''': 270–330<br/> | ||
| + | '''Tras rebotar''': | ||
| + | :'''Base''': 22–64<br/>'''[[Crit/es|Crítico]]''': 190<sup>1</sup> | ||
| + | | | ||
| + | {{Info}}Las Grenadas provocan un [[Damage{{if lang}}|daño a mínima distancia]] por un impacto directo. | ||
| + | |||
| + | {{Info}}Las Grenadas explotan al entrar en contacto con un enemigo o una contrucción. | ||
|- | |- | ||
| − | ! {{Table icon|Stickybomb Launcher| | + | ! {{Table icon|Loch-n-Load|Fabricación}} |
| + | | align="center" | {{Icon killicon|weapon=loch-n-load}} | ||
| + | | 2 | ||
| + | | 16 | ||
| + | | '''Por impacto directo''': | ||
| + | :'''Base''': 103–147<br/>'''[[Crit/es|Crítico]]''': 342–388<br/> | ||
| + | | | ||
| + | {{Info}}Grenades have zero range falloff on a direct hit. | ||
| + | |||
| + | {{Info}}Las Grenadas explotan al tocar un enemigo. | ||
| + | |||
| + | {{Pro}}Daños causados +20% | ||
| + | |||
| + | {{Pro}}Velocidad de los proyectiles: +25% | ||
| + | |||
| + | {{Con}}Las bombas lanzadas se destruyen contra las superficies | ||
| + | |||
| + | {{Con}}Tamaño de cargador: -60% | ||
| + | |||
| + | {{Con}}+25% daño a ti mismo | ||
| + | |- | ||
| + | |- | ||
| + | ! {{Table icon|Ali Baba's Wee Booties|Fabricación}} | ||
| + | | | ||
| + | | N/A | ||
| + | | N/A | ||
| + | | N/A | ||
| + | | | ||
| + | {{Pro}}Increases maximum health by 25. | ||
| + | |||
| + | {{Pro}}Increases turning speed while charging by 100%. | ||
| + | |||
| + | {{Info}}Grants its abilities passively, does not need to be selected. | ||
| + | |- | ||
| + | |} | ||
| + | |||
| + | ===Secundaria=== | ||
| + | {| class="wikitable grid" width="100%" | ||
| + | ! class="header" width="10%" | Arma | ||
| + | ! class="header" width="5%" | Icono de Muerte | ||
| + | ! class="header" width="7%" | Munición<br/>Cargada | ||
| + | ! class="header" width="5%" | Munición<br/>Llevada | ||
| + | ! class="header" width="10%" | Daño | ||
| + | ! class="header" width="30%" | Notas / Atributos Especiales | ||
| + | |- | ||
| + | ! {{Table icon|Stickybomb Launcher|Por defecto}} | ||
| align="center" | {{Icon killicon|weapon=Stickybomb Launcher}} | | align="center" | {{Icon killicon|weapon=Stickybomb Launcher}} | ||
| 8 | | 8 | ||
| 24 | | 24 | ||
| − | | '''Directamente | + | | '''Directamente''': |
| − | :'''Base''': 103– | + | :'''Base''': 103–138 |
| − | :'''[[ | + | :'''[[Crit/es|Crítico]]''': 353<sup>1</sup> |
| | | | ||
| − | {{Info}} | + | {{Info}}Primary fire launches the bombs, secondary fire makes them all explode at once. Holding primary fire launches the bomb farther. |
| − | {{Info}} | + | {{Info}}Stickybombs stick to most surfaces and remain ready until the player either detonates them or dies. |
| − | {{Info}} | + | {{Info}}Can lay up to 8 stickybombs at once. |
| − | {{Info}} | + | {{Info}}Stickybombs may be attacked and destroyed with any bullet firing weapon, direct strike from a melee weapon, or an enemy Scottish Resistance sticky detonating near it. |
|- | |- | ||
! {{Table icon|Chargin' Targe|Desbloqueable}} | ! {{Table icon|Chargin' Targe|Desbloqueable}} | ||
| align="center" | {{Icon killicon|weapon=Chargin' Targe}} | | align="center" | {{Icon killicon|weapon=Chargin' Targe}} | ||
| − | | N/ | + | | N/A |
| − | | N/ | + | | N/A |
| − | | ''' | + | | '''Totalmente cargado''': |
:50 + 10 <small>por [[Eyelander/es|cabeza]] (hasta 5)</small> | :50 + 10 <small>por [[Eyelander/es|cabeza]] (hasta 5)</small> | ||
| | | | ||
| − | {{Info}} | + | {{Info}}Secondary fire makes the player charge forward at high speed, adding mini-crits at half charge or critical hits at full charge to any melee attack. Any enemy hit by only the shield charge takes 50 or more damage. |
| − | {{Pro}}50% | + | {{Pro}}+50% de resistencia al daño por fuego al portador. |
| − | {{Pro}}40% | + | {{Pro}}+40% de resistencia al daño explosivo al portador. |
| − | {{Info}} | + | {{Info}}Grants its abilities passively, does not need to be selected. |
| + | |||
| + | {{Info}}Does not grant resistance to self-inflicted damage. | ||
|- | |- | ||
! {{Table icon|Scottish Resistance|Desbloqueable}} | ! {{Table icon|Scottish Resistance|Desbloqueable}} | ||
| Line 94: | Line 244: | ||
| 8 | | 8 | ||
| 36 | | 36 | ||
| − | | '''Directamente | + | | '''Directamente''': |
| − | :'''Base''': 103– | + | :'''Base''': 103–138 |
| − | :'''[[ | + | :'''[[Crit/es|Crítico]]''': 353<sup>1</sup> |
| | | | ||
| − | {{Info}} | + | {{Info}}Stickies are visible through walls and any obstacle, and can be selectively detonated by aiming at them and pressing the secondary fire button. |
| − | {{Info}} | + | {{Info}}Stickybombs may be attacked and destroyed with any bullet firing weapon, direct strike from a melee weapon, or an enemy Scottish Resistance sticky detonating near it. |
| − | {{Pro}}Puede destruir bombas enemigas | + | {{Pro}}Puede destruir las bombas lapa enemigas |
| − | {{Pro}} | + | {{Pro}}Máximo de bombas desplegadas +6 |
| − | {{Pro}} | + | {{Pro}}Contiene 12 bombas más |
| − | {{Pro}}+25% | + | {{Pro}}+25% a la velocidad de disparo |
| − | {{Con}} | + | {{Con}}Período detonable de las bombas 0.8 más lento |
|- | |- | ||
! {{Table icon|Sticky Jumper|Fabricación}} | ! {{Table icon|Sticky Jumper|Fabricación}} | ||
| Line 117: | Line 267: | ||
| 8 | | 8 | ||
| 72 | | 72 | ||
| − | | '''Directamente | + | | '''Directamente''': |
:'''Base''': 0 | :'''Base''': 0 | ||
| − | :'''[[ | + | :'''[[Crit/es|Crítico]]''': 0 |
| | | | ||
| − | {{Pro}}200% | + | {{Pro}}Munición secundaria máxima del portador: +200% |
| − | {{Pro}}No se | + | {{Pro}}No se reciben daños de explosión autoinfligidos. |
| − | {{Con}}No | + | {{Con}}No puedes dañar a enemigos. |
| − | {{Con}} | + | {{Con}}Los daños causados por explosiones: 100% |
| − | {{Con}} | + | {{Con}}El daño de las balas: 100% |
| − | {{Con}} | + | {{Con}}Los daños causados por el fuego: 100% |
| − | |||
| − | |||
| − | |||
| − | |||
| − | |||
| − | |||
| − | |||
| − | |||
| − | |||
| − | |||
|- | |- | ||
| − | ! {{Table icon| | + | ! {{Table icon|Splendid Screen|Fabricación}} |
| − | | align="center" | {{Icon killicon|weapon= | + | | align="center" | {{Icon killicon|weapon=Splendid Screen}} |
| − | | | + | | N/A |
| − | | | + | | N/A |
| − | | ''' | + | | '''Cargado''': |
| − | + | :85 + 17 <small>por [[Eyelander/es|cabeza]] (hasta 5)</small> | |
| − | + | |{{Info}}Secondary fire makes the player charge forward at high speed, adding critical hits at any point of charge to any melee attack. Any enemy hit by only the shield charge takes 85 or more damage. | |
| − | : | ||
| − | | | ||
| − | {{Info}} | ||
| − | + | {{Pro}}+25% de resistencia de fuego al portador | |
| − | |||
| − | |||
| − | |||
| − | |||
| − | |||
| − | |||
| − | |||
| − | |||
| − | |||
| − | |||
| − | |||
| − | |||
| − | {{Pro}}+ | ||
| − | {{Pro}}+ | + | {{Pro}}+15% de resistencia de explosión al portador |
| − | {{ | + | {{Pro}}Puede infligir daño de impacto embestiendo a cualquier rango |
| − | {{ | + | {{Pro}}+70% de daños causados por impacto de embestida |
| − | {{ | + | {{Info}}Puede accionarse en cualquier momento, no necesita estár seleccionada. |
| − | |||
| + | {{Info}}Does not grant resistance to self-inflicted damage. | ||
|} | |} | ||
| Line 184: | Line 308: | ||
! class="header" width="10%" | Arma | ! class="header" width="10%" | Arma | ||
! class="header" width="5%" | Icono de Muerte | ! class="header" width="5%" | Icono de Muerte | ||
| − | ! class="header" width="7%" | Munición<br/>Cargada | + | ! class="header" width="7%" | Munición<br/>Cargada |
! class="header" width="5%" | Munición<br/>Llevada | ! class="header" width="5%" | Munición<br/>Llevada | ||
| − | ! class="header" width="10%" | | + | ! class="header" width="10%" | Daño |
| − | ! class="header" width="30%" | | + | ! class="header" width="30%" | Notas / Atributos Especiales |
|- | |- | ||
| − | ! {{Table icon|Bottle| | + | ! {{Table icon|Bottle|Por defecto}} |
| align="center" | {{Icon killicon|weapon=Bottle}} | | align="center" | {{Icon killicon|weapon=Bottle}} | ||
| − | | N/ | + | | N/A |
| − | | N/ | + | | N/A |
| '''Base''': 65 | | '''Base''': 65 | ||
| − | '''[[ | + | '''[[Crit/es|Crítico]]''': 195 |
| | | | ||
| − | {{Info}}La | + | {{Info}}La Botella se rompe tras un golpe crítico certero (solamente cosmético). |
|- | |- | ||
! {{Table icon|Eyelander|Desbloqueable}} | ! {{Table icon|Eyelander|Desbloqueable}} | ||
| align="center" | {{Icon killicon|weapon=Eyelander}} | | align="center" | {{Icon killicon|weapon=Eyelander}} | ||
| − | | N/ | + | | N/A |
| − | | N/ | + | | N/A |
| '''Base''': 65 | | '''Base''': 65 | ||
| − | '''[[ | + | '''[[Crit/es|Crítico]]''': 195 |
| | | | ||
| − | {{Pro}}Tiene | + | {{Pro}}Tiene un 37% más de radio de longitud. |
| − | {{Pro}} | + | {{Pro}}Te aumenta la velocidad (7.5%) y la salud (15 puntos) por cada cabeza cortada hasta un máximo de 4 cabezas. |
| − | {{Con}} | + | {{Con}}Salud máxima del portador: -25 |
| − | {{Con}}Sin | + | {{Con}}Sin impactos críticos aleatorios |
|- | |- | ||
! {{Table icon|Pain Train|Fabricación}} | ! {{Table icon|Pain Train|Fabricación}} | ||
| align="center" | {{Icon killicon|weapon=Pain Train}} | | align="center" | {{Icon killicon|weapon=Pain Train}} | ||
| − | | N/ | + | | N/A |
| − | | N/ | + | | N/A |
| '''Base''': 65 | | '''Base''': 65 | ||
| − | '''[[ | + | '''[[Crit/es|Crítico]]''': 195 |
| | | | ||
| − | {{Pro}} | + | {{Pro}}Doble velocidad en la captura de puntos y en vagonetas. |
| − | {{Con}} | + | {{Con}}+10% de vulnerabilidad a las balas al portador |
|- | |- | ||
! {{Table icon|Scotsman's Skullcutter|Fabricación}} | ! {{Table icon|Scotsman's Skullcutter|Fabricación}} | ||
| align="center" | {{Icon killicon|weapon=Scotsman's Skullcutter}} | | align="center" | {{Icon killicon|weapon=Scotsman's Skullcutter}} | ||
| − | | N/ | + | | N/A |
| − | | N/ | + | | N/A |
| '''Base''': 78 | | '''Base''': 78 | ||
| − | '''[[ | + | '''[[Crit/es|Crítico]]''': 234 |
| | | | ||
| − | {{Pro}} | + | {{Pro}}Tiene un 37% más de radio de longitud. |
| − | |||
| − | |||
| − | {{ | + | {{Pro}}Daños causados +20% |
| − | {{Con}}Velocidad | + | {{Con}}Velocidad Reducida un 15% |
|- | |- | ||
| − | ! {{Table icon|Frying Pan| | + | ! {{Table icon|Frying Pan|Promotional}} |
| align="center" | {{Icon killicon|weapon=Frying Pan}} | | align="center" | {{Icon killicon|weapon=Frying Pan}} | ||
| − | | N/ | + | | N/A |
| − | | N/ | + | | N/A |
| '''Base''': 65 | | '''Base''': 65 | ||
| − | '''[[ | + | '''[[Crit/es|Crítico]]''': 195 |
| | | | ||
| − | + | {{Info}}Identico a la [[Bottle/es|Botella]]. | |
| − | |||
| − | {{Info}} | ||
|- | |- | ||
! {{Table icon|Horseless Headless Horsemann's Headtaker|Fabricación}} | ! {{Table icon|Horseless Headless Horsemann's Headtaker|Fabricación}} | ||
| Line 255: | Line 375: | ||
| N/A | | N/A | ||
| '''Base''': 65 | | '''Base''': 65 | ||
| − | '''[[ | + | '''[[Crit/es|Crítico]]''': 195 |
| − | | <small> | + | | <small>Ítem de [[Halloween/es|Halloween]].</small> |
| − | {{Info}} | + | {{Info}}Same as the [[Eyelander]]'s specs. |
|- | |- | ||
! {{Table icon|Claidheamh Mòr|Fabricación}} | ! {{Table icon|Claidheamh Mòr|Fabricación}} | ||
| − | | align="center" | {{Icon killicon|weapon= | + | | align="center" | {{Icon killicon|weapon=claidheamohmor}} |
| − | | N/ | + | | N/A |
| − | | N/ | + | | N/A |
| '''Base''': 65 | | '''Base''': 65 | ||
| − | '''[[ | + | '''[[Crit/es|Crítico]]''': 195 |
| | | | ||
| − | {{Pro}} | + | {{Pro}}Tiene un 37% más de radio de longitud. |
| + | |||
| + | {{Pro}}Charge duration is increased by 0.5 second. | ||
| − | {{Con}} | + | {{Con}}Decreases max health by 15. |
| − | {{Con}} | + | {{Con}}Sin impactos críticos aleatorios |
|- | |- | ||
| − | ! rowspan="2" | | + | ! rowspan="2" | {{Table icon|Ullapool Caber|Fabricación}} |
| − | | align="center" | {{Icon killicon|weapon= | + | | align="center" | {{Icon killicon|weapon=ullapool caber}} |
| − | | rowspan="2" | N/ | + | | rowspan="2" | N/A |
| − | | rowspan="2" | N/ | + | | rowspan="2" | N/A |
| − | | rowspan="2" | '''Base''': 35 | + | | rowspan="2" | '''Base''': {{tooltip|35|Melee damage}} + {{Tooltip|149|Explosive damage}} <sup>1</sup> |
| − | '''[[ | + | '''[[Crit/es|Crítico]]''': {{tooltip|105|Melee damage}} + {{Tooltip|300|Explosive damage}} <sup>1</sup> |
| rowspan="2" | | | rowspan="2" | | ||
| + | {{Info}}On hit the grenade's 'head' will explode dealing melee damage to the enemy and explosive damage to the user and all enemies around him. The explosion can be triggered also by hitting solid parts of the map and will launch the user upward. Afterwards, it will show signs of damage and will be able to deal only the melee damage and won't explode again until the user respawns or visits a resupply cabinet. | ||
| − | {{Pro}} | + | {{Con}}Sin impactos críticos aleatorios. |
| + | |- | ||
| + | | align="center" | {{Icon killicon|weapon=ullapool caber explode}} | ||
| + | |- | ||
| + | ! {{Table icon|Half-Zatoichi|Promotional / Fabricación}} | ||
| + | | align="center" | {{Icon killicon|weapon=half-zatoichi}} | ||
| + | | N/A | ||
| + | | N/A | ||
| + | | '''Base''': 65 | ||
| + | '''[[Crit/es|Crítico]]''': 195 | ||
| + | | | ||
| + | {{Pro}}On kill, restores the player to full health. | ||
| − | {{ | + | {{Con}}This weapon is Honorbound and once drawn cannot be sheathed until it kills. |
| − | + | {{Info}}A single successful hit will kill an enemy wielding the same weapon. | |
| − | |||
| − | |||
| − | |||
| − | {{Info}} | ||
|- | |- | ||
| − | | align="center" | | + | ! {{Table icon|Saxxy|Distributed}} |
| − | |- | + | | align="center" | {{Icon killicon|weapon=saxxy}} |
| − | ! {{Table icon| | + | | N/A |
| − | | {{Icon killicon|weapon= | + | | N/A |
| − | | N/ | + | | '''Base''': 65 |
| − | | N/ | + | '''[[Crit/es|Crítico]]''': 195 |
| + | | | ||
| + | <small>Limited item from the [[Replay Update/es|Actualización de Replay]].</small><br /> | ||
| + | {{Info}}Killed enemies freeze into solid [[Australium]] statues (purely cosmetic feature). | ||
| + | |- | ||
| + | ! {{Table icon|Persian Persuader|Fabricación}} | ||
| + | | align="center" | {{Icon killicon|weapon=Persian Persuader}} | ||
| + | | N/A | ||
| + | | N/A | ||
| '''Base''': 65 | | '''Base''': 65 | ||
| − | '''[[ | + | '''[[Crit/es|Crítico]]''': 195 |
| | | | ||
| − | {{Pro}} | + | {{Pro}}Halves the time required to recharge a charge. |
| − | {{Con}} | + | {{Con}}Sin impactos críticos aleatorios |
| − | |||
| − | |||
| + | {{Info}}All ammo collected converts into health. | ||
|- | |- | ||
| + | ! {{Table icon|Nessie's Nine Iron|Fabricación}} | ||
| + | | align="center" | {{Icon killicon|weapon=Nessie's Nine Iron}} | ||
| + | | N/A | ||
| + | | N/A | ||
| + | | '''Base''': 65 | ||
| + | '''[[Crit/es|Crítico]]''': 195 | ||
| + | | | ||
| + | {{Info}}Same as the [[Eyelander]]'s specs. | ||
|} | |} | ||
| − | <sup>1</sup> El daño de la explosión se determina por la distancia de la explosión. | + | <sup>1</sup>El daño de la explosión se determina por la distancia de la explosión. |
| − | ===Ataque | + | ===Burla de Ataque=== |
{{Taunt | {{Taunt | ||
| image = Demoeyelander.png | | image = Demoeyelander.png | ||
| Line 320: | Line 465: | ||
}} | }} | ||
| − | == Set == | + | == Set de Objetos== |
| − | {{Set| | + | {{Set|The Expert's Ordnance}} |
| + | |||
| + | {{Set|One Thousand and One Demoknights}} | ||
== Sombreros == | == Sombreros == | ||
| Line 332: | Line 479: | ||
== Logros == | == Logros == | ||
| − | {{Main|Demoman achievements/es|l1=Logros de Demoman}} | + | {| |
| − | '''Grupo Demoman''': 35 Logros, 3 [[Demoman achievements/es#Hitos|Hitos]]. | + | | [[File:Achieved.png|65px|left]] |
| + | | {{Main|Demoman achievements/es|l1=Logros de Demoman}} | ||
| + | *'''Grupo Demoman''': 35 Logros, 3 [[Demoman achievements/es#Hitos|Hitos]]. | ||
| + | |} | ||
| + | |||
| + | == Historial de Actualización == | ||
| + | {{update history|'''[[September 27, 2007 Patch]]''' | ||
| + | * Fixed prediction error that caused jittery sticky bomb launcher behavior | ||
| + | |||
| + | '''[[September 28, 2007 Patch]]''' | ||
| + | * Demoman's grenades (not [[stickybombs]]) no longer explode on contact after the first bounce | ||
| + | |||
| + | '''[[October 9, 2007 Patch]]''' | ||
| + | * Demomen grenades now collide with players and [[Engineer]] [[buildings]] after the first bounce, but still won't explode on contact | ||
| + | |||
| + | '''[[October 25, 2007 Patch]]''' | ||
| + | * Fixed some edge cases where grenades could go through player or buildings | ||
| + | * Fixed grenade explosions being able to impart damage through thin ceilings | ||
| + | |||
| + | '''[[December 20, 2007 Patch]]''' | ||
| + | * '''[[Dustbowl]]''' | ||
| + | ** Prevented Demomen being able to launch grenades into the stage three alleys while standing at the final cap point | ||
| + | |||
| + | '''[[February 14, 2008 Patch]]''' | ||
| + | * Made some small changes to the Demoman viewmodel that were causing performance problems | ||
| + | * '''[[Dustbowl]]''' | ||
| + | ** Fixed a few places where [[Grenade launcher|Demoman pipes]] could pass through non-solid models | ||
| + | |||
| + | '''[[February 28, 2008 Patch]]''' | ||
| + | * Class balancing | ||
| + | ** Reduced Demoman's maximum [[Sticky bomb]] reserve [[ammo]] from 30 to 16 | ||
| + | ** Reduced Demoman's maximum [[Grenade Launcher]] reserve ammo from 40 to 24 | ||
| + | |||
| + | '''[[March 6, 2008 Patch]]''' | ||
| + | *Fixed Demoman [[grenades]] not hurting the shooter if fired at point blank range against a target | ||
| + | |||
| + | '''[[April 29, 2008 Patch]]''' ([[Gold Rush Update]]) | ||
| + | * Added new speech | ||
| + | |||
| + | '''[[July 1, 2008 Patch]]''' | ||
| + | * Fixed bug that caused Demoman to take a small amount of extra damage from their own grenades and fly farther using them | ||
| + | |||
| + | '''[[July 29, 2008 Patch]]''' | ||
| + | * Fixed [[grenades]] being able to fire through grates at round starts | ||
| + | |||
| + | '''[[December 11, 2008 Patch]]''' | ||
| + | * Any weapons that fire bullets can now break apart the Demoman's [[stickybombs]] | ||
| + | |||
| + | '''[[February 16, 2009 Patch]]''' | ||
| + | * [[Sticky bombs]] now get a reduced close range damage ramp up (like [[Rocket Launcher]] & [[Syringe Gun]]) | ||
| + | ** Ultimately reduces [[damage]] done by sticky bombs to enemies <512 units from the Demoman | ||
| + | * {{Undocumented}} Demoman's [[bottle]] taunt has received a new `burp` sound. | ||
| + | * {{Undocumented}} Demoman's [[secondary weapon]] has been renamed to Stickybomb Launcher | ||
| + | |||
| + | '''[[March 5, 2009 Patch]]''' | ||
| + | * Fixed exploit that allowed players to circumvent the force-fire timeout on the [[Grenade Launcher]] | ||
| + | |||
| + | '''[[March 13, 2009 Patch]]''' | ||
| + | * Fixed rocket & grenade jumps not propelling players as far as they're supposed to | ||
| + | |||
| + | '''[[May 21, 2009 Patch]]''' ([[Sniper vs. Spy Update]]) | ||
| + | * Demomen can now detonate their stickies while [[taunting]] | ||
| + | * Added hat [[Demoman's Fro]] | ||
| + | |||
| + | '''[[August 13, 2009 Patch]]''' ([[Classless Update]]) | ||
| + | * Removed self-inflicted [[minicrits]]. Fixes Jarate'd Soldiers/Demomen having ineffective rocket/grenade jumps | ||
| + | * [[Pipeline|PLR_Pipeline]] | ||
| + | ** Fixed being able to shoot pipebombs over the starting gates in the first round | ||
| + | * Added hats: [[Glengarry Bonnet]] and [[Scotsman's Stove Pipe]] | ||
| + | |||
| + | '''[[August 14, 2009 Patch]]''' | ||
| + | * Fixed pipebombs sticking to saw blades | ||
| + | * Fixes Demoman taking too much damage from their pipebombs | ||
| + | |||
| + | '''[[August 21, 2009 Patch]]''' | ||
| + | * Restored LOD for the Demoman player model | ||
| + | |||
| + | '''[[September 15, 2009 Patch]]''' | ||
| + | * Compensated by increasing the radius of grenades, pipes, and rockets to 50% of what they lost at the corners of the OBB | ||
| + | * Grenades/Pipes radius change: 132->159 | ||
| + | |||
| + | '''[[December 10, 2009 Patch]]''' | ||
| + | * Added counters to the [[HUD]]s of [[Demomen]] to keep count of how many of either demomen killed as soldier or soldiers killed as demoman that person has contributed to the War | ||
| + | |||
| + | '''[[December 17, 2009 Patch]]''' ([[WAR! Update]]) | ||
| + | * Added 35 new [[Demoman achievements]] | ||
| + | * Added 3 new [[Demoman#Weapons|Demoman items]] The items added were the [[Chargin' Targe]], [[Scottish Resistance]], and [[Eyelander]] | ||
| + | * Added new Demoman Domination lines | ||
| + | |||
| + | '''[[December 18, 2009 Patch]]''' | ||
| + | * Fixed a server crash caused by the Demoman's [[Decapitation|taunt kill]] | ||
| + | * Fixed "Bloody Merry" and "Second Eye" achievements being achieved incorrectly | ||
| + | * Updated the description of the "Bravehurt" achievement | ||
| + | |||
| + | '''[[December 22, 2009 Patch]]''' | ||
| + | * Fixed the motion blur on charging Demoman not always drawing | ||
| + | * Fixed the [[Chargin' Targe|Chargin' Targe's]] Crit not working on servers with tf_weapon_criticals 0 | ||
| + | * Capped the amount of overhealing from taking heads to the player's max buffed health | ||
| + | * Updated the [[Scottish Resistance]] to detonate bombs near the player's feet (in addition to what it normally detonates). This enables sticky jumping with this weapon | ||
| + | |||
| + | '''[[January 6, 2010 Patch]]''' | ||
| + | * [[Achievement]] fixes | ||
| + | ** Fixed the "Second Eye" Demoman achievement | ||
| + | ** Updated description for the "Blind Fire" [[Demoman achievements|Demoman achievement]] to better explain the requirements | ||
| + | |||
| + | '''[[January 13, 2010 Patch]]''' | ||
| + | * Added backstab death animation | ||
| + | * Reduced the explosive damage resistance on the [[Chargin' Targe]] to 50% | ||
| + | * Recoil/Reload force added for the [[Scottish Resistance]] sticky bomb launcher | ||
| + | * More defined flesh hit/world hit force added for the [[Eyelander]] sword | ||
| + | * Added swing forces for Eyelander sword | ||
| + | |||
| + | '''[[January 27, 2010 Patch]]''' | ||
| + | * Changed the main menu background to randomly use the Red, Blue, and Demoman background images | ||
| + | * Fixed stickies being destructible before they're stuck to something | ||
| + | |||
| + | '''[[February 23, 2010 Patch]]''' | ||
| + | * Fixed [[pipebombs]] not being removed if they explode in a func_nogrenades zone | ||
| + | |||
| + | '''[[February 24, 2010 Patch]]''' | ||
| + | * Fixed pipebombs not colliding correctly with players | ||
| + | |||
| + | '''[[March 18, 2010 Patch]]''' ([[First Community Contribution Update]]) | ||
| + | * Added weapon: [[Pain Train]] | ||
| + | * Added hat: [[Hustler's Hallmark]] | ||
| + | |||
| + | '''[[April 28, 2010 Patch]]''' | ||
| + | * The [[Chargin' Targe]] changes | ||
| + | ** Direct charge hit now does 50 damage + 10 per head (up to 5 heads). | ||
| + | ** Capped the turn rate from +left and +right while charging. | ||
| + | |||
| + | '''[[May 5, 2010 Patch]]''' | ||
| + | * Fixed deflected remote-detonate pipebombs becoming [[Mini-Crits]] when detonated | ||
| + | * Fixed deflected remote-detonate pipebombs becoming full [[Crits]] if the [[Pyro]] is critboosted | ||
| + | |||
| + | '''[[May 20, 2010 Patch]]''' ([[Second Community Contribution Update]]) | ||
| + | * Added weapon: [[Scotsman's Skullcutter]] | ||
| + | * Added hat: [[Tippler's Tricorne]] | ||
| + | |||
| + | '''[[June 10, 2010 Patch]]''' ([[Mac Update]]) | ||
| + | * {{Undocumented}} The [[Eyelander]] now collects the heads inside Eyelanders of Demomen it decapitates | ||
| + | |||
| + | '''[[June 11, 2010 Patch]]''' | ||
| + | * The Demoman's [[Scotsman's Skullcutter|battleaxe]] now sounds like a sword | ||
| + | |||
| + | '''[[July 8, 2010 Patch]]''' ([[Engineer Update]]) | ||
| + | * [[Scottish Resistance]] now shows location of stickies placed with glow effect | ||
| + | |||
| + | '''[[September 30, 2010 Patch]]''' ([[Mann-Conomy Update]]) | ||
| + | * Added hats: [[Carouser's Capotain]], [[Sober Stuntman]] and [[Rimmed Raincatcher]] | ||
| + | * [[Achievement]] tuning | ||
| + | ** [[Demoman achievements|Demoman achievement]] "The Stickening" changed to 3 from 5 | ||
| + | * {{Undocumented}} The [[Tippler's Tricorne]] model was accidentally switched with the yet to be released [[Rimmed Raincatcher]] model | ||
| + | * {{Undocumented}} [[Scottish Resistance]] now fires 25% faster and has a .2 second longer bomb arm time. (Total bomb arm time is now .8 seconds.) | ||
| + | * {{Undocumented}} Added unused "Hi-five" taunt | ||
| + | |||
| + | '''[[October 6, 2010 Patch]]''' | ||
| + | * The TF badge on the [[Glengarry Bonnet]] is no longer team colored | ||
| + | * Restored the appearance of the [[Tippler's Tricorne]] to the version prior to the [[Mannconomy Update]]. This item is now paintable | ||
| + | * Added a new paintable hat, the '[[Rimmed Raincatcher]]' that has a new Tricorne style appearance | ||
| + | |||
| + | '''[[October 12, 2010 Patch]]''' | ||
| + | * Made the [[Frying Pan]] tradable | ||
| + | |||
| + | '''[[October 20, 2010 Patch]]''' | ||
| + | * [[Trading]] changes | ||
| + | ** Fixed the [[Frying Pan]] not being tradable | ||
| + | * {{Undocumented}} Removed the ability to craft the Frying Pan using the "Fabricate Class Weapons" blueprint | ||
| + | |||
| + | '''[[October 27, 2010 Patch]]''' ([[Scream Fortress]]) | ||
| + | * Added a new [[Unusual Horseless Headless Horsemann's Headtaker|Halloween weapon]] | ||
| + | * Added the [[Sticky Jumper]] for Demomen to practice jumping | ||
| + | * {{Undocumented}} Added the [[Hustler's Hallmark]] to the store | ||
| + | |||
| + | '''[[October 28, 2010 Patch]]''' | ||
| + | * Fixed the [[Sticky Jumper]] doing damage to enemies | ||
| + | * {{Undocumented}} Equipping the Sticky Jumper no longer multiples the [[Grenade Launcher]]'s carried ammo instead of the Sticky Jumper's ammo | ||
| + | |||
| + | '''[[November 19, 2010 Patch]]''' | ||
| + | * Added Telltale Games items: | ||
| + | ** [[Dangeresque, Too?]]: Strong Bad's styling glasses (equipped by the Demoman) | ||
| + | * Updated some item capabilities: | ||
| + | ** The [[Stickybomb Jumper]] can now be gift wrapped | ||
| + | * {{Undocumented}} [[Demoman]]'s arm emblem changed to a [[Stickybomb Launcher]] sticky bomb | ||
| + | |||
| + | '''[[December 2, 2010 Patch]]''' | ||
| + | * Made the following hats paintable: [[Dangeresque, Too?]] | ||
| + | |||
| + | '''[[December 17, 2010 Patch]]''' ([[Australian Christmas]]) | ||
| + | * Added '[[The Expert's Ordnance]]' item set | ||
| + | * Added new weapons: '[[The Claidheamohmor]]', '[[The Ullapool Caber]]' and '[[The Loch-n-Load]]' | ||
| + | * Added new hats: '[[Prince Tavish's Crown]]' and '[[Scotch Bonnet]]' | ||
| + | * {{Undocumented}} [[Chargin' Targe]] no longer protects you against your own explosive damage | ||
| + | * {{Undocumented}} Changed the [[Scottish Resistance]] model to use a combined world- and viewmodel | ||
| + | ** Added the laser attachment to the worldmodel of the Scottish Resistance. | ||
| + | ** Mirrored the Scottish Resistance first person viewmodel to match the worldmodel | ||
| + | |||
| + | '''[[December 21, 2010 Patch]]''' | ||
| + | * Corrected the name of the "[[Claidheamh Mòr]]" | ||
| + | |||
| + | '''[[January 10, 2011 Patch]]''' | ||
| + | * Added [[Loch-n-Load]] [[kill icon]] | ||
| + | * {{Undocumented}} Improved [[Ullapool Caber]] kill icon | ||
| + | |||
| + | '''[[January 19, 2011 Patch]]''' | ||
| + | * {{Undocumented}} Fixed world reload animation for the [[Grenade Launcher]] not showing the Demoman holding grenades when he reloads | ||
| + | * {{Undocumented}} The [[Scottish Resistance]] and the [[Stickybomb Launcher]] now drop the appropriate weapon on death on RED team | ||
| + | * {{Undocumented}} If the player suicides with the [[Ullapool Caber]] it displays the Caber's [[kill icon]] | ||
| + | |||
| + | '''[[February 3, 2011 Patch]]''' | ||
| + | * Updated the [[Scottish Resistance]] stickybombs to always glow if they will be detonated by a right-click, including the stickybombs under the Demoman's feet | ||
| + | * Fixed [[particle]] effects on the [[Hustler's Hallmark]] | ||
| + | |||
| + | '''[[February 14, 2011 Patch]]''' | ||
| + | * Fixed [[Weapons|melee]] attacks not destroying [[Stickybomb|remote detonation pipes]] | ||
| + | * Added the [[Rimmed Raincatcher]] to the list of [[Quality#Unusual items|Unusual hats]] | ||
| + | * Fixed the [[Stickybomb Launcher]] viewmodel sleeves using the wrong team colors for team [[BLU|Blue]] | ||
| + | * {{Undocumented}} [[Grenade Launcher]]s using [[Name Tag|Name]] or [[Description Tag]]s now properly use the {{code|c_model}} equivalent | ||
| + | |||
| + | '''[[February 28, 2011 Patch]]''' | ||
| + | * [[Carouser's Capotain]] and [[Sober Stuntman]] were added to the [[Mann Co. Store]] | ||
| + | |||
| + | '''[[March 10, 2011 Patch]]''' ([[Shogun Pack]]) | ||
| + | * Added Weapon: [[Half-Zatoichi]] | ||
| + | * Added hat: [[Samur-Eye]] | ||
| + | |||
| + | '''[[March 11, 2011 Patch]]''' | ||
| + | * Fixed the Demoman not using the correct animations for some of his weapons | ||
| + | |||
| + | '''[[March 15, 2011 Patch]]''' | ||
| + | * Fixed a [[server]] crash caused by using the [[Half-Zatoichi]] to hit someone not holding a weapon | ||
| + | * Fixed the Demoman [[taunts]] not working correctly when the Half-Zatoichi is the active weapon | ||
| + | * Fixed a [[bug]] where players could switch weapons after deploying the Half-Zatoichi before they killed someone with it | ||
| + | * Crafting recipe for the following weapons changed [[Horseless Headless Horsemann's Headtaker]], [[Loch-n-Load]] and [[Ullapool Caber]] | ||
| + | |||
| + | '''[[March 21, 2011 Patch]]''' | ||
| + | * Updated [[Half-Zatoichi|honor-bound weapons]] so they can be holstered within a second of touching a [[Spawn_room#Resupply|supply cabinet]] | ||
| + | * {{Undocumented}} Updated Demoman two-handed [[melee]] weapon 3rd-person views in the loadout screen | ||
| + | |||
| + | '''[[April 7, 2011 Patch]]''' | ||
| + | * Added new hat: [[Reggaelator]] | ||
| + | |||
| + | '''[[April 14, 2011 Patch]]''' ([[Hatless Update]]) | ||
| + | * Added 3 new training courses for the Demoman | ||
| + | * Fixed [[Decapitation|taunt]] kills made with a [[Half-Zatoichi|Katana]] not counting towards honorbound kills | ||
| + | * Fixed a bug where killing a Katana wielder with a Katana was incorrectly causing an increased crit chance | ||
| + | * Added "[[styles]]" for the: [[Scotsman's Stove Pipe]] | ||
| + | * Replaced the no-[[crit]] attribute with -25% damage on the following: The [[Eyelander]], The [[Horseless Headless Horseman's Headtaker]], The [[Ullapool Caber]] and The [[Claidheamh Mòr|Claidheamohmor]] | ||
| + | * Item changes: | ||
| + | ** [[Loch-n-Load]] Damage increased by 10% | ||
| + | * [[Bot]] changes: | ||
| + | ** Demoman bots will now try to move to a safe spot and lob stickybombs onto enemy sentry nests to destroy them | ||
| + | * {{Undocumented}} Added phong shader on the [[Grenade Launcher]] grenades | ||
| + | |||
| + | '''[[April 15, 2011 Patch]]''' | ||
| + | * Added a missing material for the [[Scotsman's Stove Pipe]] | ||
| + | * {{Undocumented}} Replaced the -25% damage attribute with no-[[crit]] on the following weapons: | ||
| + | ** [[Eyelander]], [[Horseless Headless Horsemann's Headtaker]], [[Ullapool Caber]] and [[Claidheamh Mòr]] | ||
| + | |||
| + | '''[[April 18, 2011 Patch]]''' | ||
| + | * {{Undocumented}} The [[Rimmed Raincatcher]] was added to the Mann Co. Store | ||
| + | |||
| + | '''[[April 20, 2011 Patch]]''' | ||
| + | * Fixed the [[Sticky Jumper]] and the [[Stickybomb Launcher]] using the wrong skins | ||
| + | |||
| + | '''[[May 31, 2011 Patch]]''' | ||
| + | * Added the [[Conjurer's Cowl]] | ||
| + | |||
| + | '''[[June 3, 2011 Patch]]''' | ||
| + | * Updated the [[Conjurer's Cowl]] to be [[Paint Can|paintable]] | ||
| + | * {{Undocumented}} The [[Horseless Headless Horsemann's Headtaker]] and [[Claidheamh Mòr]] were assigned the [[Decapitation]] taunt | ||
| + | * Removed [[Demoman]]'s taunt from the [[Pain Train]] | ||
| + | * Added an explosion sound effect for a successful hit with the [[Ullapool Caber]] | ||
| + | |||
| + | '''[[June 8, 2011 Patch]]''' | ||
| + | * {{Undocumented}} New laughing taunt animations have been added but are currently unused | ||
| + | |||
| + | '''[[June 10, 2011 Patch]]''' | ||
| + | * Fixed a problem with honorbound weapons not allowing themselves to be holstered after killing a [[Spy]] using the [[Dead Ringer]] | ||
| + | |||
| + | '''[[June 14, 2011 Patch]]''' | ||
| + | * Updated The [[Conjurer's Cowl]] so it can be [[Crafting|crafted]] and [[Trading|traded]] | ||
| + | * {{Undocumented}}The Conjurer's Cowl could now be found in random drops and can be uncrated with Unusual quality | ||
| + | |||
| + | '''[[June 23, 2011 Patch]]''' | ||
| + | * Added weapons: [[Splendid Screen]], [[Persian Persuader]] and [[Ali Baba's Wee Booties]] | ||
| + | * Added hat: [[Sultan's Ceremonial]] | ||
| + | * {{Undocumented}} Fixed an exploit with the [[Chargin' Targe]] that allowed greater turning control than intended | ||
| + | * {{Undocumented}} Demoman can now begin a charge while in midair | ||
| + | * {{Undocumented}} The charge meter for the Chargin' Targe is no longer fully depleted if the user is interrupted by a [[Compression Blast]] | ||
| + | * {{Undocumented}} The Chargin' Targe can now be refilled by resupply cabinets | ||
| + | |||
| + | '''[[July 1, 2011 Patch]]''' | ||
| + | * Added weapon: [[Nessie's Nine Iron]] | ||
| + | * Added hat: [[Tam O' Shanter]] | ||
| + | |||
| + | '''[[July 7, 2011 Patch]]''' | ||
| + | * Fixed a bug with honorbound weapons allowing themselves to be holstered before getting a kill | ||
| + | |||
| + | '''[[July 22, 2011 Patch]]''' | ||
| + | * Updated the gamehaptics file | ||
| + | ** Refined the [[Demoman]]'s [[Stickybomb Launcher]]/[[Grenade Launcher|Pipe Bomb Launcher]] reload forces | ||
| + | |||
| + | '''[[July 29, 2011 Patch]]''' | ||
| + | * Added hat: [[Mask of the Shaman]] | ||
| + | }} | ||
== Curiosidades == | == Curiosidades == | ||
| Line 351: | Line 803: | ||
*Originalmente el Demoman lanzaba una carga de dinamitas que sostenía de la mecha esta fue remplazada por el lanza granadas | *Originalmente el Demoman lanzaba una carga de dinamitas que sostenía de la mecha esta fue remplazada por el lanza granadas | ||
| + | == Galería == | ||
<br><gallery widths=150px heights=150px> | <br><gallery widths=150px heights=150px> | ||
| − | |||
File:TF2-JackHearts.png|Ta carta del Demoman vista en el juego Poker Night at the Inventory | File:TF2-JackHearts.png|Ta carta del Demoman vista en el juego Poker Night at the Inventory | ||
File:Demomanworm.png|El sombrero y parche del Demoman en el juego ''Worms: Reloaded'' | File:Demomanworm.png|El sombrero y parche del Demoman en el juego ''Worms: Reloaded'' | ||
File:Eye Lad.png|Ítem del juego ''Monday Night Combat''; "Eye Lad" | File:Eye Lad.png|Ítem del juego ''Monday Night Combat''; "Eye Lad" | ||
| − | File:Demoman_badge_old_RED.png| | + | File:Demoman_badge_old_RED.png|Símbolo original RED del Demoman |
| − | File:Demoman_badge_old_BLU.png| | + | File:Demoman_badge_old_BLU.png|Símbolo original BLU del Demoman |
File:Tf demoman freezecam smile.png|La [http://wiki.teamfortress.com/wiki/Demoman_taunts#Primary/ cara sonriente] de Demoman | File:Tf demoman freezecam smile.png|La [http://wiki.teamfortress.com/wiki/Demoman_taunts#Primary/ cara sonriente] de Demoman | ||
| + | File:demoman_patch.png|Parche alternativo del Demoman. | ||
| + | File:TFC_Demo.png|El [[Demoman (Classic)/es|Demoman]] en [[Team Fortress Classic/es|Team Fortress Classic]] | ||
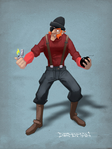
| + | File:Dm concept1.png|Diseños conceptual del Demoman | ||
| + | File:Dm concept2.png|Diseños conceptual del Demoman | ||
| + | File:Dm concept3.png|Diseños conceptual del Demoman | ||
| + | File:Dm concept3a.png|Diseños conceptual del Demoman | ||
| + | File:Dm concept4.png|Diseños conceptual del Demoman | ||
| + | File:Dm concept5.png|Diseños conceptual del Demoman | ||
| + | File:Dm concept5a.png|Diseños conceptual del Demoman | ||
| + | File:Dm concept6.png|Diseños conceptual del Demoman | ||
| + | File:Dm concept7.png|Diseños conceptual del Demoman | ||
| + | File:Dm concept8.png|Diseños conceptual del Demoman | ||
| + | File:Demoman_concept.png|Diseños conceptual del Demoman | ||
| + | File:Sketches3.png|Boceto de [[Meet the Demoman/es|Conoce al Demoman]] | ||
</gallery> | </gallery> | ||
| Line 371: | Line 837: | ||
File:Demoman Decal Black.png|[http://store.valvesoftware.com/product.php?i=STF201 Decal de la clase Demoman, Negro] | File:Demoman Decal Black.png|[http://store.valvesoftware.com/product.php?i=STF201 Decal de la clase Demoman, Negro] | ||
</gallery> | </gallery> | ||
| − | |||
| − | |||
| − | |||
| − | |||
== Véase También == | == Véase También == | ||
| − | |||
*[[Meet the Demoman/es|Conoce al Demoman]] | *[[Meet the Demoman/es|Conoce al Demoman]] | ||
| − | *[[Demoman match-ups]] | + | *[[Demoman match-ups/es|Demoman match-ups]] |
*[[Demoman taunts/es|Burlas del Demoman]] | *[[Demoman taunts/es|Burlas del Demoman]] | ||
*[[Demoman responses/es|Respuestas del Demoman]] | *[[Demoman responses/es|Respuestas del Demoman]] | ||
| Line 389: | Line 850: | ||
*[[Demoman scripts/es|Scripts Demoman]] | *[[Demoman scripts/es|Scripts Demoman]] | ||
*[[List of references (Demoman)|Lista de Referencia (Demoman)]] | *[[List of references (Demoman)|Lista de Referencia (Demoman)]] | ||
| − | + | * [[Memes/es#Demopan|Demopan]] | |
| + | * [[Memes/es#Seeman|Seeman]] | ||
== Enlaces Externos == | == Enlaces Externos == | ||
Revision as of 13:16, 1 August 2011
| La traducción de este artículo requiere ser actualizada. Puedes ayudar a mejorar esta página editándola y actualizándola con contenido de Demoman (ver fuente). Véase también Guía de traducción (Inglés). |
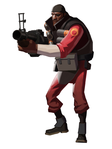
| Demoman | |
|---|---|
 | |
| Información básica | |
| Icono: | 40px |
| Tipo: | Defensiva |
| Salud: | 175 / (Véase Salud para más detalles) |
| Velocidad: | 93% (Véase Velocidad para más detalles) |
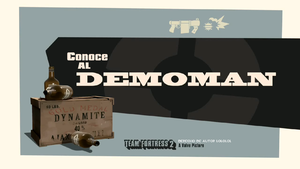
| Conoce al Demoman | |
| |
| « | Un alambre cruzado, una pizca de clorato de potasio, una sacudida violenta... y kablooie!
Haz clic para escuchar
— El Demoman ocupandose de artefactos peligrosos
|
» |
Un bebedor de sidra, experto en demoliciones de las tierras altas de Escocia, el Demoman (nombre real Tavish DeGroot) es uno de los miembros más versátiles del equipo. A pesar de su falta de armas con precisión milimétrica de largo alcance, el Demoman es poderoso, impredecible, activo y puede mantenerse en su cuenta en casi cualquier situación. Él es un maestro del explosivo, sobresaliendo en el combate indirecto, de gama media. Armado con su lanzagranadas y bombas lapa, el Demoman utiliza su único ojo bueno y el conocimiento de los alrededores para detonaciones muy oportunas que envían los enemigos al cielo, a menudo en varios pedazos.
El Demoman, como su nombre lo indica, se destaca en su rápido desmontaje de torretas gracias a los rebotes de sus granadas en esquinas redondas y para causar estragos en el campo enemigo sin dejar de estar salvo fuera de la vista. Sus bombas pegajosas son una herramienta perfecta para la negación de área, de mantenimiento de los opositores de distancia de cualquier carro, los puntos de control y de la inteligencia que considere fuera de los límites.
El Demoman tiene la voz de Gary Schwartz.
Índice
Biografía
|


Salud
Velocidad
| Modificación | Velocidad |
|---|---|
| Estándar | 93% |
| Corta-cráneos Escocés equipado | 79% |
| Intuertal, DJDSM o Hierro del Nueve de Nessie con 1 cabeza | 100.67% |
| Intuertal, DJDSM o Hierro del Nueve de Nessie con 2 cabezas | 108% |
| Intuertal, DJDSM o Hierro del Nueve de Nessie con 3 cabezas | 115.67% |
| Intuertal, DJDSM o Hierro del Nueve de Nessie totalmente cargado (4 o más cabezas recolectadas) | 123% |
Estrategias Básicas

- Pulsa MOUSE1 para disparar bombas lapa y luego pulsa MOUSE2 para detonarlas.
- Con el Lanzabombas Lapa, cuanto más tiempo mantengas pulsado el botón de disparo, más lejos llegará el proyectil.
- Coloca bombas lapa debajo de tus pies para saltar y alcanzar grandes alturas.
- Dispara bombas lapa a las paredes y el techo, donde son difíciles de detectar.
Armas
Nota: El daño de las armas es aproximado y listado a un valor base. Ver páginas individuales de armas para información adicional.
Primaria
| Arma | Icono de Muerte | Munición Cargada |
Munición Llevada |
Daño | Notas / Atributos Especiales |
|---|---|---|---|---|---|
Por defecto Lanzagranadas |
4 / 6 | 16 / 30 | Por impacto directo:
Tras rebotar:
|
| |
Fabricación Bombstruo del Lago Ness |
2 | 16 | Por impacto directo:
|
| |
Fabricación Babuchas de Alí Babá |
N/A | N/A | N/A |
|
Secundaria
| Arma | Icono de Muerte | Munición Cargada |
Munición Llevada |
Daño | Notas / Atributos Especiales |
|---|---|---|---|---|---|
Por defecto Lanzabombas Lapa |
8 | 24 | Directamente:
|
| |
Desbloqueable Targe de Carga |
N/A | N/A | Totalmente cargado:
|
| |
Desbloqueable Resistencia Escocesa |
8 | 36 | Directamente:
|
| |
Fabricación Saltalapas |
8 | 72 | Directamente:
|
| |
Fabricación Escudo Espléndido |
N/A | N/A | Cargado:
|
|
Cuerpo a Cuerpo
| Arma | Icono de Muerte | Munición Cargada |
Munición Llevada |
Daño | Notas / Atributos Especiales |
|---|---|---|---|---|---|
Por defecto Botella |
N/A | N/A | Base: 65
Crítico: 195 |
| |
Desbloqueable Intuertal |
N/A | N/A | Base: 65
Crítico: 195 |
| |
Fabricación Tren del Dolor |
N/A | N/A | Base: 65
Crítico: 195 |
| |
Fabricación Cortacráneos Escocés |
N/A | N/A | Base: 78
Crítico: 234 |
| |
Promotional Sartén |
N/A | N/A | Base: 65
Crítico: 195 |
| |
Fabricación Decapitador del Jinete Decapitado sin Montura |
N/A | N/A | Base: 65
Crítico: 195 |
Ítem de Halloween.
| |
Fabricación Claidheamh Mòr |
N/A | N/A | Base: 65
Crítico: 195 |
| |
Fabricación Cáber de Ullapool |
N/A | N/A | Base: 35 + 149 1
Crítico: 105 + 300 1 |
| |
Promotional / Fabricación Katana del Medio Zatoichi |
N/A | N/A | Base: 65
Crítico: 195 |
| |
Distributed Saxxy |
N/A | N/A | Base: 65
Crítico: 195 |
Limited item from the Actualización de Replay. | |
Fabricación Persa Persuasivo |
N/A | N/A | Base: 65
Crítico: 195 |
| |
Fabricación Hierro del Nueve de Nessie |
N/A | N/A | Base: 65
Crítico: 195 |
|
1El daño de la explosión se determina por la distancia de la explosión.
Burla de Ataque
 |
Armas asociada | Descripción | Icono de Muerte |
|---|---|---|---|
Véase también: Decapitación
El Demoman balancea su espada, rebana la cabeza del enemigo y a continuación, limpia la espada con la mano. |
|
Set de Objetos
| Artillería del Experto | |
|---|---|
|
|
| Efecto |
Sin efecto |
| Mil y un Parches | |
|---|---|
| Efecto |
Sin efecto |
Sombreros
| ||||||||||||||||||||||||||||||||||||||||||||||||||||||||||||||||||||||||||||||||||||||||||||||||||||||||||||||||||||||||||
Avatares oficiales de clase
| Avatares oficiales de clase | ||
|---|---|---|
| Original | Supercarga RED | Supercarga BLU |
|
|

|

|
| Obtener avatares de TF2 en Steam: Original | ||
Logros
 |
Artículo principal: Logros de Demoman
|
Historial de Actualización
- Fixed prediction error that caused jittery sticky bomb launcher behavior
- Demoman's grenades (not stickybombs) no longer explode on contact after the first bounce
- Demomen grenades now collide with players and Engineer buildings after the first bounce, but still won't explode on contact
- Fixed some edge cases where grenades could go through player or buildings
- Fixed grenade explosions being able to impart damage through thin ceilings
- Dustbowl
- Prevented Demomen being able to launch grenades into the stage three alleys while standing at the final cap point
- Made some small changes to the Demoman viewmodel that were causing performance problems
- Dustbowl
- Fixed a few places where Demoman pipes could pass through non-solid models
- Class balancing
- Reduced Demoman's maximum Sticky bomb reserve ammo from 30 to 16
- Reduced Demoman's maximum Grenade Launcher reserve ammo from 40 to 24
- Fixed Demoman grenades not hurting the shooter if fired at point blank range against a target
April 29, 2008 Patch (Gold Rush Update)
- Added new speech
- Fixed bug that caused Demoman to take a small amount of extra damage from their own grenades and fly farther using them
- Fixed grenades being able to fire through grates at round starts
- Any weapons that fire bullets can now break apart the Demoman's stickybombs
- Sticky bombs now get a reduced close range damage ramp up (like Rocket Launcher & Syringe Gun)
- Ultimately reduces damage done by sticky bombs to enemies <512 units from the Demoman
- [Sin documentar] Demoman's bottle taunt has received a new `burp` sound.
- [Sin documentar] Demoman's secondary weapon has been renamed to Stickybomb Launcher
- Fixed exploit that allowed players to circumvent the force-fire timeout on the Grenade Launcher
- Fixed rocket & grenade jumps not propelling players as far as they're supposed to
May 21, 2009 Patch (Sniper vs. Spy Update)
- Demomen can now detonate their stickies while taunting
- Added hat Demoman's Fro
August 13, 2009 Patch (Classless Update)
- Removed self-inflicted minicrits. Fixes Jarate'd Soldiers/Demomen having ineffective rocket/grenade jumps
- PLR_Pipeline
- Fixed being able to shoot pipebombs over the starting gates in the first round
- Added hats: Glengarry Bonnet and Scotsman's Stove Pipe
- Fixed pipebombs sticking to saw blades
- Fixes Demoman taking too much damage from their pipebombs
- Restored LOD for the Demoman player model
- Compensated by increasing the radius of grenades, pipes, and rockets to 50% of what they lost at the corners of the OBB
- Grenades/Pipes radius change: 132->159
- Added counters to the HUDs of Demomen to keep count of how many of either demomen killed as soldier or soldiers killed as demoman that person has contributed to the War
December 17, 2009 Patch (WAR! Update)
- Added 35 new Demoman achievements
- Added 3 new Demoman items The items added were the Chargin' Targe, Scottish Resistance, and Eyelander
- Added new Demoman Domination lines
- Fixed a server crash caused by the Demoman's taunt kill
- Fixed "Bloody Merry" and "Second Eye" achievements being achieved incorrectly
- Updated the description of the "Bravehurt" achievement
- Fixed the motion blur on charging Demoman not always drawing
- Fixed the Chargin' Targe's Crit not working on servers with tf_weapon_criticals 0
- Capped the amount of overhealing from taking heads to the player's max buffed health
- Updated the Scottish Resistance to detonate bombs near the player's feet (in addition to what it normally detonates). This enables sticky jumping with this weapon
- Achievement fixes
- Fixed the "Second Eye" Demoman achievement
- Updated description for the "Blind Fire" Demoman achievement to better explain the requirements
- Added backstab death animation
- Reduced the explosive damage resistance on the Chargin' Targe to 50%
- Recoil/Reload force added for the Scottish Resistance sticky bomb launcher
- More defined flesh hit/world hit force added for the Eyelander sword
- Added swing forces for Eyelander sword
- Changed the main menu background to randomly use the Red, Blue, and Demoman background images
- Fixed stickies being destructible before they're stuck to something
- Fixed pipebombs not being removed if they explode in a func_nogrenades zone
- Fixed pipebombs not colliding correctly with players
March 18, 2010 Patch (First Community Contribution Update)
- Added weapon: Pain Train
- Added hat: Hustler's Hallmark
- The Chargin' Targe changes
- Direct charge hit now does 50 damage + 10 per head (up to 5 heads).
- Capped the turn rate from +left and +right while charging.
- Fixed deflected remote-detonate pipebombs becoming Mini-Crits when detonated
- Fixed deflected remote-detonate pipebombs becoming full Crits if the Pyro is critboosted
May 20, 2010 Patch (Second Community Contribution Update)
- Added weapon: Scotsman's Skullcutter
- Added hat: Tippler's Tricorne
June 10, 2010 Patch (Mac Update)
- [Sin documentar] The Eyelander now collects the heads inside Eyelanders of Demomen it decapitates
- The Demoman's battleaxe now sounds like a sword
July 8, 2010 Patch (Engineer Update)
- Scottish Resistance now shows location of stickies placed with glow effect
September 30, 2010 Patch (Mann-Conomy Update)
- Added hats: Carouser's Capotain, Sober Stuntman and Rimmed Raincatcher
- Achievement tuning
- Demoman achievement "The Stickening" changed to 3 from 5
- [Sin documentar] The Tippler's Tricorne model was accidentally switched with the yet to be released Rimmed Raincatcher model
- [Sin documentar] Scottish Resistance now fires 25% faster and has a .2 second longer bomb arm time. (Total bomb arm time is now .8 seconds.)
- [Sin documentar] Added unused "Hi-five" taunt
- The TF badge on the Glengarry Bonnet is no longer team colored
- Restored the appearance of the Tippler's Tricorne to the version prior to the Mannconomy Update. This item is now paintable
- Added a new paintable hat, the 'Rimmed Raincatcher' that has a new Tricorne style appearance
- Made the Frying Pan tradable
- Trading changes
- Fixed the Frying Pan not being tradable
- [Sin documentar] Removed the ability to craft the Frying Pan using the "Fabricate Class Weapons" blueprint
October 27, 2010 Patch (Scream Fortress)
- Added a new Halloween weapon
- Added the Sticky Jumper for Demomen to practice jumping
- [Sin documentar] Added the Hustler's Hallmark to the store
- Fixed the Sticky Jumper doing damage to enemies
- [Sin documentar] Equipping the Sticky Jumper no longer multiples the Grenade Launcher's carried ammo instead of the Sticky Jumper's ammo
- Added Telltale Games items:
- Dangeresque, Too?: Strong Bad's styling glasses (equipped by the Demoman)
- Updated some item capabilities:
- The Stickybomb Jumper can now be gift wrapped
- [Sin documentar] Demoman's arm emblem changed to a Stickybomb Launcher sticky bomb
- Made the following hats paintable: Dangeresque, Too?
December 17, 2010 Patch (Australian Christmas)
- Added 'The Expert's Ordnance' item set
- Added new weapons: 'The Claidheamohmor', 'The Ullapool Caber' and 'The Loch-n-Load'
- Added new hats: 'Prince Tavish's Crown' and 'Scotch Bonnet'
- [Sin documentar] Chargin' Targe no longer protects you against your own explosive damage
- [Sin documentar] Changed the Scottish Resistance model to use a combined world- and viewmodel
- Added the laser attachment to the worldmodel of the Scottish Resistance.
- Mirrored the Scottish Resistance first person viewmodel to match the worldmodel
- Corrected the name of the "Claidheamh Mòr"
- Added Loch-n-Load kill icon
- [Sin documentar] Improved Ullapool Caber kill icon
- [Sin documentar] Fixed world reload animation for the Grenade Launcher not showing the Demoman holding grenades when he reloads
- [Sin documentar] The Scottish Resistance and the Stickybomb Launcher now drop the appropriate weapon on death on RED team
- [Sin documentar] If the player suicides with the Ullapool Caber it displays the Caber's kill icon
- Updated the Scottish Resistance stickybombs to always glow if they will be detonated by a right-click, including the stickybombs under the Demoman's feet
- Fixed particle effects on the Hustler's Hallmark
- Fixed melee attacks not destroying remote detonation pipes
- Added the Rimmed Raincatcher to the list of Unusual hats
- Fixed the Stickybomb Launcher viewmodel sleeves using the wrong team colors for team Blue
- [Sin documentar] Grenade Launchers using Name or Description Tags now properly use the
c_modelequivalent
- Carouser's Capotain and Sober Stuntman were added to the Mann Co. Store
March 10, 2011 Patch (Shogun Pack)
- Added Weapon: Half-Zatoichi
- Added hat: Samur-Eye
- Fixed the Demoman not using the correct animations for some of his weapons
- Fixed a server crash caused by using the Half-Zatoichi to hit someone not holding a weapon
- Fixed the Demoman taunts not working correctly when the Half-Zatoichi is the active weapon
- Fixed a bug where players could switch weapons after deploying the Half-Zatoichi before they killed someone with it
- Crafting recipe for the following weapons changed Horseless Headless Horsemann's Headtaker, Loch-n-Load and Ullapool Caber
- Updated honor-bound weapons so they can be holstered within a second of touching a supply cabinet
- [Sin documentar] Updated Demoman two-handed melee weapon 3rd-person views in the loadout screen
- Added new hat: Reggaelator
April 14, 2011 Patch (Hatless Update)
- Added 3 new training courses for the Demoman
- Fixed taunt kills made with a Katana not counting towards honorbound kills
- Fixed a bug where killing a Katana wielder with a Katana was incorrectly causing an increased crit chance
- Added "styles" for the: Scotsman's Stove Pipe
- Replaced the no-crit attribute with -25% damage on the following: The Eyelander, The Horseless Headless Horseman's Headtaker, The Ullapool Caber and The Claidheamohmor
- Item changes:
- Loch-n-Load Damage increased by 10%
- Bot changes:
- Demoman bots will now try to move to a safe spot and lob stickybombs onto enemy sentry nests to destroy them
- [Sin documentar] Added phong shader on the Grenade Launcher grenades
- Added a missing material for the Scotsman's Stove Pipe
- [Sin documentar] Replaced the -25% damage attribute with no-crit on the following weapons:
- [Sin documentar] The Rimmed Raincatcher was added to the Mann Co. Store
- Fixed the Sticky Jumper and the Stickybomb Launcher using the wrong skins
- Added the Conjurer's Cowl
- Updated the Conjurer's Cowl to be paintable
- [Sin documentar] The Horseless Headless Horsemann's Headtaker and Claidheamh Mòr were assigned the Decapitation taunt
- Removed Demoman's taunt from the Pain Train
- Added an explosion sound effect for a successful hit with the Ullapool Caber
- [Sin documentar] New laughing taunt animations have been added but are currently unused
- Fixed a problem with honorbound weapons not allowing themselves to be holstered after killing a Spy using the Dead Ringer
- Updated The Conjurer's Cowl so it can be crafted and traded
- [Sin documentar]The Conjurer's Cowl could now be found in random drops and can be uncrated with Unusual quality
- Added weapons: Splendid Screen, Persian Persuader and Ali Baba's Wee Booties
- Added hat: Sultan's Ceremonial
- [Sin documentar] Fixed an exploit with the Chargin' Targe that allowed greater turning control than intended
- [Sin documentar] Demoman can now begin a charge while in midair
- [Sin documentar] The charge meter for the Chargin' Targe is no longer fully depleted if the user is interrupted by a Compression Blast
- [Sin documentar] The Chargin' Targe can now be refilled by resupply cabinets
- Added weapon: Nessie's Nine Iron
- Added hat: Tam O' Shanter
- Fixed a bug with honorbound weapons allowing themselves to be holstered before getting a kill
- Updated the gamehaptics file
- Refined the Demoman's Stickybomb Launcher/Pipe Bomb Launcher reload forces
- Added hat: Mask of the Shaman
Curiosidades
- El Demoman tiene la voz de Gary Schwartz, que también da la voz al Heavy.
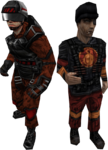
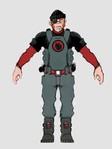
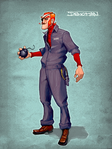
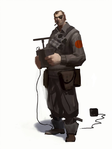
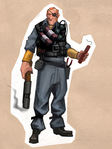
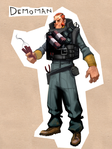
- El prototipo de la Beta de Demoman iba a ser un escocés estereotipo, con piel pálida y pelo rojo. Fue cambiado por no ser muy original y para ser diferenciado de las otras claes con más facilidad.[1]
- El icono de la HUD de Demoman está invertido horizontalmente, ya que su parche está en el ojo incorrecto y agarra su lanzagranadas con la mano izquierda.
- La ¡GUERRA!: El Demoman perdió la guerra contra Soldier, por lo que perdió la oportunidad de obtener las Botas Blindadas.
- Según su biografía, Demoman perdió su ojo antes de encontrar a sus verdaderos padres, pero en el cómic ¡GUERRA!, hay una foto con sus padres en las que tiene sus dos ojos.
- El Demoman tomó parte en un concurso de KritzKast, en el cual los participantes tenian que adivinar que es lo que Demoman decía en la parte censurada de Conoce al Demoman.
- El emblema original del brazo de Demoman era una bomba, el cual fue reemplazado por cartuchos de dinamita. Desde el 19 de Noviembre de 2010 es una bomba lapa. Las apariciones de este logo, como en las medallas 119 o Tricornio del Juerguista se mantienen sin cambiarse.
- En Poker Night at the Inventory, la imagen del Demoman RED hace un cameo como carta Jack en la mesa "TF2".
- La gorra y parche de Demoman aparece en Worms: Reloaded como un sombrero para el Worm del jugador.
- Template:W fue contratado como el primer Demoman BLU.
- El cómic ¡GUERRA! contiene una imagen de Demoman de pequeño con su padres. El escudo de detrás pone "In Regionem Caecorum Rex Est Luscus". En castellano, se traduciría como "En un país de ciegos, el tuerto es el rey" esto es parecido al logro en .En El Reino De Los Engineers, El Tuerto Es El Rey
- Ironicamente, ningún habitante de Las Tierras Altas tuvo ojos, según el cómic ¡GUERRA!.
- La clase de Asalto de Monday Night Combat tiene un sombrero promocional con el gorro y parche de Demoman llamado "Eye Lad".
- Originalmente el Demoman lanzaba una carga de dinamitas que sostenía de la mecha esta fue remplazada por el lanza granadas
Galería
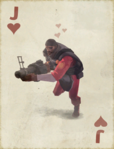
Ta carta del Demoman vista en el juego Poker Night at the Inventory
El sombrero y parche del Demoman en el juego Worms: Reloaded
Ítem del juego Monday Night Combat; "Eye Lad"
- Demoman badge old RED.png
Símbolo original RED del Demoman
- Demoman badge old BLU.png
Símbolo original BLU del Demoman

La cara sonriente de Demoman
- Demoman patch.png
Parche alternativo del Demoman.
El Demoman en Team Fortress Classic
Diseños conceptual del Demoman
Diseños conceptual del Demoman
Diseños conceptual del Demoman
Diseños conceptual del Demoman
Diseños conceptual del Demoman
Diseños conceptual del Demoman
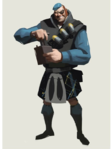
Diseños conceptual del Demoman
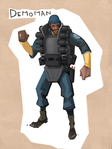
Diseños conceptual del Demoman
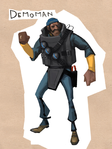
Diseños conceptual del Demoman
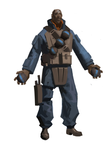
Diseños conceptual del Demoman
Diseños conceptual del Demoman
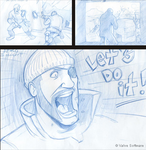
Boceto de Conoce al Demoman


Merchandaising Relacionado


Véase También
- Conoce al Demoman
- Demoman match-ups
- Burlas del Demoman
- Respuestas del Demoman
- Comandos de Voz
- Demoman User Guides
- Salto Bomba
- Malabarismos
- Estrategia con el Demoman
- Scripts Demoman
- Lista de Referencia (Demoman)
- Demopan
- Seeman
Enlaces Externos
- ¡Guerra! Actualización
- ¡Guerra! Actualización - Actualización Demoman
- The Demoman comic
- TF2 Official Blog - A Grim Bloody Fable
- TF2 Official Blog - Atención...
- TF2 Official Blog - Actualización Guerra
- TF2 Official Blog - Es un baño de sangre!
- TF2 Official Blog - Guerra, Dia 2
- TF2 Official Blog - Corazones de hierro
| |||||