Difference between revisions of "Heavy match-ups"
m (Replaced 'FAN' with 'Force-A-Nature' and a link to the page.) |
GrampaSwood (talk | contribs) m |
||
| (114 intermediate revisions by 54 users not shown) | |||
| Line 1: | Line 1: | ||
| − | {| | + | {{Quotation|'''The Heavy''' on his tactical analysis of the opposition|Entire team is babies!|sound=Heavy_taunts14.wav}} |
| − | |||
| − | |||
| − | |||
| − | |||
| − | |||
| − | |||
| − | |||
| − | |||
| − | |||
| − | |||
| − | |||
| − | |||
| − | |||
| − | |||
| − | |||
| − | |||
| − | + | {{Match-Up|forclass=heavy | |
| − | | | + | | scout-strategy = |
| − | + | '''Relative merits:''' The Scout is mobile but fragile. If he catches you off-guard, he has the potential to kill you before you have the time to react and rev up your Minigun. In a direct fight, he will try to wear you down by dodging your fire or via hit-and-run tactics. The Scout can typically choose when and where to fight, so preparation and a proper response are key. | |
| − | | | ||
| − | |||
| − | |||
| − | |||
| − | |||
| − | |||
| − | |||
| − | |||
| − | + | '''Tactics:''' No matter where you are, keep in mind that the Scout can quickly join the action and be ready to react! Be most ready when traveling in enclosed spaces, which provide cover or alternate paths that a Scout can ambush you from. On the other hand, open areas let you see the Scout coming and dissuades a direct assault, but leaves you open to harassment from weapons like the [[Flying Guillotine]] and [[Wrap Assassin]]. Where you happen to be will likely be decided by the overall battle, so expect to deal with both scenarios. | |
| − | |||
| − | |||
| − | |||
| − | |||
| − | |||
| − | + | Your best case is to catch the Scout at medium range with your Minigun already revved. He is the most difficult class to track - keep your aim steady even as he darts and double jumps around. | |
| − | |||
| − | |||
| − | |||
| − | |||
| − | |||
| − | |||
| − | |||
| − | |||
| − | |||
| − | |||
| − | |||
| − | |||
| − | |||
| − | |||
| − | |||
| − | |||
| − | |||
| − | |||
| − | |||
| − | |||
| − | |||
| + | '''Useful weapons:''' | ||
| + | * If the Scout is too difficult to hit thanks to his double jump or him constantly changing directions, [[Natascha]] can slow him down to a crawl. | ||
| + | * If the Scout keeps running away before you can retaliate, consider using the faster-revving [[Tomislav]]. | ||
| + | * The [[Shotgun]] can be fired while moving between locations and does not need to be revved. | ||
| + | | soldier-strategy = | ||
| + | '''Relative merits:''' You are the only class that boasts more health and firepower than the Soldier. The Soldier will be aware of this and either abuse cover or high ground to bombard you with rockets. | ||
| + | |||
| + | '''Tactics:''' Position yourself such that the Soldier must reveal himself to fire at you. When the Soldier leaves cover, lay down oppressive fire to wear down his health and stop him from rocket jumping away. If you can goad the Soldier into wasting his rockets at long range, which will subject them to damage fall-off, you can unrev the Minigun and reposition yourself. | ||
| + | |||
| + | '''Useful weapons:''' | ||
| + | * Equipping the [[Shotgun]] lets you stay mobile while being bombarded by rockets. | ||
| + | * The [[Gloves of Running Urgently]] or [[Fists of Steel]] can help you survive a retreat. | ||
| + | * The [[Tomislav]] is more accurate and can be revved up faster, making it easier for you to punish a Soldier who may try to rocket jump away. | ||
| + | |||
| + | | pyro-strategy = | ||
| + | '''Relative merits:''' The Pyro should not be able to defeat you without an ambush, as your Minigun deals far more damage than their Flame Thrower. However, they have tools to disrupt your defensive positioning, including the [[compression blast]] and [[Flare Gun]]. | ||
| + | |||
| + | '''Tactics:''' The Pyro should try to catch you off-guard, making use of certain weapon combinations to burst you down before you can react. Like when dealing with the Scout, note possible routes you can be flanked from. If you can react in time, jump backwards to create some distance while revving your Minigun, then fight back. Once in a direct fight, keep your crosshair steady as the Pyro attempts to circle-strafe or airblast you. Watch out for [[Flare Gun]] shots at long range, as its 90-damage critical hits can wear you down if you stay ignited. | ||
| + | |||
| + | '''Useful weapons:''' | ||
| + | * Your lunchbox secondaries can be thrown as small health packs to extinguish teammates - of these, the [[Dalokohs Bar]] and [[Second Banana]] recharge the fastest. | ||
| + | |||
| + | | demoman-strategy = | ||
| + | '''Relative merits:''' The Demoman’s explosives can easily match your large damage output, especially from medium range and beyond. A smart Demoman will keep his distance or stay behind cover while lobbing [[Grenade Launcher|grenades]] or a field of [[Stickybomb]]s. | ||
| + | |||
| + | '''Tactics:''' At the front lines, you want to force the Demoman behind cover just so you can hold position, which in turn allows him to reload and attack you again. If a teammate is not available to move ahead of you, take out your Shotgun and close the distance, taking care for any [[Stickybomb Launcher|Stickybomb]] traps. Pay attention to the Demoman's loadout; a Demoman who runs at you with his melee weapon and a shield should be a much easier kill. | ||
| + | |||
| + | '''Useful weapons:''' | ||
| + | * Equipping the Shotgun allows you to fight and somewhat dodge the Demoman's projectiles. | ||
| + | * The [[Fists of Steel]] can provide protection against a Grenade or stray Stickybomb. | ||
| + | |||
| + | | heavy-strategy = | ||
| + | '''Mirror match-up:''' You would meet an enemy Heavy on the front lines. The encounter is decided by who has more health, who fires first, and which primary weapons the two of you are wielding. | ||
| + | |||
| + | '''Tactics:''' Be the Heavy that already has a revved Minigun and taken a favorable position. Even alone, it is possible to take down an enemy Heavy that is paired with a Medic by simply being the first to fire. | ||
| + | |||
| + | '''Useful weapons:''' | ||
| + | * Mini-guns that offer a balanced amount of revving speed, DPS, and accuracy do a better job at shredding enemy Heavies. Generally, a Heavy wielding [[Natascha]], a weapon with lower damage output, will lose to one wielding any other available primary weapon. | ||
| + | |||
| + | | engineer-strategy = | ||
| + | '''Relative merits:''' You can reliably take on an Engineer's Sentry Gun at levels 1 or 2. A Sentry Gun that is level 3 or controlled by the [[Wrangler]] can match your firepower. | ||
| + | |||
| + | '''Tactics:''' A lone Engineer is an easy fight, but you are more concerned about his Sentry Gun. Regarding his buildings, if you can get the drop on even a level 3 [[Sentry Gun]] at close range without getting pushed back, your Minigun can actually destroy it faster than it can kill you. If you need to deal with a Sentry Gun at a longer range, it’s best to pressure it with Minigun bursts or come back with teammates, as all of your weapons suffer at longer ranges. | ||
| + | |||
| + | '''Useful weapons:''' | ||
| + | * Combining your firepower with a Medic's [[ÜberCharge]] is a common tactic for pushing into a Sentry Gun. | ||
| + | * You can switch to the [[Brass Beast]] or [[Fists of Steel]], weapons with damage resistance, to help you or your teammates approach. | ||
| + | |||
| + | | medic-strategy = | ||
| + | '''Relative merits:''' The Medic is typically accompanied by a [[Medic buddy]] that can steadily wear your health down. A lone Medic is capable of running away while taking potshots. | ||
| + | |||
| + | '''Tactics:''' Any chip damage you deal to a Medic's patient will gradually be healed off. If you are alone, your goal is to deal enough damage to make the Medic retreat so you can heal up and take a better position. If you can get the first strike, your Minigun will quickly burn through any overhealing. | ||
| + | |||
| + | '''Useful weapons:''' | ||
| + | * To match an enemy duo, ask a friendly Medic to heal you with his [[Medi Gun]]. The Sandvich should be tossed to your Medic if he is low on health. | ||
| + | * The Second Banana can be eaten between several fights with the same enemy. | ||
| + | |||
| + | | sniper-strategy = | ||
| + | '''Relative merits:''' The Sniper is one of your main counters. Your slow movement speed and massive size make you an easy target for a [[headshot]]. Even when a friendly Medic overheals you, a fully charged headshot will instantly kill you. | ||
| + | |||
| + | '''Tactics:''' There is no practical way for you to approach an enemy Sniper. If none of your teammates are occupying him, respect his position, don't go out into the open, and communicate with your teammates on whether it's safe or not to engage in a sightline. At medium range, you can nick the Sniper with enough [[Shotgun]] bullets to severely impede his aim as you close in; occasionally steer to the sides to add some unpredictability to your movement. If you happen the close the distance or find him out of position, your Minigun will shred him. | ||
| + | |||
| + | '''Useful weapons:''' | ||
| + | * Equipping the [[G.R.U.]] or [[Fists of Steel]] can make crossing a Sniper’s field of view a little bit safer. | ||
| + | |||
| + | | spy-strategy = | ||
| + | '''Relative merits:''' Your large, bulky frame is easy for your team to rally around, which in turn makes you an important target for the enemy Spy. As you're typically in the front lines, a competent Spy will take advantage of this and strike when you're distracted. You cannot outrun the Spy, so protect yourself and your teammates. | ||
| + | |||
| + | '''Tactics:''' Communication is key when locating and taking down an enemy Spy. If a teammate alerts your team that a Spy is lurking around, be careful of activity that indicates a threat, such as if a friendly Medic stops healing you or teammates disappear. Short bursts from the Minigun are great for [[Spy-checking]], with the bonus of likely killing the Spy in the process. If the Spy uses his [[Cloak]] to retreat, fan the Minigun or Shotgun over a wide area to try and reveal him. | ||
| + | |||
| + | When not actively in combat, constantly look behind your back and Spy-check any suspicious teammates. | ||
| + | |||
| + | '''Useful weapons:''' | ||
| + | * The [[Huo-Long Heater]] deploys a ring of [[fire]] around you when revved up, which could reveal nearby Spies that you should react to quickly. Be wary of teammates who jump around your ring, as it may be a Spy trying to bypass the fire. | ||
| + | |||
| + | }} | ||
| + | |||
| + | == See also == | ||
| + | *[[Team strategy]] | ||
| + | * [[Heavy (competitive)]] | ||
[[Category:Strategy|Heavy match-ups]] | [[Category:Strategy|Heavy match-ups]] | ||
<br/> | <br/> | ||
| − | |||
| − | |||
| − | |||
| + | {{CommunityStrategyNav}} | ||
{{Heavy Nav}} | {{Heavy Nav}} | ||
| − | |||
[[Category:Heavy]] | [[Category:Heavy]] | ||
[[Category:Class match-ups]] | [[Category:Class match-ups]] | ||
Latest revision as of 12:53, 28 September 2023
| “ | Entire team is babies!
Click to listen
— The Heavy on his tactical analysis of the opposition
|
” |
| Class | Strategy | ||
|---|---|---|---|
 Heavy |
vs. | 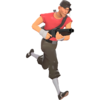 Scout |
Relative merits: The Scout is mobile but fragile. If he catches you off-guard, he has the potential to kill you before you have the time to react and rev up your Minigun. In a direct fight, he will try to wear you down by dodging your fire or via hit-and-run tactics. The Scout can typically choose when and where to fight, so preparation and a proper response are key.
Tactics: No matter where you are, keep in mind that the Scout can quickly join the action and be ready to react! Be most ready when traveling in enclosed spaces, which provide cover or alternate paths that a Scout can ambush you from. On the other hand, open areas let you see the Scout coming and dissuades a direct assault, but leaves you open to harassment from weapons like the Flying Guillotine and Wrap Assassin. Where you happen to be will likely be decided by the overall battle, so expect to deal with both scenarios. Your best case is to catch the Scout at medium range with your Minigun already revved. He is the most difficult class to track - keep your aim steady even as he darts and double jumps around. Useful weapons:
|
Heavy |
vs. | 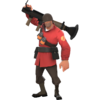 Soldier |
Relative merits: You are the only class that boasts more health and firepower than the Soldier. The Soldier will be aware of this and either abuse cover or high ground to bombard you with rockets.
Tactics: Position yourself such that the Soldier must reveal himself to fire at you. When the Soldier leaves cover, lay down oppressive fire to wear down his health and stop him from rocket jumping away. If you can goad the Soldier into wasting his rockets at long range, which will subject them to damage fall-off, you can unrev the Minigun and reposition yourself. Useful weapons:
|
Heavy |
vs. | 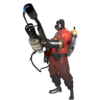 Pyro |
Relative merits: The Pyro should not be able to defeat you without an ambush, as your Minigun deals far more damage than their Flame Thrower. However, they have tools to disrupt your defensive positioning, including the compression blast and Flare Gun.
Tactics: The Pyro should try to catch you off-guard, making use of certain weapon combinations to burst you down before you can react. Like when dealing with the Scout, note possible routes you can be flanked from. If you can react in time, jump backwards to create some distance while revving your Minigun, then fight back. Once in a direct fight, keep your crosshair steady as the Pyro attempts to circle-strafe or airblast you. Watch out for Flare Gun shots at long range, as its 90-damage critical hits can wear you down if you stay ignited. Useful weapons:
|
Heavy |
vs. | 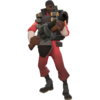 Demoman |
Relative merits: The Demoman’s explosives can easily match your large damage output, especially from medium range and beyond. A smart Demoman will keep his distance or stay behind cover while lobbing grenades or a field of Stickybombs.
Tactics: At the front lines, you want to force the Demoman behind cover just so you can hold position, which in turn allows him to reload and attack you again. If a teammate is not available to move ahead of you, take out your Shotgun and close the distance, taking care for any Stickybomb traps. Pay attention to the Demoman's loadout; a Demoman who runs at you with his melee weapon and a shield should be a much easier kill. Useful weapons:
|
Heavy |
vs. | Heavy |
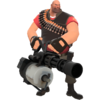
Mirror match-up: You would meet an enemy Heavy on the front lines. The encounter is decided by who has more health, who fires first, and which primary weapons the two of you are wielding.
Tactics: Be the Heavy that already has a revved Minigun and taken a favorable position. Even alone, it is possible to take down an enemy Heavy that is paired with a Medic by simply being the first to fire. Useful weapons:
|
Heavy |
vs. |  Engineer |
Relative merits: You can reliably take on an Engineer's Sentry Gun at levels 1 or 2. A Sentry Gun that is level 3 or controlled by the Wrangler can match your firepower.
Tactics: A lone Engineer is an easy fight, but you are more concerned about his Sentry Gun. Regarding his buildings, if you can get the drop on even a level 3 Sentry Gun at close range without getting pushed back, your Minigun can actually destroy it faster than it can kill you. If you need to deal with a Sentry Gun at a longer range, it’s best to pressure it with Minigun bursts or come back with teammates, as all of your weapons suffer at longer ranges. Useful weapons:
|
Heavy |
vs. | 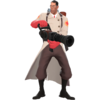 Medic |
Relative merits: The Medic is typically accompanied by a Medic buddy that can steadily wear your health down. A lone Medic is capable of running away while taking potshots.
Tactics: Any chip damage you deal to a Medic's patient will gradually be healed off. If you are alone, your goal is to deal enough damage to make the Medic retreat so you can heal up and take a better position. If you can get the first strike, your Minigun will quickly burn through any overhealing. Useful weapons:
|
Heavy |
vs. | 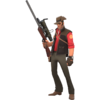 Sniper |
Relative merits: The Sniper is one of your main counters. Your slow movement speed and massive size make you an easy target for a headshot. Even when a friendly Medic overheals you, a fully charged headshot will instantly kill you.
Tactics: There is no practical way for you to approach an enemy Sniper. If none of your teammates are occupying him, respect his position, don't go out into the open, and communicate with your teammates on whether it's safe or not to engage in a sightline. At medium range, you can nick the Sniper with enough Shotgun bullets to severely impede his aim as you close in; occasionally steer to the sides to add some unpredictability to your movement. If you happen the close the distance or find him out of position, your Minigun will shred him. Useful weapons:
|
Heavy |
vs. | 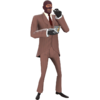 Spy |
Relative merits: Your large, bulky frame is easy for your team to rally around, which in turn makes you an important target for the enemy Spy. As you're typically in the front lines, a competent Spy will take advantage of this and strike when you're distracted. You cannot outrun the Spy, so protect yourself and your teammates.
Tactics: Communication is key when locating and taking down an enemy Spy. If a teammate alerts your team that a Spy is lurking around, be careful of activity that indicates a threat, such as if a friendly Medic stops healing you or teammates disappear. Short bursts from the Minigun are great for Spy-checking, with the bonus of likely killing the Spy in the process. If the Spy uses his Cloak to retreat, fan the Minigun or Shotgun over a wide area to try and reveal him. When not actively in combat, constantly look behind your back and Spy-check any suspicious teammates. Useful weapons:
|
See also
|