Sniper match-ups
| Class | Strategy | ||
|---|---|---|---|
 Sniper |
vs | 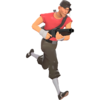 Scout |
Although an enemy Scout is difficult to hit, he’ll only be able to harass you with his Pistol at longer ranges. He dominates you at close range, so try to take him out before he gets too close. His head is a rather small target, so don’t be afraid to take your time to land a fully charged bodyshot instead of going for a quick headshot. If a Scout runs in a straight path towards you, he’ll be easy to headshot, no matter how close he already is. If he does manage to close the distance, he’ll have a huge advantage. At close range, backpedal while firing your Submachine Gun or uncharged shots from your primary weapon. |
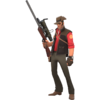
Sniper |
vs | 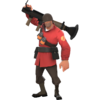 Soldier |
An enemy Soldier will typically be fighting at the frontlines, far away from you. He is a slow, bulky target and is easy to hit when grounded. If he sees you, he’ll probably fire rockets at your position to force you behind cover. In this situation, you can just take quick shots between his barrages. If he tries to approach you by rocket jumping , you’ll have to either shoot him out of the air or simply retreat. It is suicide to go toe-to-toe with a Soldier at close range, where he can easily land rockets and Shotgun blasts. |
Sniper |
vs | 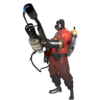 Pyro |
Unless an enemy Pyro is using the [[Flare Gun, he has no way to fight back at long range. If he is out in the open, you can attack without fear of retaliation. However, at close range, his Flamethrower will devastate you. If stuck in this sort of situation, backpedal while firing your Submachine Gun or uncharged shots from your primary weapon. Using Jarate defensively will negate the effects of any afterburn. |
Sniper |
vs |  Demoman |
Over long distances, an enemy Demoman can only lob inaccurate grenades and Stickybombs at your position. Keep moving in between your own shots to avoid the wide splash damage. If he tries to sticky jump or use the Chargin’ Targe to approach you, hide behind cover or take advantage of his predictable trajectory to land an easy headshot. At medium range, his explosives can easily make short work of you. If he gets too close, backpedal while firing your Submachine Gun or uncharged shots from your primary weapon. The Demoman, with his indirect weaponry, is one of the only classes capable of attacking you from outside your line of sight; well placed explosives can turn your sniping spot into a deathtrap. Keep an eye out for traps and use your Sniper Rifle or Submachine Gun to remove Stickybombs if needed. |
Sniper |
vs |  Heavy |
The Heavy’s slow speed and large size make him a juicy target. At a distance, his Minigun fire suffers from bullet spread and will do minimal damage, allowing you to snipe freely. Even with his large health pool, it will take only a few headshots to take him out. At close range, however, his weaponry will shred you to bits. If a Heavy somehow maneuvers to your sniping location, just run; both uncharged shots from your primary weapon and your Submachine Gun will deal pitiful damage. |
Sniper |
vs |  Engineer |
You are unlikely to face an Engineer in direct combat unless the two of you are away from his Sentry Gun. His Shotgun, Pistol, and possibly Combat Mini-Sentry will give him the advantage in close range combat, so don’t seek him out yourself. You can use a few charged shots from your primary weapon to pick off an exposed Sentry Gun from a distance. If the Engineer is actively repairing the Sentry Gun or harassing you with the Pistol or Wrangler, target him first; he can’t repair his buildings if he’s dead. |
Sniper |
vs |  Medic |
Medics are often underestimated by Snipers. Remember that they regenerate health, and have a higher max hp than you (unless you carry the Darwins Danger Shield). Their Syringe Gun easily out damages your SMG, so try to draw them into in a melee duel. If they have the Übersaw, then you have an even match (as the Kukri has a higher DPS), but with the Bonesaw they will usually overpower you. Snipers are the most viable candidate for killing Medics who are paired up with pesky Medic buddies, and as such, should be treated as high priority targets. Their high speed and constant strafing makes a headshot difficult, but due to their relatively low health, a fully charged shot to the body will kill the Medic. It's best not to leave them alive, as they can take cover behind their Medic buddy and regenerate their health. |
Sniper |
vs | Sniper |
Protecting your team-mates from a pesky Sniper can assist heavily in winning a map (though overdoing this can lead to 'Sniper-wars', where both of you are of no direct use to each other's teams at all!). Other Snipers remain a priority target, as you are to them. Shuffle about constantly if you're in their crosshairs, and aim for the head. If you find yourself getting knocked out more than you are knocking them out, then it might be time to switch classes. A good strategy against other Snipers is to duck just before taking a shot out of cover. Most times the other Sniper while take his shot at where your head used to be, leaving him vulnerable. If you have a Huntsman and the other Sniper has a rifle, a good strategy for getting close enough is to fire your SMG while advancing until you're in range.
When fighting against Snipers who are equipped with the Croc-O-Style Item set, avoid the temptation to attack with a headshot. Snipers using the set cannot kill you with a headshot, but cannot be killed by them either. Attacking with a fully charged body shot is a better choice against these Snipers. Conversely, you can also use the Croc-O-Style to avoid being instantly killed by a headshot, but you will often have to fully charge to kill another Sniper, as headshots will not be available. Also remember that if headshotted, you will have 1 hp remaining, and even a stray bullet will be able to kill you. Stay behind team lines so that this doesn't happen. |
Sniper |
vs |  Spy |
Watch your back; the Spy is the Sniper's nemesis. Spy check people you notice hanging around the battlements. Spies will often disguise themselves as other Snipers in popular sniping locations, so be especially wary of any other Snipers that come close. Also sometimes decent sniping locations are also used as Engineer nests so watch for Engineers as well. Watch the kill log in the top-right of for team-mates getting Backstabbed, friendly buildings being sapped, or enemy Sappers being removed. If there's another Sniper on the deck, try to put him between you and the entrance to the Sniper deck so that you have some advanced warning. Better him than you. Given a threat to personal space, melee combat is highly recommended. After all, you have a much bigger Knife. Jarate also helps, as it augments your Kukri's damage and makes the Spy unable to safely escape even if he does kill you.
If the Spy is wielding his Revolver, strafe and gun or hope for a melee Crit, as 3 hits at close range are fatal. It's important to use Jarate against the Spies because Jarate will short out their Cloak, reveal their disguise and allow your teammates to take them out quickly. Using the Razorback will also provide protection from Spies when near teammates and make them take more time to kill you with the Revolver, but it will be ineffective if you are not paying attention to your surroundings or you may fail to notice having your Razorback removed while scoped and be backstabbed normally. Spies carrying the Ambassador can make quick work of you with a headshot and then a finishing shot (which is especially popular when Snipers wield the Razorback), so check your surroundings often. The Tribalman's Shiv is also effective for killing Spies as the bleeding effect nullifies their Cloak ability, and the long term damage may kill the Spy should he try to run away or end up killing you. |
See also
|