Difference between revisions of "Community Scout strategy"
(→Weapon Specific) |
|||
| Line 1: | Line 1: | ||
| − | {{ | + | [[File:Community_Scout_Strategy_Header.png|350px|right|"LOOK AT ME!"]] |
| + | {{Quotation|'''The Scout''' on impersonators|Hit the road, bozo, let a real Scout get to work!|sound=Scout dominationsct03.wav}} | ||
| − | The [[Scout]] | + | The [[Scout]] has the fastest movement [[speed]] of the nine mercenaries, the ability to double jump, captures objectives and pushes payloads at double the regular speed, and deals a consistent amount of damage from short to medium range. These attributes make him great for quickly completing objectives, such as capturing [[Control point (objective)|Control Points]], and optimal for one-on-one battles when timed correctly. However, his maximum base health of 125 makes direct confrontations against some mercenaries difficult and risky. Optimal combat involves [[Strafing|circle strafing]] or [[#Weapon Heckling|weapon heckling]], techniques that help the Scout avoid and simultaneously put out as much damage as possible. |
| + | {{TOC limit|limit=3}} | ||
| − | If your team | + | == Quick tips == |
| + | * You have double the capture rate of any other class. If you are anywhere near an unguarded enemy [[Control point (objective)|Control Point]], stand on it in order to aid your team and sometimes distract enemies from your team. | ||
| + | ** In [[Payload]] maps, crouch-walking behind the Payload to use it as a shield can be very useful since your body and hitbox is smaller than other classes and can fit behind the Payload easily. This is particularly effective against stationary Sentry Guns, as they cannot target anyone they do not have a direct line of sight. | ||
| − | + | * Know where the [[Health|health packs]] are on every map, because you will usually work alone and thus be out of reach of your team's Medic(s). | |
| − | * | + | ** You can use the [[Mad Milk]] on maps with few health packs to avoid having to leave combat for healing. Additionally, Mad Milk can be used to support your team in a firefight. |
| − | * | + | * Attempting to out-gun tougher classes directly is unwise unless you know they are low on health. |
| + | ** Use your maneuverability to catch enemies (especially tougher classes) off-guard. Your extra speed and double jump can get you over gaps and other obstacles that block most of the other classes. Constantly strafe when your enemy decides to engage you. | ||
| − | * | + | * [[Sentry Gun]]s should be avoided because the Scout relies on not being hit; a Sentry Gun's attacks are very strong, have high knockback, and its bullets never miss, making it a natural counter. |
| + | ** However, it is possible to destroy a lone Sentry by finding cover near it, exiting cover whilst shooting at it, and retreating to cover repeatedly, as well as with circle-strafing. | ||
| + | ** [[Bonk! Atomic Punch]] can be used to distract an enemy Sentry Gun while a teammate destroys it, or to run past the Sentry Gun while avoiding damage. Remember, bullets knock you back, so make sure that the Sentry does not pin you against buildings or other obstacles, or you will die as soon as your invulnerability wears off. | ||
| + | * As the class with the fastest base speed in the game, you should leave [[Teleporters]] for other classes to use. Unless the distance is significant enough, the Teleporter is Level 3, or if you are sure they will be able to recharge before other teammates come by, it is best to run to the objective instead. | ||
| − | * | + | == General == |
| + | === Combat === | ||
| + | * The Scout excels at one-on-one combat. Wandering or lone players (such as Spies and enemy Scouts) are good targets for a Scout, but if they see you coming, you will not last long. Instead, ambush them from above, behind, or anywhere else from which they can not see you. | ||
| + | ** Knowing how to prioritize targets is an important part of playing Scout. Your first priority should be to target the enemy Medic, especially in Competitive, where ÜberCharge is often the deciding factor of whether you win or not. | ||
| − | * | + | * Refrain from excessively using your Bat or other melee weapons in combat. They may hit fast, but the low damage output with a small health pool most likely won't end in your favor. |
| − | * | + | * Call for help if you cannot handle enemies by yourself. Your firepower is generally only effective against a single target. Once enemy reinforcements arrive, you will be forced to retreat. |
| − | * | + | * Your speed is useful for avoiding [[backstab]]s and [[headshot]]s; however, jumping will leave you suspended in a predictable arc against [[Sniper]]s. Use the double jump mechanic (while rapidly pressing crouch), as well as [[strafing]] to avoid their shots, but be warned that many Snipers will wait for you to use your double jump, after which you will fall predictably to the ground and may be easier to hit. |
| + | ** You should also be aware of common sightlines in various maps, so you are not always worrying about whether a Sniper might be looking at you or not. | ||
| − | * | + | * Open ground lets you use your maneuverability most effectively; tight spaces limit your evasive options and will make staying alive much harder. |
| − | * | + | * When playing as Scout, keep moving. If a confrontation goes poorly, you can ([[Slowdown|almost]]) always continue running, using your speed to escape. You can then find a health kit and often come back to finish your opponent off before they have a chance to do the same. |
| + | ** Never stand still when you are attacking someone as a Scout — your movement is the only way to prevent yourself from dying quickly, thanks to your low base health. Use your speed to your advantage by strafing left and right while attacking someone. Keep your distance when facing classes such as Soldiers and other Scouts, as a Soldier's rockets at close range do 90+ damage and a Scattergun will do the same damage as yours. When facing other Scouts, try to mirror their strafing movements to make them easier to hit. Once you get below 75 health, start to either make a retreat or jump around erratically to try and land a solid hit to finish the other Scout off. | ||
| + | * If you find yourself circling an enemy, focus on your strafing and jumping, and fire your weapon only when your crosshair lines up with your target. This makes it more difficult for your enemy to hit you. | ||
| − | * | + | * Find a mouse sensitivity that is suitable for '''you''' while playing Scout. A high sensitivity lets you quickly switch targets as you move, while a low sensitivity, paired with more mouse movement, makes it considerably easier to land point-blank shots with your Scattergun. |
| + | ** Optimal sensitivities may vary from person to person. Do not be afraid to try out new sensitivities in order to find one that works best for you. Try to use a new sensitivity for at least a few days before switching to a different one. | ||
| − | * | + | * When low on health, wait for the right moment to strike. Use walls and corners to gain an advantage over enemies by firing and retreating quickly to avoid enemy fire. |
| − | * | + | * The Scout has the smallest hitbox and can hide behind objects better than every other class. This can be useful while waiting for a group of enemies to pass by. |
| + | ** Take note of the object you are hiding behind. If it is tall but narrow, deploying your Bat will allow you to hide without your Scattergun or [[Pistol]] protruding through and giving you away. Your primary or secondary weapons, however, would be better for short but wide hiding spots. | ||
| − | * | + | * Try to be unpredictable while fighting classes that are using [[hitscan]] weapons, such as the [[Shotgun]]. Hitscan weapons, usually bullet-based weapons, will instantly hit you, as they do not have travel time, unlike a Rocket Launcher or a Flamethrower. |
| − | * | + | * When fighting enemy [[Pyro]]s that are attempting to [[Compression blast|airblast]] you in a predictable arc to kill you with their secondary, use your second jump to escape from above. |
| + | ** Your backwards run speed is greater than a Pyro's forward movement speed, meaning you can run back from enemy Pyros while shooting at them without the risk of being ignited. | ||
| − | * | + | * Do not confront a Sentry Gun unless necessary. If you can approach it from behind or to the side, you can take advantage of the Sentry Gun's slow rotation speed. Pop out of cover long enough to take a shot at it, then wait about one second for the Sentry to turn back to its default position. |
| + | ** It is also possible to circle-strafe a Sentry Gun, as it cannot turn quickly enough to fire at you. This can be difficult, however, and requires that you be somewhat close to the Sentry Gun while also being able to adjust your aim with your constant movements, which may be more difficult if you have a lower mouse sensitivity. | ||
| + | ** Generally, if a Sentry Gun has an attentive Engineer nearby, it is best to find another route instead of trying to destroy it. | ||
| − | * If you a | + | * Do not overestimate your mobility options, staying grounded and not strafing while jumping might be more useful than erratic movements. If you have a good hold of the combat situation try to not throw off your aim by jumping chaotically, instead focus on hitting more shots in a quick succesion. |
| − | * | + | * [[Rocket jumping]] Soldiers can easily be shutdown with the use of your Scattergun and other unlocks, due to the knockback it provides. This can be done to protect you and your teammates, especially your [[Medic]], from an otherwise fatal interaction. |
| + | ** To maximize effectiveness, use your multiple jumps to close the distance, increase the damage done to the Soldier, and dodge potential rockets being shot from above. | ||
| − | * | + | === Speed === |
| + | * Your speed allows you to decide which battles to engage in; enemies cannot escape from you if you pursue them, nor can they catch you if you don't want to fight them. | ||
| − | * | + | * Your high mobility makes you more difficult to hit, and at long range, your speed can render certain projectile weapons useless, since you can easily dodge these attacks. |
| − | * | + | * You can reach health/ammo kits or Dispensers more quickly than other classes when needed, minimizing your downtime. |
| + | ** However, be mindful of other players that might need a health kit more than you do, as your fast speed means you can easily find another one slightly farther away. | ||
| − | * | + | * [[Death]] is less of a penalty for you since you will spend less time than other classes running to where the battle is. Still, be wary that you may die often due to your low health, and [[respawn]] times are not reduced for you. |
| + | ** You are often the first to the fight at the beginning of the round. Be cautious, though, as you won't be the only one on the battlefield for long. | ||
| − | * | + | * Because you can easily outrun other classes, it is possible to [[backcap]] [[Control point (objective)|Control Points]] and other objectives. If the point captures quickly enough, this will lock the enemy out of capturing your own Control Point, forcing them to fall back. |
| + | ** Even if you do not manage to capture the point, you can still divert enemy forces so that some must run to deal with you, which you can then engage or simply escape. | ||
| − | * | + | * You are the ideal [[Capture the Flag#Intelligence|Intelligence]] carrier due to your mobility. With good planning, firepower, and luck, you can snatch the Intelligence from enemy-guarded territory and still make it out alive. |
| − | * | + | * Run into players to [[Spy checking|Spy check]], as this can conserve ammo, and your high mobility means that doing so won't be much of a time penalty. If you do not pass through them, and instead bump into them, then they are a disguised Spy. One or two point-blank shots from your primary will be enough to kill the Spy. Be sure to keep your distance and never turn away, lest you open yourself up for a [[backstab]]. |
| + | ** [[Mad Milk]] can be useful for tracking down a cloaked Spy, as it allows you to see him while he is invisible. He will be unable to escape you until the debuff wears off — your speed allows you to pursue him easily. | ||
| − | * | + | * Medics who heal you will be able to match your speed — help them reach the front lines faster! Try not to use your double jump too much — you might leave him behind a barrier he cannot cross and leave him open to enemy attacks. |
| − | * | + | === Weapon Heckling === |
| + | * '''Weapon heckling''' is a tactic that involves deploying a weapon that outranges or overpowers the current weapon your opponent is holding. While every class is capable of doing this with varied results, the Scout's natural speed and his weapons (with different optimal ranges) allow you to pull this off with much more efficiency. | ||
| − | * | + | * Know the optimal range of your weapons and use them when your opponent is using a weapon that cannot significantly harm you at said range. |
| + | ** For example, if a Soldier is your target, move in close (though not too close) and blast him with a Scattergun at close range. If he knocks you back with the Rocket Launcher, draw your Pistol and fire at medium range, where rockets take some time to reach. If he switches to the Shotgun to deal accurate and instant damage, get close again and shoot with the Scattergun, where his Shotgun will deal less damage than his Rocket Launcher. | ||
| − | * | + | * Weapon heckling is as important when fighting enemy Scouts as it is with fighting other classes. It is usually more effective to use your Pistol over a Scattergun at medium range, for example, in order to maximize your damage and still have extra Scattergun shots in reserve. |
| + | ** As both of you will usually be avoiding each other's shots, it is sometimes possible to bait enemy Scout(s) into using up all his Scattergun shots, then taking advantage of his reload time and running in with your Scattergun or Bat. | ||
| − | + | [[Image:Scoutjump.png|right|200px|thumb|The Scout's double jump is incredibly versatile; use it well.]] | |
| − | * | + | === Jumping === |
| + | * Whichever movement key is being held at the time of the [[Jumping#Double Jump|double jump]] is the direction you will go. This allows you to instantly change direction in mid-air and confuse enemies. | ||
| + | ** Performing a double jump without pressing a movement key will cancel all horizontal momentum, regardless of your current speed. As a result of this, try to predict where enemies are aiming before double jumping. | ||
| − | * | + | * Jumping in combat is a double-edged sword. Against weaker players, it can effectively throw off their aim. However, experienced players can wait for you to commit to your second or [[Atomizer|third jump]] before attempting an [[Aerial|airshot]]. Once you have committed, your trajectory is mostly locked and skilled players can easily predict your path and severely damage or outright kill you either before or right when you reach the ground. |
| + | ** An example is with [[Sniper]]s: most usually aim where they expect you to be just after they zoom in, and double jumping will throw them off. Skilled Snipers, however, can use this to predict the path of your second jump, since you cannot move in mid-air after using it, and line up a headshot at your inevitable location. | ||
| − | + | * Double jumping just before you hit the ground will negate [[fall damage]], regardless of the distance you have fallen. | |
| − | {| class="wikitable grid | + | * Use the double jump to take the higher roads over railroad cars and bridges. Most opponents tend to look forward, rather than up. If it is safe to do so, attack from above to take enemies by surprise, using your double jump to negate fall damage. You can confuse enemies by falling from above, firing at them, then jumping over their head as they turn around to see what hit them. This will often allow you to land one or two free hits on them before they figure out where you are. |
| + | |||
| + | * Certain ledges may require you to crouch-jump in order to reach them. Holding the crouch button while performing a double jump will allow you to reach those ledges. | ||
| + | |||
| + | * Crouch-jumping can also shrink your hitbox making it harder for enemies to hit you. But you can only do this twice while in the air. | ||
| + | |||
| + | * Make sure you jump before falling from a ledge if you are double jumping to another spot. Falling off negates your first jump, so be careful. | ||
| + | |||
| + | * If you are under fire, try double-jumping over the enemy's head to disorient them. You can also use this maneuver to land a couple of extra shots at close range. | ||
| + | ** A slightly difficult, yet potentially useful strategy is to jump on top of an enemy's head, and attack from there. This is best used against Heavies, whose slow movement speed makes it easier to stay on top of them. However, they will be able to kill you quickly from close range, so only engage Heavies when they are vulnerable and on low health. | ||
| + | |||
| + | * You are able to perform a triple jump of sorts if the [[Force-A-Nature]] is equipped as your primary weapon, as the [[Knockback|recoil]] from firing can be used to propel yourself a few feet in the opposite direction of where the shot was fired. To do this, jump and then double jump, and while in the air after the second jump, aim directly down and shoot. It will propel you into the air, effectively giving you a third jump. | ||
| + | ** The Force-A-Nature can be used for a single, very high jump if timed correctly. Whilst running forward, aim down and jump. As you leave the ground, immediately shoot directly down. You will go much farther into the air than a regular double jump would, and you'll still have your double jump. | ||
| + | ** Similar results can be achieved using the [[Boston Basher]]'s [[Bleeding|self-damage]], though this costs a lot of health to use. | ||
| + | ** The [[Atomizer]] allows you to do a triple jump in the same manner as regular jumping, but you must have it deployed. | ||
| + | *** You can use the Force-A-Nature and the Atomizer together to perform a [[Jumping#Quad jump|quad jump]]. | ||
| + | *** The [[Soda Popper]] allows you to quintuple jump after filling the Hype meter; however, this does not stack with the Atomizer. | ||
| + | *** When active, the [[Winger]] increases the height of all your jumps, allowing you to boost any previously mentioned jump techniques. | ||
| + | |||
| + | == Weapon Specific == | ||
| + | === Primary Weapons === | ||
| + | ==== [[Scattergun]] + [[reskins]] ==== | ||
| + | {| class="wikitable grid" width="100%" style="text-align: center;" | ||
| + | ! class="header" width="17%" rowspan=2 | Weapon | ||
| + | ! class="header" width="16%" rowspan=2 | Kill Icon | ||
| + | ! class="header" width="17%" colspan=2 | Ammo | ||
| + | ! class="header" width="50%" colspan=4 | Damage | ||
|- | |- | ||
| − | ! | + | ! class="header" width="8%" | Loaded |
| + | ! class="header" width="8%" | Carried | ||
| + | ! class="header" width="13%"| Point Blank | ||
| + | ! class="header" width="13%"| Medium Range | ||
| + | ! class="header" width="13%"| Long Range | ||
| + | ! class="header" width="13%"| Critical | ||
|- | |- | ||
| − | ! | + | ! {{Table icon|Scattergun|Stock}} |
| − | + | | align="center" | {{Icon killicon|weapon=Scattergun}} | |
| + | | 6 | ||
| + | | 32 | ||
| + | | 11-105 | ||
| + | | 6-60 | ||
| + | | 3-32 | ||
| + | | 180 | ||
|- | |- | ||
| − | + | |} | |
| − | + | ||
| − | + | * With six shots, the Scattergun is your most reliable primary weapon for prolonged combat, as well as the most versatile compared to the others. This comes at the cost of a relatively long reload time when it is empty, so try to keep at least two shots loaded before engaging the enemy. | |
| − | + | ||
| − | + | * The Scattergun does large amounts of damage at close range — one shot deals 105 damage if all bullets connect at point-blank range, slightly more than a [[Shotgun]] (which in comparison only does a maximum of 90 damage at point-blank range). This makes three shots enough to take out a non-overhealed [[Heavy]]. Think about how to engage your opponent without alerting them to your presence. Many classes will go down quickly if caught off-guard. | |
| − | ' | + | |
| − | + | * Range severely reduces the Scattergun's damage. If you have not been noticed yet, avoid firing early. Wait until you are just a few feet away from the enemy and then open fire. This reduces the number of times you need to hit the enemy and gives them less time to react. This also may negate the need for reloading in the middle of a fight. | |
| + | ** This is a major factor in fighting Soldiers. Two shots are enough to take down a Soldier at point-blank range, while you need three to do the same at a slightly greater distance. The difference between needing only two shots to kill and needing three is huge against a class whose primary weapon can easily kill you. Sneak up, flank, close the distance, and score two point-blank shots to eliminate him before he can react. | ||
| + | ** If you can, use the Pistol to soften up your targets at a distance before moving in for the finishing shot with your Scattergun. | ||
| + | |||
| + | * When using your Scattergun, a reliable method to hit your target is to strafe left and right with your cross-hair centered and firing when your cross-hair crosses your opponent rather than solely using your mouse to aim. This allows you to focus on moving more efficiently and erratically, making you harder to hit, while at the same time making your aim smoother and more accurate via prediction. | ||
| + | |||
| + | * A trick that may work against newer Scouts is to shoot 3-4 shots from the Scattergun and then reload one shot. If the enemy sees you reloading, they may believe it is safe to rush up to you, giving you an easy chance to dodge and kill. | ||
| + | ==== [[Force-A-Nature]] + reskins ==== | ||
| + | {| class="wikitable grid" width="100%" style="text-align: center;" | ||
| + | ! class="header" width="17%" rowspan=2 | Weapon | ||
| + | ! class="header" width="16%" rowspan=2 | Kill Icon | ||
| + | ! class="header" width="17%" colspan=2 | Ammo | ||
| + | ! class="header" width="50%" colspan=4 | Damage | ||
| + | |- | ||
| + | ! class="header" width="8%" | Loaded | ||
| + | ! class="header" width="8%" | Carried | ||
| + | ! class="header" width="13%"| Point Blank | ||
| + | ! class="header" width="13%"| Medium Range | ||
| + | ! class="header" width="13%"| Long Range | ||
| + | ! class="header" width="13%"| Critical | ||
| + | |- | ||
| + | ! {{Table icon|Force-A-Nature|Unlock}} | ||
| + | | align="center" | {{Icon killicon|weapon=Force-A-Nature}} | ||
| + | | 2 | ||
| + | | 32 | ||
| + | | 9-113 | ||
| + | | 5-65 | ||
| + | | 3-34 | ||
| + | | 194 | ||
|- | |- | ||
| − | + | |} | |
| − | + | ||
| − | + | * The Force-A-Nature has only two shots per clip, fires considerably faster than the stock Scattergun, and reloads both shots at once. It also has 10% less damage per pellet in exchange for 20% more pellets per shot, making it deal slightly more damage per shot than the Scattergun. The Force-A-Nature will [[Knockback|knock nearby targets back]], and when he is in mid-air, the Scout as well. This mechanic allows [[Jumping#Triple Jump|triple jumps]] (and [[Jumping#Quad Jump|quadruple jumps]] if accompanied by the [[Atomizer]]). | |
| − | + | ||
| − | + | * The Force-A-Nature's high burst damage and quick firing speed make it good at hit-and-run tactics. However, try not to get into a firefight with many enemies at once, as its slow reload time, small magazine, and short range is not suited for large, prolonged shootouts. Instead, try flanking to take on a single isolated enemy. Try not to approach them from the front; instead, attack from the side or behind, where you can close in easily. | |
| − | + | ||
| − | + | * Because the Force-A-Nature discards the second round if reloaded before both rounds are fired, it might be wise to turn off the automatic reload feature from the Advanced Options menu. | |
| + | |||
| + | * Keep in mind that you can jump even longer distances with the Force-A-Nature by jumping, aiming below you, and firing at the end of your second jump. Another method is to jump, fire quickly, and jump again. Only fire one shot, as firing a second shot while still in the air will not have any further effect on your velocity. | ||
| + | ** Use your recoil to reach high places in order to kill unaware classes from above. It lowers your chances of being killed when getting closer because players do not usually look up. | ||
| + | ** The Force-A-Nature works better while the target is busy with something, such as an [[Engineer]] setting up a building. | ||
| + | |||
| + | * Use the Force-A-Nature's knockback ability to your advantage, since it can send enemies flying several meters and into [[Environmental death|hazards]] such as the [[Environmental death#Pitfall|pits]] in [[Lumberyard]] and [[Steel]]. It is particularly useful in places where enemies huddle together. You can jump in, blast two people away from the objective, and retreat to reload and strike again. | ||
| + | ** The knockback can be a double-edged sword, so if at all possible, determine where your shot will throw them into. It is not hard to accidentally send your target into a med-kit, into the safety of [[Sentry Gun]] coverage, or even into a cluster of his teammates. | ||
| + | *** Use the knockback to push people into walls, giving you an easy second shot to finish them. | ||
| + | |||
| + | * The Force-A-Nature can push [[ÜberCharge]]d enemies. Use this to either push enemies away from your teammates or break the [[Medi Gun]] beam and attack the now-vulnerable target. | ||
| + | |||
| + | * The Force-A-Nature is generally easier to use when you are grounded, as your enemies will take the full force of the weapon's knockback and you will not lose control. When firing in the air, the knockback keeps enemies pinned down for a second, but your shot will blast you slightly backwards, which can throw off your aim and send you in a predictable path for people to fire at you. | ||
| + | |||
| + | * If you equip the Force-A-Nature, consider equipping the Pistol as well. With the Pistol, you have the ability to finish off enemies that survived your Force-A-Nature shots without having to wait for the Force-A-Nature's reload, as well as a backup in case your targets are launched from your first shot. An alternative method is to use your Bat for the finishing hit, in which case it would be ideal to knock the enemy into a wall or the air first for an easy follow-up swing. | ||
| + | |||
| + | * With fixed bullet spread on, the pellets from the shot will fire in a 3x3 grid. The extra two pellets will fire to the right of the center, making medium range engagements easier if you aim slightly to the ''left'' of the target. | ||
| + | ==== [[Shortstop]] + reskins ==== | ||
| + | {| class="wikitable grid" width="100%" style="text-align: center;" | ||
| + | ! class="header" width="17%" rowspan=2 | Weapon | ||
| + | ! class="header" width="16%" rowspan=2 | Kill Icon | ||
| + | ! class="header" width="17%" colspan=2 | Ammo | ||
| + | ! class="header" width="50%" colspan=4 | Damage | ||
| + | |- | ||
| + | ! class="header" width="8%" | Loaded | ||
| + | ! class="header" width="8%" | Carried | ||
| + | ! class="header" width="13%"| Point Blank | ||
| + | ! class="header" width="13%"| Medium Range | ||
| + | ! class="header" width="13%"| Long Range | ||
| + | ! class="header" width="13%"| Critical | ||
| + | |- | ||
| + | ! {{Table icon|Shortstop|Craft}} | ||
| + | | align="center" | {{Icon killicon|weapon=Shortstop}} | ||
| + | | 4 | ||
| + | | 32 | ||
| + | | 18-72 | ||
| + | | 12-48 | ||
| + | | 6-25 | ||
| + | | 144 | ||
|- | |- | ||
| − | + | |} | |
| − | + | ||
| − | + | * The Shortstop has a fast firing speed along with a clip-based reload for prolonged combat. The Scout is able to keep his distance while still doing decent damage because each pellet does double damage compared to the Scattergun, albeit with only four pellets per clip. When active, it makes the Scout 20% more vulnerable to [[Knockback|push force]] taken from [[damage]], explosions, or the Pyro's [[compression blast]]. Additionally, it allows the Scout to "shove" a single enemy away with secondary fire, causing them to get knocked back a short distance. | |
| − | + | ||
| − | + | * Four direct hits from the Shortstop can kill most classes, but be cautious when facing tougher classes like the [[Heavy]], who may survive the four shots of the Shortstop and may kill you as you reload. | |
| − | + | ** This can be mitigated by using the [[Mad Milk]], which heals you based on the damage you do, effectively giving you more health to square off against bulkier classes, so long as you land your shots. Alternatively, use a damaging secondary like the Pistol to avoid having to wait for the Shortstop to reload. | |
| − | + | ||
| + | * It can be deceptively difficult to hit opponents with the Shortstop, since it only fires four pellets in a narrow spread. As such, treat the weapon somewhat like a [[Revolver]]: you have to aim accurately with your crosshair in order to deal good damage at medium range, while its spread and damage makes it near useless at long range. | ||
| + | |||
| + | * This weapon fires two seconds of [[critical hits]] whenever it randomly crits, similarly to the [[Pistol]]. Hence, while crits from this weapon only deal a maximum of 144 damage per shot, you will be able to fire up to four critical shots to make up for it. | ||
| + | |||
| + | * The Shortstop has a moderate reloading time; turning on auto-reload may cut off a good chunk of the reload time. | ||
| + | |||
| + | * The Shortstop works well for dealing with [[Sentry Gun]]s. A Mini-Sentry Gun will go down in about a clip, even when you are standing outside of its range, and standard Sentry Guns will take significant damage from the Shortstop's increased damage per pellet. | ||
| + | |||
| + | * This weapon grants you a unique "shove" mechanic if you have the Shortstop as the active weapon, allowing you to push away enemies that are close by. This is useful for giving you space, since the Shortstop lacks the damage ramp-up of your other primaries, and can also forcibly reposition foes or push them into a [[Environmental death|hazard]] such as a [[Environmental death#Pitfall|pitfall]] or friendly [[Sentry Gun]]s. | ||
| + | ** Unlike the [[compression blast]], your shove does not happen instantly, and has a longer cooldown time between shoves. Time them carefully. | ||
| + | ** The shove can also be used to spycheck, effectively not wasting ammo and pushing the Spy away from you or your teammates. | ||
| + | |||
| + | * While the 20% increase in knockback taken allows classes with knockback capabilities (like the [[Pyro]]) to easily push you into an environmental hazard, you can use this to your advantage; the knockback allows you to "surf" and escape from your pursuer. | ||
| + | ** Make use of air-strafing to control your trajectory if attempting this. Not only will this make you more mobile, but will also make it harder for enemies to hit you while airborne. To air-strafe, hold down a directional key (left or right) and turn your mouse slowly in that direction. | ||
| + | *** {{botignore|Miniguns}} and Mini-Sentry Guns can be great sources of knockback to surf off of at medium range, as they shoot at a consistent rate. This should only be attempted if you have a decent amount of health left, as Heavies especially can shred you in a second with their primary. | ||
| + | |||
| + | * The [[Crit-a-Cola]] pairs well with this weapon, as the Shortstop's faster firing rate will maximize the potential of the [[mini-crit]] boost's duration, while its high damage per pellet and greatly increased accuracy will make you quite powerful at range. | ||
| + | ==== [[Soda Popper]] + reskins ==== | ||
| + | {| class="wikitable grid" width="100%" style="text-align: center;" | ||
| + | ! class="header" width="17%" rowspan=2 | Weapon | ||
| + | ! class="header" width="16%" rowspan=2 | Kill Icon | ||
| + | ! class="header" width="17%" colspan=2 | Ammo | ||
| + | ! class="header" width="50%" colspan=6 | Damage | ||
| + | |- | ||
| + | ! class="header" width="7%" | Loaded | ||
| + | ! class="header" width="7%" | Carried | ||
| + | ! class="header" width="7%" | Point Blank | ||
| + | ! class="header" width="7%" | Medium Range | ||
| + | ! class="header" width="7%" | Long Range | ||
| + | ! class="header" width="7%" | Critical | ||
| + | ! class="header" width="7%" | Damage to Activate Hype | ||
| + | ! class="header" width="7%" | Hype Duration | ||
| + | |- | ||
| + | ! {{Table icon|Soda Popper|Craft}} | ||
| + | | align="center" | {{Icon killicon|weapon=Soda Popper}} | ||
| + | | 2 | ||
| + | | 32 | ||
| + | | 11-105 | ||
| + | | 6-60 | ||
| + | | 3-32 | ||
| + | | 180 | ||
| + | | 350 | ||
| + | | 8 seconds | ||
|- | |- | ||
| − | |||
| − | |||
| − | |||
| − | |||
| − | |||
| − | |||
| − | |||
|} | |} | ||
| − | |||
| − | |||
| − | |||
| − | * | + | * The Soda Popper is very similar to the Force-A-Nature, firing two shells in fast succession and reloading both shots, but with the damage and pellet count of the normal Scattergun, faster reload time compared to the Force-A-Nature, and no knockback. In addition, the weapon has a "Hype" meter that fills by dealing damage with any weapon while having the Soda Popper equipped. When completely filled, alternate fire activates "Hype mode" and grants 5 extra air jumps for 10 seconds. The Hype meter takes roughly 350 damage to completely fill. |
| − | * | + | * Like the Force-A-Nature, the Soda Popper is generally useful for hit-and-run tactics due to its reduced magazine size. However, it reloads faster than the Force-A-Nature, making it better for offensive fighting. |
| + | ** As with the Force-A-Nature, reloading after firing one shot wastes the second shot, so try to make sure both shots are used for efficient ammo usage. | ||
| − | * | + | * Similarly to the [[Baby Face's Blaster]], you need to deal damage to fill up the Soda Popper's Hype meter. It takes approximately 4 point-blank shots from the Soda Popper, 16 shots from the Pistol, or 10 swings from the Bat to do so. |
| − | * | + | * The extra midair jumps enhances your already good mobility. Classes that rely on tracking a target (such as the [[Sniper]]) or projectile classes with slow projectiles (like the [[Soldier]]) will have an even harder time landing direct shots on you before you land. |
| − | * | + | * This can be paired very well with the [[Bonk! Atomic Punch]] for being able to jump around and take alternative routes that Scout would otherwise not be able to reach while also being invulnerable to make a great flank. |
| − | * | + | * A good tactic is to constantly keep in the air with your extra jumps while firing downwards at your target. This lets you chip at your opponent's health while you evade all damage. |
| − | + | * On large maps such as [[Frontier]] or [[2Fort]], Hype can be used to find alternate routes around the enemy, or to simply get somewhere faster. | |
| − | |||
| − | |||
| − | * | + | * The [[Pistol]], [[Pretty Boy's Pocket Pistol]], and the [[Winger]] are all very suitable for attacking in midair with the hype meter as using your Soda Popper is used for close range attacks while pistols are usually associated with more long ranged attacks. |
| − | * | + | * This weapon pairs very well with the [[Winger]], as its increased jump height lets you reach even greater heights when using the Soda Popper's Hype. It also serves as a backup weapon for opponents that survive both shots of your Soda Popper, though other pistols will be more effective for dealing damage. |
| − | ** | + | ** The stock [[Pistol]] is also a good choice as a backup weapon, as it is more useful in prolonged combat. |
| − | + | ==== [[Baby Face's Blaster]] ==== | |
| + | {| class="wikitable grid" width="100%" style="text-align: center;" | ||
| + | ! class="header" width="17%" rowspan=2 | Weapon | ||
| + | ! class="header" width="16%" rowspan=2 | Kill Icon | ||
| + | ! class="header" width="17%" colspan=2 | Ammo | ||
| + | ! class="header" width="50%" colspan=4 | Damage | ||
| + | |- | ||
| + | ! class="header" width="8%" | Loaded | ||
| + | ! class="header" width="8%" | Carried | ||
| + | ! class="header" width="13%"| Point Blank | ||
| + | ! class="header" width="13%"| Medium Range | ||
| + | ! class="header" width="13%"| Long Range | ||
| + | ! class="header" width="13%"| Critical | ||
| + | |- | ||
| + | ! {{Table icon|Baby Face's Blaster|Craft}} | ||
| + | | align="center" | {{Icon killicon|weapon=Baby Face's Blaster}} | ||
| + | | 4 | ||
| + | | 32 | ||
| + | | 11-105 | ||
| + | | 6-60 | ||
| + | | 3-32 | ||
| + | | 180 | ||
| + | |} | ||
| − | * | + | * The Baby Face's Blaster acts like the Scattergun, but decreases the Scout's base speed by 10% and only has four shots per clip. However, it has a boost meter: as damage is dealt, the meter fills and the Scout's speed increases. At full boost, the Scout runs 40% faster than a normal Scout. The boost decreases when receiving damage and upon a double-jump, and is lost upon death. |
| − | * | + | * The Baby Face's Blaster is a strong weapon for those who stick to a "hit-and-run" playstyle. The quick speed allows a skilled player to avoid engaging in a prolonged fight to avoid damage and keep their boost from being drained, and take small chunks of health from a target multiple times before killing them. |
| + | ** However, its reduced clip size makes direct confrontations riskier, as you have less margin for error. Ambushes become less effective as well, as the number of enemies you can damage and/or kill with a clip decreases. | ||
| − | * | + | * Your priority should be constantly gaining boost while using this weapon, due to the benefits you gain with increased speed and how easy it is to lose charge. |
| − | + | ** It takes 100 damage from any weapon to fill the boost bar, such as a point-blank shot from the Blaster. However, it only takes 25 damage to completely drain a full boost bar, making an enemy Scout's [[Bat]] swing or a single close-range Winger shot enough to take away all your increased speed. Keep scoring hits on opponents so your boost is always high. | |
| − | * | + | * At full boost, you will be extremely hard to hit as long as you move unpredictably. Only [[Sentry Gun]]s, the [[Natascha]], and [[Flamethrower]]s are constant threats. However, your inability to double jump without losing your boost means you will have a harder time dodging [[projectile]]s, such as [[Rocket Launcher|rockets]]. |
| + | ** Your high speed will make it even more difficult to aim at times, so try and adjust for that by ambushing enemies, who will have no time to dodge. | ||
| − | * | + | * Your full speed boost is capable of chasing down or retreating from any opponents, even enemy [[Scout]]s. |
| + | ** The only exceptions are enemy Scouts with the same weapon at full charge, a [[Demoman]] who is [[Chargin' Targe|charging]], and explosive jumping enemies. Have this in mind when fighting against any of those. | ||
| − | * | + | * The Baby Face's Blaster is useful for reaching and capturing objectives. It is especially useful for grabbing the Intelligence on [[Capture the Flag]] maps and returning it quickly. |
| − | * | + | * Air jumping will deplete 75% of your boost, making double jumps riskier if you want to keep your boost. Make sure your air jump is worth the sacrifice, such as to dodge a rocket that would have drained all of your boost anyway. |
| − | * | + | * There are some instances to take note of when collecting boost: |
| + | ** Shooting an enemy Scout under the effects of [[Bonk! Atomic Punch]] ''will'' charge the Blaster's boost. | ||
| + | ** Shooting an enemy under the effects of a stock [[Medi Gun]]'s Übercharge will ''not'' charge the boost. | ||
| − | * | + | * Use your favorite secondary to collect boost as quickly as possible. Harass enemies with pistols at a distance for small gains, get a [[Flying Guillotine]] hit to instantly charge your meter, or drink [[Crit-a-Cola]] and blast at range. |
| − | *The | + | * The [[Fan O' War]]'s mark for death can help with collecting boost. However, you have to actually hit someone with it first, which can be difficult with your initially reduced speed, and will make you a vulnerable target. |
| − | *The | + | * The [[Atomizer]] is not recommended to use with this weapon, as a triple jump will remove all your boost. However, it will make your jumps more effective when you actually need to use it. |
| − | * | + | * The [[Boston Basher]] will charge up to 85% of your boost meter on a successful hit, but missing and hitting yourself will often fully drain it. |
| − | |||
| − | * | + | * The [[Wrap Assassin]] is a good alternative to the Boston Basher as it has a ranged bleed on hit |
| − | ===[[ | + | ==== [[Back Scatter]] ==== |
| − | { | + | {| class="wikitable grid" width="100%" style="text-align: center;" |
| − | + | ! class="header" width="17%" rowspan=2 | Weapon | |
| + | ! class="header" width="16%" rowspan=2 | Kill Icon | ||
| + | ! class="header" width="17%" colspan=2 | Ammo | ||
| + | ! class="header" width="50%" colspan=4 | Damage | ||
| + | |- | ||
| + | ! class="header" width="8%" | Loaded | ||
| + | ! class="header" width="8%" | Carried | ||
| + | ! class="header" width="13%"| Point Blank | ||
| + | ! class="header" width="13%"| Medium Range | ||
| + | ! class="header" width="13%"| Long Range | ||
| + | ! class="header" width="13%"| Critical | ||
| + | |- | ||
| + | ! {{Table icon|Back Scatter|Craft}} | ||
| + | | align="center" | {{Icon killicon|weapon=Back Scatter}} | ||
| + | | 4 | ||
| + | | 32 | ||
| + | | 11-105 | ||
| + | | 6-60 | ||
| + | | 3-32 | ||
| + | | 180 | ||
| + | |} | ||
| − | *The | + | * The Back Scatter deals mini-crits when fired at close range from behind, at the cost of 20% increased bullet spread and a reduced clip size of four. |
| − | * | + | * In general, the Back Scatter acts as an ambushing-focused sidegrade to the Scattergun. While it excels at picking off unaware targets, direct confrontations at medium range and farther become less effective due to its lower clip size and accuracy. |
| − | * | + | * Some strategies that apply for the [[Spy]] may also apply to this weapon. Get behind enemies and fire at them while unnoticed to benefit from the Back Scatter’s mini-crits. |
| − | *The | + | * The Back Scatter deals 142 mini-crit damage at point blank — enough to kill 125-health classes with a single shot if all pellets connect. This makes you even more effective when attacking unaware targets, such as Snipers and Medics. |
| + | ** Jumping over an enemy and then quickly turning around can land you a free mini-crit shot. | ||
| − | * | + | * The Back Scatter excels at Spy-checking due to a back hit being able to instantly kill enemy Spies. |
| + | ** If the Spy has a Dead Ringer, the mini-crit marker over his head will give him away. Follow this marker and shoot them until they die. | ||
| − | * | + | * Even if your opponent turns around, you can still take them down with two shots at close range, since the Back Scatter deals standard Scattergun damage if all pellets connect. |
| + | ** The clip size penalty can be negligible if you do not usually use a gun's entire clip (for example, firing 2 shots then reloading will have no difference to the Scattergun), although this means you will reload more frequently. | ||
| − | *The | + | * Because of the decreased accuracy, engaging at medium range is not suggested. Prolonged combat also becomes less effective, as your lower clip size and higher bullet spread will put you at a significant disadvantage. |
| + | ** The extra spread of this weapon does make Spy-checking easier, though, due to the larger spread letting your bullets cover a larger area. | ||
| − | * | + | * Getting behind enemy lines is crucial in using this weapon most efficiently. [[Bonk! Atomic Punch]], the [[Atomizer]], and the [[Winger]] synergize best with this, allowing you to get behind enemies without too much trouble. |
| − | * | + | * Because of the lower clip size, it can be good to bring a [[Pistol]] variant for when you run out of Scattergun shots. |
| − | * | + | * Pairing the Back Scatter with the [[Crit-a-Cola]] is not recommended, as the bullet spread will prevent your shots from hitting at range, while you can already deal mini-crits from behind anyway. |
| − | *The | + | * Due to the gun's stats when compared to the stock [[Scattergun]], the Back Scatter can be used to help train Scouts to play their class more effectively overall. |
| + | ** The mini-crits encourage Scouts to adopt a more flank and ambush-focused playstyle, as well as avoiding damage in one-on-one fights by maneuvering behind the enemy. | ||
| + | ** The smaller clip size means the Scout can be left vulnerable waiting for a reload if they spam all their rounds, meaning the player needs to apply effective ammo management in order to not be caught vulnerable after spamming 4 shots and waiting for a reload. | ||
| + | ** The wider bullet spread means that the Scout needs to shoot only if they're as close to the target as possible, and to use their Pistol or [[Flying Guillotine]] for midrange rather than their primary. | ||
| − | + | === Secondary Weapons === | |
| + | ==== [[Pistol]] + reskins ==== | ||
| + | {| class="wikitable grid" width="100%" style="text-align: center;" | ||
| + | ! class="header" width="17%" rowspan=2 | Weapon | ||
| + | ! class="header" width="16%" rowspan=2 | Kill Icon | ||
| + | ! class="header" width="17%" colspan=2 | Ammo | ||
| + | ! class="header" width="50%" colspan=4 | Damage | ||
| + | |- | ||
| + | ! class="header" width="8%" | Loaded | ||
| + | ! class="header" width="8%" | Carried | ||
| + | ! class="header" width="13%"| Point Blank | ||
| + | ! class="header" width="13%"| Medium Range | ||
| + | ! class="header" width="13%"| Long Range | ||
| + | ! class="header" width="13%"| Critical | ||
| + | |- | ||
| + | ! {{Table icon|Pistol|Stock}} | ||
| + | | align="center" | {{Icon killicon|weapon=Pistol}} | ||
| + | | rowspan="3" |12 | ||
| + | | rowspan="3" |36 | ||
| + | | rowspan="3" |22 | ||
| + | | rowspan="3" |15 | ||
| + | | rowspan="3" |8 | ||
| + | | rowspan="3" |45 | ||
| + | |- | ||
| + | ! {{Table icon|Lugermorph|Promotional}} | ||
| + | | align="center" | {{Icon killicon|weapon=Lugermorph}} | ||
| + | |- | ||
| + | ! {{Table icon|C.A.P.P.E.R|Uncrate}} | ||
| + | | align="center" | {{Icon killicon|weapon=C.A.P.P.E.R}} | ||
| + | |} | ||
| − | * | + | * Targets too far away for the Scattergun should be fought with the Pistol. Its greater accuracy at medium range and quick reload makes it a viable backup weapon for when your Scattergun runs out of ammunition, though it only holds three spare magazines of bullets. |
| − | * | + | * One of the Pistol's primary uses is to finish off wounded targets attempting to retreat. Do not underestimate the power of the Pistol, as several shots at close range can kill you quickly. |
| + | ** The Pistol is also a great weapon for baiting enemy players. If you can run behind enemy lines, hit a few shots and then run away; players will often try to pursue you, making it easier for your team to move in without as much trouble. | ||
| − | + | * The Pistol reloads much more quickly than the Scattergun. When both are empty, reloading the Pistol first will allow you to fire sooner than reloading the Scattergun. | |
| − | + | ** Be careful - changing weapons before the Pistol finishes reloading will cancel the reload, wasting the time you spent reloading. Wait until when your ammo count changes before switching weapons. | |
| − | |||
| − | * | + | * The Pistol can waste a lot of ammunition if fired haphazardly into a firefight, partly due to its firing speed and especially since you only have three magazines of bullets. Choose your targets wisely and aim carefully. |
| − | * | + | * Your Pistol is the best option to take down [[Sentry Gun]]s from longer ranges than any other Scout weapon, since [[buildings]] are not affected by damage falloff. If you're out of the Sentry Gun's range, consider hitting the Engineer with a [[Sandman]] ball (if your using it) when he is far away from the Sentry (making it harder for him to reach the Sentry before you destroy it) and then destroying the Sentry Gun with your Pistol. |
| − | * | + | * When running towards enemies aware of your presence, try firing at them with your Pistol before closing in on them with your Scattergun. When taking on lighter classes, 2–3 seconds of accurate Pistol fire can take away a quarter to a third of their maximum health, allowing you to finish them off with one close-range blast of your primary weapon. |
| − | * The Pistol | + | * The Pistol is one of the most deadly weapons to get Critical hits with. If you happen to get [[First Blood]] in [[Arena]], switch to your Pistol, as it can take any class down in one clip, including most overhealed enemies if you fire fast, and accurately, and the Critical hits mean the Pistol can kill enemies from longer distances without a need to consider damage falloff. However, for closer ranges, the Scattergun may still work better. |
| − | * | + | * The Pistol is a reliable backup weapon for any of your primary weapons. All Scattergun sidegrades have a lower clip size, so switch to your Pistol and fire at them once you are out of shots. This allows you to sustain fire when you would otherwise have been vulnerable reloading. |
| − | + | ==== [[Winger]] + reskins ==== | |
| + | {| class="wikitable grid" width="100%" style="text-align: center;" | ||
| + | ! class="header" width="17%" rowspan=2 | Weapon | ||
| + | ! class="header" width="16%" rowspan=2 | Kill Icon | ||
| + | ! class="header" width="17%" colspan=2 | Ammo | ||
| + | ! class="header" width="50%" colspan=4 | Damage | ||
| + | |- | ||
| + | ! class="header" width="8%" | Loaded | ||
| + | ! class="header" width="8%" | Carried | ||
| + | ! class="header" width="13%"| Point Blank | ||
| + | ! class="header" width="13%"| Medium Range | ||
| + | ! class="header" width="13%"| Long Range | ||
| + | ! class="header" width="13%"| Critical | ||
| + | |- | ||
| + | ! {{Table icon|Winger|Craft}} | ||
| + | | align="center" | {{Icon killicon|weapon=Winger}} | ||
| + | | 5 | ||
| + | | 36 | ||
| + | | 26 | ||
| + | | 17 | ||
| + | | 9 | ||
| + | | 52 | ||
| + | |- | ||
| + | |} | ||
| − | * The Pistol | + | * The Winger deals 15% more damage per shot than the Pistol, but has only 5 rounds per magazine. It also allows the user to jump 25% higher when active. |
| − | * The Pistol | + | * The Winger requires you to fire more accurately than the Pistol. If you cannot aim well, consider using a different Pistol instead. |
| − | * | + | * Much of the strategy incorporated with the use of the Pistol can be used with the Winger, but players must be wary of the Winger's frequent reloading. |
| − | * | + | * The Winger is a better weapon-heckling version of the Pistol, inflicting higher damage per round in exchange for a much smaller magazine. Take advantage of its high damage and use it for close encounters. |
| + | ** However, the larger clip of the Pistol makes for more sustained damage, and can potentially take down a target when the Winger would have run out of shots. Choose whichever one is preferable for the engagement. | ||
| − | * | + | * Despite its drawback of 5 shots, this allows players to manage the ammo pool of the Winger more easily, and the increased damage, while not as great as the Pistol's damage-per-second due to its larger clip, is still useful as a backup weapon with your primary weapons. However, the Winger is best for short encounters with weak targets, while the Pistol excels at prolonged combat. Consider this when determining your loadout. |
| − | + | * The higher base damage of the Winger makes it better suited for taking out Sentry Guns at a distance; remember that shots fired at [[buildings]] do not factor in damage ramp-up/fall-off. | |
| − | + | ** However, the reduced magazine size will make it harder when there is an Engineer constantly repairing the Sentry Gun. | |
| − | * | ||
| − | * | + | * Use the Winger's increased jump height to take alternate routes throughout the map. Ambush enemies by approaching from unexpected areas. |
| − | + | ==== [[Pretty Boy's Pocket Pistol]] ==== | |
| + | {| class="wikitable grid" width="100%" style="text-align: center;" | ||
| + | ! class="header" width="17%" rowspan=2 | Weapon | ||
| + | ! class="header" width="16%" rowspan=2 | Kill Icon | ||
| + | ! class="header" width="17%" colspan=2 | Ammo | ||
| + | ! class="header" width="50%" colspan=4 | Damage | ||
| + | |- | ||
| + | ! class="header" width="8%" | Loaded | ||
| + | ! class="header" width="8%" | Carried | ||
| + | ! class="header" width="13%"| Point Blank | ||
| + | ! class="header" width="13%"| Medium Range | ||
| + | ! class="header" width="13%"| Long Range | ||
| + | ! class="header" width="13%"| Critical | ||
| + | |- | ||
| + | ! {{Table icon|Pretty Boy's Pocket Pistol|Craft}} | ||
| + | | align="center" | {{Icon killicon|weapon=Pretty Boy's Pocket Pistol}} | ||
| + | | 9 | ||
| + | | 36 | ||
| + | | 22 | ||
| + | | 15 | ||
| + | | 8 | ||
| + | | 45 | ||
| + | |} | ||
| − | + | The Pretty Boy's Pocket Pistol deals the same damage as the stock Pistol; however, it has a 25% smaller clip size. It allows you to heal up to 3 health per hit and has a 15% faster firing speed. | |
| − | * | + | * This weapon offers a middle-ground between the healing utility of the [[Mad Milk]] and the various offensive roles of the Stock Pistol. It does not support your team, but it can be greatly beneficial for surviving when roaming around in enemy territory, where friendly [[Dispenser]]s and [[Medic]]s are scarce. It also fulfills most of the Stock Pistol's roles, albeit slightly less effectively. |
| − | * | + | * Due to its increased firing speed, the Pretty Boy's Pocket Pistol is excellent for dealing fast burst damage that the stock Pistol cannot match. |
| + | ** However, due to the decreased clip size, the Pistol still deals more damage overall, but across a longer period of time. | ||
| − | * | + | * As a Pistol, this weapon is useful in all the same ways as the Stock Pistol, including the ability to easily finish off weakened enemies at a distance, directly fight enemies at a distance, and destroy [[Sentry Gun]]s at a distance, among others. |
| + | ** Similarly to the Stock Pistol, the Pocket Pistol also offers an alternative to the [[Scattergun]] with better effective distance, faster fire rate, and a faster reload speed. It is a good backup weapon for when there is no time to reload your Scattergun or when you are out of its effective range. | ||
| − | * | + | * The Pretty Boy's Pocket Pistol is useful for healing minor wounds. Fire at unaware or unprepared targets. |
| − | * | + | * Attacking unaware or distant enemies can significantly increase the Scout's chances of survival. |
| + | ** Some very easy targets to hit include unprepared [[Heavy|Heavies]] and [[Pyro]]s. | ||
| + | ** If being pursued by an enemy, it may be a good decision to turn around and fire at them, to partially regain health you are losing. | ||
| − | *If | + | * If lit on fire, shoot the offending Pyro. Stay out of the range of their flames and backpedal while firing. |
| − | * | + | * Don't rely on the healing of the Pretty Boy's Pocket Pistol alone. If you need to heal a significant portion of your health, reach a health pack or Medic instead, and use the Pistol to top off any remaining health while you retreat. |
| − | + | ==== [[Bonk! Atomic Punch]] + reskins ==== | |
| + | {| class="wikitable grid" width="100%" style="text-align: center;" | ||
| + | ! class="header" width="17%" rowspan=2 | Weapon | ||
| + | ! class="header" width="17%" colspan=2 | Ammo | ||
| + | ! class="header" width="50%" colspan=3 | Effect | ||
| + | |- | ||
| + | ! class="header" width="8%" | Loaded | ||
| + | ! class="header" width="8%" | Carried | ||
| + | ! class="header" width="17%" | Drink Effect | ||
| + | ! class="header" width="17%" | Duration | ||
| + | ! class="header" width="17%" | Recharge Time | ||
| + | |- | ||
| + | ! {{Table icon|Bonk! Atomic Punch|Unlock}} | ||
| + | | 1 | ||
| + | | ∞ | ||
| + | | Drink to become invulnerable. Cannot attack, capture, or defend during this time. Damage absorbed will slow you when the effect ends. | ||
| + | | 8 seconds | ||
| + | | {{tooltip|22 s|After effect wears off}} | ||
| + | |- | ||
| + | |} | ||
| − | + | * When consumed Bonk! Atomic Punch, you will become invincible for 8 seconds, although you are still affected by [[knockback]], similar to an [[ÜberCharge]]. While active, the camera shifts to a third-person view, and the Scout cannot attack (but can still taunt-kill with the [[Sandman]] or [[Atomizer]]). After the invulnerability effect wears off, the Scout will receive a 5-second slowing effect based on the damage they absorbed under Bonk!'s effect. Bonk! takes 22 seconds to recharge after use. | |
| − | |||
| − | |||
| − | * | + | * Use Bonk! as a safety net when you find yourself in a bad situation, like running into [[Sentry Gun]]s, [[Heavy]]/[[Medic]] combos, or large groups of enemies. |
| + | ** Be careful where you drink Bonk!; for the duration of the drinking animation, you are immobile and vulnerable to damage. If you are launched by [[knockback]] while you drink, the animation will be canceled and you will not gain invulnerability, but it will still consume the drink and you will have to wait for it to recharge. | ||
| + | ** Take note of the map's flank routes and locations. You may need to run to a deserted area and wait out the [[slowdown]] following the end of your effect, as you will be highly vulnerable then, or you may be able to run behind your teammates for cover and recovery. | ||
| − | * | + | * You can still perform some actions after you have drunk Bonk!, such as reloading your Scattergun and taunting. This can help you get ready for your next fight, or set up a [[taunt kill]] on unaware players. As you cannot switch weapons under Bonk!, make sure that you switch to the Bonk! from your primary rather than your melee weapon, as you will be forced to the last held weapon after you use Bonk!. |
| − | * | + | * Bonk! can be used to avoid damage-over-time from [[fire]] or [[bleeding]]. Though the afterburn will continue to damage you after Bonk! wears off, the life extension Bonk! gives you just might be enough to reach a water pool or a source of health before you burn to death. |
| + | ** This also lets you negate [[Jarate]] and other effects that mark you for death. Drink Bonk! to protect yourself from the increased damage you will take otherwise. It is also possible to be covered in Jarate during the effects of Bonk!, so if this happens, make a hasty retreat before you begin taking damage again. | ||
| + | *** However, this does not work for effects like the [[Mad Milk]]'s health-on-hit effect, as enemies can still gain on-hit effects from you while you are under the effects on Bonk!. The same goes for enemy Medics using the [[Ubersaw]], as they can still fill up their ÜberCharge meter by hitting you. | ||
| − | * | + | * If your team is about to push with an [[ÜberCharge]], take a drink before turning a corner that could potentially have a Sentry Gun or Stickybombs around it. This can keep your Medic safe before he uses his ÜberCharge, and your allies can take out the opposition while you provide cover and distraction. It may also let you take the brunt of the knockback rather than your teammates, so they can advance more easily. If you have no one backing you, simply reporting what you found via voice chat or using the "Sentry Ahead!" voice command can potentially save your teammates. |
| + | ** If your team lacks a Medic, you can use Bonk! in the same way as an ÜberCharge, making the Sentry Gun target you while your teammates attack it. Make sure to escape before the Bonk! wears off, and know that Sentry Guns will deal knockback to you that may make it harder to flee. However, [[Wrangler|Wrangled]] Sentry Guns may make this ineffective, as the Engineer controlling it will likely focus its fire on the greater threats. | ||
| + | *** It is possible to position yourself so that the Engineer is between you and their Sentry Gun. As Sentry Guns can injure both their owner and the enemy, you can use this to kill the Engineer with his own Sentry Gun, though this can be risky, as you will need to balance time used to kill the Engineer as well as time to escape before the effect ends. | ||
| + | ** As you will be absorbing high amounts of damage, you will be considerably slowed after the invulnerability wears off. If you "dodge" 200 damage or more, you will be reduced to half speed for 5 seconds, allowing enemies to hit you easily. | ||
| − | * | + | * It is very easy to distract enemies while you are under the influence of Bonk!. Enemy [[Sniper]]s can be distracted as they try to shoot you or keep their crosshair on you, waiting for your invulnerability to wear off. Running into [[Soldier]]s and [[Demoman|Demomen]] will usually result in them hurting or outright killing themselves with their explosive weapons. Heavies and [[Pyro]]s will also find it difficult to focus on firing if you run circles around them. |
| − | * | + | * You can use your invulnerability to block enemies or projectiles. Body-blocking an enemy Medic's patient can potentially waste their ÜberCharge. More importantly, it saves your Medic's ÜberCharge for dealing with the enemy, rather than countering the enemy's charge. |
| + | ** Save Sentry Guns or even hurt teammates from enemy fire by taking rockets and bullets before they can hit. Keep track of when your Bonk! runs out, though, and escape a few seconds before it wears off to recover from the post-effect slowdown in peace. | ||
| − | * | + | * Bonk! can be used to propel yourself across the map using enemy explosives or Sentry Guns. However, where you will go is often unpredictable, as you will have to rely on enemies for knockback. |
| − | * | + | * Try to avoid taking unnecessary fire from enemies, as it will slow you down even more. Remember that you can still dodge attacks just as easily under the effects of Bonk!. |
| + | * Try to use Bonk! at the right time. Using it in situations where it was not needed may result in a slowdown effect for no reason. | ||
| − | + | ==== [[Crit-a-Cola]] ==== | |
| + | {| class="wikitable grid" width="100%" style="text-align: center;" | ||
| + | ! class="header" width="17%" rowspan=2 | Weapon | ||
| + | ! class="header" width="17%" colspan=2 | Ammo | ||
| + | ! class="header" width="50%" colspan=3 | Effect | ||
| + | |- | ||
| + | ! class="header" width="8%" | Loaded | ||
| + | ! class="header" width="8%" | Carried | ||
| + | ! class="header" width="17%"| Drink Effect | ||
| + | ! class="header" width="17%"| Duration | ||
| + | ! class="header" width="17%"| Recharge Time | ||
| + | |- | ||
| + | ! {{Table icon|Crit-a-Cola|Craft}} | ||
| + | | 1 | ||
| + | | ∞ | ||
| + | | While effect is active: each attack mini-crits and sets Mark-For-Death for 5 seconds. | ||
| + | | 8 seconds | ||
| + | | {{tooltip|22 s|After effect wears off}} | ||
| + | |} | ||
| − | * | + | * When consumed Crit-a-Cola, all damage dealt will be [[Critical hits#Mini-crit|mini-crits]] for 8 seconds. Attacking while under the effect will mark you for death for five seconds (does not stack, but resets each time you attack). The active weapon will glow and crackle with electricity (similar to a Crit boost, but with a much lighter color). The effect lasts 8 seconds and can be used again in 22 seconds. |
| − | * | + | * The Crit-a-Cola is a high-risk, high-reward weapon. A mini-crit-boosted Scattergun is a very powerful weapon, but its glow can single you out as a target, and since you take mini-crits for five seconds after attacking, you can die very quickly. Because of this, the Crit-a-Cola encourages an ambush style of play. |
| + | ** Since you take mini-crits for five seconds after attacking, using this to up your damage output in a 1v1 fight is no longer viable, so Crit-a-Cola is now mainly a tool for assassinating lone players or flanking and taking out Medics. | ||
| − | * A | + | * During the 8-second mini-crit period, you can fire up to 7 Scattergun shots, 6 Force-A-Nature shots, 9 Shortstop shots, or swing any melee weapon 10 times. As such, make sure your weapon is fully loaded to benefit the most from the mini-crits. |
| + | *** Keep in mind that when you use the Crit-a-Cola, you will automatically switch to your last equipped weapon. If this is your melee weapon, be prepared to attack with it or quickly switch to your primary. | ||
| − | * | + | * At point-blank range, one blast from the Scattergun (or any primary weapon other than the Shortstop) with the mini-crit buff is capable of killing any 125 HP class from full health. Therefore, if you find yourself behind multiple light classes, the Crit-a-Cola can give you one kill per shot. Land two shots to kill most other classes. |
| + | * Be careful about drinking the Crit-a-Cola when facing competent Soldiers or Demomen. You will die to one close-range {{botignore|direct hit}} [[Rocket Launcher|rocket]] or [[Grenade Launcher|grenade]], and if you are using the [[Sandman]], one point-blank [[Shotgun]] blast will also kill you. | ||
| − | * | + | * Since mini-crits do not suffer from damage falloff, your primary weapon will remain useful at a longer range as well. |
| + | ** However, you will still be generally disadvantaged at range against most classes. As you are vulnerable while drinking, it is better to hide, drink it, then run closer to fight back. | ||
| + | |||
| + | * Never drink the Crit-a-Cola under the effects of a friendly Buff Banner or a [[Critical hits#Crit boost|critical hit boost]], or when facing an enemy that is marked-for-death. Your mini-crits do not stack with critical hits or other mini-crits - using Crit-a-Cola will only weaken yourself with a self-inflicted marked-for-death debuff. | ||
| + | ** If possible, coordinate drinking Crit-a-Cola with a friendly Soldier's [[Battalion's Backup]]; the defense boost will negate your increased vulnerability and will allow you to deal mini-crits with no downsides. | ||
| − | * | + | * The [[Force-A-Nature]] is capable of dealing up to 134 damage with the Crit-a-Cola, making it possible to kill any class (besides overhealed Heavies) with two shots at point-blank range. This tactic is best used for taking out a single, high-priority target, such as a Medic with a prepared ÜberCharge, as the Force-A-Nature's fast firing speed may be able to kill the enemy before they can react. |
| + | ** Remember to take into account the Force-A-Nature’s knockback to ensure you don’t accidentally blast your target into safety. | ||
| − | * | + | * The Crit-a-Cola pairs well with the [[Shortstop]], as its extra range and tighter spread combined with mini-crits not being affected by damage falloff lets you fire from a safer distance than is possible with the Scattergun. |
| − | + | * The Crit-a-Cola and [[Soda Popper]] can be used together well because the damage boost from the Crit-a-Cola allows you to charge your Hype faster, and the Hype buff will allow you to avoid most damage altogether, negating your marked-for-death debuff. | |
| − | + | ** However, you sacrifice a secondary weapon, making you less effective at long range. | |
| − | |||
| − | * | + | * When using the [[Baby Face's Blaster]] with the Crit-a-Cola, it is much easier to gain boost at a distance due to the mini-crits. |
| − | * | + | * It's recommended to avoid using the Sandman when equipped with the Crit-a-Cola, because the 15 base health you lose may allow Soldiers, Demomen, and other Scouts to kill you before you can kill them. |
| − | + | ==== [[Mad Milk]] + reskins ==== | |
| − | + | {| class="wikitable grid" width="100%" style="text-align: center;" | |
| + | ! class="header" width="17%" rowspan=2 | Weapon | ||
| + | ! class="header" width="17%" colspan=2 | Ammo | ||
| + | ! class="header" width="50%" colspan=4 | Effect | ||
| + | |- | ||
| + | ! class="header" width="8%" | Loaded | ||
| + | ! class="header" width="8%" | Carried | ||
| + | ! class="header" width="13%"| Effect on Enemies | ||
| + | ! class="header" width="13%"| Effect on Teammates | ||
| + | ! class="header" width="13%"| Duration | ||
| + | ! class="header" width="13%"| Recharge Time | ||
| + | |- | ||
| + | ! {{Table icon|Mad Milk|Craft}} | ||
| + | | rowspan="2" | 1 | ||
| + | | rowspan="2" | ∞ | ||
| + | | rowspan="2" | 60% of all damage dealt is returned as health. Also negates Cloak. | ||
| + | | rowspan="2" | Extinguishes flame on yourself and/or teammates. | ||
| + | | rowspan="2" | 10 seconds / {{tooltip|2.5 seconds|On a continuously healed target by any type of Medi Gun or Dispenser.}} | ||
| + | | rowspan="2" | 20 seconds / 16 seconds when teammates extinguished. | ||
| + | |- | ||
| + | ! {{Table icon|Mutated Milk|Uncrate}} | ||
| + | |- | ||
| + | |} | ||
| − | * | + | * Mad Milk is similar to [[Jarate]], it is a thrown weapon that covers enemies in the substance, and nullifies the Cloak of enemy Spies and extinguishes teammates and yourself when on fire. Anyone who attacks a player covered in Mad Milk will heal 60% of the damage they dealt. Mad Milk has a recharge time of 20 seconds. |
| − | *Mad Milk | + | * Mad Milk allows you to remain in combat for longer without dying or needing to retreat, since you will regain health as you deal damage. |
| − | * | + | * Mad Milk is a great supplement for an offensive push, allowing attackers to replenish their health quickly. Simply throw it onto enemy combatants and retreat while firing to both heal yourself and teammates. This makes overpowering the enemy much easier during pushes. |
| + | ** For example, when using the Kritzkrieg's crit-boost, teammates heal a great amount of health. | ||
| − | *Mad Milk can be used | + | * Mad Milk can also be used on defense. When thrown on a Payload or control point, your teammates and yourself can easily stop a push. |
| − | *Using Mad Milk | + | * Using Mad Milk on classes like the Heavy can be a great benefit to your team because it allows your teammates to regain large amounts of health, due to his slow speed and high health. For example, Snipers will be able to regain at least 90 health if they land a headshot on a “milked” target. |
| + | ** While still risky, Mad Milk makes head-on approaches to bulky classes like [[Heavy|Heavies]] much easier, as you will be able to take more damage as you attack the enemy. | ||
| + | ** Using Mad Milk on offensive classes like Pyros allows for survivability while fighting them. It allows you to survive the high outputs of damage from them through close range combat. | ||
| − | * | + | * Mad Milk is a useful tool for dealing with enemy Spies. The dripping effect is easily spotted if they are disguised and will prevent them from evading your team by cloaking. |
| − | + | ** Additionally, the white particles of any player dripping in milk makes them more visible on dark maps such as [[Sawmill]]. | |
| − | ** | ||
| − | + | * Mad Milk lets you extinguish teammates or yourself. It is especially beneficial to you, as [[afterburn]] will deal enough damage over time to drain half your health. Do not be afraid to use it when you see a burning teammate, as it refills 20% of its charge instantly if you extinguish a teammate. | |
| − | |||
| − | * | ||
| − | * | + | * Some of your Scattergun variants synergize well with Mad Milk. |
| + | ** The healing will be more effective at close range with the Scattergun, as the larger clip and stronger shots can keep you alive longer using Mad Milk's effect. | ||
| + | ** The Shortstop will excel at a distance, as its reliable medium-range shots will give you a decent amount of health while letting you hang back safely. | ||
| + | ** Mad Milk will keep you alive while you constantly hunt enemies with the Baby Face's Blaster to fill your Boost bar. | ||
| − | * | + | * Hitting an enemy with the [[Fan O'War]] and dousing them with Mad Milk will return more health per hit, but may alert the enemy to your presence. |
| − | + | ==== [[Flying Guillotine]] ==== | |
| + | {| class="wikitable grid" width="100%" style="text-align: center;" | ||
| + | ! class="header" width="17%" rowspan=2 | Weapon | ||
| + | ! class="header" width="16%" rowspan=2 | Kill Icon | ||
| + | ! class="header" width="17%" colspan=2 | Ammo | ||
| + | ! class="header" width="50%" colspan=4 | Damage | ||
| + | |- | ||
| + | ! class="header" width="8%" | Loaded | ||
| + | ! class="header" width="8%" | Carried | ||
| + | ! class="header" width="13%"| Any Range | ||
| + | ! class="header" width="13%"| Mini-crit | ||
| + | ! class="header" width="13%"| Critical | ||
| + | ! class="header" width="13%"| Recharge Time | ||
| + | |- | ||
| + | ! {{Table icon|Flying Guillotine|Craft}} | ||
| + | | align="center" | {{Icon killicon|weapon=Flying Guillotine}} | ||
| + | | 1 | ||
| + | | ∞ | ||
| + | | 50 | ||
| + | | 68 | ||
| + | | 150 | ||
| + | | 6 seconds / {{tooltip|4.5 seconds|On long range hit}} | ||
| + | |- | ||
| + | ! [[Bleeding]] | ||
| + | | align="center" | {{Icon killicon|weapon=Bleed}} | ||
| + | | N/A | ||
| + | | N/A | ||
| + | | 40 damage over 6 seconds | ||
| + | | 54 damage over 6 seconds | ||
| + | | 40 damage over 6 seconds | ||
| + | | N/A | ||
| + | |} | ||
| − | *The | + | * The Flying Guillotine is a thrown weapon that causes [[bleeding]] when it hits an enemy. |
| − | * | + | * The Flying Guillotine sacrifices your accurate Pistol for a stronger, harder-to-aim weapon with cooldown. One hit from the Flying Guillotine deals moderate damage, equivalent to several Pistol shots, if including bleed. However, you will lack a secondary weapon if you miss, so make sure your throws count. |
| − | * | + | * This weapon flies at an arc, and takes some time to reach its destination. Lead your target accordingly, as throwing where your enemy was will simply cause it to miss. |
| + | ** While it can be hard to aim, the Flying Guillotine is very hard to see when thrown. Enemies will usually fail to see your throw coming until it strikes them. | ||
| − | + | * The Flying Guillotine deals no damage to [[buildings]]: when thrown at any building, the weapon will simply bounce off. | |
| − | + | ** Conversely, enemy Pyros can [[Compression blast|airblast]] your thrown weapon and bounce it back at you. Be careful, as this will take away most of your health. | |
| − | * | ||
| − | * | + | * This weapon can be very useful on [[Payload]] matches because most players will be moving slowly and/or not paying attention while they are pushing the cart, so you can dish out a solid amount of damage. The added bleeding effect negates the healing from the cart and you can move in and easily kill the player with your Scattergun. |
| − | * | + | * Paired with the Force-A-Nature, you can use the Flying Guillotine to cripple an enemy's health greatly, and while they go to find a health kit, you can chase them down with the Force-A-Nature and finish them off with 2 quick shots to the back. This works better with lower-health classes like Sniper, Spy, or even another Scout, while leaving the classes with more health to your teammates. |
| − | * | + | * Bleeding damage included, a regular hit will fill up most of the [[Baby Face Blaster]]'s boost gauge in one hit. |
| − | * | + | * Long-range hits will decrease the already short recharge time. Try to hit shots from farther away to make it able to be thrown more often. |
| − | + | === Melee Weapons === | |
| + | ==== [[Bat]] + reskins ==== | ||
| + | {| class="wikitable grid" width="100%" style="text-align: center;" | ||
| + | ! class="header" width="20%" rowspan=2 | Weapon | ||
| + | ! class="header" width="20%" rowspan=2 | Kill Icon | ||
| + | ! class="header" width="15%" rowspan=2 | Attack Interval | ||
| + | ! class="header" width="40%" colspan=3 | Damage | ||
| + | |- | ||
| + | ! class="header" width="15%" | Point Blank | ||
| + | ! class="header" width="15%" | Mini-crit | ||
| + | ! class="header" width="15%" | Critical | ||
| + | |- | ||
| + | ! {{Table icon|Bat|Stock}} | ||
| + | | align="center" | {{Icon killicon|weapon=Bat}} | ||
| + | | rowspan="13" | 0.5 seconds | ||
| + | | rowspan="13" | 35 | ||
| + | | rowspan="13" | 47 | ||
| + | | rowspan="13" | 105 | ||
| + | |- | ||
| + | ! {{Table icon|Frying Pan|Promotional}} | ||
| + | | align="center" | {{Icon killicon|weapon=Frying Pan}} | ||
| + | |- | ||
| + | ! {{Table icon|Saxxy|Promotional}} | ||
| + | | align="center" | {{Icon killicon|weapon=Saxxy}} | ||
| + | |- | ||
| + | ! {{Table icon|Conscientious Objector|Drop}} | ||
| + | | align="center" | {{Icon killicon|weapon=Conscientious Objector}} | ||
| + | |- | ||
| + | ! {{Table icon|Freedom Staff|Promotional}} | ||
| + | | align="center" | {{Icon killicon|weapon=Freedom Staff}} | ||
| + | |- | ||
| + | ! {{Table icon|Bat Outta Hell|Drop}} | ||
| + | | align="center" | {{Icon killicon|weapon=Bat Outta Hell}} | ||
| + | |- | ||
| + | ! {{Table icon|Memory Maker|Promotional}} | ||
| + | | align="center" | {{Icon killicon|weapon=Memory Maker}} | ||
| + | |- | ||
| + | ! {{Table icon|Ham Shank|Drop}} | ||
| + | | align="center" | {{Icon killicon|weapon=Ham Shank}} | ||
| + | |- | ||
| + | ! {{Table icon|Golden Frying Pan|Reward}} | ||
| + | | align="center" | {{Icon killicon|weapon=Golden Frying Pan}} | ||
| + | |- | ||
| + | ! {{Table icon|Necro Smasher|Achievement}} | ||
| + | | align="center" | {{Icon killicon|weapon=Necro Smasher}} | ||
| + | |- | ||
| + | ! {{Table icon|Crossing Guard|Uncrate}} | ||
| + | | align="center" | {{Icon killicon|weapon=Crossing Guard}} | ||
| + | |- | ||
| + | ! {{Table icon|Batsaber|Uncrate}} | ||
| + | | align="center" | {{Icon killicon|weapon=Batsaber}} | ||
| + | |- | ||
| + | ! {{Table icon|Prinny Machete|Promotional}} | ||
| + | | align="center" | {{Icon killicon|weapon=Prinny Machete}} | ||
| + | |- | ||
| + | |} | ||
| − | * | + | * While the Bat swings quickly, it deals less than half the damage of other stock melee weapons. Each swing does 1/3 of a point-blank Scattergun shot, making it only useful as a backup weapon. |
| + | ** On servers with random critical hits, the Bat becomes much more effective due to its high swing speed, which lets it roll for more crits compared to other melee weapons. | ||
| − | *The | + | * The Bat works well as a finishing weapon. A couple fast hits on an injured enemy will most likely kill them. |
| + | ** If low on ammo or have no time to reload your weapons in the middle of a firefight, the Bat acts as a last resort weapon, although it is usually best you retreat. | ||
| − | * | + | * In a one-on-one melee fight, you will be able to get in more hits due to the Bat's swing speed and your own mobility, but your enemy will be able to kill you faster if he lands his. |
| − | * | + | * You may prefer to kill situationally-unaware or aiming-impaired Heavies with the Bat by circle strafing around them or jumping on top of their large bodies, but this strategy should not be used excessively otherwise. |
| − | * | + | * You may use the bat when ambushing an enemy who is constantly strafing (as melee weapons require less precise aim to hit). |
| − | * | + | * Unless under the conditions described above, you would generally be better off using your Scattergun. |
| − | + | ==== [[Sandman]] + reskins ==== | |
| + | {| class="wikitable grid" width="100%" style="text-align: center;" | ||
| + | ! class="header" width="20%" rowspan=2 | Weapon | ||
| + | ! class="header" width="20%" rowspan=2 | Kill Icon | ||
| + | ! class="header" width="20%" rowspan=2 | Attack Interval | ||
| + | ! class="header" width="40%" colspan=5 | Damage | ||
| + | |- | ||
| + | ! class="header" width="10%" | Point Blank | ||
| + | ! class="header" width="10%" | Mini-crit | ||
| + | ! class="header" width="10%" | Critical | ||
| + | ! class="header" width="10%" | Slow Time | ||
| + | ! class="header" width="10%" | Recharge Time | ||
| + | |- | ||
| + | ! rowspan="2" | {{Table icon|Sandman|Unlock}} | ||
| + | | align="center" | {{Icon killicon|weapon=Sandman}} | ||
| + | | 0.5 seconds | ||
| + | | 35 | ||
| + | | 47 | ||
| + | | 105 | ||
| + | | N/A | ||
| + | | N/A | ||
| + | |- | ||
| + | | align="center" | {{Icon killicon|weapon=Sandman Ball}} | ||
| + | | 0.25 seconds | ||
| + | | 15 | ||
| + | | 20 | ||
| + | | 45 | ||
| + | | 1-7 seconds | ||
| + | | 15 seconds | ||
| + | |- | ||
| + | |} | ||
| − | * | + | * The Sandman can launch a baseball with the secondary fire that will [[Slowdown|slow]] an enemy on hit for 1-8 seconds, depending on how long the ball has stayed in the air, but carrying this weapon will lower the Scout's maximum [[health]] by 15, to a total of 110. Hit targets are considerably slowed and cannot [[Jumping|jump]]. Hitting an enemy with the ball at maximum range will render the target immobile for the entire effect duration. The ball has a recharge rate of 10 seconds, but can instantly be reused by picking up a baseball that has been launched by the player or another Scout. |
| + | ** The ball counts as a [[Projectiles|projectile]], and can be [[Compression blast|airblasted]]. | ||
| + | ** A launched ball lingers for 3<!-- confirm?--> seconds if it hits someone, or 10 seconds if it doesn't. | ||
| − | + | * The Sandman can be a great support weapon for your team. Slowing a target that has a [[ÜberCharge#Kritzkrieg|Kritzkrieg]] activated on them can delay the enemy's push. | |
| − | [[ | + | ** It is also a great tool for slowing key targets, like [[Heavy|Heavies]], [[Medic]]s, or [[Sniper]]s, leaving them open to attack. |
| − | |||
| − | * | + | * If you are caught in a bad situation, the slowing effect can buy you enough time to get to safety. |
| + | ** Similarly, if you are in a situation to get the first strike, slowing your opponent can make it much easier for you to hit them before they can react. | ||
| − | * | + | * [[Critical hits]] lengthen the slow time. In servers with random critical hits enabled, the baseball also uses the same base critical chance of 15% as any melee weapon, making such criticals rather common on these servers. |
| − | * | + | * Aiming the baseball is not always easy due to its arc and travel time, but in certain areas, it can be. For example, the bridge in [[Badlands (Control Point)|Badlands]] is just long enough for you to hit an enemy with a moon shot (a maximum strength slow) and it is relatively easy to hit someone with it since the bridge is a straight pathway. |
| − | * | + | * When equipping the Sandman, be aware that you start with only 110 health. At point-blank range, a Soldier can kill you with one rocket, as can a Demoman with a well-placed stickybomb. If survival is a priority, it is better to switch to another melee weapon. |
| − | + | * A lone [[Engineer]] is a prime target for the Sandman's ball. While slowed, the Engineer may not be able to reach his Sentry Gun in time due to his decreased speed. Use this opportunity to attack the [[Sentry Gun]]. This is especially useful if the Engineer is a good distance away from his Sentry Gun. | |
| − | |||
| − | |||
| − | * | + | * Avoid using the Sandman with [[Crit-a-Cola]], as the 15 health deduction will allow enemies to kill you nearly instantly. |
| − | + | ==== [[Holy Mackerel]] + reskins ==== | |
| − | + | {| class="wikitable grid" width="100%" style="text-align: center;" | |
| + | ! class="header" width="20%" rowspan=2 | Weapon | ||
| + | ! class="header" width="20%" rowspan=2 | Kill Icon | ||
| + | ! class="header" width="20%" rowspan=2 | Attack Interval | ||
| + | ! class="header" width="40%" colspan=3 | Damage | ||
| + | |- | ||
| + | ! class="header" width="10%" | Point Blank | ||
| + | ! class="header" width="10%" | Mini-crit | ||
| + | ! class="header" width="10%" | Critical | ||
| + | |- | ||
| + | ! {{Table icon|Holy Mackerel|Craft}} | ||
| + | | align="center" | {{Icon killicon|weapon=Holy Mackerel}} | ||
| + | | rowspan="2" | 0.5 seconds | ||
| + | | rowspan="2" | 35 | ||
| + | | rowspan="2" | 47 | ||
| + | | rowspan="2" | 105 | ||
| + | |- | ||
| + | ! {{Table icon|Unarmed Combat|Craft}} | ||
| + | | align="center" | {{Icon killicon|weapon=unarmed combat}} | ||
| + | |- | ||
| + | |} | ||
| − | + | * The Holy Mackerel and Unarmed Combat are similar to the stock Bat. But each hit will be announced on the kill feed, and with a kill will show "FISH KILL!" or "ARM KILL!". | |
| − | + | * While the kill feed announcement may be aesthetic, hitting a cloaked Spy will be displayed on the kill feed. Conversely, triggering a [[Dead Ringer]] Spy's cloak or hitting a disguised Spy will not be displayed in the kill feed. This lets you track down Spies that attempt to feign death. | |
| − | + | * The Holy Mackerel and Unarmed Combat will make your presence known to any enemy who looks at the kill feed and draw attention to you. | |
| − | + | ==== [[Candy Cane]] ==== | |
| + | {| class="wikitable grid" width="100%" style="text-align: center;" | ||
| + | ! class="header" width="20%" rowspan=2 | Weapon | ||
| + | ! class="header" width="20%" rowspan=2 | Kill Icon | ||
| + | ! class="header" width="20%" rowspan=2 | Attack Interval | ||
| + | ! class="header" width="40%" colspan=3 | Damage | ||
| + | |- | ||
| + | ! class="header" width="10%" | Point Blank | ||
| + | ! class="header" width="10%" | Mini-crit | ||
| + | ! class="header" width="10%" | Critical | ||
| + | |- | ||
| + | ! {{Table icon|Candy Cane|Craft}} | ||
| + | | align="center" | {{Icon killicon|weapon=Candy Cane}} | ||
| + | | 0.5 seconds | ||
| + | | 35 | ||
| + | | 47 | ||
| + | | 105 | ||
| + | |} | ||
| − | * | + | * The Candy Cane drop a small Health pack, regardless of what weapon the player was using in order to kill the enemy. As a drawback, the Scout takes 25% more damage from explosives. |
| − | * | + | * Killing an enemy with any of your weapons while you have the Candy Cane equipped will drop a health kit. |
| + | ** Use the Candy Cane to check for [[Dead Ringer]] Spies, as feigned deaths will not drop Health kits. | ||
| − | + | * The Candy Cane can be a double-edged sword when fighting groups of enemies. While the dropped Health packs can allow you and your teammates to stay in the fight for longer, they can also be picked up by the enemy, making them more difficult to kill. Use it when pushing the enemy back. | |
| − | |||
| − | *The | ||
| − | * | + | * A successful kill with the Candy Cane in [[Medieval Mode]] will cause two health kits to be dropped instead of one. |
| − | * | + | * Try to avoid Soldiers and Demomen due to the explosive damage penalty. With the Candy Cane equipped, a direct hit from most of their primary weapons at close range will instantly kill you. |
| + | ** With this knowledge, consider equipping this weapon with others that give you additional damage vulnerability, such as the Crit-a-Cola, may be useful, as any hit from an explosive would kill you anyway, even without the marked-for-death effect. | ||
| + | ** You can also use this fact to train yourself to dodge better, as getting hit by the explosive damage punishes you for not dodging well. | ||
| − | * | + | * Using the Mad Milk with the Candy Cane can allow you to heal yourself and teammates if no Medics or Health kits are nearby. |
| − | *The | + | * The Candy Cane is also useful when you have a damaged Medic nearby. With the Medic's healing, you can easily secure a kill, which will drop a small medkit for your Medic. |
| − | ==Weapon | + | ==== [[Boston Basher]] + reskins ==== |
| + | {| class="wikitable grid" width="100%" style="text-align: center;" | ||
| + | ! class="header" width="17%" rowspan=2 | Weapon | ||
| + | ! class="header" width="16%" rowspan=2 | Kill Icon | ||
| + | ! class="header" width="20%" rowspan=2 | Attack Interval | ||
| + | ! class="header" width="50%" colspan=5 | Damage | ||
| + | |- | ||
| + | ! class="header" width="10%" | Point Blank | ||
| + | ! class="header" width="10%" | Mini-crit | ||
| + | ! class="header" width="10%" | Critical | ||
| + | |- | ||
| + | ! {{Table icon|Boston Basher|Craft}} | ||
| + | | align="center" | {{Icon killicon|weapon=Boston Basher}} | ||
| + | | rowspan="2" |0.5 seconds | ||
| + | | rowspan="2" |35 | ||
| + | | rowspan="2" |47 | ||
| + | | rowspan="2" |105 | ||
| + | |- | ||
| + | ! {{Table icon|Three-Rune Blade|Promotional/Craft}} | ||
| + | | align="center" | {{Icon killicon|weapon=Three-Rune Blade}} | ||
| + | |- | ||
| + | ! [[Bleed]]ing | ||
| + | | align="center" | {{Icon killicon|weapon=Bleed}} | ||
| + | | N/A | ||
| + | | 40 damage over 5 seconds | ||
| + | | 50 damage over 5 seconds | ||
| + | | N/A | ||
| + | |} | ||
| − | + | * The Boston Basher will apply [[Bleeding|bleed]] to an enemy hit by it for 5 seconds (for a total of 75 damage), but on miss, it will apply 18 base damage and bleed effect to the user at a reduced rate (a total of 48 damage). The user will not be damaged when hitting a teammate, any world geometry, or props. | |
| − | + | * Be cautious and accurate with your shots; missing can take out up to half your health. | |
| − | + | ** Spamming the Boston Basher will usually result in death; it is advisable to only go for 1-2 hits per attack on a target. | |
| + | ** If you end up making yourself bleed, you can stop the bleeding by using items such as Mad Milk, Bonk! Atomic Punch, or a health kit. | ||
| − | + | * A successful hit including bleed will deal 75 damage, making hit-and-run tactics even more effective. Run in, melee your target once to soften him up, and fire Scattergun shots as you retreat. | |
| + | ** If you are losing a one-on-one fight and need to escape or are likely to die, hitting your opponent as you run away may be enough to kill them. This is more effective on light classes like other Scouts, although heavier classes may still be forced to retreat. | ||
| − | + | * Ambushing is key with the Boston Basher. If an enemy is unaware of your presence, run in and land a few hits with the Basher before finishing them off with your Scattergun. | |
| − | + | * By swinging right after jumping, you can boost yourself with the self-damage of the Boston Basher to heights comparable to the Pyro's [[Detonator]] jump. However, this costs a lot of health, so take note of where the map's health packs are. | |
| + | ** By combining the boost of the Boston Basher with the ability of the [[Force-A-Nature]] to perform a third jump, you can jump over long stretches of a map. | ||
| − | + | * By hitting yourself while being healed, you can help a friendly [[Medic]] build [[ÜberCharge]] faster. | |
| − | + | * The bleed effect can be useful for preventing [[Spy|Spies]] from escaping by [[cloak]]ing. However, do not try to hit a Spy that is already invisible, or you may weaken yourself and allow him to finish you off with his Revolver. | |
| + | ** Hitting a teammate will not result in damage, this can be used for Spy-checking. | ||
| − | + | * If you land a successful hit on an enemy with the Boston Basher while the enemy is coated in [[Mad Milk]], the bleed damage will heal you. This can reduce the health lost from missed attacks. | |
| − | |||
| − | |||
| − | |||
| − | + | * The [[Crit-a-Cola]] can be useful with the Boston Basher; self-inflicted damage will not be boosted by Crit-a-Cola's effect, and the mini-crits apply to bleed damage making it an even better ambush and hit-and-run tactic against enemies because of the increased damage dealt. | |
| − | |||
| − | === | + | ==== [[Sun-on-a-Stick]] ==== |
| + | {| class="wikitable grid" width="100%" style="text-align: center;" | ||
| + | ! class="header" width="20%" rowspan=2 | Weapon | ||
| + | ! class="header" width="20%" rowspan=2 | Kill Icon | ||
| + | ! class="header" width="20%" rowspan=2 | Attack Interval | ||
| + | ! class="header" width="40%" colspan=3 | Damage | ||
| + | |- | ||
| + | ! class="header" width="10%" | Point Blank | ||
| + | ! class="header" width="10%" | Mini-crit | ||
| + | ! class="header" width="10%" | Critical | ||
| + | |- | ||
| + | ! {{Table icon|Sun-on-a-Stick|Promotional/Craft}} | ||
| + | | align="center" | {{Icon killicon|weapon=Sun-on-a-Stick}} | ||
| + | | 0.5 seconds | ||
| + | | 26 | ||
| + | | 35 | ||
| + | | 79 | ||
| + | |} | ||
| − | + | * The Sun-on-a-Stick delivers 25% less damage than the stock Bat, but guarantees a critical hit whenever you strike a [[Fire|burning]] enemy. Additionally, it grants the user 25% fire resistance when it is the active weapon. | |
| − | + | * Equipping the Sun-on-a-Stick usually comes down to whether you have a Pyro on your team, as the critical hits only come into play when your opponent is suffering from afterburn. | |
| − | + | ** Likewise, fire resistance is virtually useless if there are no Pyros on the enemy team, and flat-out worthless if there are no enemies capable of inflicting fire damage at all, such as [[Cow Mangler 5000]]-wielding Soldiers. | |
| − | + | * While the Sun-on-a-Stick's critical hits on burning targets are powerful, your Scattergun deals damage much more reliably. Because of this, attacking with the weapon is generally a bad idea unless you are ambushing a burning enemy. | |
| − | + | * The Sun-on-a-Stick's passive fire resistance is usually more useful than its highly situational critical hits, giving you the extra survivability needed to retreat to a health source when you're on fire. | |
| − | + | * The best game mode to use this weapon in is Medieval mode. Snipers and Pyros can light opponents on fire with the [[Huntsman]] and the [[Sharpened Volcano Fragment]]. Otherwise, it is overall a weak weapon to use for combat, and may not be reliable in a melee fight. | |
| − | |||
| − | |||
| − | === | + | ==== [[Fan O'War]] ==== |
| − | + | {| class="wikitable grid" width="100%" style="text-align: center;" | |
| + | ! class="header" width="20%" rowspan=2 | Weapon | ||
| + | ! class="header" width="20%" rowspan=2 | Kill Icon | ||
| + | ! class="header" width="20%" rowspan=2 | Attack Interval | ||
| + | ! class="header" width="40%" colspan=4 | Damage | ||
| + | |- | ||
| + | ! class="header" width="13%" | Point Blank | ||
| + | ! class="header" width="13%" | Critical | ||
| + | ! class="header" width="13%" | Marked for Death Time | ||
| + | |- | ||
| + | ! {{Table icon|Fan O'War|Promotional/Craft}} | ||
| + | | align="center" | {{Icon killicon|weapon=Fan O'War}} | ||
| + | | 0.5 seconds | ||
| + | | 9 | ||
| + | | 27 | ||
| + | | 15 seconds | ||
| + | |} | ||
| − | + | * The Fan O'War will "marked for death" when hit an enemy. The "marked for death" is indicated by the skull with crossbones floating above their head, and all damage they take will be mini-crits. The "marked for death" effect lasts 15 seconds. The Fan O'War also deals critical hits when it would normally mini-crit. As a drawback, the Fan O' War deals 75% less damage on hit. | |
| + | ** The Fan O' War's effect can only be applied to one enemy at a time. | ||
| − | + | * Remember that the Fan O'War is essentially the melee equivalent of [[Crit-a-Cola]]; while you do not receive increased damage from enemies, it still requires that you get within point-blank range of enemies. | |
| + | ** Unlike the Crit-a-Cola, you still get access to your secondary weapon, so the Fan O' War is a good choice if you do not use your melee weapon for combat often. | ||
| − | + | * The Fan O'War deals 9 damage against unmarked players, and 26 damage for subsequent hits. Like most melee weapons, it is not a good choice for directly dealing damage. Hit the enemy once, then use your primary and secondary weapons to take full advantage of the damage bonus. | |
| − | + | * Ambushing and good maneuvering are crucial with the Fan O'War; whether you are using it on the front lines or the opposing base, remember that surprise is key to landing a hit. Rushing straight towards an enemy with a melee weapon is never a good strategy. | |
| + | ** Try attacking enemies that are alone, so that you are not outnumbered once you mark an enemy for death. | ||
| + | ** If you are cornered, hit key targets like [[Heavy|Heavies]] and [[Medic]]s. Your teammates may be able to kill them even if you die. | ||
| − | + | * Unlike [[Jarate]], the mark for death persists for 15 seconds and its duration is not reduced if the target is being healed, making the Fan O'War better at weakening key targets. | |
| − | + | * The Fan O'War is very effective for countering [[Spy|Spies]]. Even if a marked Spy [[cloak]]s with a [[Dead Ringer]], the skull symbol will remain above his head, nullifying his invisibility. | |
| − | + | ==== [[Atomizer]] ==== | |
| − | + | {| class="wikitable grid" width="100%" style="text-align: center;" | |
| − | + | ! class="header" width="20%" rowspan=2 | Weapon | |
| − | + | ! class="header" width="20%" rowspan=2 | Kill Icon | |
| − | + | ! class="header" width="20%" rowspan=2 | Attack Interval | |
| − | + | ! class="header" width="40%" colspan=5 | Damage | |
| − | + | |- | |
| − | + | ! class="header" width="10%" | On Enemies | |
| − | + | ! class="header" width="10%" | On Buildings | |
| − | + | ! class="header" width="10%" | Mini-Critical | |
| − | + | ! class="header" width="10%" | Critical | |
| − | + | |- | |
| + | ! {{Table icon|Atomizer|Craft}} | ||
| + | | align="center" | {{Icon killicon|weapon=Atomizer}} | ||
| + | | 0.5 seconds | ||
| + | | 30 | ||
| + | | 35 | ||
| + | | 40 | ||
| + | | 89 | ||
| + | |} | ||
| − | + | * The Atomizer grants the Scout the ability to triple jump while holding the weapon and mini-crit enemies while airborne, but also deploys 50% slower in addition to 15% less damage done to players. | |
| + | ** The Atomizer deals less damage to players, but not to buildings. Using it to take out an enemy Teleporter or Dispenser can conserve primary and secondary ammo while doing regular damage. | ||
| − | + | * Like the Fan O'War, the Atomizer is more of a utility than a weapon. If you do not use your melee enough for its penalties to matter, consider using the Atomizer. | |
| − | * | ||
| − | |||
| − | |||
| − | |||
| − | + | * Use the Triple jump while attacking an enemy to be able to get a [[Mini-Crit]] and deal 40 damage. This Mini-Crit can be utilized expertly while dealing with slow classes such as the [[Heavy]] or the [[Soldier]] as they will be distracted and getting Mini-crits hit towards them and they not even noticing it. | |
| − | * | ||
| − | |||
| − | |||
| − | |||
| − | + | * The Atomizer's third jump can be very useful when retreating, as it gives you another jump to dodge enemy attacks. This triple jump can be used for distracting or confusing slow classes when going over them for a sneaky attack. Its switch speed penalty makes it less useful in direct combat, however; you cannot fire your Scattergun while holding the Atomizer. | |
| − | * | ||
| − | |||
| − | |||
| − | |||
| − | + | * Using the Atomizer's third jump, you can often take shortcuts into places in the map you could not otherwise reach. Try using them for devastating flanks. | |
| − | * | ||
| − | |||
| − | |||
| − | |||
| − | + | * With the [[Force-A-Nature]] equipped, you can perform a [[Jumping#Quad Jump|quadruple jump]] by combining the Atomizer's triple jump with the Force-A-Nature's self-inflicted [[Knockback|recoil]]. | |
| − | * | ||
| − | |||
| − | |||
| − | |||
| − | |||
| − | + | * The Atomizer does not pair well with the [[Baby Face's Blaster]], as the Blaster loses most of its speed boost with each jump. Using your third jump will lose all your Boost. | |
| − | * | ||
| − | |||
| − | |||
| − | ===[[ | + | ==== [[Wrap Assassin]] ==== |
| − | + | {| class="wikitable grid" width="100%" style="text-align: center;" | |
| + | ! class="header" width="20%" rowspan=2 | Weapon | ||
| + | ! class="header" width="20%" rowspan=2 | Kill Icon | ||
| + | ! class="header" width="20%" rowspan=2 | Attack Interval | ||
| + | ! class="header" width="40%" colspan=5 | Damage | ||
| + | |- | ||
| + | ! class="header" width="10%" | Point Blank | ||
| + | ! class="header" width="10%" | Mini-crit | ||
| + | ! class="header" width="10%" | Critical | ||
| + | ! class="header" width="10%" | Recharge Time | ||
| + | |- | ||
| + | ! rowspan="2" | {{Table icon|Wrap Assassin|Craft}} | ||
| + | | align="center" | {{Icon killicon|weapon=Wrap Assassin}} | ||
| + | | 0.5 seconds | ||
| + | | 11 | ||
| + | | 17 | ||
| + | | 32 | ||
| + | | N/A | ||
| + | |- | ||
| + | | align="center" | {{Icon killicon|weapon=Sandman Ball}} | ||
| + | | 0.25 seconds | ||
| + | | 15 | ||
| + | | 20 | ||
| + | | 45 | ||
| + | | 11.25 seconds | ||
| + | |- | ||
| + | ! [[Bleeding]] | ||
| + | | align="center" | {{Icon killicon|weapon=Bleed}} | ||
| + | | 40 damage over 5 seconds | ||
| + | | N/A | ||
| + | | N/A | ||
| + | | N/A | ||
| + | | N/A | ||
| + | |} | ||
| − | * | + | * The Wrap Assassin allows you to launch a Bauble with secondary fire similar to the [[Sandman]]'s baseball, but causes damage and [[bleeding]] on hit instead of slowing. The bauble also breaks on contact with a surface, dealing negligible damage to enemies around it, or the Scout himself. The Wrap Assassin's ball regenerates 25% faster than the Sandman's, allowing for more shots. The drawback is its melee damage, which is reduced by 65%. |
| − | + | * The Wrap Assassin is a Sandman variant that sacrifices its [[Slowdown|slow]] ability for a more frequent damage option and no maximum health reduction. Its melee damage reduction should be negligible if you use a primary weapon at close range. | |
| + | ** As the bauble works similarly to the Sandman's ball, most of the Sandman's tactics work for this weapon. | ||
| − | * | + | * Try to aim at groups of people clustered together, such as near a control point, to increase your chance of hitting a target. |
| + | ** The ornament also shatters if it hits anything, dealing 4-13 damage in an area-of-effect. This shatter damage does not cause bleeding. Rely on direct hits to deal damage. | ||
| − | * | + | * The bleed damage of the Wrap Assassin can greatly benefit from the Crit-a-Cola, as it will deal a greater amount of damage to enemies. |
| − | * | + | * The Wrap Assassin's ball can be used as an opening attack, or to to harass and keep pressure on distant enemies like [[Snipers]], with the damage over time effect. |
| − | + | * Although the Flying Guillotine does more damage and has a faster recharge time, the Wrap Assassin allows you to choose a secondary of your preference and retain a weapon that causes a bleeding effect. | |
| + | ** However, using both at once can make you a damage-over-time powerhouse, as bleed damage stacks with multiple bleeding weapons. You will do up to 146 damage if both weapons hit. | ||
| + | ** Use the [[Force-A-Nature]] alongside the Wrap Assassin and Flying Guillotine to deal up to 259 damage. | ||
| − | + | == {{Anchor|Taunt Attacks}}[[Taunts#Kill taunts|Kill taunts]] == | |
| − | + | === {{Anchor|Home Run}} [[Grand Slam]] === | |
| + | {| class="wikitable grid" width="100%" style="text-align: center;" | ||
| + | ! class="header" width="17%" | | ||
| + | ! class="header" width="16%" | Kill Icon | ||
| + | ! class="header" width="10%" | Weapon | ||
| + | ! class="header" width="10%" | Damage | ||
| + | ! class="header" width="10%" | Duration | ||
| + | ! class="header" width="37%" | Details | ||
| + | |- style="height: 110px;" | ||
| + | | {{Table icon|Grand Slam}} | ||
| + | | align="center" | {{Icon killicon|weapon=Grand Slam}} | ||
| + | | [[Sandman]]<br>[[Atomizer]] | ||
| + | | 500 with Sandman, 425 with Atomizer | ||
| + | | 5 seconds | ||
| + | | The Scout points to the sky, winds up, and swings a deadly blow. | ||
| + | |} | ||
| − | + | * It is advisable to only use your killing taunt on Snipers with tunnel vision. As with most other killing taunts, it can also be used to retaliate during Humiliation as the losing team. | |
| − | * | + | * You can use this taunt attack after drinking Bonk! Atomic Punch to be invulnerable during the taunt. Make sure to use it wisely because you can only do the taunt once in the duration of the Bonk! Atomic Punch. You can, however, still be knocked back, ruining the taunt attempt. It can prove useful to walk into a large crowd and perform the taunt, as unaware players might not spot you performing the taunt. However, this will likely result in getting yourself killed. |
| − | |||
| − | |||
| − | + | * This taunt is completely quiet until executed. However, the kill gives off a much louder sound upon {{botignore|execution}}. Be sure to get ready for any attention you'll draw to yourself from the loud cheering sound after a successful Grand Slam taunt kill. | |
| − | + | == Weapon combinations == | |
| − | + | {| class="wikitable grid collapsible collapsed" width="65%" | |
| − | + | |- | |
| + | ! colspan=4 class="header" | Example Combinations | ||
| + | |- | ||
| + | ! colspan=3 class="header" | Combo | ||
| + | ! class="header" | Usage | ||
| + | |- | ||
| + | ! align="center" | {{Icon weapon|weapon=Scattergun |icon-size=40x40px}} | ||
| + | {{Icon weapon|weapon=Force-A-Nature |icon-size=40x40px}} <br /> | ||
| + | '''[[Scattergun]]''' or '''[[Force-A-Nature]]''' | ||
| + | ! align="center" | {{Icon weapon|weapon=Pistol |icon-size=40x40px}} | ||
| + | {{Icon weapon|weapon=Bonk! Atomic Punch|icon-size=40x40px}} | ||
| + | '''[[Pistol]]''' or '''[[Bonk! Atomic Punch]]''' | ||
| + | ! align="center" | {{Icon weapon|weapon=Bat|icon-size=40x40px}} | ||
| + | {{Icon weapon|weapon=Sandman|icon-size=40x40px}} | ||
| + | '''[[Bat]]''' or '''[[Sandman]]''' | ||
| + | | | ||
| − | + | This is a balanced, offensive Scout set that focuses on the central role of Scout: flanking and picking. | |
| − | + | The Scattergun's larger magazine size compared to the Force-A-Nature's makes up for the lack of a Pistol, while the Force-A-Nature allows you to finish off any injured opponents or push away other defenders that may stand in your way. | |
| − | |||
| − | |||
| − | |||
| − | |||
| − | |||
| − | |||
| − | + | Bonk! Atomic Punch is most useful when you need to get by enemy Sentry Guns in order to run past unharmed with relative ease, but is not much to fully stop a Sentry for good, or for mid-ranged self defense, unlike the Pistol. | |
| − | |||
| − | |||
| − | + | If you need to augment your survivability, swap the Sandman for the Bat. The Sandman's ability to hit a slowing baseball, however, can serve as a last minute attack when either Scattergun needs to be reloaded, or as an offensive mechanism to get in a couple of easy hits. | |
| − | |||
| − | |||
| − | |||
| − | + | Use caution while using the Sandman, however; the Sandman's -15 health attribute drops your health down to only 110, allowing Soldiers to kill you with one attack at close range. Should you not land a Scattergun kill, either close in again with the Pistol or use your slowing ball as you retreat to prevent the enemy from following you. | |
| − | |||
| − | |||
| − | |||
| − | |||
| − | ===== | + | |- |
| − | + | ! align="center" | {{Icon weapon|weapon=Force-A-Nature|icon-size=40x40px}} | |
| − | + | {{Icon weapon|weapon=Soda Popper|icon-size=40x40px}}<br /> | |
| − | + | '''[[Force-A-Nature]]''' or '''[[Soda Popper]]''' | |
| + | ! align="center" | {{Icon weapon|weapon=Flying Guillotine|icon-size=100x100px}} | ||
| + | '''[[Flying Guillotine]]''' | ||
| + | ! align="center" | {{Icon weapon|weapon=Wrap Assassin|icon-size=100x100px}} | ||
| + | '''[[Wrap Assassin]]''' | ||
| − | + | | | |
| − | + | This loadout focuses on damage over time, with your bleed damage projectiles doing most of your work. As such, this combination of weapons works best at medium range, and is generally only effective against a single target. | |
| − | |||
| − | |||
| − | + | By constantly flinging both the Flying Guillotine and the Wrap Assassin's baubles into groups of enemies, you can help your team by softening up to two enemies each time. However, this combination shines against a single target, as bleed damage stacks if they are caused by separate weapons. If you find a key target, landing both projectiles will double the bleed damage and inflict both weapon's base damage as well, which is enough to kill any 125-health class over time and severely weaken tougher classes. For anyone who survives, simply blast them with your primary weapon. | |
| − | + | Your primary weapons generally help you make up for your close-range weakness, or to get behind enemy lines to ambush them with this combo. The Force-A-Nature allows you to knock back enemies that get too close for you to throw your projectiles safely, gives you a very powerful retaliation option, and can help with getting behind enemies with its force jump so you can catch them offguard. If you want to take ambushing one step further, the Soda Popper's multiple jumps will make it even easier to get behind enemy lines, where you can constantly pester your opponents. | |
| − | |||
| − | |||
| − | |||
| − | |||
| − | |||
| − | + | As effective as this combo may be, remember that you will lack a reliable weapon for at least 6 seconds if you throw both projectiles at once. Fending off more than one opponent will be more difficult for you, so land your bleed weapons, retreat, and return once you are recharged. | |
| − | |||
| − | |||
| − | |||
| − | |||
| − | |||
| − | |||
| − | ===== | + | |- |
| − | + | ! align="center" | {{Icon weapon|weapon=Shortstop|icon-size=100x100px}} | |
| − | + | '''[[Shortstop]]''' | |
| − | + | ! align="center" | {{Icon weapon|weapon=Crit-a-Cola|icon-size=100x100px}} | |
| − | + | '''[[Crit-a-Cola]]''' | |
| − | + | ! align="center" | {{Icon weapon|weapon=Boston Basher|icon-size=40x40px}} | |
| + | {{Icon weapon|weapon=Wrap Assassin|icon-size=40x40px}}<br /> | ||
| + | '''[[Boston Basher]]''' or '''[[Wrap Assassin]]''' | ||
| + | | | ||
| − | + | This combination turns the Shortstop into a viable way to deal large amounts of burst damage at higher ranges than you usually can, and increases the power of your bleed damage. | |
| − | |||
| − | |||
| − | |||
| − | |||
| − | |||
| − | + | As mini-crits do not suffer from [[damage]] fall-off, you are lethal from all ranges (for short periods of time). Because of this, the Shortstop will deliver strong and accurate damage with mini-crits even at range, and paired with 4 rounds per magazine and a fast reload, it is potentially lethal even to Heavies if you get close. | |
| − | |||
| − | |||
| − | |||
| − | |||
| − | + | As bleeding damage is also affected by your mini-crit boost, pairing it with a bleeding melee weapon can be very powerful as well. If you prefer to stay back at a distance, the Wrap Assassin will maximize your damage potential at from afar if you land a bauble while you are mini-crit boosted. The Boston Basher works better for those who want to get in to do damage. However, given that Crit-a-Cola also makes your self-inflicted hits hurt even more as well, it is important to have a nearby healing source or Medic in case you miss with the Boston Basher. | |
| − | |||
| − | |||
| − | |||
| − | ===[[ | + | |- |
| + | ! align="center" | {{Icon weapon|weapon=Shortstop|icon-size=40x40px}} | ||
| + | {{Icon weapon|weapon=Scattergun|icon-size=40x40px}}<br /> | ||
| + | '''[[Shortstop]]''' or '''[[Scattergun]]''' | ||
| + | ! align="center" | {{Icon weapon|weapon=Mad Milk|icon-size=100x100px}} | ||
| + | '''[[Mad Milk]]''' | ||
| + | ! align="center" | {{Icon weapon|weapon=Sandman|icon-size=100x100px}} | ||
| + | '''[[Sandman]]''' | ||
| + | | | ||
| − | + | This is a great combo when you want to help your team survive longer and aid them with pushes. | |
| − | |||
| − | |||
| − | |||
| − | |||
| − | |||
| − | + | The Shortstop and Scattergun are excellent weapons when you do not have your Pistol equipped. The Scattergun has its reliable six shots and high damage at close range that lets you take down targets easily, while the Shortstop lets you do more damage at a distance if safety is imperative. When a Medic is not around, the Mad Milk's ability will provide your teammates with a well-appreciated opportunity to heal when they hit a soaked enemy, and if you do have a Medic, it will make his job infinitely easier and improves the effectiveness of your team's pushes, as they will survive longer on the battlefield. Mad Milk will also reveal cloaked Spies, aiding your team with Spy checking, and will also extinguish any teammates on [[fire]]. The Sandman's ball can slow key targets and make aiming much easier for you and your teammates. | |
| − | |||
| − | |||
| − | |||
| − | |||
| − | ===== | + | |- |
| − | + | ! align="center" | {{Icon weapon|weapon=Shortstop|icon-size=100x100px}} | |
| − | + | '''[[Shortstop]]''' | |
| − | + | ! align="center" | {{Icon weapon|weapon=Mad Milk|icon-size=100x100px}} | |
| − | + | '''[[Mad Milk]]''' | |
| − | + | ! align="center" | {{Icon weapon|weapon=Candy Cane|icon-size=100x100px}} | |
| − | + | '''[[Candy Cane]]''' | |
| + | | | ||
| − | + | This is an ideal loadout for Medieval mode. | |
| − | |||
| − | |||
| − | |||
| − | |||
| − | + | Since the only explosive attack is from the Demoman's [[Ullapool Caber]], the Candy Cane coupled with the Mad Milk can help you and your teammates survive long enough to capture a point. | |
| − | |||
| − | |||
| − | |||
| − | |||
| − | + | In normal gameplay, however, you need to be careful to not engage in front line combat unless required because of the likelihood of stray explosives. The Shortstop will help you with this vulnerability, as it increases the amount of knockback you experience and can send you flying into safety if you are hit by an explosion. Because of the additional health this loadout provides to your team, it is also very useful in Arena mode. | |
| − | |||
| − | |||
| − | |||
| − | ===[[ | + | |- |
| + | ! align="center" | {{Icon weapon|weapon=Scattergun|icon-size=100x100px}} | ||
| + | '''[[Scattergun]]''' | ||
| + | ! align="center" | {{Icon weapon|weapon=Pistol|icon-size=100x100px}} | ||
| + | '''[[Pistol]]''' | ||
| + | ! align="center" | {{Icon weapon|weapon=Fan O'War|icon-size=100x100px}} | ||
| + | '''[[Fan O'War]]''' | ||
| + | | | ||
| − | + | This combo uses the Fan O'War to enhance the capabilities of your Stock weapons, which have the the most ammunition and the overall best power output. | |
| − | |||
| − | |||
| − | |||
| − | |||
| − | |||
| − | |||
| − | + | Your standard fare of Scattergun and Pistol bullets will help you in general situations, as they are dependable overall with few situational weaknesses. Using the Fan O'War will make the best out of a bad situation, since it will increase your weapon's already high damage. Mark your target for death before going up to them, such as a Heavy with the [[Natascha]], or a Soldier or Demoman in a tight corridor. Consider using this loadout when you know you will be facing high HP enemies. | |
| − | |||
| − | |||
| − | |||
| − | |||
| − | ===== | + | |- |
| − | + | ! align="center" | {{Icon weapon|weapon=Scattergun|icon-size=100x100px}} | |
| − | + | '''[[Scattergun]]''' | |
| − | + | ! align="center" | {{Icon weapon|weapon=Mad Milk|icon-size=100x100px}} | |
| − | + | '''[[Mad Milk]]''' | |
| − | + | ! align="center" | {{Icon weapon|weapon=Sun-on-a-Stick|icon-size=100x100px}} | |
| + | '''[[Sun-on-a-Stick]]''' | ||
| + | | | ||
| − | + | This combination is recommended if you are working with a Pyro on your team, or are trying to counter an enemy Pyro. | |
| − | |||
| − | |||
| − | |||
| − | |||
| − | + | The Sun-on-a-Stick's guaranteed critical hits on burning players allows for easy kills when working in conjunction with a Pyro. Mad Milk will provide more health for Pyros against a group of enemies, and allows them guaranteed critical hits if they are using the [[Neon Annihilator]]. The Scattergun can damage burning enemies from a distance, hastening their death due to afterburn, or weaken high HP classes such as the Heavy or Soldier before your Pyro buddy runs in. This loadout also works well in Medieval Mode if you have a Pyro coordinating with you on your team. | |
| − | |||
| − | |||
| − | |||
| − | |||
| − | ===== | + | |- |
| − | + | ! align="center" | {{Icon weapon|weapon=Shortstop|icon-size=40x40px}} | |
| − | + | {{Icon weapon|weapon=Force-A-Nature|icon-size=40x40px}}<br /> | |
| − | + | '''[[Shortstop]]''' or '''[[Force-A-Nature]]''' | |
| − | + | ! align="center" | {{Icon weapon|weapon=Mad Milk|icon-size=100x100px}} | |
| + | '''[[Mad Milk]]''' | ||
| + | ! align="center" | {{Icon weapon|weapon=Fan O'War|icon-size=100x100px}} | ||
| + | '''[[Fan O'War]]''' | ||
| + | | | ||
| − | + | This setup is for an entirely support-based Scout. Because you will lack a true weapon other than your primary weapon, play carefully and stay with your team, supporting them with your utility and providing covering fire. | |
| − | + | Mad Milk can be thrown onto any approaching enemies to allow your teammates to restore health, while the Fan O'War allows your team to deal more damage to high-priority targets. Combine both on a single target to grant even higher healing while increasing damage done. Both of these weapons can also be used to reveal cloaked or disguised Spies; Mad Milk will drip from them when hit, and the 'Marked for Death' symbol will remain above their heads for 10 seconds after a successful hit. Both of them are also unaffected by the Dead Ringer, making them more effective. The Shortstop's fast firing rate, accuracy at medium range, and short reload time makes up for a lack of a Pistol (or melee weapon), whereas the Force-A-Nature makes up for a lack of firepower, and at close ranges can knock enemy players away from important locations and allow you to reach more advantageous positions to throw Mad Milk or flank from. | |
| − | |||
| − | |||
| − | |||
| − | |||
| − | |||
| − | |||
| − | + | With the Force-A-Nature, this is also a great loadout for Mann vs. Machine. As the Scout's main roles are money collection and team support, there is little need to invest points in anything but upgrades for Mad Milk and resistances. As such, the MvM Scout tends rely on the effects of his primary and melee weapons, rather than on any damage they can deal. | |
| − | |||
| − | |||
| − | |||
| − | |||
| − | + | For instance, the knockback from Force-A-Nature can either temporarily stop giant robots in their tracks, or send bomb-carrying Robots flying backward, thus causing them to lose ground. Mad Milk, of course, is the staple for the Scout not only due to the slowing upgrade, but also due to the healing bonus given to the entire team. The Fan O'War, while dealing little damage on hit, marks its target for death. This is primarily used against giant Robots, as the mark causes the giant robot to take mini-crit damage from nearly all sources, allowing your team to destroy it faster. | |
| − | |||
| − | |||
| − | |||
| − | |||
| − | ===== | + | |- |
| − | + | ! align="center" | {{Icon weapon|weapon=Force-a-Nature|icon-size=100x100px}} | |
| − | + | '''[[Force-A-Nature]]''' | |
| − | + | ! align="center" | {{Icon weapon|weapon=Pistol|icon-size=40x40px}} | |
| + | {{Icon weapon|weapon=Pretty Boy's Pocket Pistol|icon-size=40x40px}}<br /> | ||
| + | '''[[Pistol]]''' or '''[[Pretty Boy's Pocket Pistol]]''' | ||
| + | ! align="center" | {{Icon weapon|weapon=Atomizer|icon-size=100x100px}} | ||
| + | '''[[Atomizer]]''' | ||
| + | | | ||
| − | + | This combination allows you to reach tremendous heights at the cost of firepower. | |
| − | |||
| − | |||
| − | |||
| − | + | By using the Atomizer's triple jump ability in combination with the Force-A-Nature's knockback jumps to pull off a quadruple jump, you will be able to reach places that only a Soldier or Demoman could reach with explosive jumping. However, as the Atomizer does little damage, the best way to protect yourself is with Force-A-Nature blasts, followed by a retreat with the Pistol if you do not have enough time to reload the Force-A-Nature. Use the Pretty Boy's Pocket Pistol when backing up to gain some additional health. | |
| − | |||
| − | |||
| − | ===[[ | + | |- |
| + | ! align="center" | {{Icon weapon|weapon=Scattergun|icon-size=100x100px}} | ||
| + | '''[[Scattergun]]''' | ||
| + | ! align="center" | {{Icon weapon|weapon=Mad Milk|icon-size=100x100px}} | ||
| + | '''[[Mad Milk]]''' | ||
| + | ! align="center" | {{Icon weapon|weapon=Boston Basher|icon-size=100x100px}} | ||
| + | '''[[Boston Basher]]''' | ||
| + | | | ||
| − | + | This loadout is good for survivability and is best when combining the Mad Milk's self-healing with the Boston Basher's ability to cause [[Bleeding|bleed]], causing self-healing over time. | |
| − | + | The Scattergun can quickly dispatch enemies at close range for burst healing when enemies are covered in Mad Milk. Milked enemies will also help you negate self-inflicted damage if you happen to accidentally hit yourself with the Boston Basher. | |
| − | |||
| − | ===[[ | + | |- |
| + | ! align="center" | {{Icon weapon|weapon=Baby Face's Blaster|icon-size=100x100px}} | ||
| + | '''[[Baby Face's Blaster]]''' | ||
| + | ! align="center" | {{Icon weapon|weapon=Pretty Boy's Pocket Pistol|icon-size=100x100px}} | ||
| + | {{Icon weapon|weapon=Flying Guillotine|icon-size=100x100px}}<br /> | ||
| + | '''[[Pretty Boy's Pocket Pistol]]''' or '''[[Flying Guillotine]]''' | ||
| + | ! align="center" | {{Icon weapon|weapon=Bat|icon-size=40x400px}} | ||
| + | {{Icon weapon|weapon=Candy Cane|icon-size=40x40px}}<br /> | ||
| + | {{Icon weapon|weapon=Wrap Assassin|icon-size=40x40px}}<br /> | ||
| + | '''[[Bat]]''' or '''[[Candy Cane]]''' or '''[[Wrap Assassin]]''' | ||
| + | | '''The Public Enemy Setup''' | ||
| − | + | The Public Enemy Setup works well together, as it prevents wasting Boost by jumping, and helps you regain lost health from damage so you can move in to gain even more Boost. | |
| − | |||
| − | + | The Baby Face's Blaster discourages jumping, which means that fall damage may be a situational problem. The boost provided by the Baby Face's Blaster presents more opportunities for ambushes, and the healing granted by the Pocket Pistol lets you steal any lost health that would have depleted when you escape from enemies, which would have also depleted your Boost. Heal up with Pocket Pistol shots from afar if you lack Boost, then run in again. If you like, the Candy Cane will help you keep gaining your Boost if you get damaged on the battlefield, as you will stay healthier and be able to fire more shots off. However, remember it makes you very vulnerable to explosives, so you might prefer to bring the stock Bat or the Wrap Assassin instead. Use the Wrap Assassin to gain boost from afar, but beware of the little melee damage the weapon itself does. If a bauble is hit from far enough, it will do a critical hit and give you even more boost (bleeding damage is unaffected). | |
| − | + | |- | |
| − | + | ! align="center" | {{Icon weapon|weapon=Baby Face's Blaster|icon-size=100x100px}} | |
| − | + | '''[[Baby Face's Blaster]]''' | |
| + | ! align="center" | {{Icon weapon|weapon=Pistol|icon-size=40x40px}} | ||
| + | {{Icon weapon|weapon=Winger|icon-size=40x40px}}<br /> | ||
| + | {{Icon weapon|weapon=Flying Guillotine|icon-size=40x40px}}<br /> | ||
| + | '''[[Pistol]]''' or '''[[Winger]]''' or '''[[Flying Guillotine]]''' | ||
| + | ! align="center" | {{Icon weapon|weapon=Wrap Assassin|icon-size=40x40px}} | ||
| + | {{Icon weapon|weapon=Sandman|icon-size=40x40px}}<br /> | ||
| + | '''[[Wrap Assassin]]''' or '''[[Sandman]]''' | ||
| + | | | ||
| − | + | This set is centered on building Boost quickly with the Scout's secondary and melee weapons at a distance. | |
| − | |||
| − | |||
| − | |||
| − | |||
| − | |||
| − | + | The Pistol's high rate of fire and quick reload can make it easier to quickly build Boost quicker. Its clip size makes it easy to spam, and is recommended if you are not as accurate when in motion. The Winger trades magazine size for power, but less accurate players may have trouble landing hits with it. The Flying Guillotine trades spammability for instant benefits; although its cooldown and travel time makes it harder to land hits with, a single hit will fill your Boost bar almost all of the way. | |
| − | + | Depending on your melee, you can pick either the Wrap Assassin or Sandman. The Wrap Assassin is effective if you are not using the Flying Guillotine for ranged combat, as it can inflict bleed at long ranges to safely fill up your Boost meter. The Sandman reduces your survivability, but deals reliable melee damage, and its slowing ball pairs well with the Pistol or Flying Guillotine, making it easier to score Pistol shots or hits with the Guillotine. | |
| − | |||
| − | |||
| − | + | Having both the Flying Guillotine and Wrap Assassin equipped can be useful to deal constant bleed damage elsewhere when you run to another place, such as the intelligence. Because they are both long range weapons, it is possible to damage enemies far away while focusing on objectives. Due to the nature of the bleed effect, if you receive any damage from the enemy team, the current bleed damage that you are dealing with the other weapons will help you gain back your lost Boost, especially if you use the Flying Guillotine and Wrap Assassin on different enemies and not focusing on just one individual. | |
| − | |||
| − | |||
| − | |||
| − | |||
| − | |||
| − | |||
| − | |||
| − | |||
| − | + | Regardless of your choice, it is essential to keep getting hits to keep your Boost high, as you lose a lot of Boost when you are damaged. Once you get full Boost, run in to do some damage, then retreat to a distance to regain your Boost. Rinse and repeat. | |
| − | |||
| − | |||
| − | |||
| − | |||
| − | |||
| − | |||
| − | |||
| − | |||
| − | |||
| − | |||
| − | |||
| − | ===[[ | + | |- |
| − | + | ! align="center" | {{Icon weapon|weapon=Baby Face's Blaster|icon-size=100x100px}} | |
| + | '''[[Baby Face's Blaster]]''' | ||
| + | ! align="center" | {{Icon weapon|weapon=Bonk! Atomic Punch|icon-size=100x100px}} | ||
| + | '''[[Bonk! Atomic Punch]]''' | ||
| + | ! align="center" | {{Icon weapon|weapon=Sandman|icon-size=100x100px}} | ||
| + | '''[[Sandman]]''' | ||
| + | | | ||
| − | + | This set monopolizes on your ability to make quick getaways and use hit-and-run tactics. While using this set initially leaves Scout vulnerable with a slower starting speed and 110 HP, the reward is often worth the risk. | |
| − | |||
| − | |||
| − | |||
| − | |||
| − | |||
| − | + | The Baby Face's Blaster lets the Scout fly in and out of battle at blazing speeds once he has full Boost. As damage reduces the Boost bar, pairing this with the Bonk! Atomic Punch's effects gives you the absolute maximum infiltration and retreating potential without fear of losing Boost. Capture the Flag maps become fairly easy for grabbing the intelligence if the opposing team does not have many Sentry Guns. Arena and King of the Hill modes are also less intimidating as you can retreat to heal with minimal chance of being injured while running away. The Sandman is used to slow enemies, further opening your window of opportunity to close in quickly for a kill or to escape on a whim. | |
| − | |||
| − | |||
| − | |||
| − | |||
| − | + | However, because you lack a reliable ranged weapon to build Boost, you are fully dependent on the Blaster. Make sure to drink Bonk! as soon as possible to ensure you do not lose your hard-earned Boost before you move in. | |
| − | + | |- | |
| + | ! align="center" | {{Icon weapon|weapon=Force-A-Nature|icon-size=40x40px}} | ||
| + | {{Icon weapon|weapon=Soda Popper|icon-size=40x40px}}<br /> | ||
| + | '''[[Force-A-Nature]]''' or '''[[Soda Popper]]''' | ||
| + | ! align="center" | {{Icon weapon|weapon=Crit-A-Cola|icon-size=40x40px}} | ||
| + | {{Icon weapon|weapon=Flying Guillotine|icon-size=40x40px}}<br /> | ||
| + | '''[[Crit-a-Cola]]''' or '''[[Flying Guillotine]]''' | ||
| + | ! align="center" | {{Icon weapon|weapon=Sandman|icon-size=100x100px}} | ||
| + | '''[[Sandman]]''' | ||
| + | | | ||
| + | |||
| + | This setup mainly focuses on the Scout using alternative routes to sneak up on opponents and deal a lot of damage in a short period of time using quick-firing Scatterguns or Flying Guillotine. | ||
| + | |||
| + | The Force-A-Nature and Soda Popper work best as flanking weapons thanks to their faster firing rate. If using the Force-A-Nature, the Crit-a-Cola pairs well with it, as it can kill most classes in a single clip before they can react. If not, the Flying Guillotine can be used as a long ranged backup weapon. The Soda Popper's hype charge can be enhanced with the Crit-a-Cola's damage boost, and when full, the multiple jumps can let you reach massive heights, while also ambushing from behind the enemy's defenses. The Sandman's ability to fire slowing balls can be used to ambush or escape combat more effectively. | ||
| + | |||
| + | |- | ||
| + | ! align="center" | {{Icon weapon|weapon=Baby Face's Blaster|icon-size=100x100px}} | ||
| + | '''[[Baby Face's Blaster]]''' | ||
| + | ! align="center" | {{Icon weapon|weapon=Crit-A-Cola|icon-size=100x100px}} | ||
| + | '''[[Crit-a-Cola]]''' | ||
| + | ! align="center" | {{Icon weapon|weapon=Bat|icon-size=40x40px}} | ||
| + | {{Icon weapon|weapon=Sandman|icon-size=40x40px}} <br/ > | ||
| + | {{Icon weapon|weapon=Fan O'War|icon-size=40x40px}}<br/ > | ||
| + | {{Icon weapon|weapon=Wrap Assassin|icon-size=40x40px}}<br/ > | ||
| + | '''[[Bat]]''' or '''[[Sandman]]''' or '''[[Fan O'War]]''' or '''[[Wrap Assassin]]''' | ||
| + | | | ||
| + | |||
| + | This set focuses on maximizing the Scout's movement speed to its fullest potential, making you a very hard target to hit, at the cost of survivability and being close to enemies. | ||
| + | |||
| + | The Baby Face Blaster is weaker than the Scattergun in combat due to its lower clip size. However, coupled with the Crit-a-Cola, hitting multiple targets at close to mid range can build Boost almost instantly. Once you have full Boost, Crit-a-Cola will not boost your speed even further, but you will be fast and strong enough to take down most enemies in a single hit if you get close. As you take increased damage if Crit-a-Cola is in use, you will be very vulnerable especially since damage easily reduces your Boost, but you will often be fast enough to dodge most projectiles. Just be wary of Sentry Guns, which have perfect aim. | ||
| + | |||
| + | Bring a melee weapon of your choice. The Bat does have any downsides and improves your survivability. The Sandman will let you slow your target before you move in with your speed, but makes you even more fragile. The Fan O' War will be easier to use since you will often be moving faster than usual, and the Wrap Assassin's bleed effect will help you gain Boost easily when boosted by your mini-crits. | ||
| + | |||
| + | |- | ||
| + | ! align="center" | {{Icon weapon|weapon=Soda Popper|icon-size=100x100px}} | ||
| + | <br /> | ||
| + | '''[[Soda Popper]]''' | ||
| + | ! align="center" | {{Icon weapon|weapon=Winger|icon-size=100x100px}}<br /> | ||
| + | '''[[Winger]]''' | ||
| + | ! align="center" | {{Icon weapon|weapon=Atomizer|icon-size=100x100px}} | ||
| + | '''[[Atomizer]]''' | ||
| + | | '''The #1 Fan''' | ||
| + | |||
| + | This setup rewards good aiming and ambushing tactics with high burst damage and incredible mobility. | ||
| + | |||
| + | The faster reload speed of the Soda Popper gives your enemies less time to catch you unarmed, while its faster firing speed helps you to kill unaware foes before they can even react. Once your Hype meter is full, the additional air jumps when activating Hype mode allows you to rain bullets from the air or flank your enemies and set up ambushes. | ||
| + | |||
| + | The increased jump height of the Winger lets you easily jump over obstacles or enemies, before landing beside them to fire strong Winger shots at them. Keep in mind that you should focus on hit-and-run tactics because of the reduced clip size of both the Soda Popper and the Winger. The Atomizer's third jump provides a good fallback to help you escape when you do not have Hype mode activated. | ||
| − | + | The best way to use this set is to weave in and out of combat to build your Hype meter. When it is full, activate Hype and then switch back to the Winger to boost your air-jumps. This allows you to jump over enemies' heads to shoot them from behind, or simply to get into enemy territory. | |
| − | |||
| − | |||
| − | |||
| − | ==== | + | |- |
| − | + | ! align="center" | {{Icon weapon|weapon=Back Scatter|icon-size=100x100px}} | |
| − | + | '''[[Back Scatter]]''' | |
| − | + | ! align="center" | {{Icon weapon|weapon=Mad Milk|icon-size=100x100px}} | |
| − | + | '''[[Mad Milk]]''' | |
| − | + | ! align="center" | {{Icon weapon|weapon=Fan O'War|icon-size=40x40px}} | |
| + | {{Icon weapon|weapon=Wrap Assassin|icon-size=40x40px}}<br/ > | ||
| + | {{Icon weapon|weapon=Holy Mackerel|icon-size=40x40px}}<br/ > | ||
| + | '''[[Fan O'War]]''' or '''[[Wrap Assassin]]''' or '''[[Holy Mackerel]]''' | ||
| + | | | ||
| − | + | This combination of weapons is specifically designed to hunt down enemy Spies. As a Scout, you are the fastest class in the game and the second most effective Spy hunting class after the Pyro. While you can simply run into a suspicious teammate to check them, this loadout enables you to check for Spies with less risk to yourself as well as notify your team of any Spies you may discover. | |
| − | |||
| − | |||
| − | |||
| − | |||
| − | |||
| − | + | The Back Scatter's wider spread becomes a benefit here, as even a single pellet will reveal an invisible Spy by their flicker—simply fire from a medium distance at suspicious spots, since you have Back Scatter ammo to spare. It can also be useful if you see a disguised Spy about to backstab a teammate; simply blast him at the back to rid of him with your mini-crits. | |
| − | |||
| − | |||
| − | |||
| − | |||
| − | |||
| − | |||
| − | |||
| − | |||
| − | |||
| − | |||
| − | |||
| − | |||
| − | + | Once you find a Spy, bring out your melee weapon or your Mad Milk to highlight them as a target. If the enemy Spy is not using a [[Dead Ringer]], the Wrap Assassin or Fan O'War can make it easy to find them using the telltale blood spatter or Marked For Death symbol above their heads. If you suspect there are Dead Ringer Spies on the field, the Holy Mackerel and its variants can ensure that you do not let them get away with faking their death. If the kill feed indicates that the Spy has not actually died, use your Mad Milk to douse the area; done quickly, the Spy will not be able to avoid being covered in Mad Milk, which will give away his position. | |
| − | |||
| − | |||
| − | == | + | Even when not hunting Spies, this loadout can still contribute to the Scout's usefulness by extending his team's effectiveness due to the Mad Milk and Fan O'War, and rewards powerful sneak attacks from behind on targets splashed with Mad Milk. |
| − | *[[Scout | + | |
| − | *[[ | + | |- |
| − | *[[ | + | ! align="center" | {{Icon weapon|weapon=Force-a-Nature|icon-size=100x100px}} |
| − | *[[ | + | '''[[Force-A-Nature]]''' |
| + | ! align="center" | {{Icon weapon|weapon=Winger|icon-size=100x100px}}<br /> | ||
| + | '''[[Winger]]''' | ||
| + | ! align="center" | {{Icon weapon|weapon=Atomizer|icon-size=100x100px}} | ||
| + | '''[[Atomizer]]''' | ||
| + | | | ||
| + | |||
| + | This set trades the #1 Fan set's Soda Popper for the Force-A-Nature, allowing you to get out of confrontations you cannot win and traverse large areas in good time. | ||
| + | |||
| + | This loadout enables two Winger-boosted jumps and a Force-A-Nature force jump, allowing you to be extremely unpredictable and agile. This is strictly a hit-and-run playstyle, due to the Force-A-Nature's small clip. Surprise your enemy by dropping from the sky after a triple jump, then fire at them to push them back. This is useful for when a key target decides to push into your team's territory (such as a Heavy), as you can deny his entry and simply jump away to safety. The Force-A-Nature knockback also lets you escape if you cannot win a confrontation, as well as push enemies into environmental hazards or into the hands of your teammates. This set can also aid your team if you play as a decoy, as you can distract your opponents by firing from above while jumping, hence keeping attention away from your teammates. | ||
| + | |||
| + | |- | ||
| + | ! align="center" | {{Icon weapon|weapon=Force-a-nature|icon-size=100x100px}} | ||
| + | '''[[Force-A-Nature]]''' | ||
| + | ! align="center" | {{Icon weapon|weapon=Crit-a-Cola|icon-size=100x100px}} | ||
| + | '''[[Crit-a-Cola]]''' | ||
| + | ! align="center" | {{Icon weapon|weapon=Boston Basher|icon-size=100x100px}} | ||
| + | '''[[Boston Basher]]''' | ||
| + | | | ||
| + | |||
| + | This is a high risk high reward load-out. Due to the Force-A-Nature's second shot usually not being very effective due to its knockback with the first shot, you will not be able to exactly put out high numbers with both of your shots. However, with the Crit-a-Cola, you can make your second shot count more with more damage output. The Boston Basher is put into this combo due to its ability in mobility and synergy with doing Basher jumps and the Force-A-Nature's Force Jumps. It is also a great way to put out greater damage numbers due to the Crit-a-Cola doing a great chunk of melee damage to foes. Be careful, as going into melee range of people can make you a one shot kill yourself with the Crit-a-Cola's downside. This load-out is more encouraged for a flank Scout play style. | ||
| + | |||
| + | |- | ||
| + | ! align="center" | {{Icon weapon|weapon=Force-a-Nature|icon-size=100x100px}} | ||
| + | '''[[Force-A-Nature]]''' | ||
| + | ! align="center" | {{Icon weapon|weapon=Bonk! Atomic Punch|icon-size=100x100px}} | ||
| + | '''[[Bonk! Atomic Punch]]''' | ||
| + | ! align="center" | {{Icon weapon|weapon=Wrap Assassin|icon-size=100x100px}} | ||
| + | '''[[Wrap Assassin]]''' | ||
| + | | | ||
| + | |||
| + | This load-out turns the Scout into a major distraction. Although you will not be able to do high damage as with the Scattergun, the Force-A-Nature can be used to push opponents away from their objective or target, while still dealing high burst damage to take out anyone unaware. The Wrap Assassin's bat and bleed damage is not spectacular, but its main benefits include shaking the screens of Snipers to hinder their aim, and causing damage over time that can lead panicky opponents to hunt you down and waste time. Bonk! Atomic Punch will be a fallback option for escape if you are low on health, and you can use the invulnerability to distract opponents or block their line of sight. | ||
| + | |||
| + | |- | ||
| + | ! align="center" | {{Icon weapon|weapon=Back Scatter|icon-size=100x100px}} | ||
| + | '''[[Back Scatter]]''' | ||
| + | ! align="center" | {{Icon weapon|weapon=Bonk! Atomic Punch|icon-size=40x40px}} | ||
| + | {{Icon weapon|weapon=Pretty Boy's Pocket Pistol|icon-size=40x40px}}<br/ > | ||
| + | {{Icon weapon|weapon=Winger|icon-size=40x40px}}<br/ > | ||
| + | '''[[Bonk! Atomic Punch]]''' or '''[[Pretty Boy's Pocket Pistol]]''' or '''[[Winger]]''' | ||
| + | ! align="center" | {{Icon weapon|weapon=Atomizer|icon-size=40x40px}} | ||
| + | {{Icon weapon|weapon=Candy Cane|icon-size=40x40px}}<br/ > | ||
| + | '''[[Atomizer]]''' or '''[[Candy Cane]]''' | ||
| + | | '''The Boston Flanker''' | ||
| + | |||
| + | This loadout focuses on using the Back Scatter as a flanking weapon. | ||
| + | |||
| + | The Bonk! Atomic Punch and Atomizer can help a Scout to get behind enemy lines. Invincibility can allow a Scout to go unscathed, and even undetected, through enemy territory. The Bonk! Atomic Punch is also useful as an escape option. The Atomizer can assist in finding alternate routes or evading damage. Together with the Back Scatter, these weapons can easily allow a Scout to flank and attack people from behind with his Back Scatter. Alternatively, the Winger can be used instead of the Bonk! Atomic Punch, in order to gain greater access to flank routes. | ||
| + | |||
| + | Another loadout for a flanking Scout is the Back Scatter, Pretty Boy's Pocket Pistol and Candy Cane. The healing power of the other two weapons comes at the cost of some vulnerability to damage, so it should be your goal to avoid taking explosive damage, and the Pretty Boy's Pocket Pistol should only be deployed when desperate or from safety (such as from behind). This set is particularly deadly against [[Heavy|Heavies]], [[Engineer]]s, [[Sniper]]s, [[Medic]]s, [[Pyro]]s, [[Spy|Spies]], and other Scouts. However, this loadout is less effective against [[Demoman|Demomen]], [[Soldier]]s, and [[Sentry Gun]]s. | ||
| + | |||
| + | As a general rule, the Back Scatter should be used with [[Pistol]] variants (in order to make up for lesser accuracy) or the Bonk! Atomic Punch. The [[Crit-a-Cola]] is one of the worst weapons to equip alongside the Back Scatter as [[Critical hits|Mini-Crits]] do not stack. | ||
| + | |||
| + | This loadout will be helpful in teaching Scout players the flank routes and how to get behind the enemy team. | ||
| + | |||
| + | |- | ||
| + | ! align="center" | {{Icon weapon|weapon=Soda Popper|icon-size=100x100px}} | ||
| + | '''[[Soda Popper]]''' | ||
| + | ! align="center" | {{Icon weapon|weapon=Crit-a-Cola|icon-size=100x100px}} | ||
| + | '''[[Crit-a-Cola]]''' | ||
| + | ! align="center" | {{Icon weapon|weapon=Bat|icon-size=100x100px}} | ||
| + | '''Any Melee''' | ||
| + | | | ||
| + | |||
| + | This is a combo loadout that revolves around using the Crit-a-Cola to build Hype faster, and then using your Hype to play aggressively. This loadout requires you to switch between flanking sneakily and playing aggressively. Be careful when building up Hype, because of the Crit-a-Cola's bigger downside. | ||
| + | |||
| + | |- | ||
| + | ! colspan=4 style="background:#dee8ed; font-size:90%; text-align:center;" | <small>Unless marked with a †, all weapons can be substituted with [[reskins]].</small> | ||
| + | |} | ||
| + | |||
| + | == Cooperative Class Strategies == | ||
| + | === {{class link|Scout}} === | ||
| + | An experienced Scout alone is powerful, but two or more, or even a squadron can cause massive havoc for the enemy team. A coordinated ambush can easily take down any enemy. | ||
| + | * Because a Scout's main duties are to provide a distraction and rush to the objective, one Scout has the ability to distract a whole team at once by shooting from one route, while another Scout can go through an alternate route to the objective without any hassle. | ||
| + | * If a team is experienced enough and is willing to cooperate, they can utilize a [[Scout Rush]] to swarm over enemy objectives before the enemy team has time to prepare a defense. | ||
| + | ** In [[Capture the Flag]], a team of Scouts can get to the enemy base before the other team has time to set up defenses. Once the Scouts are situated in the flag room, it is only a matter of time before they capture the flag. | ||
| + | ** In [[Attack/Defend]], a team of BLU Scouts can overwhelm the RED defense before they are fully prepared to counter-attack. Coupled with the outrageous capture speed of a Scout rush and the RED team's long [[respawn]] time, this strategy is very hard to combat. | ||
| + | ** In [[Payload Race]], the cart only requires two Scouts to reach maximum speed, while the rest of the team can rush to the other cart and prevent them from advancing farther. With the majority of teammates focused on the enemy while the enemy is focused on their cart, the attacking team will make easy work of the opposition. | ||
| + | * When teaming up with another Scout, make sure your loadout complements their loadout's weaknesses. | ||
| + | ** A team of Scouts can fulfill many roles; distracting [[Sentry Gun]]s with [[Bonk! Atomic Punch|Bonk!]], [[Slowdown|slowing]] enemies for easier aiming, healing teammates and [[Spy-checking]] via [[Mad Milk]], and even taking down a Heavy-Medic combo. | ||
| + | *** Even without the effects of Bonk!, a pair of Scouts can quickly rush a Sentry Gun and destroy it with their Scatterguns, with the Sentry having no one target to lock on. | ||
| + | * Regardless of the tactics mentioned above, Scout teams suffer when the enemy has set up defenses; it will be difficult to overwhelm an objective quickly if a fully constructed [[Sentry Gun]] is built there, or if a Heavy-Medic pair constantly hunts you down. Additionally, cramped maps such as [[Junction]] will make it more difficult for Scout teams to avoid damage. | ||
| + | ** As such, the earlier in a round you attempt a Scout team, the better. | ||
| + | |||
| + | === {{class link|Soldier}} === | ||
| + | While it may seem unlikely, a Soldier-Scout duo can easily decimate any obstacle that happens to move into their sights; with the combined effect of the Scattergun and [[Rocket Launcher]]'s close to medium range power, it is unlikely that any target will survive long enough to fight back. | ||
| + | * Although the Scout is very powerful on the ground, the Soldier is the master of the air. While the Scout engages an enemy from below, the Soldier can rocket jump and blast rockets on the ground to overwhelm his enemies. While both teammates are focused on the same enemy, they can easily take down any foe together. | ||
| + | * As the Soldier's rockets have a longer travel time than bullets, the Scout can run in and clean up any injured enemies should the Soldier miss rockets at medium range. | ||
| + | ** These two teammates can work together as a tag-team. The Scout can protect the Soldier while he reloads by firing his Scattergun to draw attention away from the Soldier. The Soldier should have reloaded by the time the Scout runs out of bullets, and the Soldier can then protect the Scout as he reloads. | ||
| + | * The Soldier, with his rocket jumps, can be just as mobile as the Scout, at the cost of some health. This pairing can be used to their advantage. | ||
| + | ** In [[Control Point (game mode)|Control Points]], this means that they can both capture the same point together with the efficiency of three players. If the Soldier is using the [[Pain Train]], this pair-up is especially effective. | ||
| + | ** In [[Capture the Flag]], this combo allows the Scout and Soldier to capture the flag in double-time. While the Scout goes into the base to steal the intelligence, the Soldier waits outside for the Scout. The Scout passes the intelligence to the Soldier, where he rocket jumps back to his home base. The Scout goes back to the enemy base as he captures, and the cycle starts anew. | ||
| + | ** In [[Payload]], a Scout can hide behind the cart while a Soldier stands on top of the cart to shoot at enemies. This pairing defends the Scout's invaluable double-capture bonus while still clearing a straight path to the next capture zone. | ||
| + | ** On [[Steel]], the Soldier and Scout can both rush to Point E while the enemy team is distracted at other control points. The Scout can deny enemy troops a clear path by firing at approaching enemies, and the Soldier can target specific enemies so that they do not interfere. | ||
| + | * This team can make a great Anti-[[Sentry Gun]] setup; the Scout can use [[Bonk! Atomic Punch]] to distract Sentry Guns, while the Soldier can destroy them and any [[Engineer]]s with a few Rockets. | ||
| + | * [[Mad Milk]] thrown by the Scout into a group of enemies will allow the Soldier to heal significant amounts of health and keep in combat longer, especially with the [[Black Box]]. The [[Candy Cane]] is also a good choice, as the Soldier can pick up health packs you drop. | ||
| + | * A Soldier with the [[Buff Banner]] can improve the Scout's Scattergun effectiveness, as mini-crits are not affected by damage falloff. This will make both the Scout and Soldier deal good damage at range. | ||
| + | * This team is weakest in small buildings. The more open areas the map has, the more effective this combination will be, as both players will be able to move quickly. | ||
| + | |||
| + | === {{class link|Pyro}} === | ||
| + | The Pyro and Scout are both excellent and efficient ambushing classes. Due to their strengths at close range, a coordinated ambush can result in killing practically any enemy without too much effort. | ||
| + | * As the Scout's speed makes him a wonderful distraction, a Scout can run in and make an opponent focus on him as the Pyro takes an alternate route to ambush them while they are turned away. | ||
| + | ** The same can be done in reverse, where the Pyro burns and confuses an opponent as the Scout runs in to finish the job. | ||
| + | * A Pyro can "mark" an opponent by setting them on fire before the Scout runs in to take them down, as they will either be injured or running to a healthpack. | ||
| + | * A Pyro can be a lifesaver for a burning Scout, as afterburn can drain about half of his health. [[Compression blast|Airblasting]] can potentially save the Scout from a lengthy respawn time. | ||
| + | * An enemy who has been set on fire by a Pyro can be finished off quickly by a Scout with the [[Sun-on-a-Stick]] and, combined with Mad Milk, the Pyro can [[Critical hits|crit]] using the [[Neon Annihilator]]. In addition to the extra damage, the Mad Milk will heal the Pyro for 94 health on a successful hit. This is a potent combination in Medieval mode. | ||
| + | ** Even without this combination, Mad Milk can improve a Pyro's endurance while they burn enemies. | ||
| + | * A Scout equipped with a [[Candy Cane]] can potentially give a steady stream of health to a Pyro carrying the [[Back Scratcher]]: the Pyro can light enemies on fire while the Scout provides the finishing blow. Likewise, the Scout's 25% damage vulnerability to explosives can be neutralized by simply airblasting away any explosives. | ||
| + | * The Pyro can use the [[Detonator]] or [[Scorch Shot]] to take routes where the Scout can. | ||
| + | * The Mad Milk pairs especially well with the [[Phlogistinator]]. The Mad Milk's healing rate will partially negate the Pyro's vulnerability while they burn opponents for "Mmph" and, when the weapon is charged, the Pyro can not only fill up their whole health capacity in under a second using milked targets, but also destroy any opponents in range. | ||
| + | ** The Backburner operates on the same principles as the Phlogistinator, but with more emphasis on ambushing. | ||
| + | * The Pyro's afterburn combined with the Scout's [[bleeding]] (when equipped with either the [[Flying Guillotine]], [[Wrap Assassin]], [[Boston Basher]], or [[Three-Rune Blade]]) turns the team into a damage-over-time powerhouse. Constant hits from the [[Flare Gun]] and the Scout's bleed weapons will do significant damage, even at range, where the Scout and Pyro are weak at. | ||
| + | * As mentioned above, this team combination is exceptionally weak at range. [[Sniper]]s and [[Heavy|Heavies]] can often ruin any attempts for the Scout or Pyro to move in. This team combo works best when both parties find alternate routes to ambush enemies, or when one provides a distraction for the other. | ||
| + | |||
| + | === {{class link|Demoman}} === | ||
| + | Another unlikely team up, the Demoman and Scout are complete opposites of each other; the Scout focuses on quick, offensive ambushing, while the Demoman focuses on defense and keeping the enemy at bay from mid-range. However, when combined, they can fill a number of roles together. | ||
| + | * Because the Scout specializes in distractions and weapon heckling, a lone Scout is able to lead an enemy right into a Sticky trap even from far away. | ||
| + | ** This also allows a Demoman with a sword and shield to charge up to a distracted enemy. | ||
| + | * As the Demoman excels at medium range and Grenades are hard to land, he can help the Scout deal good damage where his Scattergun would not, while the Scout can run in to clean up any missed Grenade shots with his more accurate Scattergun. | ||
| + | * Similarly to a Scout and Soldier team, a Demoman can equip the [[Sticky Jumper]] and [[Pain Train]] to gain the capture rate and speed of a Scout. Combined, they can swiftly capture points together. | ||
| + | * [[Mad Milk]] can offset the -25 health penalty incurred by the [[Eyelander]], giving the Demoman more survivability. | ||
| + | * Because the [[Sandman]] ball can slow enemies for a period of time, a Demoman can place multiple Stickybombs around a slowed enemy before they can get away and detonate them all at once to guarantee an instant kill. Eyelander-wielding Demomen can also get an easy head with this combo, not needing to have to chase down the enemy anymore. | ||
| + | ** The Scout can also use the [[Force-A-Nature]] to launch slowed enemies into Stickybomb traps for an easy kill. | ||
| + | * This team combo works well if both parties make up for each class's range weakness. | ||
| + | |||
| + | === {{class link|Heavy}} === | ||
| + | The Heavy and Scout are complete opposites when it comes to movement speed; the combined force of their weapons, however, is not much of a laughing matter. | ||
| + | * Because the Scout is good for distracting enemies, leading them into the path of a Heavy will force them to retreat, allowing you to finish them off after the Heavy has inflicted his share of damage. | ||
| + | * Conversely, the Heavy is a good shock trooper at the front lines, and is enough of a threat that enemies will usually focus on him. The Scout can take advantage by having free reign of the area the Heavy is covering, and can fire easily at distracted enemies. | ||
| + | * If a Heavy stands in a narrow doorway expecting enemies to come by, the Scout can use his [[Bonk! Atomic Punch]] and walk in front of him to act as a human shield. Since enemies cannot shoot through you and the friendly Heavy can, the Heavy's chances of survival greatly increase. | ||
| + | * The pair can complement each other's healing capabilities through combining the Heavy's [[Sandvich]] and the Scout's [[Mad Milk]]; the Heavy benefits from the massive healing granted from hitting milked targets with his [[Minigun]], and the Scout will uniquely gain 75 health from the Sandvich instead of 50 health. | ||
| + | ** Mad Milk is especially useful with the [[Dalokohs Bar]] or [[Warrior's Spirit]], where the former's +50 health increase will give the Heavy even further augmented survivability, and the latter's max damage vulnerability will be offset by the constant healing. | ||
| + | * The Heavy's [[Natascha]]'s slowdown effect combined with the slow effect of a Sandman ball will make enemies practically immobile, giving either of you an easy kill. | ||
| + | ** Even without the Sandman, this will make the Scout's job much easier. | ||
| + | * Because the Heavy carries huge firepower and very slow speed, this makes him a prime target for Spies to [[backstab]] him. A Scout can Spy-check the area by throwing his Mad Milk or attacking teammates. | ||
| + | * As the Heavy is slow whilst you are fast, it is essential to protect the Heavy or wait for him to move before you approach enemies, especially if both of you are working closely together. Ensure that he survives instant deaths from backstabs or [[headshot]]s by providing a distraction, while he protects you from being overwhelmed by opponents. | ||
| + | |||
| + | === {{class link|Engineer}} === | ||
| + | Scouts, at first, do not seem to be a potential Engineer buddy. However, the Scout's abilities not only make up for what the Engineer lacks, but can also be a vital part of a base. | ||
| + | * One of the Scout's purposes is to see what is ahead of the team and alert them to it. If a Scout sees an incoming threat, such as a Heavy, Demoman, or Soldier, alert the Engineer as soon as you can so he can prepare better. | ||
| + | ** If it is a weaker class, such as another Scout, it may be best to kill him yourself or let the Sentry Gun kill him. | ||
| + | * If the Engineer is trying to get to the enemy base to build a [[Teleporters|Teleporter]], the Scout should go in front of him to check for danger. Additionally, if enemies come out of one route while the Engineer wants to build in another route (such as the vents on [[Turbine]]), the Scout should distract the enemies so that the Engineer can slip by unnoticed. | ||
| + | * One of the Sentry Gun's primary counters is a Heavy and Medic pair. Luckily, the Scout can take action to keep the Sentry active. | ||
| + | ** If a Scout has Bonk! equipped, use it to body-block the Heavy's bullets. The Sentry Gun should kill the Heavy before your invincibility wears off. | ||
| + | ** Even if the Heavy is Übered, you can use the [[Force-A-Nature]] to knock either him or the Medic off-course, messing up his aim. However, this strategy will not work on a Quick-Fix Übercharge, as it prevents all [[knockback]]. | ||
| + | ** If you can hit the Heavy with the [[Fan of War]], all damage he takes will be increased by 35%, including ramp-up damage. This will cause the Heavy to take much more damage than a Medic can heal, dramatically decreasing his survivability. | ||
| + | * A Scout has much better [[Spy-checking]] abilities than the Engineer does. Use this to your advantage. | ||
| + | ** A Scout's Pistol is useful for surveying the area for [[cloak]]ed Spies. If you stand near a Dispenser while spamming bullets, you gain as much ammunition as the Engineer normally would. | ||
| + | ** A Scout's speed allows him to run into teammates to check for Spies; if you cannot go through a teammate, they are an enemy Spy. Furthermore, if the Spy attacks you on a reflex, he will reveal himself and be gunned down by the Sentry Gun. | ||
| + | ** The Mad Milk will reveal [[cloak]]ed and [[disguise]]d enemy Spies. If you think you see a disguised Spy or if he tries to cloak in order to escape, use your Mad Milk in order to track him down. | ||
| + | ** The Scout's bleed mechanic works in the same way as the Mad Milk, while dealing damage over time. Do not be afraid to hit teammates with the Boston Basher if you are not sure they are a Spy; your Engineer's Dispenser will heal you up if you miss. | ||
| + | ** The [[Holy Mackerel]] or [[Unarmed Combat]] will reveal cloaked Spies in the kill feed when hit. However, they will not reveal disguised Spies or those using the [[Dead Ringer]]. | ||
| + | * Using the [[Crit-a-Cola]] while standing next to a [[Dispenser]] will offset the self-mark-for-death penalty, allowing you to roast your enemies from afar when coupled with the [[Shortstop]]. | ||
| + | * If you see a fully charged Medic looking to use his Ubercharge with his patient to destroy your Engineer's Sentry Gun, shoot at the Medic to try and force an early Ubercharge from him, or if he has slow reaction times, kill him outright. | ||
| + | * Overall, you will be a fragile, yet useful Engineer buddy with lots of utility. While you will often be at the front lines preventing enemies from coming close, helping out your Engineer will make his job, and your team's defense, more effective. | ||
| + | |||
| + | === {{class link|Medic}} === | ||
| + | A Scout and Medic can make a great team. The Scout's main job is to protect the Medic at all costs and escort him to other teammates so he can heal them as quickly as possible. | ||
| + | * Always be sure to [[Spy-checking|Spy-check]], as Medics are usually the main killing priority for Spies; alert teammates immediately if you find a possible Spy that is trying to target your Medic. | ||
| + | * Due to the Scout's low health pool, it is a good idea for a Medic to stay nearby in order to top him off as necessary. | ||
| + | ** Keep in mind that in the order of classes to heal, Scouts are a relatively low priority. If more important teammates (ex. [[Heavy|Heavies]], [[Soldier]]s, [[Demoman|Demomen]], or another [[Medic]]) are injured, heal them first. | ||
| + | * Do not ask for an [[Übercharge]] to be deployed, unless it is an emergency or if the Medic is using the [[Kritzkrieg]] or [[Quick-Fix]]; if you do, you can easily waste an [[Übercharge]] that would have been more beneficial with another teammate. | ||
| + | ** However, do not underestimate a crit-boosted Scout. A full Pistol clip, aimed correctly, deals enough damage to take down any class. Additionally, the Scattergun's [[critical hits]] can take down any [[overheal]]ed target in just 3 hits at close range, even a [[Heavy]]. As critical hits do not suffer from damage falloff, this can make you exceptionally powerful even at range. | ||
| + | * Although it is generally a bad idea to [[pocket]] a Scout, it can be viable. Since all Mediguns mirror the patient's speed for the Medic himself, he will be able to keep up with you, while its healing lets you tank damage much more than usual. | ||
| + | ** This works especially well with the Mad Milk, as the health on hit can make the duo very hard to kill. | ||
| + | * The [[Vaccinator]]'s resistances can potentially save the Scout and his low health pool from death. The Medic can give a resistance bubble to the Scout before he moves in, such as bullet resistance to tank a Sentry Gun's shots. | ||
| + | * The Quick-Fix pairs perfectly for the Scout, due to the increased healing working well with the Scout's low health pool. | ||
| + | ** In Control Points, the Scout's speed and evasiveness can allow a Medic and Scout pair to get behind enemy lines in order to [[Backcapping|back-cap]] the point. The Scout's firepower and the Medic's rapid healing allows the duo to hold the point until it becomes available to capture. | ||
| + | ** In [[Capture the Flag]], the Medic can ride with the Scout until he reaches the Intelligence room. When the Medic is situated in the enemy base, the Scout can run off without him to capture the flag. The Medic can then wait for teammates to arrive and give them assistance with the next cap. | ||
| + | * Using the [[Boston Basher]]'s self-inflicted damage is extremely useful for building an [[ÜberCharge]]. If the Scout keeps hurting himself, the Medic will be able to fill his meter in half the time he could if the Scout was at full health. | ||
| + | * If the Scout uses the [[Baby Face's Blaster]], the Medic will receive speed directly proportional to the Scout's boost bar. When the Scout is at full speed, the Medic will go ludicrously fast, allowing them to get to the front lines much faster. The healing will also allow the Scout to gain boost back safely whenever he gets hurt. | ||
| + | * This team combination does not work well when you encounter multiple bulkier enemies like the Soldier or Heavy, as the Scout is only strong in one-on-one confrontations. As the Medic will be more beneficial if he heals his entire team instead of just you, ensure that your team can handle themselves before attempting any of these solo tactics. | ||
| + | |||
| + | === {{class link|Sniper}} === | ||
| + | The Scout and Sniper make up for each other's range weakness. The Scout focuses on close-range combat while the Sniper focuses on long-range combat, allowing the both of you to guard one another. | ||
| + | * The Scout is a perfect distraction for a Sniper. If he has a line of sight, the Sniper can constantly get free shots with minimal danger at a distance while enemies are distracted by the Scout's close-range shenanigans. | ||
| + | ** The Sniper can also take down distant [[Sentry Gun]]s so you can run in safely. | ||
| + | * A Sniper can protect you from other Scouts and Snipers. If trying to capture the Intelligence, a point, or escort the Payload, he can pick off enemies from a distance to keep you safe. You can do the same for the Sniper as well, protecting him from his close-range weakness as he snipes. | ||
| + | * Snipers who decide to follow you to the front lines with the [[Huntsman]] will be vulnerable after each shot. The Scout can distract enemies as the Sniper keeps back, or outright kill enemies who want to come closer to capitalize on the Huntman's slow reload. | ||
| + | * [[Jarate]] will make the Scout's job easier, as he can take down enemies with less shots. [[Mad Milk]] can also be a surprisingly good utility for a Sniper, as a fully-charged headshot on a milked target will instantly refill all his health. | ||
| + | * The Sandman's slow will keep opponents moving minimally, making it much easier for the Sniper to get a [[headshot]] or two. | ||
| + | * The Sniper and Scout can form an adequate Spy checking-team. With the combined force of the [[Wrap Assassin]], Mad Milk or Flying Guillotine, [[Bushwacka]] or [[Tribalman's Shiv]], and [[Jarate]], a Spy usually cannot escape. | ||
| + | * While you may excel at keeping one another safe, you will often not be able to protect both members due to the different ranges your classes work at. This team combination might have to sacrifice one's safety for the benefit of the other, as a Sniper will be easily killed at close range, while a Scout's weapons are helpless at long range. | ||
| − | == | + | === {{class link|Spy}} === |
| − | *[ | + | It is very rare for a Scout to ever team up with a Spy, but it is possible and has potential, due to each classes' tendencies to ambush on command. |
| + | * As usual, the Scout is a perfect distraction for his teammate. Enemies focusing on the Scout will not realize if a Spy sneaks up behind them for a backstab. | ||
| + | ** The Spy can also hang back at a distance as a Scout fights in the front lines. He can then use his health-observing ability to pick off weakened targets with the [[Revolver]], or simply keep firing for headshots with the [[Ambassador]]. | ||
| + | * The Scout can make it look like he's being chased by an "enemy" for a quick distraction. Let the Spy disguise as an enemy and chase the Scout, as he shoots back and retreats. Enemies might move forward to help their "teammate", and the Spy can hang back to get backstabs. It makes it more convincing if the Scout uses the "Help!" command using C+1. | ||
| + | ** The Spy can also disguise as a friendly teammate beside the Scout, and feign death using the [[Dead Ringer]] as they approach opponents. The Scout can distract the enemy long enough for the Spy to switch to an enemy disguise, recharge his Dead Ringer, and blend into the opposing team. | ||
| + | * A [[Bonk! Atomic Punch]] distraction combined with the Spy's ability to sap buildings can quickly eliminate an entire sentry nest before reinforcements arrive. | ||
| + | ** The Scout can also use Bonk! to clear a pathway of Stickybombs so the Spy can move in. However, take note that this will result in the Scout absorbing a high amount of damage that will lead to a considerable slowdown after the invulnerability wears off. | ||
| + | ** With proper communication, a Scout with Bonk! and a Spy can clear out a point and capture it. | ||
| + | * As Spies are constantly Spy-checked, he will frequently be on fire. Equipping [[Mad Milk]] to extinguish him will help immensely. | ||
| + | * Take note of this team combination, as you can be the one that ruins your friendly Spy's espionage. Refrain from running towards him if you meet behind enemy lines, as you may accidentally get him blown up by an unwary opponent. | ||
| + | == See also == | ||
| + | * [[Team strategy]] | ||
| + | * [[Jumping#Double Jump|Double jump]] | ||
{{Class strategy}} | {{Class strategy}} | ||
{{Scout Nav}} | {{Scout Nav}} | ||
| − | + | [[Category:Community strategy]] | |
| + | [[Category:Scout]] | ||
[[Category:Strategy]] | [[Category:Strategy]] | ||
| − | |||
Latest revision as of 00:44, 21 May 2024

| “ | Hit the road, bozo, let a real Scout get to work!
Click to listen
— The Scout on impersonators
|
” |
The Scout has the fastest movement speed of the nine mercenaries, the ability to double jump, captures objectives and pushes payloads at double the regular speed, and deals a consistent amount of damage from short to medium range. These attributes make him great for quickly completing objectives, such as capturing Control Points, and optimal for one-on-one battles when timed correctly. However, his maximum base health of 125 makes direct confrontations against some mercenaries difficult and risky. Optimal combat involves circle strafing or weapon heckling, techniques that help the Scout avoid and simultaneously put out as much damage as possible.
Quick tips
- You have double the capture rate of any other class. If you are anywhere near an unguarded enemy Control Point, stand on it in order to aid your team and sometimes distract enemies from your team.
- In Payload maps, crouch-walking behind the Payload to use it as a shield can be very useful since your body and hitbox is smaller than other classes and can fit behind the Payload easily. This is particularly effective against stationary Sentry Guns, as they cannot target anyone they do not have a direct line of sight.
- Know where the health packs are on every map, because you will usually work alone and thus be out of reach of your team's Medic(s).
- You can use the Mad Milk on maps with few health packs to avoid having to leave combat for healing. Additionally, Mad Milk can be used to support your team in a firefight.
- Attempting to out-gun tougher classes directly is unwise unless you know they are low on health.
- Use your maneuverability to catch enemies (especially tougher classes) off-guard. Your extra speed and double jump can get you over gaps and other obstacles that block most of the other classes. Constantly strafe when your enemy decides to engage you.
- Sentry Guns should be avoided because the Scout relies on not being hit; a Sentry Gun's attacks are very strong, have high knockback, and its bullets never miss, making it a natural counter.
- However, it is possible to destroy a lone Sentry by finding cover near it, exiting cover whilst shooting at it, and retreating to cover repeatedly, as well as with circle-strafing.
- Bonk! Atomic Punch can be used to distract an enemy Sentry Gun while a teammate destroys it, or to run past the Sentry Gun while avoiding damage. Remember, bullets knock you back, so make sure that the Sentry does not pin you against buildings or other obstacles, or you will die as soon as your invulnerability wears off.
- As the class with the fastest base speed in the game, you should leave Teleporters for other classes to use. Unless the distance is significant enough, the Teleporter is Level 3, or if you are sure they will be able to recharge before other teammates come by, it is best to run to the objective instead.
General
Combat
- The Scout excels at one-on-one combat. Wandering or lone players (such as Spies and enemy Scouts) are good targets for a Scout, but if they see you coming, you will not last long. Instead, ambush them from above, behind, or anywhere else from which they can not see you.
- Knowing how to prioritize targets is an important part of playing Scout. Your first priority should be to target the enemy Medic, especially in Competitive, where ÜberCharge is often the deciding factor of whether you win or not.
- Refrain from excessively using your Bat or other melee weapons in combat. They may hit fast, but the low damage output with a small health pool most likely won't end in your favor.
- Call for help if you cannot handle enemies by yourself. Your firepower is generally only effective against a single target. Once enemy reinforcements arrive, you will be forced to retreat.
- Your speed is useful for avoiding backstabs and headshots; however, jumping will leave you suspended in a predictable arc against Snipers. Use the double jump mechanic (while rapidly pressing crouch), as well as strafing to avoid their shots, but be warned that many Snipers will wait for you to use your double jump, after which you will fall predictably to the ground and may be easier to hit.
- You should also be aware of common sightlines in various maps, so you are not always worrying about whether a Sniper might be looking at you or not.
- Open ground lets you use your maneuverability most effectively; tight spaces limit your evasive options and will make staying alive much harder.
- When playing as Scout, keep moving. If a confrontation goes poorly, you can (almost) always continue running, using your speed to escape. You can then find a health kit and often come back to finish your opponent off before they have a chance to do the same.
- Never stand still when you are attacking someone as a Scout — your movement is the only way to prevent yourself from dying quickly, thanks to your low base health. Use your speed to your advantage by strafing left and right while attacking someone. Keep your distance when facing classes such as Soldiers and other Scouts, as a Soldier's rockets at close range do 90+ damage and a Scattergun will do the same damage as yours. When facing other Scouts, try to mirror their strafing movements to make them easier to hit. Once you get below 75 health, start to either make a retreat or jump around erratically to try and land a solid hit to finish the other Scout off.
- If you find yourself circling an enemy, focus on your strafing and jumping, and fire your weapon only when your crosshair lines up with your target. This makes it more difficult for your enemy to hit you.
- Find a mouse sensitivity that is suitable for you while playing Scout. A high sensitivity lets you quickly switch targets as you move, while a low sensitivity, paired with more mouse movement, makes it considerably easier to land point-blank shots with your Scattergun.
- Optimal sensitivities may vary from person to person. Do not be afraid to try out new sensitivities in order to find one that works best for you. Try to use a new sensitivity for at least a few days before switching to a different one.
- When low on health, wait for the right moment to strike. Use walls and corners to gain an advantage over enemies by firing and retreating quickly to avoid enemy fire.
- The Scout has the smallest hitbox and can hide behind objects better than every other class. This can be useful while waiting for a group of enemies to pass by.
- Take note of the object you are hiding behind. If it is tall but narrow, deploying your Bat will allow you to hide without your Scattergun or Pistol protruding through and giving you away. Your primary or secondary weapons, however, would be better for short but wide hiding spots.
- Try to be unpredictable while fighting classes that are using hitscan weapons, such as the Shotgun. Hitscan weapons, usually bullet-based weapons, will instantly hit you, as they do not have travel time, unlike a Rocket Launcher or a Flamethrower.
- When fighting enemy Pyros that are attempting to airblast you in a predictable arc to kill you with their secondary, use your second jump to escape from above.
- Your backwards run speed is greater than a Pyro's forward movement speed, meaning you can run back from enemy Pyros while shooting at them without the risk of being ignited.
- Do not confront a Sentry Gun unless necessary. If you can approach it from behind or to the side, you can take advantage of the Sentry Gun's slow rotation speed. Pop out of cover long enough to take a shot at it, then wait about one second for the Sentry to turn back to its default position.
- It is also possible to circle-strafe a Sentry Gun, as it cannot turn quickly enough to fire at you. This can be difficult, however, and requires that you be somewhat close to the Sentry Gun while also being able to adjust your aim with your constant movements, which may be more difficult if you have a lower mouse sensitivity.
- Generally, if a Sentry Gun has an attentive Engineer nearby, it is best to find another route instead of trying to destroy it.
- Do not overestimate your mobility options, staying grounded and not strafing while jumping might be more useful than erratic movements. If you have a good hold of the combat situation try to not throw off your aim by jumping chaotically, instead focus on hitting more shots in a quick succesion.
- Rocket jumping Soldiers can easily be shutdown with the use of your Scattergun and other unlocks, due to the knockback it provides. This can be done to protect you and your teammates, especially your Medic, from an otherwise fatal interaction.
- To maximize effectiveness, use your multiple jumps to close the distance, increase the damage done to the Soldier, and dodge potential rockets being shot from above.
Speed
- Your speed allows you to decide which battles to engage in; enemies cannot escape from you if you pursue them, nor can they catch you if you don't want to fight them.
- Your high mobility makes you more difficult to hit, and at long range, your speed can render certain projectile weapons useless, since you can easily dodge these attacks.
- You can reach health/ammo kits or Dispensers more quickly than other classes when needed, minimizing your downtime.
- However, be mindful of other players that might need a health kit more than you do, as your fast speed means you can easily find another one slightly farther away.
- Death is less of a penalty for you since you will spend less time than other classes running to where the battle is. Still, be wary that you may die often due to your low health, and respawn times are not reduced for you.
- You are often the first to the fight at the beginning of the round. Be cautious, though, as you won't be the only one on the battlefield for long.
- Because you can easily outrun other classes, it is possible to backcap Control Points and other objectives. If the point captures quickly enough, this will lock the enemy out of capturing your own Control Point, forcing them to fall back.
- Even if you do not manage to capture the point, you can still divert enemy forces so that some must run to deal with you, which you can then engage or simply escape.
- You are the ideal Intelligence carrier due to your mobility. With good planning, firepower, and luck, you can snatch the Intelligence from enemy-guarded territory and still make it out alive.
- Run into players to Spy check, as this can conserve ammo, and your high mobility means that doing so won't be much of a time penalty. If you do not pass through them, and instead bump into them, then they are a disguised Spy. One or two point-blank shots from your primary will be enough to kill the Spy. Be sure to keep your distance and never turn away, lest you open yourself up for a backstab.
- Mad Milk can be useful for tracking down a cloaked Spy, as it allows you to see him while he is invisible. He will be unable to escape you until the debuff wears off — your speed allows you to pursue him easily.
- Medics who heal you will be able to match your speed — help them reach the front lines faster! Try not to use your double jump too much — you might leave him behind a barrier he cannot cross and leave him open to enemy attacks.
Weapon Heckling
- Weapon heckling is a tactic that involves deploying a weapon that outranges or overpowers the current weapon your opponent is holding. While every class is capable of doing this with varied results, the Scout's natural speed and his weapons (with different optimal ranges) allow you to pull this off with much more efficiency.
- Know the optimal range of your weapons and use them when your opponent is using a weapon that cannot significantly harm you at said range.
- For example, if a Soldier is your target, move in close (though not too close) and blast him with a Scattergun at close range. If he knocks you back with the Rocket Launcher, draw your Pistol and fire at medium range, where rockets take some time to reach. If he switches to the Shotgun to deal accurate and instant damage, get close again and shoot with the Scattergun, where his Shotgun will deal less damage than his Rocket Launcher.
- Weapon heckling is as important when fighting enemy Scouts as it is with fighting other classes. It is usually more effective to use your Pistol over a Scattergun at medium range, for example, in order to maximize your damage and still have extra Scattergun shots in reserve.
- As both of you will usually be avoiding each other's shots, it is sometimes possible to bait enemy Scout(s) into using up all his Scattergun shots, then taking advantage of his reload time and running in with your Scattergun or Bat.

Jumping
- Whichever movement key is being held at the time of the double jump is the direction you will go. This allows you to instantly change direction in mid-air and confuse enemies.
- Performing a double jump without pressing a movement key will cancel all horizontal momentum, regardless of your current speed. As a result of this, try to predict where enemies are aiming before double jumping.
- Jumping in combat is a double-edged sword. Against weaker players, it can effectively throw off their aim. However, experienced players can wait for you to commit to your second or third jump before attempting an airshot. Once you have committed, your trajectory is mostly locked and skilled players can easily predict your path and severely damage or outright kill you either before or right when you reach the ground.
- An example is with Snipers: most usually aim where they expect you to be just after they zoom in, and double jumping will throw them off. Skilled Snipers, however, can use this to predict the path of your second jump, since you cannot move in mid-air after using it, and line up a headshot at your inevitable location.
- Double jumping just before you hit the ground will negate fall damage, regardless of the distance you have fallen.
- Use the double jump to take the higher roads over railroad cars and bridges. Most opponents tend to look forward, rather than up. If it is safe to do so, attack from above to take enemies by surprise, using your double jump to negate fall damage. You can confuse enemies by falling from above, firing at them, then jumping over their head as they turn around to see what hit them. This will often allow you to land one or two free hits on them before they figure out where you are.
- Certain ledges may require you to crouch-jump in order to reach them. Holding the crouch button while performing a double jump will allow you to reach those ledges.
- Crouch-jumping can also shrink your hitbox making it harder for enemies to hit you. But you can only do this twice while in the air.
- Make sure you jump before falling from a ledge if you are double jumping to another spot. Falling off negates your first jump, so be careful.
- If you are under fire, try double-jumping over the enemy's head to disorient them. You can also use this maneuver to land a couple of extra shots at close range.
- A slightly difficult, yet potentially useful strategy is to jump on top of an enemy's head, and attack from there. This is best used against Heavies, whose slow movement speed makes it easier to stay on top of them. However, they will be able to kill you quickly from close range, so only engage Heavies when they are vulnerable and on low health.
- You are able to perform a triple jump of sorts if the Force-A-Nature is equipped as your primary weapon, as the recoil from firing can be used to propel yourself a few feet in the opposite direction of where the shot was fired. To do this, jump and then double jump, and while in the air after the second jump, aim directly down and shoot. It will propel you into the air, effectively giving you a third jump.
- The Force-A-Nature can be used for a single, very high jump if timed correctly. Whilst running forward, aim down and jump. As you leave the ground, immediately shoot directly down. You will go much farther into the air than a regular double jump would, and you'll still have your double jump.
- Similar results can be achieved using the Boston Basher's self-damage, though this costs a lot of health to use.
- The Atomizer allows you to do a triple jump in the same manner as regular jumping, but you must have it deployed.
- You can use the Force-A-Nature and the Atomizer together to perform a quad jump.
- The Soda Popper allows you to quintuple jump after filling the Hype meter; however, this does not stack with the Atomizer.
- When active, the Winger increases the height of all your jumps, allowing you to boost any previously mentioned jump techniques.
Weapon Specific
Primary Weapons
Scattergun + reskins
| Weapon | Kill Icon | Ammo | Damage | ||||
|---|---|---|---|---|---|---|---|
| Loaded | Carried | Point Blank | Medium Range | Long Range | Critical | ||
Stock Scattergun |
6 | 32 | 11-105 | 6-60 | 3-32 | 180 | |
- With six shots, the Scattergun is your most reliable primary weapon for prolonged combat, as well as the most versatile compared to the others. This comes at the cost of a relatively long reload time when it is empty, so try to keep at least two shots loaded before engaging the enemy.
- The Scattergun does large amounts of damage at close range — one shot deals 105 damage if all bullets connect at point-blank range, slightly more than a Shotgun (which in comparison only does a maximum of 90 damage at point-blank range). This makes three shots enough to take out a non-overhealed Heavy. Think about how to engage your opponent without alerting them to your presence. Many classes will go down quickly if caught off-guard.
- Range severely reduces the Scattergun's damage. If you have not been noticed yet, avoid firing early. Wait until you are just a few feet away from the enemy and then open fire. This reduces the number of times you need to hit the enemy and gives them less time to react. This also may negate the need for reloading in the middle of a fight.
- This is a major factor in fighting Soldiers. Two shots are enough to take down a Soldier at point-blank range, while you need three to do the same at a slightly greater distance. The difference between needing only two shots to kill and needing three is huge against a class whose primary weapon can easily kill you. Sneak up, flank, close the distance, and score two point-blank shots to eliminate him before he can react.
- If you can, use the Pistol to soften up your targets at a distance before moving in for the finishing shot with your Scattergun.
- When using your Scattergun, a reliable method to hit your target is to strafe left and right with your cross-hair centered and firing when your cross-hair crosses your opponent rather than solely using your mouse to aim. This allows you to focus on moving more efficiently and erratically, making you harder to hit, while at the same time making your aim smoother and more accurate via prediction.
- A trick that may work against newer Scouts is to shoot 3-4 shots from the Scattergun and then reload one shot. If the enemy sees you reloading, they may believe it is safe to rush up to you, giving you an easy chance to dodge and kill.
Force-A-Nature + reskins
| Weapon | Kill Icon | Ammo | Damage | ||||
|---|---|---|---|---|---|---|---|
| Loaded | Carried | Point Blank | Medium Range | Long Range | Critical | ||
Unlock Force-A-Nature |
2 | 32 | 9-113 | 5-65 | 3-34 | 194 | |
- The Force-A-Nature has only two shots per clip, fires considerably faster than the stock Scattergun, and reloads both shots at once. It also has 10% less damage per pellet in exchange for 20% more pellets per shot, making it deal slightly more damage per shot than the Scattergun. The Force-A-Nature will knock nearby targets back, and when he is in mid-air, the Scout as well. This mechanic allows triple jumps (and quadruple jumps if accompanied by the Atomizer).
- The Force-A-Nature's high burst damage and quick firing speed make it good at hit-and-run tactics. However, try not to get into a firefight with many enemies at once, as its slow reload time, small magazine, and short range is not suited for large, prolonged shootouts. Instead, try flanking to take on a single isolated enemy. Try not to approach them from the front; instead, attack from the side or behind, where you can close in easily.
- Because the Force-A-Nature discards the second round if reloaded before both rounds are fired, it might be wise to turn off the automatic reload feature from the Advanced Options menu.
- Keep in mind that you can jump even longer distances with the Force-A-Nature by jumping, aiming below you, and firing at the end of your second jump. Another method is to jump, fire quickly, and jump again. Only fire one shot, as firing a second shot while still in the air will not have any further effect on your velocity.
- Use your recoil to reach high places in order to kill unaware classes from above. It lowers your chances of being killed when getting closer because players do not usually look up.
- The Force-A-Nature works better while the target is busy with something, such as an Engineer setting up a building.
- Use the Force-A-Nature's knockback ability to your advantage, since it can send enemies flying several meters and into hazards such as the pits in Lumberyard and Steel. It is particularly useful in places where enemies huddle together. You can jump in, blast two people away from the objective, and retreat to reload and strike again.
- The knockback can be a double-edged sword, so if at all possible, determine where your shot will throw them into. It is not hard to accidentally send your target into a med-kit, into the safety of Sentry Gun coverage, or even into a cluster of his teammates.
- Use the knockback to push people into walls, giving you an easy second shot to finish them.
- The knockback can be a double-edged sword, so if at all possible, determine where your shot will throw them into. It is not hard to accidentally send your target into a med-kit, into the safety of Sentry Gun coverage, or even into a cluster of his teammates.
- The Force-A-Nature can push ÜberCharged enemies. Use this to either push enemies away from your teammates or break the Medi Gun beam and attack the now-vulnerable target.
- The Force-A-Nature is generally easier to use when you are grounded, as your enemies will take the full force of the weapon's knockback and you will not lose control. When firing in the air, the knockback keeps enemies pinned down for a second, but your shot will blast you slightly backwards, which can throw off your aim and send you in a predictable path for people to fire at you.
- If you equip the Force-A-Nature, consider equipping the Pistol as well. With the Pistol, you have the ability to finish off enemies that survived your Force-A-Nature shots without having to wait for the Force-A-Nature's reload, as well as a backup in case your targets are launched from your first shot. An alternative method is to use your Bat for the finishing hit, in which case it would be ideal to knock the enemy into a wall or the air first for an easy follow-up swing.
- With fixed bullet spread on, the pellets from the shot will fire in a 3x3 grid. The extra two pellets will fire to the right of the center, making medium range engagements easier if you aim slightly to the left of the target.
Shortstop + reskins
| Weapon | Kill Icon | Ammo | Damage | ||||
|---|---|---|---|---|---|---|---|
| Loaded | Carried | Point Blank | Medium Range | Long Range | Critical | ||
Craft Shortstop |
4 | 32 | 18-72 | 12-48 | 6-25 | 144 | |
- The Shortstop has a fast firing speed along with a clip-based reload for prolonged combat. The Scout is able to keep his distance while still doing decent damage because each pellet does double damage compared to the Scattergun, albeit with only four pellets per clip. When active, it makes the Scout 20% more vulnerable to push force taken from damage, explosions, or the Pyro's compression blast. Additionally, it allows the Scout to "shove" a single enemy away with secondary fire, causing them to get knocked back a short distance.
- Four direct hits from the Shortstop can kill most classes, but be cautious when facing tougher classes like the Heavy, who may survive the four shots of the Shortstop and may kill you as you reload.
- This can be mitigated by using the Mad Milk, which heals you based on the damage you do, effectively giving you more health to square off against bulkier classes, so long as you land your shots. Alternatively, use a damaging secondary like the Pistol to avoid having to wait for the Shortstop to reload.
- It can be deceptively difficult to hit opponents with the Shortstop, since it only fires four pellets in a narrow spread. As such, treat the weapon somewhat like a Revolver: you have to aim accurately with your crosshair in order to deal good damage at medium range, while its spread and damage makes it near useless at long range.
- This weapon fires two seconds of critical hits whenever it randomly crits, similarly to the Pistol. Hence, while crits from this weapon only deal a maximum of 144 damage per shot, you will be able to fire up to four critical shots to make up for it.
- The Shortstop has a moderate reloading time; turning on auto-reload may cut off a good chunk of the reload time.
- The Shortstop works well for dealing with Sentry Guns. A Mini-Sentry Gun will go down in about a clip, even when you are standing outside of its range, and standard Sentry Guns will take significant damage from the Shortstop's increased damage per pellet.
- This weapon grants you a unique "shove" mechanic if you have the Shortstop as the active weapon, allowing you to push away enemies that are close by. This is useful for giving you space, since the Shortstop lacks the damage ramp-up of your other primaries, and can also forcibly reposition foes or push them into a hazard such as a pitfall or friendly Sentry Guns.
- Unlike the compression blast, your shove does not happen instantly, and has a longer cooldown time between shoves. Time them carefully.
- The shove can also be used to spycheck, effectively not wasting ammo and pushing the Spy away from you or your teammates.
- While the 20% increase in knockback taken allows classes with knockback capabilities (like the Pyro) to easily push you into an environmental hazard, you can use this to your advantage; the knockback allows you to "surf" and escape from your pursuer.
- Make use of air-strafing to control your trajectory if attempting this. Not only will this make you more mobile, but will also make it harder for enemies to hit you while airborne. To air-strafe, hold down a directional key (left or right) and turn your mouse slowly in that direction.
- Miniguns and Mini-Sentry Guns can be great sources of knockback to surf off of at medium range, as they shoot at a consistent rate. This should only be attempted if you have a decent amount of health left, as Heavies especially can shred you in a second with their primary.
- Make use of air-strafing to control your trajectory if attempting this. Not only will this make you more mobile, but will also make it harder for enemies to hit you while airborne. To air-strafe, hold down a directional key (left or right) and turn your mouse slowly in that direction.
- The Crit-a-Cola pairs well with this weapon, as the Shortstop's faster firing rate will maximize the potential of the mini-crit boost's duration, while its high damage per pellet and greatly increased accuracy will make you quite powerful at range.
Soda Popper + reskins
| Weapon | Kill Icon | Ammo | Damage | ||||||
|---|---|---|---|---|---|---|---|---|---|
| Loaded | Carried | Point Blank | Medium Range | Long Range | Critical | Damage to Activate Hype | Hype Duration | ||
Craft Soda Popper |
2 | 32 | 11-105 | 6-60 | 3-32 | 180 | 350 | 8 seconds | |
- The Soda Popper is very similar to the Force-A-Nature, firing two shells in fast succession and reloading both shots, but with the damage and pellet count of the normal Scattergun, faster reload time compared to the Force-A-Nature, and no knockback. In addition, the weapon has a "Hype" meter that fills by dealing damage with any weapon while having the Soda Popper equipped. When completely filled, alternate fire activates "Hype mode" and grants 5 extra air jumps for 10 seconds. The Hype meter takes roughly 350 damage to completely fill.
- Like the Force-A-Nature, the Soda Popper is generally useful for hit-and-run tactics due to its reduced magazine size. However, it reloads faster than the Force-A-Nature, making it better for offensive fighting.
- As with the Force-A-Nature, reloading after firing one shot wastes the second shot, so try to make sure both shots are used for efficient ammo usage.
- Similarly to the Baby Face's Blaster, you need to deal damage to fill up the Soda Popper's Hype meter. It takes approximately 4 point-blank shots from the Soda Popper, 16 shots from the Pistol, or 10 swings from the Bat to do so.
- The extra midair jumps enhances your already good mobility. Classes that rely on tracking a target (such as the Sniper) or projectile classes with slow projectiles (like the Soldier) will have an even harder time landing direct shots on you before you land.
- This can be paired very well with the Bonk! Atomic Punch for being able to jump around and take alternative routes that Scout would otherwise not be able to reach while also being invulnerable to make a great flank.
- A good tactic is to constantly keep in the air with your extra jumps while firing downwards at your target. This lets you chip at your opponent's health while you evade all damage.
- On large maps such as Frontier or 2Fort, Hype can be used to find alternate routes around the enemy, or to simply get somewhere faster.
- The Pistol, Pretty Boy's Pocket Pistol, and the Winger are all very suitable for attacking in midair with the hype meter as using your Soda Popper is used for close range attacks while pistols are usually associated with more long ranged attacks.
- This weapon pairs very well with the Winger, as its increased jump height lets you reach even greater heights when using the Soda Popper's Hype. It also serves as a backup weapon for opponents that survive both shots of your Soda Popper, though other pistols will be more effective for dealing damage.
- The stock Pistol is also a good choice as a backup weapon, as it is more useful in prolonged combat.
Baby Face's Blaster
| Weapon | Kill Icon | Ammo | Damage | ||||
|---|---|---|---|---|---|---|---|
| Loaded | Carried | Point Blank | Medium Range | Long Range | Critical | ||
Craft Baby Face's Blaster |
4 | 32 | 11-105 | 6-60 | 3-32 | 180 | |
- The Baby Face's Blaster acts like the Scattergun, but decreases the Scout's base speed by 10% and only has four shots per clip. However, it has a boost meter: as damage is dealt, the meter fills and the Scout's speed increases. At full boost, the Scout runs 40% faster than a normal Scout. The boost decreases when receiving damage and upon a double-jump, and is lost upon death.
- The Baby Face's Blaster is a strong weapon for those who stick to a "hit-and-run" playstyle. The quick speed allows a skilled player to avoid engaging in a prolonged fight to avoid damage and keep their boost from being drained, and take small chunks of health from a target multiple times before killing them.
- However, its reduced clip size makes direct confrontations riskier, as you have less margin for error. Ambushes become less effective as well, as the number of enemies you can damage and/or kill with a clip decreases.
- Your priority should be constantly gaining boost while using this weapon, due to the benefits you gain with increased speed and how easy it is to lose charge.
- It takes 100 damage from any weapon to fill the boost bar, such as a point-blank shot from the Blaster. However, it only takes 25 damage to completely drain a full boost bar, making an enemy Scout's Bat swing or a single close-range Winger shot enough to take away all your increased speed. Keep scoring hits on opponents so your boost is always high.
- At full boost, you will be extremely hard to hit as long as you move unpredictably. Only Sentry Guns, the Natascha, and Flamethrowers are constant threats. However, your inability to double jump without losing your boost means you will have a harder time dodging projectiles, such as rockets.
- Your high speed will make it even more difficult to aim at times, so try and adjust for that by ambushing enemies, who will have no time to dodge.
- Your full speed boost is capable of chasing down or retreating from any opponents, even enemy Scouts.
- The Baby Face's Blaster is useful for reaching and capturing objectives. It is especially useful for grabbing the Intelligence on Capture the Flag maps and returning it quickly.
- Air jumping will deplete 75% of your boost, making double jumps riskier if you want to keep your boost. Make sure your air jump is worth the sacrifice, such as to dodge a rocket that would have drained all of your boost anyway.
- There are some instances to take note of when collecting boost:
- Shooting an enemy Scout under the effects of Bonk! Atomic Punch will charge the Blaster's boost.
- Shooting an enemy under the effects of a stock Medi Gun's Übercharge will not charge the boost.
- Use your favorite secondary to collect boost as quickly as possible. Harass enemies with pistols at a distance for small gains, get a Flying Guillotine hit to instantly charge your meter, or drink Crit-a-Cola and blast at range.
- The Fan O' War's mark for death can help with collecting boost. However, you have to actually hit someone with it first, which can be difficult with your initially reduced speed, and will make you a vulnerable target.
- The Atomizer is not recommended to use with this weapon, as a triple jump will remove all your boost. However, it will make your jumps more effective when you actually need to use it.
- The Boston Basher will charge up to 85% of your boost meter on a successful hit, but missing and hitting yourself will often fully drain it.
- The Wrap Assassin is a good alternative to the Boston Basher as it has a ranged bleed on hit
Back Scatter
| Weapon | Kill Icon | Ammo | Damage | ||||
|---|---|---|---|---|---|---|---|
| Loaded | Carried | Point Blank | Medium Range | Long Range | Critical | ||
Craft Back Scatter |
4 | 32 | 11-105 | 6-60 | 3-32 | 180 | |
- The Back Scatter deals mini-crits when fired at close range from behind, at the cost of 20% increased bullet spread and a reduced clip size of four.
- In general, the Back Scatter acts as an ambushing-focused sidegrade to the Scattergun. While it excels at picking off unaware targets, direct confrontations at medium range and farther become less effective due to its lower clip size and accuracy.
- Some strategies that apply for the Spy may also apply to this weapon. Get behind enemies and fire at them while unnoticed to benefit from the Back Scatter’s mini-crits.
- The Back Scatter deals 142 mini-crit damage at point blank — enough to kill 125-health classes with a single shot if all pellets connect. This makes you even more effective when attacking unaware targets, such as Snipers and Medics.
- Jumping over an enemy and then quickly turning around can land you a free mini-crit shot.
- The Back Scatter excels at Spy-checking due to a back hit being able to instantly kill enemy Spies.
- If the Spy has a Dead Ringer, the mini-crit marker over his head will give him away. Follow this marker and shoot them until they die.
- Even if your opponent turns around, you can still take them down with two shots at close range, since the Back Scatter deals standard Scattergun damage if all pellets connect.
- The clip size penalty can be negligible if you do not usually use a gun's entire clip (for example, firing 2 shots then reloading will have no difference to the Scattergun), although this means you will reload more frequently.
- Because of the decreased accuracy, engaging at medium range is not suggested. Prolonged combat also becomes less effective, as your lower clip size and higher bullet spread will put you at a significant disadvantage.
- The extra spread of this weapon does make Spy-checking easier, though, due to the larger spread letting your bullets cover a larger area.
- Getting behind enemy lines is crucial in using this weapon most efficiently. Bonk! Atomic Punch, the Atomizer, and the Winger synergize best with this, allowing you to get behind enemies without too much trouble.
- Because of the lower clip size, it can be good to bring a Pistol variant for when you run out of Scattergun shots.
- Pairing the Back Scatter with the Crit-a-Cola is not recommended, as the bullet spread will prevent your shots from hitting at range, while you can already deal mini-crits from behind anyway.
- Due to the gun's stats when compared to the stock Scattergun, the Back Scatter can be used to help train Scouts to play their class more effectively overall.
- The mini-crits encourage Scouts to adopt a more flank and ambush-focused playstyle, as well as avoiding damage in one-on-one fights by maneuvering behind the enemy.
- The smaller clip size means the Scout can be left vulnerable waiting for a reload if they spam all their rounds, meaning the player needs to apply effective ammo management in order to not be caught vulnerable after spamming 4 shots and waiting for a reload.
- The wider bullet spread means that the Scout needs to shoot only if they're as close to the target as possible, and to use their Pistol or Flying Guillotine for midrange rather than their primary.
Secondary Weapons
Pistol + reskins
| Weapon | Kill Icon | Ammo | Damage | ||||
|---|---|---|---|---|---|---|---|
| Loaded | Carried | Point Blank | Medium Range | Long Range | Critical | ||
Stock Pistol |
12 | 36 | 22 | 15 | 8 | 45 | |
Promotional Lugermorph |
|||||||
Uncrate C.A.P.P.E.R |
|||||||
- Targets too far away for the Scattergun should be fought with the Pistol. Its greater accuracy at medium range and quick reload makes it a viable backup weapon for when your Scattergun runs out of ammunition, though it only holds three spare magazines of bullets.
- One of the Pistol's primary uses is to finish off wounded targets attempting to retreat. Do not underestimate the power of the Pistol, as several shots at close range can kill you quickly.
- The Pistol is also a great weapon for baiting enemy players. If you can run behind enemy lines, hit a few shots and then run away; players will often try to pursue you, making it easier for your team to move in without as much trouble.
- The Pistol reloads much more quickly than the Scattergun. When both are empty, reloading the Pistol first will allow you to fire sooner than reloading the Scattergun.
- Be careful - changing weapons before the Pistol finishes reloading will cancel the reload, wasting the time you spent reloading. Wait until when your ammo count changes before switching weapons.
- The Pistol can waste a lot of ammunition if fired haphazardly into a firefight, partly due to its firing speed and especially since you only have three magazines of bullets. Choose your targets wisely and aim carefully.
- Your Pistol is the best option to take down Sentry Guns from longer ranges than any other Scout weapon, since buildings are not affected by damage falloff. If you're out of the Sentry Gun's range, consider hitting the Engineer with a Sandman ball (if your using it) when he is far away from the Sentry (making it harder for him to reach the Sentry before you destroy it) and then destroying the Sentry Gun with your Pistol.
- When running towards enemies aware of your presence, try firing at them with your Pistol before closing in on them with your Scattergun. When taking on lighter classes, 2–3 seconds of accurate Pistol fire can take away a quarter to a third of their maximum health, allowing you to finish them off with one close-range blast of your primary weapon.
- The Pistol is one of the most deadly weapons to get Critical hits with. If you happen to get First Blood in Arena, switch to your Pistol, as it can take any class down in one clip, including most overhealed enemies if you fire fast, and accurately, and the Critical hits mean the Pistol can kill enemies from longer distances without a need to consider damage falloff. However, for closer ranges, the Scattergun may still work better.
- The Pistol is a reliable backup weapon for any of your primary weapons. All Scattergun sidegrades have a lower clip size, so switch to your Pistol and fire at them once you are out of shots. This allows you to sustain fire when you would otherwise have been vulnerable reloading.
Winger + reskins
| Weapon | Kill Icon | Ammo | Damage | ||||
|---|---|---|---|---|---|---|---|
| Loaded | Carried | Point Blank | Medium Range | Long Range | Critical | ||
Craft Winger |
5 | 36 | 26 | 17 | 9 | 52 | |
- The Winger deals 15% more damage per shot than the Pistol, but has only 5 rounds per magazine. It also allows the user to jump 25% higher when active.
- The Winger requires you to fire more accurately than the Pistol. If you cannot aim well, consider using a different Pistol instead.
- Much of the strategy incorporated with the use of the Pistol can be used with the Winger, but players must be wary of the Winger's frequent reloading.
- The Winger is a better weapon-heckling version of the Pistol, inflicting higher damage per round in exchange for a much smaller magazine. Take advantage of its high damage and use it for close encounters.
- However, the larger clip of the Pistol makes for more sustained damage, and can potentially take down a target when the Winger would have run out of shots. Choose whichever one is preferable for the engagement.
- Despite its drawback of 5 shots, this allows players to manage the ammo pool of the Winger more easily, and the increased damage, while not as great as the Pistol's damage-per-second due to its larger clip, is still useful as a backup weapon with your primary weapons. However, the Winger is best for short encounters with weak targets, while the Pistol excels at prolonged combat. Consider this when determining your loadout.
- The higher base damage of the Winger makes it better suited for taking out Sentry Guns at a distance; remember that shots fired at buildings do not factor in damage ramp-up/fall-off.
- However, the reduced magazine size will make it harder when there is an Engineer constantly repairing the Sentry Gun.
- Use the Winger's increased jump height to take alternate routes throughout the map. Ambush enemies by approaching from unexpected areas.
Pretty Boy's Pocket Pistol
| Weapon | Kill Icon | Ammo | Damage | ||||
|---|---|---|---|---|---|---|---|
| Loaded | Carried | Point Blank | Medium Range | Long Range | Critical | ||
Craft Pretty Boy's Pocket Pistol |
9 | 36 | 22 | 15 | 8 | 45 | |
The Pretty Boy's Pocket Pistol deals the same damage as the stock Pistol; however, it has a 25% smaller clip size. It allows you to heal up to 3 health per hit and has a 15% faster firing speed.
- This weapon offers a middle-ground between the healing utility of the Mad Milk and the various offensive roles of the Stock Pistol. It does not support your team, but it can be greatly beneficial for surviving when roaming around in enemy territory, where friendly Dispensers and Medics are scarce. It also fulfills most of the Stock Pistol's roles, albeit slightly less effectively.
- Due to its increased firing speed, the Pretty Boy's Pocket Pistol is excellent for dealing fast burst damage that the stock Pistol cannot match.
- However, due to the decreased clip size, the Pistol still deals more damage overall, but across a longer period of time.
- As a Pistol, this weapon is useful in all the same ways as the Stock Pistol, including the ability to easily finish off weakened enemies at a distance, directly fight enemies at a distance, and destroy Sentry Guns at a distance, among others.
- Similarly to the Stock Pistol, the Pocket Pistol also offers an alternative to the Scattergun with better effective distance, faster fire rate, and a faster reload speed. It is a good backup weapon for when there is no time to reload your Scattergun or when you are out of its effective range.
- The Pretty Boy's Pocket Pistol is useful for healing minor wounds. Fire at unaware or unprepared targets.
- Attacking unaware or distant enemies can significantly increase the Scout's chances of survival.
- If lit on fire, shoot the offending Pyro. Stay out of the range of their flames and backpedal while firing.
- Don't rely on the healing of the Pretty Boy's Pocket Pistol alone. If you need to heal a significant portion of your health, reach a health pack or Medic instead, and use the Pistol to top off any remaining health while you retreat.
Bonk! Atomic Punch + reskins
| Weapon | Ammo | Effect | |||
|---|---|---|---|---|---|
| Loaded | Carried | Drink Effect | Duration | Recharge Time | |
Unlock Bonk! Atomic Punch |
1 | ∞ | Drink to become invulnerable. Cannot attack, capture, or defend during this time. Damage absorbed will slow you when the effect ends. | 8 seconds | 22 s |
- When consumed Bonk! Atomic Punch, you will become invincible for 8 seconds, although you are still affected by knockback, similar to an ÜberCharge. While active, the camera shifts to a third-person view, and the Scout cannot attack (but can still taunt-kill with the Sandman or Atomizer). After the invulnerability effect wears off, the Scout will receive a 5-second slowing effect based on the damage they absorbed under Bonk!'s effect. Bonk! takes 22 seconds to recharge after use.
- Use Bonk! as a safety net when you find yourself in a bad situation, like running into Sentry Guns, Heavy/Medic combos, or large groups of enemies.
- Be careful where you drink Bonk!; for the duration of the drinking animation, you are immobile and vulnerable to damage. If you are launched by knockback while you drink, the animation will be canceled and you will not gain invulnerability, but it will still consume the drink and you will have to wait for it to recharge.
- Take note of the map's flank routes and locations. You may need to run to a deserted area and wait out the slowdown following the end of your effect, as you will be highly vulnerable then, or you may be able to run behind your teammates for cover and recovery.
- You can still perform some actions after you have drunk Bonk!, such as reloading your Scattergun and taunting. This can help you get ready for your next fight, or set up a taunt kill on unaware players. As you cannot switch weapons under Bonk!, make sure that you switch to the Bonk! from your primary rather than your melee weapon, as you will be forced to the last held weapon after you use Bonk!.
- Bonk! can be used to avoid damage-over-time from fire or bleeding. Though the afterburn will continue to damage you after Bonk! wears off, the life extension Bonk! gives you just might be enough to reach a water pool or a source of health before you burn to death.
- This also lets you negate Jarate and other effects that mark you for death. Drink Bonk! to protect yourself from the increased damage you will take otherwise. It is also possible to be covered in Jarate during the effects of Bonk!, so if this happens, make a hasty retreat before you begin taking damage again.
- If your team is about to push with an ÜberCharge, take a drink before turning a corner that could potentially have a Sentry Gun or Stickybombs around it. This can keep your Medic safe before he uses his ÜberCharge, and your allies can take out the opposition while you provide cover and distraction. It may also let you take the brunt of the knockback rather than your teammates, so they can advance more easily. If you have no one backing you, simply reporting what you found via voice chat or using the "Sentry Ahead!" voice command can potentially save your teammates.
- If your team lacks a Medic, you can use Bonk! in the same way as an ÜberCharge, making the Sentry Gun target you while your teammates attack it. Make sure to escape before the Bonk! wears off, and know that Sentry Guns will deal knockback to you that may make it harder to flee. However, Wrangled Sentry Guns may make this ineffective, as the Engineer controlling it will likely focus its fire on the greater threats.
- It is possible to position yourself so that the Engineer is between you and their Sentry Gun. As Sentry Guns can injure both their owner and the enemy, you can use this to kill the Engineer with his own Sentry Gun, though this can be risky, as you will need to balance time used to kill the Engineer as well as time to escape before the effect ends.
- As you will be absorbing high amounts of damage, you will be considerably slowed after the invulnerability wears off. If you "dodge" 200 damage or more, you will be reduced to half speed for 5 seconds, allowing enemies to hit you easily.
- If your team lacks a Medic, you can use Bonk! in the same way as an ÜberCharge, making the Sentry Gun target you while your teammates attack it. Make sure to escape before the Bonk! wears off, and know that Sentry Guns will deal knockback to you that may make it harder to flee. However, Wrangled Sentry Guns may make this ineffective, as the Engineer controlling it will likely focus its fire on the greater threats.
- It is very easy to distract enemies while you are under the influence of Bonk!. Enemy Snipers can be distracted as they try to shoot you or keep their crosshair on you, waiting for your invulnerability to wear off. Running into Soldiers and Demomen will usually result in them hurting or outright killing themselves with their explosive weapons. Heavies and Pyros will also find it difficult to focus on firing if you run circles around them.
- You can use your invulnerability to block enemies or projectiles. Body-blocking an enemy Medic's patient can potentially waste their ÜberCharge. More importantly, it saves your Medic's ÜberCharge for dealing with the enemy, rather than countering the enemy's charge.
- Save Sentry Guns or even hurt teammates from enemy fire by taking rockets and bullets before they can hit. Keep track of when your Bonk! runs out, though, and escape a few seconds before it wears off to recover from the post-effect slowdown in peace.
- Bonk! can be used to propel yourself across the map using enemy explosives or Sentry Guns. However, where you will go is often unpredictable, as you will have to rely on enemies for knockback.
- Try to avoid taking unnecessary fire from enemies, as it will slow you down even more. Remember that you can still dodge attacks just as easily under the effects of Bonk!.
- Try to use Bonk! at the right time. Using it in situations where it was not needed may result in a slowdown effect for no reason.
Crit-a-Cola
| Weapon | Ammo | Effect | |||
|---|---|---|---|---|---|
| Loaded | Carried | Drink Effect | Duration | Recharge Time | |
Craft Crit-a-Cola |
1 | ∞ | While effect is active: each attack mini-crits and sets Mark-For-Death for 5 seconds. | 8 seconds | 22 s |
- When consumed Crit-a-Cola, all damage dealt will be mini-crits for 8 seconds. Attacking while under the effect will mark you for death for five seconds (does not stack, but resets each time you attack). The active weapon will glow and crackle with electricity (similar to a Crit boost, but with a much lighter color). The effect lasts 8 seconds and can be used again in 22 seconds.
- The Crit-a-Cola is a high-risk, high-reward weapon. A mini-crit-boosted Scattergun is a very powerful weapon, but its glow can single you out as a target, and since you take mini-crits for five seconds after attacking, you can die very quickly. Because of this, the Crit-a-Cola encourages an ambush style of play.
- Since you take mini-crits for five seconds after attacking, using this to up your damage output in a 1v1 fight is no longer viable, so Crit-a-Cola is now mainly a tool for assassinating lone players or flanking and taking out Medics.
- During the 8-second mini-crit period, you can fire up to 7 Scattergun shots, 6 Force-A-Nature shots, 9 Shortstop shots, or swing any melee weapon 10 times. As such, make sure your weapon is fully loaded to benefit the most from the mini-crits.
- Keep in mind that when you use the Crit-a-Cola, you will automatically switch to your last equipped weapon. If this is your melee weapon, be prepared to attack with it or quickly switch to your primary.
- At point-blank range, one blast from the Scattergun (or any primary weapon other than the Shortstop) with the mini-crit buff is capable of killing any 125 HP class from full health. Therefore, if you find yourself behind multiple light classes, the Crit-a-Cola can give you one kill per shot. Land two shots to kill most other classes.
- Be careful about drinking the Crit-a-Cola when facing competent Soldiers or Demomen. You will die to one close-range direct hit rocket or grenade, and if you are using the Sandman, one point-blank Shotgun blast will also kill you.
- Since mini-crits do not suffer from damage falloff, your primary weapon will remain useful at a longer range as well.
- However, you will still be generally disadvantaged at range against most classes. As you are vulnerable while drinking, it is better to hide, drink it, then run closer to fight back.
- Never drink the Crit-a-Cola under the effects of a friendly Buff Banner or a critical hit boost, or when facing an enemy that is marked-for-death. Your mini-crits do not stack with critical hits or other mini-crits - using Crit-a-Cola will only weaken yourself with a self-inflicted marked-for-death debuff.
- If possible, coordinate drinking Crit-a-Cola with a friendly Soldier's Battalion's Backup; the defense boost will negate your increased vulnerability and will allow you to deal mini-crits with no downsides.
- The Force-A-Nature is capable of dealing up to 134 damage with the Crit-a-Cola, making it possible to kill any class (besides overhealed Heavies) with two shots at point-blank range. This tactic is best used for taking out a single, high-priority target, such as a Medic with a prepared ÜberCharge, as the Force-A-Nature's fast firing speed may be able to kill the enemy before they can react.
- Remember to take into account the Force-A-Nature’s knockback to ensure you don’t accidentally blast your target into safety.
- The Crit-a-Cola pairs well with the Shortstop, as its extra range and tighter spread combined with mini-crits not being affected by damage falloff lets you fire from a safer distance than is possible with the Scattergun.
- The Crit-a-Cola and Soda Popper can be used together well because the damage boost from the Crit-a-Cola allows you to charge your Hype faster, and the Hype buff will allow you to avoid most damage altogether, negating your marked-for-death debuff.
- However, you sacrifice a secondary weapon, making you less effective at long range.
- When using the Baby Face's Blaster with the Crit-a-Cola, it is much easier to gain boost at a distance due to the mini-crits.
- It's recommended to avoid using the Sandman when equipped with the Crit-a-Cola, because the 15 base health you lose may allow Soldiers, Demomen, and other Scouts to kill you before you can kill them.
Mad Milk + reskins
| Weapon | Ammo | Effect | ||||
|---|---|---|---|---|---|---|
| Loaded | Carried | Effect on Enemies | Effect on Teammates | Duration | Recharge Time | |
Craft Mad Milk |
1 | ∞ | 60% of all damage dealt is returned as health. Also negates Cloak. | Extinguishes flame on yourself and/or teammates. | 10 seconds / 2.5 seconds | 20 seconds / 16 seconds when teammates extinguished. |
Uncrate Mutated Milk | ||||||
- Mad Milk is similar to Jarate, it is a thrown weapon that covers enemies in the substance, and nullifies the Cloak of enemy Spies and extinguishes teammates and yourself when on fire. Anyone who attacks a player covered in Mad Milk will heal 60% of the damage they dealt. Mad Milk has a recharge time of 20 seconds.
- Mad Milk allows you to remain in combat for longer without dying or needing to retreat, since you will regain health as you deal damage.
- Mad Milk is a great supplement for an offensive push, allowing attackers to replenish their health quickly. Simply throw it onto enemy combatants and retreat while firing to both heal yourself and teammates. This makes overpowering the enemy much easier during pushes.
- For example, when using the Kritzkrieg's crit-boost, teammates heal a great amount of health.
- Mad Milk can also be used on defense. When thrown on a Payload or control point, your teammates and yourself can easily stop a push.
- Using Mad Milk on classes like the Heavy can be a great benefit to your team because it allows your teammates to regain large amounts of health, due to his slow speed and high health. For example, Snipers will be able to regain at least 90 health if they land a headshot on a “milked” target.
- While still risky, Mad Milk makes head-on approaches to bulky classes like Heavies much easier, as you will be able to take more damage as you attack the enemy.
- Using Mad Milk on offensive classes like Pyros allows for survivability while fighting them. It allows you to survive the high outputs of damage from them through close range combat.
- Mad Milk is a useful tool for dealing with enemy Spies. The dripping effect is easily spotted if they are disguised and will prevent them from evading your team by cloaking.
- Additionally, the white particles of any player dripping in milk makes them more visible on dark maps such as Sawmill.
- Mad Milk lets you extinguish teammates or yourself. It is especially beneficial to you, as afterburn will deal enough damage over time to drain half your health. Do not be afraid to use it when you see a burning teammate, as it refills 20% of its charge instantly if you extinguish a teammate.
- Some of your Scattergun variants synergize well with Mad Milk.
- The healing will be more effective at close range with the Scattergun, as the larger clip and stronger shots can keep you alive longer using Mad Milk's effect.
- The Shortstop will excel at a distance, as its reliable medium-range shots will give you a decent amount of health while letting you hang back safely.
- Mad Milk will keep you alive while you constantly hunt enemies with the Baby Face's Blaster to fill your Boost bar.
- Hitting an enemy with the Fan O'War and dousing them with Mad Milk will return more health per hit, but may alert the enemy to your presence.
Flying Guillotine
| Weapon | Kill Icon | Ammo | Damage | ||||
|---|---|---|---|---|---|---|---|
| Loaded | Carried | Any Range | Mini-crit | Critical | Recharge Time | ||
Craft Flying Guillotine |
1 | ∞ | 50 | 68 | 150 | 6 seconds / 4.5 seconds | |
| Bleeding | N/A | N/A | 40 damage over 6 seconds | 54 damage over 6 seconds | 40 damage over 6 seconds | N/A | |
- The Flying Guillotine is a thrown weapon that causes bleeding when it hits an enemy.
- The Flying Guillotine sacrifices your accurate Pistol for a stronger, harder-to-aim weapon with cooldown. One hit from the Flying Guillotine deals moderate damage, equivalent to several Pistol shots, if including bleed. However, you will lack a secondary weapon if you miss, so make sure your throws count.
- This weapon flies at an arc, and takes some time to reach its destination. Lead your target accordingly, as throwing where your enemy was will simply cause it to miss.
- While it can be hard to aim, the Flying Guillotine is very hard to see when thrown. Enemies will usually fail to see your throw coming until it strikes them.
- The Flying Guillotine deals no damage to buildings: when thrown at any building, the weapon will simply bounce off.
- Conversely, enemy Pyros can airblast your thrown weapon and bounce it back at you. Be careful, as this will take away most of your health.
- This weapon can be very useful on Payload matches because most players will be moving slowly and/or not paying attention while they are pushing the cart, so you can dish out a solid amount of damage. The added bleeding effect negates the healing from the cart and you can move in and easily kill the player with your Scattergun.
- Paired with the Force-A-Nature, you can use the Flying Guillotine to cripple an enemy's health greatly, and while they go to find a health kit, you can chase them down with the Force-A-Nature and finish them off with 2 quick shots to the back. This works better with lower-health classes like Sniper, Spy, or even another Scout, while leaving the classes with more health to your teammates.
- Bleeding damage included, a regular hit will fill up most of the Baby Face Blaster's boost gauge in one hit.
- Long-range hits will decrease the already short recharge time. Try to hit shots from farther away to make it able to be thrown more often.
Melee Weapons
Bat + reskins
| Weapon | Kill Icon | Attack Interval | Damage | ||
|---|---|---|---|---|---|
| Point Blank | Mini-crit | Critical | |||
Stock Bat |
0.5 seconds | 35 | 47 | 105 | |
Promotional Frying Pan |
|||||
Promotional Saxxy |
|||||
Drop Conscientious Objector |
|||||
Promotional Freedom Staff |
|||||
Drop Bat Outta Hell |
|||||
Promotional Memory Maker |
|||||
Drop Ham Shank |
|||||
Reward Golden Frying Pan |
|||||
Achievement Necro Smasher |
|||||
Uncrate Crossing Guard |
|||||
Uncrate Batsaber |
|||||
Promotional Prinny Machete |
|||||
- While the Bat swings quickly, it deals less than half the damage of other stock melee weapons. Each swing does 1/3 of a point-blank Scattergun shot, making it only useful as a backup weapon.
- On servers with random critical hits, the Bat becomes much more effective due to its high swing speed, which lets it roll for more crits compared to other melee weapons.
- The Bat works well as a finishing weapon. A couple fast hits on an injured enemy will most likely kill them.
- If low on ammo or have no time to reload your weapons in the middle of a firefight, the Bat acts as a last resort weapon, although it is usually best you retreat.
- In a one-on-one melee fight, you will be able to get in more hits due to the Bat's swing speed and your own mobility, but your enemy will be able to kill you faster if he lands his.
- You may prefer to kill situationally-unaware or aiming-impaired Heavies with the Bat by circle strafing around them or jumping on top of their large bodies, but this strategy should not be used excessively otherwise.
- You may use the bat when ambushing an enemy who is constantly strafing (as melee weapons require less precise aim to hit).
- Unless under the conditions described above, you would generally be better off using your Scattergun.
Sandman + reskins
| Weapon | Kill Icon | Attack Interval | Damage | ||||
|---|---|---|---|---|---|---|---|
| Point Blank | Mini-crit | Critical | Slow Time | Recharge Time | |||
Unlock Sandman |
0.5 seconds | 35 | 47 | 105 | N/A | N/A | |
| 0.25 seconds | 15 | 20 | 45 | 1-7 seconds | 15 seconds | ||
- The Sandman can launch a baseball with the secondary fire that will slow an enemy on hit for 1-8 seconds, depending on how long the ball has stayed in the air, but carrying this weapon will lower the Scout's maximum health by 15, to a total of 110. Hit targets are considerably slowed and cannot jump. Hitting an enemy with the ball at maximum range will render the target immobile for the entire effect duration. The ball has a recharge rate of 10 seconds, but can instantly be reused by picking up a baseball that has been launched by the player or another Scout.
- The ball counts as a projectile, and can be airblasted.
- A launched ball lingers for 3 seconds if it hits someone, or 10 seconds if it doesn't.
- The Sandman can be a great support weapon for your team. Slowing a target that has a Kritzkrieg activated on them can delay the enemy's push.
- If you are caught in a bad situation, the slowing effect can buy you enough time to get to safety.
- Similarly, if you are in a situation to get the first strike, slowing your opponent can make it much easier for you to hit them before they can react.
- Critical hits lengthen the slow time. In servers with random critical hits enabled, the baseball also uses the same base critical chance of 15% as any melee weapon, making such criticals rather common on these servers.
- Aiming the baseball is not always easy due to its arc and travel time, but in certain areas, it can be. For example, the bridge in Badlands is just long enough for you to hit an enemy with a moon shot (a maximum strength slow) and it is relatively easy to hit someone with it since the bridge is a straight pathway.
- When equipping the Sandman, be aware that you start with only 110 health. At point-blank range, a Soldier can kill you with one rocket, as can a Demoman with a well-placed stickybomb. If survival is a priority, it is better to switch to another melee weapon.
- A lone Engineer is a prime target for the Sandman's ball. While slowed, the Engineer may not be able to reach his Sentry Gun in time due to his decreased speed. Use this opportunity to attack the Sentry Gun. This is especially useful if the Engineer is a good distance away from his Sentry Gun.
- Avoid using the Sandman with Crit-a-Cola, as the 15 health deduction will allow enemies to kill you nearly instantly.
Holy Mackerel + reskins
| Weapon | Kill Icon | Attack Interval | Damage | ||
|---|---|---|---|---|---|
| Point Blank | Mini-crit | Critical | |||
Craft Holy Mackerel |
0.5 seconds | 35 | 47 | 105 | |
Craft Unarmed Combat |
|||||
- The Holy Mackerel and Unarmed Combat are similar to the stock Bat. But each hit will be announced on the kill feed, and with a kill will show "FISH KILL!" or "ARM KILL!".
- While the kill feed announcement may be aesthetic, hitting a cloaked Spy will be displayed on the kill feed. Conversely, triggering a Dead Ringer Spy's cloak or hitting a disguised Spy will not be displayed in the kill feed. This lets you track down Spies that attempt to feign death.
- The Holy Mackerel and Unarmed Combat will make your presence known to any enemy who looks at the kill feed and draw attention to you.
Candy Cane
| Weapon | Kill Icon | Attack Interval | Damage | ||
|---|---|---|---|---|---|
| Point Blank | Mini-crit | Critical | |||
Craft Candy Cane |
0.5 seconds | 35 | 47 | 105 | |
- The Candy Cane drop a small Health pack, regardless of what weapon the player was using in order to kill the enemy. As a drawback, the Scout takes 25% more damage from explosives.
- Killing an enemy with any of your weapons while you have the Candy Cane equipped will drop a health kit.
- Use the Candy Cane to check for Dead Ringer Spies, as feigned deaths will not drop Health kits.
- The Candy Cane can be a double-edged sword when fighting groups of enemies. While the dropped Health packs can allow you and your teammates to stay in the fight for longer, they can also be picked up by the enemy, making them more difficult to kill. Use it when pushing the enemy back.
- A successful kill with the Candy Cane in Medieval Mode will cause two health kits to be dropped instead of one.
- Try to avoid Soldiers and Demomen due to the explosive damage penalty. With the Candy Cane equipped, a direct hit from most of their primary weapons at close range will instantly kill you.
- With this knowledge, consider equipping this weapon with others that give you additional damage vulnerability, such as the Crit-a-Cola, may be useful, as any hit from an explosive would kill you anyway, even without the marked-for-death effect.
- You can also use this fact to train yourself to dodge better, as getting hit by the explosive damage punishes you for not dodging well.
- Using the Mad Milk with the Candy Cane can allow you to heal yourself and teammates if no Medics or Health kits are nearby.
- The Candy Cane is also useful when you have a damaged Medic nearby. With the Medic's healing, you can easily secure a kill, which will drop a small medkit for your Medic.
Boston Basher + reskins
| Weapon | Kill Icon | Attack Interval | Damage | ||||
|---|---|---|---|---|---|---|---|
| Point Blank | Mini-crit | Critical | |||||
Craft Boston Basher |
0.5 seconds | 35 | 47 | 105 | |||
Promotional/Craft Three-Rune Blade |
|||||||
| Bleeding | N/A | 40 damage over 5 seconds | 50 damage over 5 seconds | N/A | |||
- The Boston Basher will apply bleed to an enemy hit by it for 5 seconds (for a total of 75 damage), but on miss, it will apply 18 base damage and bleed effect to the user at a reduced rate (a total of 48 damage). The user will not be damaged when hitting a teammate, any world geometry, or props.
- Be cautious and accurate with your shots; missing can take out up to half your health.
- Spamming the Boston Basher will usually result in death; it is advisable to only go for 1-2 hits per attack on a target.
- If you end up making yourself bleed, you can stop the bleeding by using items such as Mad Milk, Bonk! Atomic Punch, or a health kit.
- A successful hit including bleed will deal 75 damage, making hit-and-run tactics even more effective. Run in, melee your target once to soften him up, and fire Scattergun shots as you retreat.
- If you are losing a one-on-one fight and need to escape or are likely to die, hitting your opponent as you run away may be enough to kill them. This is more effective on light classes like other Scouts, although heavier classes may still be forced to retreat.
- Ambushing is key with the Boston Basher. If an enemy is unaware of your presence, run in and land a few hits with the Basher before finishing them off with your Scattergun.
- By swinging right after jumping, you can boost yourself with the self-damage of the Boston Basher to heights comparable to the Pyro's Detonator jump. However, this costs a lot of health, so take note of where the map's health packs are.
- By combining the boost of the Boston Basher with the ability of the Force-A-Nature to perform a third jump, you can jump over long stretches of a map.
- By hitting yourself while being healed, you can help a friendly Medic build ÜberCharge faster.
- The bleed effect can be useful for preventing Spies from escaping by cloaking. However, do not try to hit a Spy that is already invisible, or you may weaken yourself and allow him to finish you off with his Revolver.
- Hitting a teammate will not result in damage, this can be used for Spy-checking.
- If you land a successful hit on an enemy with the Boston Basher while the enemy is coated in Mad Milk, the bleed damage will heal you. This can reduce the health lost from missed attacks.
- The Crit-a-Cola can be useful with the Boston Basher; self-inflicted damage will not be boosted by Crit-a-Cola's effect, and the mini-crits apply to bleed damage making it an even better ambush and hit-and-run tactic against enemies because of the increased damage dealt.
Sun-on-a-Stick
| Weapon | Kill Icon | Attack Interval | Damage | ||
|---|---|---|---|---|---|
| Point Blank | Mini-crit | Critical | |||
Promotional/Craft Sun-on-a-Stick |
0.5 seconds | 26 | 35 | 79 | |
- The Sun-on-a-Stick delivers 25% less damage than the stock Bat, but guarantees a critical hit whenever you strike a burning enemy. Additionally, it grants the user 25% fire resistance when it is the active weapon.
- Equipping the Sun-on-a-Stick usually comes down to whether you have a Pyro on your team, as the critical hits only come into play when your opponent is suffering from afterburn.
- Likewise, fire resistance is virtually useless if there are no Pyros on the enemy team, and flat-out worthless if there are no enemies capable of inflicting fire damage at all, such as Cow Mangler 5000-wielding Soldiers.
- While the Sun-on-a-Stick's critical hits on burning targets are powerful, your Scattergun deals damage much more reliably. Because of this, attacking with the weapon is generally a bad idea unless you are ambushing a burning enemy.
- The Sun-on-a-Stick's passive fire resistance is usually more useful than its highly situational critical hits, giving you the extra survivability needed to retreat to a health source when you're on fire.
- The best game mode to use this weapon in is Medieval mode. Snipers and Pyros can light opponents on fire with the Huntsman and the Sharpened Volcano Fragment. Otherwise, it is overall a weak weapon to use for combat, and may not be reliable in a melee fight.
Fan O'War
| Weapon | Kill Icon | Attack Interval | Damage | |||
|---|---|---|---|---|---|---|
| Point Blank | Critical | Marked for Death Time | ||||
Promotional/Craft Fan O'War |
0.5 seconds | 9 | 27 | 15 seconds | ||
- The Fan O'War will "marked for death" when hit an enemy. The "marked for death" is indicated by the skull with crossbones floating above their head, and all damage they take will be mini-crits. The "marked for death" effect lasts 15 seconds. The Fan O'War also deals critical hits when it would normally mini-crit. As a drawback, the Fan O' War deals 75% less damage on hit.
- The Fan O' War's effect can only be applied to one enemy at a time.
- Remember that the Fan O'War is essentially the melee equivalent of Crit-a-Cola; while you do not receive increased damage from enemies, it still requires that you get within point-blank range of enemies.
- Unlike the Crit-a-Cola, you still get access to your secondary weapon, so the Fan O' War is a good choice if you do not use your melee weapon for combat often.
- The Fan O'War deals 9 damage against unmarked players, and 26 damage for subsequent hits. Like most melee weapons, it is not a good choice for directly dealing damage. Hit the enemy once, then use your primary and secondary weapons to take full advantage of the damage bonus.
- Ambushing and good maneuvering are crucial with the Fan O'War; whether you are using it on the front lines or the opposing base, remember that surprise is key to landing a hit. Rushing straight towards an enemy with a melee weapon is never a good strategy.
- Unlike Jarate, the mark for death persists for 15 seconds and its duration is not reduced if the target is being healed, making the Fan O'War better at weakening key targets.
- The Fan O'War is very effective for countering Spies. Even if a marked Spy cloaks with a Dead Ringer, the skull symbol will remain above his head, nullifying his invisibility.
Atomizer
| Weapon | Kill Icon | Attack Interval | Damage | ||||
|---|---|---|---|---|---|---|---|
| On Enemies | On Buildings | Mini-Critical | Critical | ||||
Craft Atomizer |
0.5 seconds | 30 | 35 | 40 | 89 | ||
- The Atomizer grants the Scout the ability to triple jump while holding the weapon and mini-crit enemies while airborne, but also deploys 50% slower in addition to 15% less damage done to players.
- The Atomizer deals less damage to players, but not to buildings. Using it to take out an enemy Teleporter or Dispenser can conserve primary and secondary ammo while doing regular damage.
- Like the Fan O'War, the Atomizer is more of a utility than a weapon. If you do not use your melee enough for its penalties to matter, consider using the Atomizer.
- Use the Triple jump while attacking an enemy to be able to get a Mini-Crit and deal 40 damage. This Mini-Crit can be utilized expertly while dealing with slow classes such as the Heavy or the Soldier as they will be distracted and getting Mini-crits hit towards them and they not even noticing it.
- The Atomizer's third jump can be very useful when retreating, as it gives you another jump to dodge enemy attacks. This triple jump can be used for distracting or confusing slow classes when going over them for a sneaky attack. Its switch speed penalty makes it less useful in direct combat, however; you cannot fire your Scattergun while holding the Atomizer.
- Using the Atomizer's third jump, you can often take shortcuts into places in the map you could not otherwise reach. Try using them for devastating flanks.
- With the Force-A-Nature equipped, you can perform a quadruple jump by combining the Atomizer's triple jump with the Force-A-Nature's self-inflicted recoil.
- The Atomizer does not pair well with the Baby Face's Blaster, as the Blaster loses most of its speed boost with each jump. Using your third jump will lose all your Boost.
Wrap Assassin
| Weapon | Kill Icon | Attack Interval | Damage | ||||
|---|---|---|---|---|---|---|---|
| Point Blank | Mini-crit | Critical | Recharge Time | ||||
Craft Wrap Assassin |
0.5 seconds | 11 | 17 | 32 | N/A | ||
| 0.25 seconds | 15 | 20 | 45 | 11.25 seconds | |||
| Bleeding | 40 damage over 5 seconds | N/A | N/A | N/A | N/A | ||
- The Wrap Assassin allows you to launch a Bauble with secondary fire similar to the Sandman's baseball, but causes damage and bleeding on hit instead of slowing. The bauble also breaks on contact with a surface, dealing negligible damage to enemies around it, or the Scout himself. The Wrap Assassin's ball regenerates 25% faster than the Sandman's, allowing for more shots. The drawback is its melee damage, which is reduced by 65%.
- The Wrap Assassin is a Sandman variant that sacrifices its slow ability for a more frequent damage option and no maximum health reduction. Its melee damage reduction should be negligible if you use a primary weapon at close range.
- As the bauble works similarly to the Sandman's ball, most of the Sandman's tactics work for this weapon.
- Try to aim at groups of people clustered together, such as near a control point, to increase your chance of hitting a target.
- The ornament also shatters if it hits anything, dealing 4-13 damage in an area-of-effect. This shatter damage does not cause bleeding. Rely on direct hits to deal damage.
- The bleed damage of the Wrap Assassin can greatly benefit from the Crit-a-Cola, as it will deal a greater amount of damage to enemies.
- The Wrap Assassin's ball can be used as an opening attack, or to to harass and keep pressure on distant enemies like Snipers, with the damage over time effect.
- Although the Flying Guillotine does more damage and has a faster recharge time, the Wrap Assassin allows you to choose a secondary of your preference and retain a weapon that causes a bleeding effect.
- However, using both at once can make you a damage-over-time powerhouse, as bleed damage stacks with multiple bleeding weapons. You will do up to 146 damage if both weapons hit.
- Use the Force-A-Nature alongside the Wrap Assassin and Flying Guillotine to deal up to 259 damage.
Kill taunts
Grand Slam
| Kill Icon | Weapon | Damage | Duration | Details | |
|---|---|---|---|---|---|
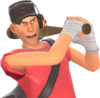 Grand Slam |

|
Sandman Atomizer |
500 with Sandman, 425 with Atomizer | 5 seconds | The Scout points to the sky, winds up, and swings a deadly blow. |
- It is advisable to only use your killing taunt on Snipers with tunnel vision. As with most other killing taunts, it can also be used to retaliate during Humiliation as the losing team.
- You can use this taunt attack after drinking Bonk! Atomic Punch to be invulnerable during the taunt. Make sure to use it wisely because you can only do the taunt once in the duration of the Bonk! Atomic Punch. You can, however, still be knocked back, ruining the taunt attempt. It can prove useful to walk into a large crowd and perform the taunt, as unaware players might not spot you performing the taunt. However, this will likely result in getting yourself killed.
- This taunt is completely quiet until executed. However, the kill gives off a much louder sound upon execution. Be sure to get ready for any attention you'll draw to yourself from the loud cheering sound after a successful Grand Slam taunt kill.
Weapon combinations
| Example Combinations | |||
|---|---|---|---|
| Combo | Usage | ||
|
This is a balanced, offensive Scout set that focuses on the central role of Scout: flanking and picking. The Scattergun's larger magazine size compared to the Force-A-Nature's makes up for the lack of a Pistol, while the Force-A-Nature allows you to finish off any injured opponents or push away other defenders that may stand in your way. Bonk! Atomic Punch is most useful when you need to get by enemy Sentry Guns in order to run past unharmed with relative ease, but is not much to fully stop a Sentry for good, or for mid-ranged self defense, unlike the Pistol. If you need to augment your survivability, swap the Sandman for the Bat. The Sandman's ability to hit a slowing baseball, however, can serve as a last minute attack when either Scattergun needs to be reloaded, or as an offensive mechanism to get in a couple of easy hits. Use caution while using the Sandman, however; the Sandman's -15 health attribute drops your health down to only 110, allowing Soldiers to kill you with one attack at close range. Should you not land a Scattergun kill, either close in again with the Pistol or use your slowing ball as you retreat to prevent the enemy from following you. | |||
|
This loadout focuses on damage over time, with your bleed damage projectiles doing most of your work. As such, this combination of weapons works best at medium range, and is generally only effective against a single target. By constantly flinging both the Flying Guillotine and the Wrap Assassin's baubles into groups of enemies, you can help your team by softening up to two enemies each time. However, this combination shines against a single target, as bleed damage stacks if they are caused by separate weapons. If you find a key target, landing both projectiles will double the bleed damage and inflict both weapon's base damage as well, which is enough to kill any 125-health class over time and severely weaken tougher classes. For anyone who survives, simply blast them with your primary weapon. Your primary weapons generally help you make up for your close-range weakness, or to get behind enemy lines to ambush them with this combo. The Force-A-Nature allows you to knock back enemies that get too close for you to throw your projectiles safely, gives you a very powerful retaliation option, and can help with getting behind enemies with its force jump so you can catch them offguard. If you want to take ambushing one step further, the Soda Popper's multiple jumps will make it even easier to get behind enemy lines, where you can constantly pester your opponents. As effective as this combo may be, remember that you will lack a reliable weapon for at least 6 seconds if you throw both projectiles at once. Fending off more than one opponent will be more difficult for you, so land your bleed weapons, retreat, and return once you are recharged. | |||
|
This combination turns the Shortstop into a viable way to deal large amounts of burst damage at higher ranges than you usually can, and increases the power of your bleed damage. As mini-crits do not suffer from damage fall-off, you are lethal from all ranges (for short periods of time). Because of this, the Shortstop will deliver strong and accurate damage with mini-crits even at range, and paired with 4 rounds per magazine and a fast reload, it is potentially lethal even to Heavies if you get close. As bleeding damage is also affected by your mini-crit boost, pairing it with a bleeding melee weapon can be very powerful as well. If you prefer to stay back at a distance, the Wrap Assassin will maximize your damage potential at from afar if you land a bauble while you are mini-crit boosted. The Boston Basher works better for those who want to get in to do damage. However, given that Crit-a-Cola also makes your self-inflicted hits hurt even more as well, it is important to have a nearby healing source or Medic in case you miss with the Boston Basher. | |||
|
This is a great combo when you want to help your team survive longer and aid them with pushes. The Shortstop and Scattergun are excellent weapons when you do not have your Pistol equipped. The Scattergun has its reliable six shots and high damage at close range that lets you take down targets easily, while the Shortstop lets you do more damage at a distance if safety is imperative. When a Medic is not around, the Mad Milk's ability will provide your teammates with a well-appreciated opportunity to heal when they hit a soaked enemy, and if you do have a Medic, it will make his job infinitely easier and improves the effectiveness of your team's pushes, as they will survive longer on the battlefield. Mad Milk will also reveal cloaked Spies, aiding your team with Spy checking, and will also extinguish any teammates on fire. The Sandman's ball can slow key targets and make aiming much easier for you and your teammates. | |||
|
This is an ideal loadout for Medieval mode. Since the only explosive attack is from the Demoman's Ullapool Caber, the Candy Cane coupled with the Mad Milk can help you and your teammates survive long enough to capture a point. In normal gameplay, however, you need to be careful to not engage in front line combat unless required because of the likelihood of stray explosives. The Shortstop will help you with this vulnerability, as it increases the amount of knockback you experience and can send you flying into safety if you are hit by an explosion. Because of the additional health this loadout provides to your team, it is also very useful in Arena mode. | |||
|
This combo uses the Fan O'War to enhance the capabilities of your Stock weapons, which have the the most ammunition and the overall best power output. Your standard fare of Scattergun and Pistol bullets will help you in general situations, as they are dependable overall with few situational weaknesses. Using the Fan O'War will make the best out of a bad situation, since it will increase your weapon's already high damage. Mark your target for death before going up to them, such as a Heavy with the Natascha, or a Soldier or Demoman in a tight corridor. Consider using this loadout when you know you will be facing high HP enemies. | |||
|
This combination is recommended if you are working with a Pyro on your team, or are trying to counter an enemy Pyro. The Sun-on-a-Stick's guaranteed critical hits on burning players allows for easy kills when working in conjunction with a Pyro. Mad Milk will provide more health for Pyros against a group of enemies, and allows them guaranteed critical hits if they are using the Neon Annihilator. The Scattergun can damage burning enemies from a distance, hastening their death due to afterburn, or weaken high HP classes such as the Heavy or Soldier before your Pyro buddy runs in. This loadout also works well in Medieval Mode if you have a Pyro coordinating with you on your team. | |||
|
This setup is for an entirely support-based Scout. Because you will lack a true weapon other than your primary weapon, play carefully and stay with your team, supporting them with your utility and providing covering fire. Mad Milk can be thrown onto any approaching enemies to allow your teammates to restore health, while the Fan O'War allows your team to deal more damage to high-priority targets. Combine both on a single target to grant even higher healing while increasing damage done. Both of these weapons can also be used to reveal cloaked or disguised Spies; Mad Milk will drip from them when hit, and the 'Marked for Death' symbol will remain above their heads for 10 seconds after a successful hit. Both of them are also unaffected by the Dead Ringer, making them more effective. The Shortstop's fast firing rate, accuracy at medium range, and short reload time makes up for a lack of a Pistol (or melee weapon), whereas the Force-A-Nature makes up for a lack of firepower, and at close ranges can knock enemy players away from important locations and allow you to reach more advantageous positions to throw Mad Milk or flank from. With the Force-A-Nature, this is also a great loadout for Mann vs. Machine. As the Scout's main roles are money collection and team support, there is little need to invest points in anything but upgrades for Mad Milk and resistances. As such, the MvM Scout tends rely on the effects of his primary and melee weapons, rather than on any damage they can deal. For instance, the knockback from Force-A-Nature can either temporarily stop giant robots in their tracks, or send bomb-carrying Robots flying backward, thus causing them to lose ground. Mad Milk, of course, is the staple for the Scout not only due to the slowing upgrade, but also due to the healing bonus given to the entire team. The Fan O'War, while dealing little damage on hit, marks its target for death. This is primarily used against giant Robots, as the mark causes the giant robot to take mini-crit damage from nearly all sources, allowing your team to destroy it faster. | |||
|
This combination allows you to reach tremendous heights at the cost of firepower. By using the Atomizer's triple jump ability in combination with the Force-A-Nature's knockback jumps to pull off a quadruple jump, you will be able to reach places that only a Soldier or Demoman could reach with explosive jumping. However, as the Atomizer does little damage, the best way to protect yourself is with Force-A-Nature blasts, followed by a retreat with the Pistol if you do not have enough time to reload the Force-A-Nature. Use the Pretty Boy's Pocket Pistol when backing up to gain some additional health. | |||
|
This loadout is good for survivability and is best when combining the Mad Milk's self-healing with the Boston Basher's ability to cause bleed, causing self-healing over time. The Scattergun can quickly dispatch enemies at close range for burst healing when enemies are covered in Mad Milk. Milked enemies will also help you negate self-inflicted damage if you happen to accidentally hit yourself with the Boston Basher. | |||
|
The Public Enemy Setup
The Public Enemy Setup works well together, as it prevents wasting Boost by jumping, and helps you regain lost health from damage so you can move in to gain even more Boost. The Baby Face's Blaster discourages jumping, which means that fall damage may be a situational problem. The boost provided by the Baby Face's Blaster presents more opportunities for ambushes, and the healing granted by the Pocket Pistol lets you steal any lost health that would have depleted when you escape from enemies, which would have also depleted your Boost. Heal up with Pocket Pistol shots from afar if you lack Boost, then run in again. If you like, the Candy Cane will help you keep gaining your Boost if you get damaged on the battlefield, as you will stay healthier and be able to fire more shots off. However, remember it makes you very vulnerable to explosives, so you might prefer to bring the stock Bat or the Wrap Assassin instead. Use the Wrap Assassin to gain boost from afar, but beware of the little melee damage the weapon itself does. If a bauble is hit from far enough, it will do a critical hit and give you even more boost (bleeding damage is unaffected). | ||
|
This set is centered on building Boost quickly with the Scout's secondary and melee weapons at a distance. The Pistol's high rate of fire and quick reload can make it easier to quickly build Boost quicker. Its clip size makes it easy to spam, and is recommended if you are not as accurate when in motion. The Winger trades magazine size for power, but less accurate players may have trouble landing hits with it. The Flying Guillotine trades spammability for instant benefits; although its cooldown and travel time makes it harder to land hits with, a single hit will fill your Boost bar almost all of the way. Depending on your melee, you can pick either the Wrap Assassin or Sandman. The Wrap Assassin is effective if you are not using the Flying Guillotine for ranged combat, as it can inflict bleed at long ranges to safely fill up your Boost meter. The Sandman reduces your survivability, but deals reliable melee damage, and its slowing ball pairs well with the Pistol or Flying Guillotine, making it easier to score Pistol shots or hits with the Guillotine. Having both the Flying Guillotine and Wrap Assassin equipped can be useful to deal constant bleed damage elsewhere when you run to another place, such as the intelligence. Because they are both long range weapons, it is possible to damage enemies far away while focusing on objectives. Due to the nature of the bleed effect, if you receive any damage from the enemy team, the current bleed damage that you are dealing with the other weapons will help you gain back your lost Boost, especially if you use the Flying Guillotine and Wrap Assassin on different enemies and not focusing on just one individual. Regardless of your choice, it is essential to keep getting hits to keep your Boost high, as you lose a lot of Boost when you are damaged. Once you get full Boost, run in to do some damage, then retreat to a distance to regain your Boost. Rinse and repeat. | ||
|
This set monopolizes on your ability to make quick getaways and use hit-and-run tactics. While using this set initially leaves Scout vulnerable with a slower starting speed and 110 HP, the reward is often worth the risk. The Baby Face's Blaster lets the Scout fly in and out of battle at blazing speeds once he has full Boost. As damage reduces the Boost bar, pairing this with the Bonk! Atomic Punch's effects gives you the absolute maximum infiltration and retreating potential without fear of losing Boost. Capture the Flag maps become fairly easy for grabbing the intelligence if the opposing team does not have many Sentry Guns. Arena and King of the Hill modes are also less intimidating as you can retreat to heal with minimal chance of being injured while running away. The Sandman is used to slow enemies, further opening your window of opportunity to close in quickly for a kill or to escape on a whim. However, because you lack a reliable ranged weapon to build Boost, you are fully dependent on the Blaster. Make sure to drink Bonk! as soon as possible to ensure you do not lose your hard-earned Boost before you move in. | |||
|
This setup mainly focuses on the Scout using alternative routes to sneak up on opponents and deal a lot of damage in a short period of time using quick-firing Scatterguns or Flying Guillotine. The Force-A-Nature and Soda Popper work best as flanking weapons thanks to their faster firing rate. If using the Force-A-Nature, the Crit-a-Cola pairs well with it, as it can kill most classes in a single clip before they can react. If not, the Flying Guillotine can be used as a long ranged backup weapon. The Soda Popper's hype charge can be enhanced with the Crit-a-Cola's damage boost, and when full, the multiple jumps can let you reach massive heights, while also ambushing from behind the enemy's defenses. The Sandman's ability to fire slowing balls can be used to ambush or escape combat more effectively. | |||
|
This set focuses on maximizing the Scout's movement speed to its fullest potential, making you a very hard target to hit, at the cost of survivability and being close to enemies. The Baby Face Blaster is weaker than the Scattergun in combat due to its lower clip size. However, coupled with the Crit-a-Cola, hitting multiple targets at close to mid range can build Boost almost instantly. Once you have full Boost, Crit-a-Cola will not boost your speed even further, but you will be fast and strong enough to take down most enemies in a single hit if you get close. As you take increased damage if Crit-a-Cola is in use, you will be very vulnerable especially since damage easily reduces your Boost, but you will often be fast enough to dodge most projectiles. Just be wary of Sentry Guns, which have perfect aim. Bring a melee weapon of your choice. The Bat does have any downsides and improves your survivability. The Sandman will let you slow your target before you move in with your speed, but makes you even more fragile. The Fan O' War will be easier to use since you will often be moving faster than usual, and the Wrap Assassin's bleed effect will help you gain Boost easily when boosted by your mini-crits. | ||
| The #1 Fan
This setup rewards good aiming and ambushing tactics with high burst damage and incredible mobility. The faster reload speed of the Soda Popper gives your enemies less time to catch you unarmed, while its faster firing speed helps you to kill unaware foes before they can even react. Once your Hype meter is full, the additional air jumps when activating Hype mode allows you to rain bullets from the air or flank your enemies and set up ambushes. The increased jump height of the Winger lets you easily jump over obstacles or enemies, before landing beside them to fire strong Winger shots at them. Keep in mind that you should focus on hit-and-run tactics because of the reduced clip size of both the Soda Popper and the Winger. The Atomizer's third jump provides a good fallback to help you escape when you do not have Hype mode activated. The best way to use this set is to weave in and out of combat to build your Hype meter. When it is full, activate Hype and then switch back to the Winger to boost your air-jumps. This allows you to jump over enemies' heads to shoot them from behind, or simply to get into enemy territory. | |||
|
This combination of weapons is specifically designed to hunt down enemy Spies. As a Scout, you are the fastest class in the game and the second most effective Spy hunting class after the Pyro. While you can simply run into a suspicious teammate to check them, this loadout enables you to check for Spies with less risk to yourself as well as notify your team of any Spies you may discover. The Back Scatter's wider spread becomes a benefit here, as even a single pellet will reveal an invisible Spy by their flicker—simply fire from a medium distance at suspicious spots, since you have Back Scatter ammo to spare. It can also be useful if you see a disguised Spy about to backstab a teammate; simply blast him at the back to rid of him with your mini-crits. Once you find a Spy, bring out your melee weapon or your Mad Milk to highlight them as a target. If the enemy Spy is not using a Dead Ringer, the Wrap Assassin or Fan O'War can make it easy to find them using the telltale blood spatter or Marked For Death symbol above their heads. If you suspect there are Dead Ringer Spies on the field, the Holy Mackerel and its variants can ensure that you do not let them get away with faking their death. If the kill feed indicates that the Spy has not actually died, use your Mad Milk to douse the area; done quickly, the Spy will not be able to avoid being covered in Mad Milk, which will give away his position. Even when not hunting Spies, this loadout can still contribute to the Scout's usefulness by extending his team's effectiveness due to the Mad Milk and Fan O'War, and rewards powerful sneak attacks from behind on targets splashed with Mad Milk. | |||
|
This set trades the #1 Fan set's Soda Popper for the Force-A-Nature, allowing you to get out of confrontations you cannot win and traverse large areas in good time. This loadout enables two Winger-boosted jumps and a Force-A-Nature force jump, allowing you to be extremely unpredictable and agile. This is strictly a hit-and-run playstyle, due to the Force-A-Nature's small clip. Surprise your enemy by dropping from the sky after a triple jump, then fire at them to push them back. This is useful for when a key target decides to push into your team's territory (such as a Heavy), as you can deny his entry and simply jump away to safety. The Force-A-Nature knockback also lets you escape if you cannot win a confrontation, as well as push enemies into environmental hazards or into the hands of your teammates. This set can also aid your team if you play as a decoy, as you can distract your opponents by firing from above while jumping, hence keeping attention away from your teammates. | |||
|
This is a high risk high reward load-out. Due to the Force-A-Nature's second shot usually not being very effective due to its knockback with the first shot, you will not be able to exactly put out high numbers with both of your shots. However, with the Crit-a-Cola, you can make your second shot count more with more damage output. The Boston Basher is put into this combo due to its ability in mobility and synergy with doing Basher jumps and the Force-A-Nature's Force Jumps. It is also a great way to put out greater damage numbers due to the Crit-a-Cola doing a great chunk of melee damage to foes. Be careful, as going into melee range of people can make you a one shot kill yourself with the Crit-a-Cola's downside. This load-out is more encouraged for a flank Scout play style. | |||
|
This load-out turns the Scout into a major distraction. Although you will not be able to do high damage as with the Scattergun, the Force-A-Nature can be used to push opponents away from their objective or target, while still dealing high burst damage to take out anyone unaware. The Wrap Assassin's bat and bleed damage is not spectacular, but its main benefits include shaking the screens of Snipers to hinder their aim, and causing damage over time that can lead panicky opponents to hunt you down and waste time. Bonk! Atomic Punch will be a fallback option for escape if you are low on health, and you can use the invulnerability to distract opponents or block their line of sight. | |||
| The Boston Flanker
This loadout focuses on using the Back Scatter as a flanking weapon. The Bonk! Atomic Punch and Atomizer can help a Scout to get behind enemy lines. Invincibility can allow a Scout to go unscathed, and even undetected, through enemy territory. The Bonk! Atomic Punch is also useful as an escape option. The Atomizer can assist in finding alternate routes or evading damage. Together with the Back Scatter, these weapons can easily allow a Scout to flank and attack people from behind with his Back Scatter. Alternatively, the Winger can be used instead of the Bonk! Atomic Punch, in order to gain greater access to flank routes. Another loadout for a flanking Scout is the Back Scatter, Pretty Boy's Pocket Pistol and Candy Cane. The healing power of the other two weapons comes at the cost of some vulnerability to damage, so it should be your goal to avoid taking explosive damage, and the Pretty Boy's Pocket Pistol should only be deployed when desperate or from safety (such as from behind). This set is particularly deadly against Heavies, Engineers, Snipers, Medics, Pyros, Spies, and other Scouts. However, this loadout is less effective against Demomen, Soldiers, and Sentry Guns. As a general rule, the Back Scatter should be used with Pistol variants (in order to make up for lesser accuracy) or the Bonk! Atomic Punch. The Crit-a-Cola is one of the worst weapons to equip alongside the Back Scatter as Mini-Crits do not stack. This loadout will be helpful in teaching Scout players the flank routes and how to get behind the enemy team. | |||
Any Melee |
This is a combo loadout that revolves around using the Crit-a-Cola to build Hype faster, and then using your Hype to play aggressively. This loadout requires you to switch between flanking sneakily and playing aggressively. Be careful when building up Hype, because of the Crit-a-Cola's bigger downside. | ||
| Unless marked with a †, all weapons can be substituted with reskins. | |||
Cooperative Class Strategies
 Scout
Scout
An experienced Scout alone is powerful, but two or more, or even a squadron can cause massive havoc for the enemy team. A coordinated ambush can easily take down any enemy.
- Because a Scout's main duties are to provide a distraction and rush to the objective, one Scout has the ability to distract a whole team at once by shooting from one route, while another Scout can go through an alternate route to the objective without any hassle.
- If a team is experienced enough and is willing to cooperate, they can utilize a Scout Rush to swarm over enemy objectives before the enemy team has time to prepare a defense.
- In Capture the Flag, a team of Scouts can get to the enemy base before the other team has time to set up defenses. Once the Scouts are situated in the flag room, it is only a matter of time before they capture the flag.
- In Attack/Defend, a team of BLU Scouts can overwhelm the RED defense before they are fully prepared to counter-attack. Coupled with the outrageous capture speed of a Scout rush and the RED team's long respawn time, this strategy is very hard to combat.
- In Payload Race, the cart only requires two Scouts to reach maximum speed, while the rest of the team can rush to the other cart and prevent them from advancing farther. With the majority of teammates focused on the enemy while the enemy is focused on their cart, the attacking team will make easy work of the opposition.
- When teaming up with another Scout, make sure your loadout complements their loadout's weaknesses.
- A team of Scouts can fulfill many roles; distracting Sentry Guns with Bonk!, slowing enemies for easier aiming, healing teammates and Spy-checking via Mad Milk, and even taking down a Heavy-Medic combo.
- Even without the effects of Bonk!, a pair of Scouts can quickly rush a Sentry Gun and destroy it with their Scatterguns, with the Sentry having no one target to lock on.
- A team of Scouts can fulfill many roles; distracting Sentry Guns with Bonk!, slowing enemies for easier aiming, healing teammates and Spy-checking via Mad Milk, and even taking down a Heavy-Medic combo.
- Regardless of the tactics mentioned above, Scout teams suffer when the enemy has set up defenses; it will be difficult to overwhelm an objective quickly if a fully constructed Sentry Gun is built there, or if a Heavy-Medic pair constantly hunts you down. Additionally, cramped maps such as Junction will make it more difficult for Scout teams to avoid damage.
- As such, the earlier in a round you attempt a Scout team, the better.
 Soldier
While it may seem unlikely, a Soldier-Scout duo can easily decimate any obstacle that happens to move into their sights; with the combined effect of the Scattergun and Rocket Launcher's close to medium range power, it is unlikely that any target will survive long enough to fight back.
- Although the Scout is very powerful on the ground, the Soldier is the master of the air. While the Scout engages an enemy from below, the Soldier can rocket jump and blast rockets on the ground to overwhelm his enemies. While both teammates are focused on the same enemy, they can easily take down any foe together.
- As the Soldier's rockets have a longer travel time than bullets, the Scout can run in and clean up any injured enemies should the Soldier miss rockets at medium range.
- These two teammates can work together as a tag-team. The Scout can protect the Soldier while he reloads by firing his Scattergun to draw attention away from the Soldier. The Soldier should have reloaded by the time the Scout runs out of bullets, and the Soldier can then protect the Scout as he reloads.
- The Soldier, with his rocket jumps, can be just as mobile as the Scout, at the cost of some health. This pairing can be used to their advantage.
- In Control Points, this means that they can both capture the same point together with the efficiency of three players. If the Soldier is using the Pain Train, this pair-up is especially effective.
- In Capture the Flag, this combo allows the Scout and Soldier to capture the flag in double-time. While the Scout goes into the base to steal the intelligence, the Soldier waits outside for the Scout. The Scout passes the intelligence to the Soldier, where he rocket jumps back to his home base. The Scout goes back to the enemy base as he captures, and the cycle starts anew.
- In Payload, a Scout can hide behind the cart while a Soldier stands on top of the cart to shoot at enemies. This pairing defends the Scout's invaluable double-capture bonus while still clearing a straight path to the next capture zone.
- On Steel, the Soldier and Scout can both rush to Point E while the enemy team is distracted at other control points. The Scout can deny enemy troops a clear path by firing at approaching enemies, and the Soldier can target specific enemies so that they do not interfere.
- This team can make a great Anti-Sentry Gun setup; the Scout can use Bonk! Atomic Punch to distract Sentry Guns, while the Soldier can destroy them and any Engineers with a few Rockets.
- Mad Milk thrown by the Scout into a group of enemies will allow the Soldier to heal significant amounts of health and keep in combat longer, especially with the Black Box. The Candy Cane is also a good choice, as the Soldier can pick up health packs you drop.
- A Soldier with the Buff Banner can improve the Scout's Scattergun effectiveness, as mini-crits are not affected by damage falloff. This will make both the Scout and Soldier deal good damage at range.
- This team is weakest in small buildings. The more open areas the map has, the more effective this combination will be, as both players will be able to move quickly.
 Pyro
Pyro
The Pyro and Scout are both excellent and efficient ambushing classes. Due to their strengths at close range, a coordinated ambush can result in killing practically any enemy without too much effort.
- As the Scout's speed makes him a wonderful distraction, a Scout can run in and make an opponent focus on him as the Pyro takes an alternate route to ambush them while they are turned away.
- The same can be done in reverse, where the Pyro burns and confuses an opponent as the Scout runs in to finish the job.
- A Pyro can "mark" an opponent by setting them on fire before the Scout runs in to take them down, as they will either be injured or running to a healthpack.
- A Pyro can be a lifesaver for a burning Scout, as afterburn can drain about half of his health. Airblasting can potentially save the Scout from a lengthy respawn time.
- An enemy who has been set on fire by a Pyro can be finished off quickly by a Scout with the Sun-on-a-Stick and, combined with Mad Milk, the Pyro can crit using the Neon Annihilator. In addition to the extra damage, the Mad Milk will heal the Pyro for 94 health on a successful hit. This is a potent combination in Medieval mode.
- Even without this combination, Mad Milk can improve a Pyro's endurance while they burn enemies.
- A Scout equipped with a Candy Cane can potentially give a steady stream of health to a Pyro carrying the Back Scratcher: the Pyro can light enemies on fire while the Scout provides the finishing blow. Likewise, the Scout's 25% damage vulnerability to explosives can be neutralized by simply airblasting away any explosives.
- The Pyro can use the Detonator or Scorch Shot to take routes where the Scout can.
- The Mad Milk pairs especially well with the Phlogistinator. The Mad Milk's healing rate will partially negate the Pyro's vulnerability while they burn opponents for "Mmph" and, when the weapon is charged, the Pyro can not only fill up their whole health capacity in under a second using milked targets, but also destroy any opponents in range.
- The Backburner operates on the same principles as the Phlogistinator, but with more emphasis on ambushing.
- The Pyro's afterburn combined with the Scout's bleeding (when equipped with either the Flying Guillotine, Wrap Assassin, Boston Basher, or Three-Rune Blade) turns the team into a damage-over-time powerhouse. Constant hits from the Flare Gun and the Scout's bleed weapons will do significant damage, even at range, where the Scout and Pyro are weak at.
- As mentioned above, this team combination is exceptionally weak at range. Snipers and Heavies can often ruin any attempts for the Scout or Pyro to move in. This team combo works best when both parties find alternate routes to ambush enemies, or when one provides a distraction for the other.
 Demoman
Another unlikely team up, the Demoman and Scout are complete opposites of each other; the Scout focuses on quick, offensive ambushing, while the Demoman focuses on defense and keeping the enemy at bay from mid-range. However, when combined, they can fill a number of roles together.
- Because the Scout specializes in distractions and weapon heckling, a lone Scout is able to lead an enemy right into a Sticky trap even from far away.
- This also allows a Demoman with a sword and shield to charge up to a distracted enemy.
- As the Demoman excels at medium range and Grenades are hard to land, he can help the Scout deal good damage where his Scattergun would not, while the Scout can run in to clean up any missed Grenade shots with his more accurate Scattergun.
- Similarly to a Scout and Soldier team, a Demoman can equip the Sticky Jumper and Pain Train to gain the capture rate and speed of a Scout. Combined, they can swiftly capture points together.
- Mad Milk can offset the -25 health penalty incurred by the Eyelander, giving the Demoman more survivability.
- Because the Sandman ball can slow enemies for a period of time, a Demoman can place multiple Stickybombs around a slowed enemy before they can get away and detonate them all at once to guarantee an instant kill. Eyelander-wielding Demomen can also get an easy head with this combo, not needing to have to chase down the enemy anymore.
- The Scout can also use the Force-A-Nature to launch slowed enemies into Stickybomb traps for an easy kill.
- This team combo works well if both parties make up for each class's range weakness.
 Heavy
Heavy
The Heavy and Scout are complete opposites when it comes to movement speed; the combined force of their weapons, however, is not much of a laughing matter.
- Because the Scout is good for distracting enemies, leading them into the path of a Heavy will force them to retreat, allowing you to finish them off after the Heavy has inflicted his share of damage.
- Conversely, the Heavy is a good shock trooper at the front lines, and is enough of a threat that enemies will usually focus on him. The Scout can take advantage by having free reign of the area the Heavy is covering, and can fire easily at distracted enemies.
- If a Heavy stands in a narrow doorway expecting enemies to come by, the Scout can use his Bonk! Atomic Punch and walk in front of him to act as a human shield. Since enemies cannot shoot through you and the friendly Heavy can, the Heavy's chances of survival greatly increase.
- The pair can complement each other's healing capabilities through combining the Heavy's Sandvich and the Scout's Mad Milk; the Heavy benefits from the massive healing granted from hitting milked targets with his Minigun, and the Scout will uniquely gain 75 health from the Sandvich instead of 50 health.
- Mad Milk is especially useful with the Dalokohs Bar or Warrior's Spirit, where the former's +50 health increase will give the Heavy even further augmented survivability, and the latter's max damage vulnerability will be offset by the constant healing.
- The Heavy's Natascha's slowdown effect combined with the slow effect of a Sandman ball will make enemies practically immobile, giving either of you an easy kill.
- Even without the Sandman, this will make the Scout's job much easier.
- Because the Heavy carries huge firepower and very slow speed, this makes him a prime target for Spies to backstab him. A Scout can Spy-check the area by throwing his Mad Milk or attacking teammates.
- As the Heavy is slow whilst you are fast, it is essential to protect the Heavy or wait for him to move before you approach enemies, especially if both of you are working closely together. Ensure that he survives instant deaths from backstabs or headshots by providing a distraction, while he protects you from being overwhelmed by opponents.
 Engineer
Scouts, at first, do not seem to be a potential Engineer buddy. However, the Scout's abilities not only make up for what the Engineer lacks, but can also be a vital part of a base.
- One of the Scout's purposes is to see what is ahead of the team and alert them to it. If a Scout sees an incoming threat, such as a Heavy, Demoman, or Soldier, alert the Engineer as soon as you can so he can prepare better.
- If it is a weaker class, such as another Scout, it may be best to kill him yourself or let the Sentry Gun kill him.
- If the Engineer is trying to get to the enemy base to build a Teleporter, the Scout should go in front of him to check for danger. Additionally, if enemies come out of one route while the Engineer wants to build in another route (such as the vents on Turbine), the Scout should distract the enemies so that the Engineer can slip by unnoticed.
- One of the Sentry Gun's primary counters is a Heavy and Medic pair. Luckily, the Scout can take action to keep the Sentry active.
- If a Scout has Bonk! equipped, use it to body-block the Heavy's bullets. The Sentry Gun should kill the Heavy before your invincibility wears off.
- Even if the Heavy is Übered, you can use the Force-A-Nature to knock either him or the Medic off-course, messing up his aim. However, this strategy will not work on a Quick-Fix Übercharge, as it prevents all knockback.
- If you can hit the Heavy with the Fan of War, all damage he takes will be increased by 35%, including ramp-up damage. This will cause the Heavy to take much more damage than a Medic can heal, dramatically decreasing his survivability.
- A Scout has much better Spy-checking abilities than the Engineer does. Use this to your advantage.
- A Scout's Pistol is useful for surveying the area for cloaked Spies. If you stand near a Dispenser while spamming bullets, you gain as much ammunition as the Engineer normally would.
- A Scout's speed allows him to run into teammates to check for Spies; if you cannot go through a teammate, they are an enemy Spy. Furthermore, if the Spy attacks you on a reflex, he will reveal himself and be gunned down by the Sentry Gun.
- The Mad Milk will reveal cloaked and disguised enemy Spies. If you think you see a disguised Spy or if he tries to cloak in order to escape, use your Mad Milk in order to track him down.
- The Scout's bleed mechanic works in the same way as the Mad Milk, while dealing damage over time. Do not be afraid to hit teammates with the Boston Basher if you are not sure they are a Spy; your Engineer's Dispenser will heal you up if you miss.
- The Holy Mackerel or Unarmed Combat will reveal cloaked Spies in the kill feed when hit. However, they will not reveal disguised Spies or those using the Dead Ringer.
- Using the Crit-a-Cola while standing next to a Dispenser will offset the self-mark-for-death penalty, allowing you to roast your enemies from afar when coupled with the Shortstop.
- If you see a fully charged Medic looking to use his Ubercharge with his patient to destroy your Engineer's Sentry Gun, shoot at the Medic to try and force an early Ubercharge from him, or if he has slow reaction times, kill him outright.
- Overall, you will be a fragile, yet useful Engineer buddy with lots of utility. While you will often be at the front lines preventing enemies from coming close, helping out your Engineer will make his job, and your team's defense, more effective.
 Medic
Medic
A Scout and Medic can make a great team. The Scout's main job is to protect the Medic at all costs and escort him to other teammates so he can heal them as quickly as possible.
- Always be sure to Spy-check, as Medics are usually the main killing priority for Spies; alert teammates immediately if you find a possible Spy that is trying to target your Medic.
- Due to the Scout's low health pool, it is a good idea for a Medic to stay nearby in order to top him off as necessary.
- Do not ask for an Übercharge to be deployed, unless it is an emergency or if the Medic is using the Kritzkrieg or Quick-Fix; if you do, you can easily waste an Übercharge that would have been more beneficial with another teammate.
- However, do not underestimate a crit-boosted Scout. A full Pistol clip, aimed correctly, deals enough damage to take down any class. Additionally, the Scattergun's critical hits can take down any overhealed target in just 3 hits at close range, even a Heavy. As critical hits do not suffer from damage falloff, this can make you exceptionally powerful even at range.
- Although it is generally a bad idea to pocket a Scout, it can be viable. Since all Mediguns mirror the patient's speed for the Medic himself, he will be able to keep up with you, while its healing lets you tank damage much more than usual.
- This works especially well with the Mad Milk, as the health on hit can make the duo very hard to kill.
- The Vaccinator's resistances can potentially save the Scout and his low health pool from death. The Medic can give a resistance bubble to the Scout before he moves in, such as bullet resistance to tank a Sentry Gun's shots.
- The Quick-Fix pairs perfectly for the Scout, due to the increased healing working well with the Scout's low health pool.
- In Control Points, the Scout's speed and evasiveness can allow a Medic and Scout pair to get behind enemy lines in order to back-cap the point. The Scout's firepower and the Medic's rapid healing allows the duo to hold the point until it becomes available to capture.
- In Capture the Flag, the Medic can ride with the Scout until he reaches the Intelligence room. When the Medic is situated in the enemy base, the Scout can run off without him to capture the flag. The Medic can then wait for teammates to arrive and give them assistance with the next cap.
- Using the Boston Basher's self-inflicted damage is extremely useful for building an ÜberCharge. If the Scout keeps hurting himself, the Medic will be able to fill his meter in half the time he could if the Scout was at full health.
- If the Scout uses the Baby Face's Blaster, the Medic will receive speed directly proportional to the Scout's boost bar. When the Scout is at full speed, the Medic will go ludicrously fast, allowing them to get to the front lines much faster. The healing will also allow the Scout to gain boost back safely whenever he gets hurt.
- This team combination does not work well when you encounter multiple bulkier enemies like the Soldier or Heavy, as the Scout is only strong in one-on-one confrontations. As the Medic will be more beneficial if he heals his entire team instead of just you, ensure that your team can handle themselves before attempting any of these solo tactics.
 Sniper
The Scout and Sniper make up for each other's range weakness. The Scout focuses on close-range combat while the Sniper focuses on long-range combat, allowing the both of you to guard one another.
- The Scout is a perfect distraction for a Sniper. If he has a line of sight, the Sniper can constantly get free shots with minimal danger at a distance while enemies are distracted by the Scout's close-range shenanigans.
- The Sniper can also take down distant Sentry Guns so you can run in safely.
- A Sniper can protect you from other Scouts and Snipers. If trying to capture the Intelligence, a point, or escort the Payload, he can pick off enemies from a distance to keep you safe. You can do the same for the Sniper as well, protecting him from his close-range weakness as he snipes.
- Snipers who decide to follow you to the front lines with the Huntsman will be vulnerable after each shot. The Scout can distract enemies as the Sniper keeps back, or outright kill enemies who want to come closer to capitalize on the Huntman's slow reload.
- Jarate will make the Scout's job easier, as he can take down enemies with less shots. Mad Milk can also be a surprisingly good utility for a Sniper, as a fully-charged headshot on a milked target will instantly refill all his health.
- The Sandman's slow will keep opponents moving minimally, making it much easier for the Sniper to get a headshot or two.
- The Sniper and Scout can form an adequate Spy checking-team. With the combined force of the Wrap Assassin, Mad Milk or Flying Guillotine, Bushwacka or Tribalman's Shiv, and Jarate, a Spy usually cannot escape.
- While you may excel at keeping one another safe, you will often not be able to protect both members due to the different ranges your classes work at. This team combination might have to sacrifice one's safety for the benefit of the other, as a Sniper will be easily killed at close range, while a Scout's weapons are helpless at long range.
 Spy
Spy
It is very rare for a Scout to ever team up with a Spy, but it is possible and has potential, due to each classes' tendencies to ambush on command.
- As usual, the Scout is a perfect distraction for his teammate. Enemies focusing on the Scout will not realize if a Spy sneaks up behind them for a backstab.
- The Spy can also hang back at a distance as a Scout fights in the front lines. He can then use his health-observing ability to pick off weakened targets with the Revolver, or simply keep firing for headshots with the Ambassador.
- The Scout can make it look like he's being chased by an "enemy" for a quick distraction. Let the Spy disguise as an enemy and chase the Scout, as he shoots back and retreats. Enemies might move forward to help their "teammate", and the Spy can hang back to get backstabs. It makes it more convincing if the Scout uses the "Help!" command using C+1.
- The Spy can also disguise as a friendly teammate beside the Scout, and feign death using the Dead Ringer as they approach opponents. The Scout can distract the enemy long enough for the Spy to switch to an enemy disguise, recharge his Dead Ringer, and blend into the opposing team.
- A Bonk! Atomic Punch distraction combined with the Spy's ability to sap buildings can quickly eliminate an entire sentry nest before reinforcements arrive.
- The Scout can also use Bonk! to clear a pathway of Stickybombs so the Spy can move in. However, take note that this will result in the Scout absorbing a high amount of damage that will lead to a considerable slowdown after the invulnerability wears off.
- With proper communication, a Scout with Bonk! and a Spy can clear out a point and capture it.
- As Spies are constantly Spy-checked, he will frequently be on fire. Equipping Mad Milk to extinguish him will help immensely.
- Take note of this team combination, as you can be the one that ruins your friendly Spy's espionage. Refrain from running towards him if you meet behind enemy lines, as you may accidentally get him blown up by an unwary opponent.
See also
|