Difference between revisions of "Heavy match-ups"
m (Grammatically, "he" is appropriate. It's also gender neutral, despite other views.) |
|||
| Line 2: | Line 2: | ||
{{Match-Up|forclass=heavy | {{Match-Up|forclass=heavy | ||
| − | | scout-strategy = | + | | scout-strategy = The Scout will either try to constantly dodge your fire or use hit-and-run tactics to wear you down. In a direct fight, the Scout will double jump and change directions often, making it difficult to keep your crosshair on him. For a more flighty Scout, always be wary of possible side paths enemies can take to ambush you. The match-up overall becomes a matter of your reaction speed; if you are too slow to respond to the attacking Scout, he can retreat and freely try again later. While fighting other enemies with a spun up Minigun, keep in mind that the Scout can use the [[Sandman]] to easily stun you from afar. The [[Natascha]] can slow a Scout and render him unable to dodge your bullets. |
| − | | soldier-strategy = You are the only class that both boasts more health than and outguns the Soldier. | + | | soldier-strategy = You are the only class that both boasts more health than and outguns the Soldier. A competent Soldier will be aware of this and either abuse cover or high ground to bombard you with rockets. Your slow speed and large size makes avoiding rockets difficult, especially if he uses the [[Direct Hit]]. If he's not out in the open, lay down oppressive fire to wear down his health or find a better position to fight from first. |
| − | | pyro-strategy = Your [[Minigun]] can deal more damage at close range than the Pyro’s [[Flamethrower]] or [[Axtinguisher]]. | + | | pyro-strategy = Your [[Minigun]] can deal more damage at close range than the Pyro’s [[Flamethrower]] or [[Axtinguisher]]. Thus, a good Pyro will resort to ambushing you. Like when dealing with the Scout, keep in mind possible routes you can be flanked from. If you are ambushed, wind up your Minigun and keep your aim steady; if you react fast enough, your large health pool should allow you to survive his high burst daamge. A Pyro that attacks you head-on will often circle-strafe in an attempt to dodge your fire. He is not as mobile as the Scout, so keeping your crosshair on him is not as difficult. Watch out for Flare Gun shots at long range, as they are capable of wearing you down if you stay in the open. |
| − | | demoman-strategy = The Demoman’s explosives can easily match your large damage output, especially from medium to long range. A smart [[Demoman]] will keep his distance while lobbing grenades | + | | demoman-strategy = The Demoman’s explosives can easily match your large damage output, especially from medium to long range. A smart [[Demoman]] will keep his distance while lobbing grenades at you, possibly in an attempt to lure you into a Stickybomb trap. At the front lines, you want to force him to take cover just so you can hold position, which in turn will allow him to reload and attack you again. Instead of enduring his abuse, try to close the distance while being wary of possible traps he has set. The Demoman can fire around corners, but can't see around them, so consider backing off and taking a different route towards him. A Demoman who runs at you with his melee weapon and a shield should be a much easier kill. |
| heavy-strategy = Both of you will often be fighting on the front lines when you meet one another. The encounter will be decided by who has more health, who fires first, and which primary weapons the two of you are wielding. Even alone, it is possible to take down an enemy Heavy that is paired with a Medic by simply being the first to fire. Generally, a Heavy wielding [[Natascha]] or the [[Tomislav]], weapons with lower raw firepower, will lose to one wielding any other available primary weapon. | | heavy-strategy = Both of you will often be fighting on the front lines when you meet one another. The encounter will be decided by who has more health, who fires first, and which primary weapons the two of you are wielding. Even alone, it is possible to take down an enemy Heavy that is paired with a Medic by simply being the first to fire. Generally, a Heavy wielding [[Natascha]] or the [[Tomislav]], weapons with lower raw firepower, will lose to one wielding any other available primary weapon. | ||
| − | | engineer-strategy = A lone Engineer is far weaker than you in a straight-up fight. If you can get the drop on any [[Sentry Gun]] at close range, your Minigun can actually destroy it faster than it can kill you. If you need to deal with a Sentry Gun at a longer range, it’s best to come back with teammates, as all of your weapons suffer | + | | engineer-strategy = A lone Engineer is far weaker than you in a straight-up fight. If you can get the drop on any [[Sentry Gun]] at close range, your Minigun can actually destroy it faster than it can kill you. If you need to deal with a Sentry Gun at a longer range, it’s best to come back with teammates, as all of your weapons suffer at longer ranges In particular, your firepower combined with a Medic's [[Übercharge]] should be enough to defeat any Sentry Gun. If necessary, you can use the [[Fists of Steel]] to tank Sentry Gun fire while your teammates destroy it. |
| medic-strategy = A lone Medic should be easy to dispatch with your Minigun. However, a Medic is typically accompanied by a [[Medic buddy]] that can steadily wear your health down. Even if you chip away at his patient’s health, the Medic will be there to heal him. Thus, avoid the pair unless you have teammates nearby or can get the drop on them at close range. | | medic-strategy = A lone Medic should be easy to dispatch with your Minigun. However, a Medic is typically accompanied by a [[Medic buddy]] that can steadily wear your health down. Even if you chip away at his patient’s health, the Medic will be there to heal him. Thus, avoid the pair unless you have teammates nearby or can get the drop on them at close range. | ||
| sniper-strategy = Your slow speed and large frame make it difficult to move unpredictably, making you an easy target. A fully charged headshot will instantly kill you, no matter how overhealed you are, so it’s best not to go out into any open areas that a Sniper is watching. At medium range, you can nick him with enough [[Minigun]] or [[Shotgun]] bullets to severely impede his aim and deter him from firing as you close in. Once you're in range, he will stand no chance. Equipping the [[G.R.U.]] or [[Fists of Steel]] can make crossing a Sniper’s field of view a little bit easier. | | sniper-strategy = Your slow speed and large frame make it difficult to move unpredictably, making you an easy target. A fully charged headshot will instantly kill you, no matter how overhealed you are, so it’s best not to go out into any open areas that a Sniper is watching. At medium range, you can nick him with enough [[Minigun]] or [[Shotgun]] bullets to severely impede his aim and deter him from firing as you close in. Once you're in range, he will stand no chance. Equipping the [[G.R.U.]] or [[Fists of Steel]] can make crossing a Sniper’s field of view a little bit easier. | ||
| − | | spy-strategy = Your slow speed, large size, and massive damage output will make you a very important target for an enemy Spy. Do not rely on your teammates to [[Spy-check]] for you, especially if you the one leading a charge. A short spray of Minigun bullets at a nearby teammate should be enough to determine | + | | spy-strategy = Your slow speed, large size, and massive damage output will make you a very important target for an enemy Spy. Do not rely on your teammates to [[Spy-check]] for you, especially if you the one leading a charge. If a friendly Medic stops healing you or teammates disappear, be suspicious. A short spray of Minigun bullets at a nearby teammate should be enough to determine if he is a Spy. If a Spy uses his [[Cloak]] to retreat, use the spread of your primary weapon or [[Shotgun]] to reveal him. The [[Huo-Long Heater]] deploys a ring of [[fire]] around you when revved up, which can reveal nearby Spies that you should react to quickly. |
}} | }} | ||
Revision as of 22:04, 24 April 2016
| “ | Entire team is babies!
Click to listen
— The Heavy on his tactical analysis of the opposition
|
” |
| Class | Strategy | ||
|---|---|---|---|
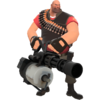 Heavy |
vs. | 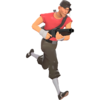 Scout |
The Scout will either try to constantly dodge your fire or use hit-and-run tactics to wear you down. In a direct fight, the Scout will double jump and change directions often, making it difficult to keep your crosshair on him. For a more flighty Scout, always be wary of possible side paths enemies can take to ambush you. The match-up overall becomes a matter of your reaction speed; if you are too slow to respond to the attacking Scout, he can retreat and freely try again later. While fighting other enemies with a spun up Minigun, keep in mind that the Scout can use the Sandman to easily stun you from afar. The Natascha can slow a Scout and render him unable to dodge your bullets. |
Heavy |
vs. | 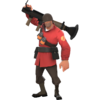 Soldier |
You are the only class that both boasts more health than and outguns the Soldier. A competent Soldier will be aware of this and either abuse cover or high ground to bombard you with rockets. Your slow speed and large size makes avoiding rockets difficult, especially if he uses the Direct Hit. If he's not out in the open, lay down oppressive fire to wear down his health or find a better position to fight from first. |
Heavy |
vs. | 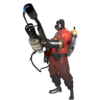 Pyro |
Your Minigun can deal more damage at close range than the Pyro’s Flamethrower or Axtinguisher. Thus, a good Pyro will resort to ambushing you. Like when dealing with the Scout, keep in mind possible routes you can be flanked from. If you are ambushed, wind up your Minigun and keep your aim steady; if you react fast enough, your large health pool should allow you to survive his high burst daamge. A Pyro that attacks you head-on will often circle-strafe in an attempt to dodge your fire. He is not as mobile as the Scout, so keeping your crosshair on him is not as difficult. Watch out for Flare Gun shots at long range, as they are capable of wearing you down if you stay in the open. |
Heavy |
vs. | 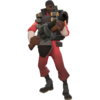 Demoman |
The Demoman’s explosives can easily match your large damage output, especially from medium to long range. A smart Demoman will keep his distance while lobbing grenades at you, possibly in an attempt to lure you into a Stickybomb trap. At the front lines, you want to force him to take cover just so you can hold position, which in turn will allow him to reload and attack you again. Instead of enduring his abuse, try to close the distance while being wary of possible traps he has set. The Demoman can fire around corners, but can't see around them, so consider backing off and taking a different route towards him. A Demoman who runs at you with his melee weapon and a shield should be a much easier kill. |
Heavy |
vs. | Heavy |
Both of you will often be fighting on the front lines when you meet one another. The encounter will be decided by who has more health, who fires first, and which primary weapons the two of you are wielding. Even alone, it is possible to take down an enemy Heavy that is paired with a Medic by simply being the first to fire. Generally, a Heavy wielding Natascha or the Tomislav, weapons with lower raw firepower, will lose to one wielding any other available primary weapon. |
Heavy |
vs. |  Engineer |
A lone Engineer is far weaker than you in a straight-up fight. If you can get the drop on any Sentry Gun at close range, your Minigun can actually destroy it faster than it can kill you. If you need to deal with a Sentry Gun at a longer range, it’s best to come back with teammates, as all of your weapons suffer at longer ranges In particular, your firepower combined with a Medic's Übercharge should be enough to defeat any Sentry Gun. If necessary, you can use the Fists of Steel to tank Sentry Gun fire while your teammates destroy it. |
Heavy |
vs. | 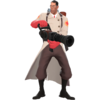 Medic |
A lone Medic should be easy to dispatch with your Minigun. However, a Medic is typically accompanied by a Medic buddy that can steadily wear your health down. Even if you chip away at his patient’s health, the Medic will be there to heal him. Thus, avoid the pair unless you have teammates nearby or can get the drop on them at close range. |
Heavy |
vs. | 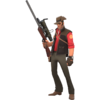 Sniper |
Your slow speed and large frame make it difficult to move unpredictably, making you an easy target. A fully charged headshot will instantly kill you, no matter how overhealed you are, so it’s best not to go out into any open areas that a Sniper is watching. At medium range, you can nick him with enough Minigun or Shotgun bullets to severely impede his aim and deter him from firing as you close in. Once you're in range, he will stand no chance. Equipping the G.R.U. or Fists of Steel can make crossing a Sniper’s field of view a little bit easier. |
Heavy |
vs. | 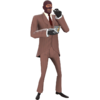 Spy |
Your slow speed, large size, and massive damage output will make you a very important target for an enemy Spy. Do not rely on your teammates to Spy-check for you, especially if you the one leading a charge. If a friendly Medic stops healing you or teammates disappear, be suspicious. A short spray of Minigun bullets at a nearby teammate should be enough to determine if he is a Spy. If a Spy uses his Cloak to retreat, use the spread of your primary weapon or Shotgun to reveal him. The Huo-Long Heater deploys a ring of fire around you when revved up, which can reveal nearby Spies that you should react to quickly. |
See also
|