The Sniper specializes in eliminating enemies at long range. He will typically position himself at a calm vantage point away from the battlefield, scanning the area for targets. His primary weapons can charge and deliver headshots, so ignoring him is never an option. Fortunately, the Sniper is very weak at close combat. A cornered Sniper can usually only fight with weaker armaments, such as his Submachine Gun or melee weapon. The best way to deal with a Sniper is awareness; if you know he's watching one route, try taking another or forcing his attention somewhere else.
General
 Role Role
|
- The Sniper's role is to pick off any exposed enemies. Make good use of cover and keep moving to avoid being an easy target.
- A Sniper is most effective when he fights from a distance. If you get close to him, he will have difficulty landing a headshot on you.
|
 Health Health
|
- The Sniper shares the lowest base health with the Scout, Spy, & Engineer. He will generally lose direct fights against sturdier classes.
|
 Speed Speed
|
- The Sniper runs at an average pace, but is heavily slowed while aiming. He has difficulty fleeing from mobile opponents such as the Scout, Soldier, and Pyro.
|
 Power Power
|
- The Sniper's primary weapons are unaffected by damage fall-off. Try not to get hit at all, as even an uncharged headshot or a fully-charged bodyshot from the default Sniper Rifle deals 150 damage - enough to instantly kill weaker classes and severely injure tougher ones.
- A fully-charged headshot will instantly kill any class, barring a combination of overhealing and damage reduction.
|
Weapon-specific
Primary weapons
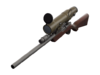
Sniper Rifle + reskins
|
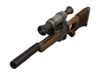
- The Sniper Rifle fires single, accurate bullets over extreme distances, but takes nearly two seconds to reload. It is less effective against several foes or when up close.
- The Sniper Rifle can zoom in to charge a shot, indicated by the Sniper holding the weapon to his eye. When scoped, the Sniper walks slowly and has a limited field of vision, making him susceptible to flanks from Scouts and Spies.
- If you're caught in his sights, move unpredictably and shoot at him to make him flinch and misaim. As you approach him, keep in mind that experienced Snipers can still headshot enemies who are only a few feet away.
- Check if there is a Sniper or his rifle's laser dot before entering an area. He can only cover one route at a time, so take a different route, move once his laser dot goes away, or attack with teammates.
- Be careful - the Sniper may move his laser pointer away to trick you into thinking he’s looking elsewhere, then attack when you expose yourself.
|

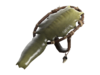
Huntsman + reskins
|
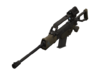
- The Huntsman fires arrows, which move slower than bullets. Incoming arrows can be dodged.
- Arrows have deceptively large hitboxes. Beware of fighting in narrow corridors, where dodging is much more difficult.
- The Huntsman cannot zoom in, forcing the Sniper to fight closer to the front lines and making him easier to target. The lack of zoom also allows him to spot flanking enemies more easily.
|
Sydney Sleeper
|
- The Sydney Sleeper’s headshot deals less damage (a maximum of 202 damage, compared to the Sniper Rifle’s 450). This means that not even a skilled Sniper can instantly kill you without some delay.
- A scoped shot from this weapon coats the victim in Jarate, allowing the Sniper's allies to finish you off easily. If you are hit, consider falling back for a few seconds until the debuff wears off.
- Overall, the Sydney Sleeper deals less damage on headshot, but charges faster; treating it as the default Sniper Rifle is a safe bet.
|
Bazaar Bargain
|
- The Bazaar Bargain reduces the Sniper’s rifle's charge time as he lands multiple headshots. If you see teammates dying to his headshots, note his skill level and avoid his line of sight.
|
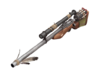
Machina + reskins
|
- The Machina's fully charged shot pierces enemies. Don't count on teammates being able to bodyblock for you if the Sniper has time to charge, especially if you play as the Medic.
- The Machina's tracer rounds reveal its user, making tracking the Sniper down much easier.
- It can only fire while scoped, leaving the Sniper even more vulnerable up close.
|
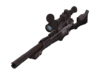
Hitman's Heatmaker
|
- After obtaining an amount of kills or assists, the Sniper can activate the Heatmaker's “focus” ability, which charges his rifle faster and keeps him scoped between shots. A Sniper who stays alive long enough to obtain that much kill credit may be skilled.
- When focus is activated, the Hitman's Heatmaker uses tracer rounds that reveal the Sniper after each shot, making him easier to locate.
- The Hitman's Heatmaker suffers a bodyshot damage penalty, rewarding you for partially dodging the Sniper's shots.
|
|
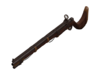
Classic
|
- The Classic allows the Sniper to charge his shot while unscoped. This means that he'll have an easier time spotting and aiming at potential attackers.
- The Classic can headshot only when it is fully charged. Engage the Sniper between charged shots.
|
Secondary weapons
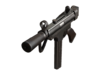
SMG + reskins
|
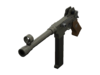
- The Submachine Gun is surprisingly accurate. Don't get complacent if a Sniper switches to it; move away from him and retaliate with a more powerful weapon.
- The Sniper only holds three clips of SMG ammo; he cannot fight for long before you can overwhelm him.
|
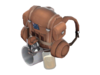
Razorback
|
- The Razorback deprives a Sniper of his secondary weapon, making him much weaker in direct combat.
- A Sniper may wear the Razorback to discourage Spies from backstabbing him. As the Spy, take care to not reveal yourself to the enemy team if you decide to kill the Sniper with your primary weapon, which will take up to 3 shots depending on weapon choice.
- The Razorback renders the Sniper unable to receive any kind of overheal, meaning that in a Sniper duel, he will always die to an uncharged headshot.
|
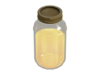
Jarate + reskins
|
- If you're covered in Jarate, the Sniper's team will deal guaranteed mini-crits to you, for about 35% more damage. Take cover if there are other enemies nearby until the debuff wears off in ten seconds.
- Jarate can be removed by extended Healing, entering water, or touching a Resupply cabinet.
- A lone Sniper will often follow up his Jarate toss with his weapon. React to his ranged or melee weapon appropriately.
- The Sniper can use Jarate to extinguish himself or his teammates. As the Pyro, don't always rely on afterburn to finish him off.
|
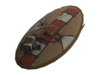
Darwin's Danger Shield
|
- Darwin's Danger Shield's grants afterburn immunity and 50% damage resistance against fire. If ambushing him as the Pyro, switch to your Shotgun or melee weapon instead.
|
Cozy Camper
|
- A Sniper equipped with the Cozy Camper will not flinch if his Sniper Rifle is fully charged. Force him to take cover or shoot early.
- A Sniper with the Cozy Camper may stay scoped in more often, leaving him without vision to spot ambushing enemies.
- Be on the lookout and react accordingly if a Sniper comes out of cover.
- The Cozy Camper deprives the Sniper of a secondary weapon, making him nearly useless in close-range combat.
- The Cozy Camper gives passive health regeneration to the Sniper, nullifying chip damage. Threaten him with heavy damage so he takes cover.
|
Cleaner's Carbine
|
- Dealing 100 damage with the Cleaner's Carbine fills a "CRIKEY" bar, giving the Sniper 8 seconds of mini-crits once filled and activated. If this happens, treat fighting him as if you have been hit by Jarate.
- The Cleaner's Carbine suffers from a smaller clip size and lower fire rate, so the Sniper either has to surprise an enemy or deal substantial chip damage. If you spot the Sniper trying to do either, attack back to prevent them from reaching full "CRIKEY."
- The Carbine's damage boost works well with the Bushwacka; be prepared for it!
|
Melee Weapons
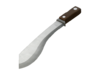
Kukri + reskins
|
- A Sniper will generally use the Kukri weapon as a last resort when cornered. It is still as strong as other melee weapons, so back up and finish him off.
|
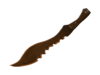
Tribalman's Shiv
|
- Don't get careless just because the Tribalman's Shiv seemingly does little damage – it inflicts bleed, causing you to take extra damage over time.
- After applying bleed, the Sniper may create space and attack you with a ranged weapon. Quickly decide to end the fight or retreat, before the damage stacks up.
- If you are hit by the Shiv again, your bleeding duration will reset. Know where you can find healing once the fight ends.
|
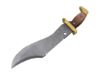
Bushwacka
|
- A Sniper will typically pull out the Bushwacka after accessing mini-crits, usually from Jarate or the Cleaner's Carbine. Fight from just outside melee range, where he is weakest, and take advantage of the damage vulnerability he receives while the Bushwacka is active.
|
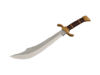
Shahanshah
|
- The Shahanshah deals increased damage if the Sniper is below half health. If fighting him in melee combat, know that his strikes may become stronger after you land a hit or two.
- A Sniper who fights with the Shahanshah is likely injured and trying to take advantage of its damage bonus. Similar to when he is using the Bushwacka, keep your distance.
|
See also
 Sniper Sniper |
|---|
| | Weapons |
Primary | | | Secondary | | | Melee |
Kukri ( Frying Pan, Saxxy, Conscientious Objector, Freedom Staff, Bat Outta Hell, Memory Maker, Ham Shank, Golden Frying Pan, Necro Smasher, Crossing Guard, Prinny Machete) · Tribalman's Shiv · Bushwacka · Shahanshah | | | |
| | | Abilities | | | | Cosmetics | | | | Item sets | | | | Special taunts | | | | Achievements | | | | Character | | | | Strategy | | | | Other | |
|
