Pyro match-ups
Revision as of 18:56, 5 December 2010 by Benjamuffin (talk | contribs) (Don't just add a bunch of weapon stats.)
| Class | Strategy | ||
|---|---|---|---|
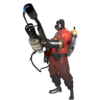 Pyro |
vs |  Scout |
The first lesson is to not underestimate a Scout; like you, they are at their most powerful when close to their enemy. If a Scout gets too close, use your Flamethrower to disorient him and get him burning, but stay wary of his Scattergun which is deadly at close range. Only the daring/skilled ones will continue the fight with you even after being burned. If out of range, try to pull off a Flare Gun shot or pepper him with Shotgun rounds. Melee swings are difficult to land on a moving Scout, but devastating when they connect - compression blasting him into wall makes an easier target. The most important part is dodging the Scout's attacks until the afterburn can finish him off or simply killing him as fast as possible with a combination of all of your weaponry. |
Pyro |
vs | 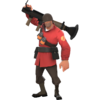 Soldier |
Key in a Soldier matchup is managing his rockets. If you're running with an airblast-capable Flamethrower, reflect his rockets as well as you can (remember, they deal Mini-Crit damage). When he realizes you are trying to toss back his own rockets he will either begin to fire at random intervals to throw you off or switch to another weapon. If he switches to his Shotgun, counter with your own secondary weapon. The Pyro can easily outrun the Soldier (unless he carries the Equalizer), so don't be afraid to ambush with the Axtinguisher or Backburner. |
Pyro |
vs | Pyro |
Every Pyro is immune to afterburn; the Flare Gun deals less damage, the flamethrowers are only effective in ambush, and the Axtinguisher is almost completely useless. If he charges you with a Flamethrower, do the same while backpedaling - this will damage him more than it does you. Close-range Shotgun blasts are reliable, and melee swings from the Fire Axe or Powerjack are very useful if necessary. A Backburner can still fire Critical hits on a Pyro, and it does the most base damage of any Flamethrower. Compression blasts are also useful in putting distance between you and an enemy Pyro, allowing you to move just outside of the range of his Flamethrower while using a Shotgun to damage him at a safe distance. |
Pyro |
vs | 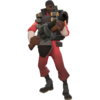 Demoman |
Much like the Soldier, reflected Grenades and Sticky Bombs are deadly to both you and the Demoman. Since he cannot fire bullets, your Shotgun and Flare Gun are both effective and unmatched. If he has equipped the Chargin' Targe, fire damage won't be as effective. Use well-timed airblasts to prevent charges and melee attacks. Shotgun blasts or a puff-and-sting Axtinguisher swipe are most useful no matter the Demoman's loadout. |
Pyro |
vs | 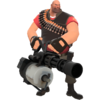 Heavy |
Dealing with a Heavy means staying out of the sights of his Minigun and Natascha. Taking on a Heavy head-on without some kind of surprise or health advantage is usually suicide. However, his gigantic back is a prime target for the Backburner. He is also susceptible to airblasts, particularly with environmental traps or minor falls. The Flare Gun, with multiple hits, can take a heavy down at long range. An old Pyro favorite is to sneakily "puff and sting" - light a Heavy up and swing the Axtinguisher twice - a tactic made even faster with a Degreaser. |
Pyro |
vs |  Engineer |
An Engineer by himself is hardly a threat. With identical speed and a fifty-point health advantage, he is no match for any weapon. However, an Engineer with a Sentry Gun is very dangerous. Even with your high health, a Sentry can easily make quick work of you if you don't carefully execute your attack. Avoid a Sentry if you cannot attack it without being spotted, or go for the Engineer once he leaves the area. The Flare Gun can be useful for long-range sniping a neglected gun. |
Pyro |
vs | 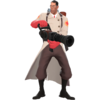 Medic |
As with all classes, a Medic is a high-priority target in any game mode. One-on-one, his needles pack a punch, but travel in fairly predictable paths. Light him up and avoid his shots for maximum efficiency. His natural health regeneration and Blutsauger prevent afterburn from being fully effective, so secondary and melee attacks are appropriate. If he's not alone, focus fire on the Medic. The airblast is perfect for separating a Medic from his healing target and prematurely ending an ÜberCharge deployed on another player. |
Pyro |
vs | 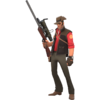 Sniper |
The Sniper, perhaps the opposite of the Pyro, can be killed with any weapon in close combat. Beware of his Jarate, though, which can extinguish your flames, reduce your defense, and give him a shot at redemption. At longer ranges, stay out of sight if at all possible. Flare Gun shots can be deadly as well as any Shotgun damage that lands, since his aim will jump. However, the Sniper can kill any Pyro too slow or too predictable to dodge a headshot. Huntsman arrows are both difficult to reflect, and devastating if used effectively. |
Pyro |
vs | 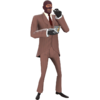 Spy |
The best way to find a Spy is to check every teammate who passes by with a quick puff from a Flamethrower, or any suspicious looking hiding spot. Once detected simply light the Spy up and use your favorite weapon. Dead Ringer Spies can, however, extinguish the fire with their watch, allowing a quick escape. Spray the area around his dead body, just in case. The Dead Ringer Cloak shields a burning Spy from damage, and generally cannot be killed until their Cloak wears off, seconds later. |
See also
|