Scout match-ups
| “ | I'm gonna headbutt ya, I'm gonna headbutt ya, I'm gonna headbutt ya!
Click to listen
— The Scout on his delicate battle plan
|
” |
| Class | Strategy | ||
|---|---|---|---|
 Scout |
vs. | Scout |
Mirror match-up: You are most likely to run into other Scouts when both of you are away from teammates, such as during the initial rush to a map objective or at the outskirts of a battlefield. Both of you do high damage at close range and have low maximum health, so the fight will likely be over within a few seconds.
Tactics: Raw skill is the greatest factor in winning a Scout duel; shoot the enemy Scout and avoid being shot yourself. Look carefully at your opponent's movement; it is easiest to hit your shots while he is moving in straight lines or landing from a double jump. You can make yourself harder to hit by changing directions unpredictably and mixing single jumps in with your double jumps. Keep the locations of nearby health kits in mind; the boost of healing they provide can turn the tide of a fight for both you and your opponent, and unlike with other classes you can't outrun him directly. If you find yourself losing, enter extremely close range to make aiming chaotic for your opponent. You will take more damage at close range, but this is less of an issue if you are already low on health, and the increased damage you will deal may turn the tide of the fight. You can also choose to retreat; because the enemy Scout is just as agile as you, it will be difficult to outrun him directly. If possible, attempt to retreat towards locations the enemy Scout is unwilling to chase you, such as a group of teammates or into the path of a Sentry Gun. Useful weapons:
|
Scout |
vs. |  Soldier |
Relative merits: Both you and the Soldier are effective close-range combatants, but you have the advantage of movement speed. A Soldier will typically aim his Rocket Launcher at your feet to deal splash damage, but your ability to double jump makes it easier to avoid being hit directly.
Tactics: Try to stay in open areas to make the best use of your mobility. Try to deny the Soldier access to high ground, where he can rain rockets from above. Consider staying at a medium distance to dodge his shots. Avoid double jumping so predictably that the Soldier shoots a rocket where you land. If you need to retreat, stay alert in case he decides to rocket jump after you. Useful weapons:
|
Scout |
vs. |  Pyro |
Relative merits: You have the speed to outmaneuver the Pyro, provided you have room to maneuver, and weapons with longer range.
Tactics: Defeating a Pyro is all about spacing. Stay just outside the Flame Thrower's range, switching between your Scattergun and Pistol as opportunity presents. Avoid enclosed areas, where the Pyro can use the compression blast to shove you into a corner for an easy kill. Try not to get hit at all - afterburn will take off up to half of your health and may empower certain Pyro weapons, like the Flare Gun. Useful weapons: |
Scout |
vs. |  Demoman |
Relative merits: Both you and the Demoman have extremely high damage output, but your mobility generally lets you engage on your own terms. When out in the open, you can easily dodge a Demoman's indirect projectiles. If you force the fight into close range, the Demoman's Grenade Launcher is difficult to aim, Stickybombs take too long to arm, and his explosions also damage him.
Tactics: Quickly get within close range, where the Demoman is weakest, or remain at medium range, where you can wear him down while dodging grenades. If need be, take alternate routes to avoid his Sticky traps and ambush him. A Demoman with a shield equipped is vulnerable to weapon heckling; stay at medium range to avoid his melee attacks, then close in once he switches to the Grenade Launcher. Be ready to react if he suddenly decides to charge at you, as his charge moves faster than your running speed. Useful weapons:
|
Scout |
vs. | 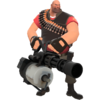 Heavy |
Relative merits: The Heavy is perhaps your exact opposite - your mobility and Scattergun's precision versus his bulk and Minigun's barrage. Although you cannot take him on directly, you can be a constant nuisance.
Tactics: The element of surprise is your strongest weapon; you can kill the beefy Heavy with just a few point blank shots before his Minigun can be revved. If his Minigun is already spun up, note the sound his weapon makes before deciding to fight - the distinct whir of the Natascha, which can slow you down, is a sign to stay back. In a direct fight, the Heavy is immobile; try popping in and out from behind cover between shots, staying in his face while circle strafing, or double jumping over his head to confuse him. Useful weapons:
|
Scout |
vs. |  Engineer |
Relative merits: A lone Engineer has similar weapons to yours but far less mobility. However, his Sentry Gun is bulky, tracks your movements, and deals heavy damage.
Tactics: If the Engineer's Sentry Gun catches you, its knock back will pin down and kill you. Avoid routes covered by Sentry Guns and check around corners before rushing into new areas. If the Sentry Gun is unattended, you can slowly destroy it from far away with a pistol or the Shortstop. Otherwise, when an Engineer is near his Sentry Gun, the best you’ll be able to do is harass him from long range. Useful weapons:
|
Scout |
vs. | 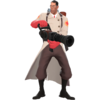 Medic |
Relative merits: Your mobility lets you flank the enemy team and choose your targets. Consider targeting the enemy Medic to eliminate their source of healing. In a direct fight, you have higher damage potential, but the Medic has higher health and health regeneration.
Tactics: The Medic will likely stay near his teammates to heal them - these enemies will have plenty of health and are harder to pick off. Additionally, the Medic is free to turn around and assess the battlefield while healing, so you need to approach decisively. Maneuver past his patient or approach the pair from behind, and pick the Medic off with a few point blank shots. Don't get greedy - retreat if you think his former patient is too healthy. Useful weapons: |
Scout |
vs. | 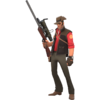 Sniper |
Relative merits: Your mobility lets you take all sorts of alternate routes to approach a Sniper. However, if the Sniper spots you, one headshot or fully charged bodyshot will instantly kill you.
Tactics: Ideally, take a route where the Sniper will not see you coming. If the Sniper is aiming at you, zigzag, jump, and strafe to become a difficult target. If you have no choice, harass the Sniper with your Pistol at long range to hopefully throw off his aim. Once you close the distance, your weapons have the advantage. Even at close range, take care, as the Sniper may try to quickly scope in and headshot you anyway. Useful weapons:
|
Scout |
vs. | 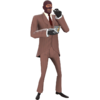 Spy |
Relative merits: Your speed makes you hard to backstab and allows you to always chase fleeing foes, making you one of the Spy’s deadlier opponents. He has some of the game’s weakest weapons, so a fight is heavily in your favor.
Tactics: You can easily Spy-check by simply running into your teammates; if you can’t move past them, they’re a Spy. If he Cloaks and flees, use your Scattergun's spread or other useful weapons to reveal him and give chase. If the Spy stays for a direct fight, strafe back and forth, land solid Scattergun shots, and take care not to expose your back to his Knife in the heat of the moment. Useful weapons:
|
See also
|