Difference between revisions of "Template:List of cosmetic styles"
(Added Le Professionnel, Hazard Handler, Close Quarters Cover, Shrapnel Shell, Cleaner's Cap, and Brother Mann) |
(Boy, I really hope somebody got fired for that blunder.) |
||
| (6 intermediate revisions by one other user not shown) | |||
| Line 23: | Line 23: | ||
|- | |- | ||
<!-- Scout --> | <!-- Scout --> | ||
| − | ! rowspan=" | + | ! rowspan="64" style="background-color:#ffbd7e;" width=80px | {{class link|Scout|br=yes}} |
| rowspan="2" style="background-color:#FFDDAD;" width=5% | '''{{item link|Batter's Helmet}}''' | | rowspan="2" style="background-color:#FFDDAD;" width=5% | '''{{item link|Batter's Helmet}}''' | ||
| [[File:RED Batter's Helmet.png|60px|link=Batter's Helmet{{if lang}}]] | | [[File:RED Batter's Helmet.png|60px|link=Batter's Helmet{{if lang}}]] | ||
| Line 268: | Line 268: | ||
| style="background:#F9D483; width:20%;" | {{item name|Jester}} | | style="background:#F9D483; width:20%;" | {{item name|Jester}} | ||
| style="background:#F9D483; width:20%;" | {{item name|Juggler}} | | style="background:#F9D483; width:20%;" | {{item name|Juggler}} | ||
| + | |- | ||
| + | | rowspan="2" style="background-color:#FFDDAD;" width=5% | '''{{item link|Seasonal Employee}}''' | ||
| + | | [[File:Seasonal Employee North Pole.png|60px|link=Seasonal Employee{{if lang}}]] | ||
| + | | [[File:Seasonal Employee South Pole.png|60px|link=Seasonal Employee{{if lang}}]] | ||
| + | |- | ||
| + | | style="background:#F9D483; width:20%;" | {{item name|North Pole - Seasonal Employee}} | ||
| + | | style="background:#F9D483; width:20%;" | {{item name|South Pole - Seasonal Employee}} | ||
|- | |- | ||
<!-- Soldier --> | <!-- Soldier --> | ||
| − | ! rowspan=" | + | ! rowspan="46" style="background-color:#ffbd7e;" | {{class link|Soldier|br=yes}} |
| rowspan="2" style="background-color:#FFDDAD;" | '''{{item link|Lord Cockswain's Novelty Mutton Chops and Pipe}}''' | | rowspan="2" style="background-color:#FFDDAD;" | '''{{item link|Lord Cockswain's Novelty Mutton Chops and Pipe}}''' | ||
| [[File:Painted Lord Cockswain's Novelty Mutton Chops and Pipe UNPAINTED.png|60px|link=Lord Cockswain's Novelty Mutton Chops and Pipe{{if lang}}]] | | [[File:Painted Lord Cockswain's Novelty Mutton Chops and Pipe UNPAINTED.png|60px|link=Lord Cockswain's Novelty Mutton Chops and Pipe{{if lang}}]] | ||
| Line 424: | Line 431: | ||
| style="background:#F9D483; width:20%;" | {{item name|Alert}} | | style="background:#F9D483; width:20%;" | {{item name|Alert}} | ||
| style="background:#F9D483; width:20%;" | {{item name|Evasion}} | | style="background:#F9D483; width:20%;" | {{item name|Evasion}} | ||
| + | |- | ||
| + | | rowspan="2" style="background-color:#FFDDAD;" | '''{{item link|Bulb Bonnet}}''' | ||
| + | | [[File:Bulb Bonnet Festive.png|60px|link=Bulb Bonnet{{if lang}}]] | ||
| + | | [[File:Bulb Bonnet Blank.png|60px|link=Bulb Bonnet{{if lang}}]] | ||
| + | |- | ||
| + | | style="background:#F9D483; width:20%;" | {{item name|Festive - Bulb Bonnet}} | ||
| + | | style="background:#F9D483; width:20%;" | {{item name|Blank - Bulb Bonnet}} | ||
| + | |- | ||
| + | | rowspan="2" style="background-color:#FFDDAD;" | '''{{item link|Thousand-Yard Stare}}''' | ||
| + | | [[File:Thousand-Yard Stare Awed.png|60px|link=Thousand-Yard Stare{{if lang}}]] | ||
| + | | [[File:Thousand-Yard Stare Shocked.png|60px|link=Thousand-Yard Stare{{if lang}}]] | ||
| + | |- | ||
| + | | style="background:#F9D483; width:20%;" | {{item name|Awed}} | ||
| + | | style="background:#F9D483; width:20%;" | {{item name|Shocked}} | ||
|- | |- | ||
<!-- Pyro --> | <!-- Pyro --> | ||
| − | ! rowspan=" | + | ! rowspan="36" style="background-color:#ffbd7e;" | {{class link|Pyro|br=yes}} |
| rowspan="2" style="background-color:#FFDDAD;" | '''{{item link|Pyromancer's Mask}}'''<sup>‡</sup> | | rowspan="2" style="background-color:#FFDDAD;" | '''{{item link|Pyromancer's Mask}}'''<sup>‡</sup> | ||
| [[File:Painted Pyromancer's Mask CF7336.png|60px|link=Pyromancer's Mask{{if lang}}]] | | [[File:Painted Pyromancer's Mask CF7336.png|60px|link=Pyromancer's Mask{{if lang}}]] | ||
| Line 523: | Line 544: | ||
| style="background:#F9D483;" | {{item name|Normal - Seared Sorcerer}} | | style="background:#F9D483;" | {{item name|Normal - Seared Sorcerer}} | ||
| style="background:#F9D483;" | {{item name|Hat and Cape Only}} | | style="background:#F9D483;" | {{item name|Hat and Cape Only}} | ||
| + | |- | ||
| + | | rowspan="2" style="background-color:#FFDDAD;" | '''{{item link|Flame Warrior}}''' | ||
| + | | [[File:RED Flame Warrior.png|60px|link=Flame Warrior{{if lang}}]] | ||
| + | | [[File:RED Flame Warrior Style 2.png|60px|link=Flame Warrior{{if lang}}]] | ||
| + | |- | ||
| + | | style="background:#F9D483;" | {{style name|Style 1}} | ||
| + | | style="background:#F9D483;" | {{style name|Style 2}} | ||
| + | |- | ||
| + | | rowspan="2" style="background-color:#FFDDAD;" | '''{{item link|Fiercesome Fluorescence}}''' | ||
| + | | [[File:RED Fiercesome Fluorescence Fearsome.png|60px|link=Fiercesome Fluorescence{{if lang}}]] | ||
| + | | [[File:RED Fiercesome Fluorescence Friendly.png|60px|link=Fiercesome Fluorescence{{if lang}}]] | ||
| + | |- | ||
| + | | style="background:#F9D483;" | {{style name|Fearsome}} | ||
| + | | style="background:#F9D483;" | {{style name|Friendly}} | ||
|- | |- | ||
| rowspan="2" style="background-color:#FFDDAD;" | '''{{item link|Impact Impaler}}''' | | rowspan="2" style="background-color:#FFDDAD;" | '''{{item link|Impact Impaler}}''' | ||
| Line 539: | Line 574: | ||
| style="background:#F9D483;" | {{item name|Style 2}} | | style="background:#F9D483;" | {{item name|Style 2}} | ||
| style="background:#F9D483;" | {{item name|Style 3}} | | style="background:#F9D483;" | {{item name|Style 3}} | ||
| + | |- | ||
| + | | rowspan="2" style="background-color:#FFDDAD;" | '''{{item link|Elf Ignition}}''' | ||
| + | | [[File:Elf Ignition Untucked.png|60px|link=Elf Ignition{{if lang}}]] | ||
| + | | [[File:Elf Ignition Tucked.png|60px|link=Elf Ignition{{if lang}}]] | ||
| + | |- | ||
| + | | style="background:#F9D483;" | {{item name|Untucked}} | ||
| + | | style="background:#F9D483;" | {{item name|Tucked}} | ||
|- | |- | ||
<!-- Demoman --> | <!-- Demoman --> | ||
| − | ! rowspan=" | + | ! rowspan="36" style="background-color:#ffbd7e;" | {{class link|Demoman|br=yes}} |
| rowspan="2" style="background-color:#FFDDAD;" | '''{{item link|Scotsman's Stove Pipe}}'''<sup>†</sup> | | rowspan="2" style="background-color:#FFDDAD;" | '''{{item link|Scotsman's Stove Pipe}}'''<sup>†</sup> | ||
| [[File:Painted Scotsman's Stove Pipe CF7336.png|60px|link=Scotsman's Stove Pipe{{if lang}}]] | | [[File:Painted Scotsman's Stove Pipe CF7336.png|60px|link=Scotsman's Stove Pipe{{if lang}}]] | ||
| Line 621: | Line 663: | ||
| style="background:#F9D483; width:20%;" | {{item name|Fusilier}} | | style="background:#F9D483; width:20%;" | {{item name|Fusilier}} | ||
| style="background:#F9D483; width:20%;" | {{item name|Grenadier}} | | style="background:#F9D483; width:20%;" | {{item name|Grenadier}} | ||
| + | |- | ||
| + | | rowspan="2" style="background-color:#FFDDAD;" | '''{{item link|Blast Bowl}}''' | ||
| + | | [[File:RED Blast Bowl.png|60px|link=Blast Bowl{{if lang}}]] | ||
| + | | [[File:RED Blast Bowl Jumper.png|60px|link=Blast Bowl{{if lang}}]] | ||
| + | |- | ||
| + | | style="background:#F9D483; width:20%;" | {{style name|Sticky - Blast Bowl}} | ||
| + | | style="background:#F9D483; width:20%;" | {{style name|Jumper - Blast Bowl}} | ||
| + | |- | ||
| + | | rowspan="2" style="background-color:#FFDDAD;" | '''{{item link|Mad Lad}}''' | ||
| + | | [[File:RED Mad Lad.png|60px|link=Mad Lad{{if lang}}]] | ||
| + | | [[File:RED Mad Lad Car Crasher.png|60px|link=Mad Lad{{if lang}}]] | ||
| + | |- | ||
| + | | style="background:#F9D483; width:20%;" | {{style name|Tank Trasher}} | ||
| + | | style="background:#F9D483; width:20%;" | {{style name|Car Crasher}} | ||
|- | |- | ||
| rowspan="2" style="background-color:#FFDDAD;" | '''{{item link|Thunder Dome}}''' | | rowspan="2" style="background-color:#FFDDAD;" | '''{{item link|Thunder Dome}}''' | ||
| Line 646: | Line 702: | ||
| style="background:#F9D483; width:20%;" | {{item name|Sticky - Shrapnel Shell}} | | style="background:#F9D483; width:20%;" | {{item name|Sticky - Shrapnel Shell}} | ||
| style="background:#F9D483; width:20%;" | {{item name|Jumper - Shrapnel Shell}} | | style="background:#F9D483; width:20%;" | {{item name|Jumper - Shrapnel Shell}} | ||
| + | |- | ||
| + | | rowspan="2" style="background-color:#FFDDAD;" | '''{{item link|Plaid Lad}}''' | ||
| + | | [[File:RED Plaid Lad.png|60px|link=Plaid Lad{{if lang}}]] | ||
| + | | [[File:RED Plaid Lad Burns.png|60px|link=Plaid Lad{{if lang}}]] | ||
| + | | [[File:RED Plaid Lad Bland.png|60px|link=Plaid Lad{{if lang}}]] | ||
| + | |- | ||
| + | | style="background:#F9D483; width:20%;" | {{item name|Bushy}} | ||
| + | | style="background:#F9D483; width:20%;" | {{item name|Burns}} | ||
| + | | style="background:#F9D483; width:20%;" | {{item name|Bland}} | ||
| + | |- | ||
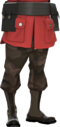
| + | | rowspan="2" style="background-color:#FFDDAD;" | '''{{item link|Glasgow Bankroll}}''' | ||
| + | | [[File:RED Glasgow Bankroll Plaid.png|60px|link=Glasgow Bankroll{{if lang}}]] | ||
| + | | [[File:RED Glasgow Bankroll Pinstripes.png|60px|link=Glasgow Bankroll{{if lang}}]] | ||
| + | | [[File:RED Glasgow Bankroll Plain.png|60px|link=Glasgow Bankroll{{if lang}}]] | ||
| + | |- | ||
| + | | style="background:#F9D483; width:20%;" | {{item name|Plaid - Glasgow Bankroll}} | ||
| + | | style="background:#F9D483; width:20%;" | {{item name|Pinstripes}} | ||
| + | | style="background:#F9D483; width:20%;" | {{item name|Plain - Glasgow Bankroll}} | ||
| + | |- | ||
| + | | rowspan="2" style="background-color:#FFDDAD;" | '''{{item link|Nightcap}}''' | ||
| + | | [[File:RED Nightcap.png|61px|link=Nightcap{{if lang}}]] | ||
| + | | [[File:RED Nightcap Snoozin'.png|61px|link=Nightcap{{if lang}}]] | ||
| + | |- | ||
| + | | style="background:#F9D483; width:20%;" | {{item name|Sleepin'}} | ||
| + | | style="background:#F9D483; width:20%;" | {{item name|Snoozin'}} | ||
|- | |- | ||
<!-- Heavy --> | <!-- Heavy --> | ||
| − | ! rowspan=" | + | ! rowspan="42" style="background-color:#ffbd7e;" | {{class link|Heavy|br=yes}} |
| rowspan="2" style="background-color:#FFDDAD;" | '''{{item link|Large Luchadore}}''' | | rowspan="2" style="background-color:#FFDDAD;" | '''{{item link|Large Luchadore}}''' | ||
| [[File:RED Large Luchadore El Macho.png|60px|link=Large Luchadore{{if lang}}]] | | [[File:RED Large Luchadore El Macho.png|60px|link=Large Luchadore{{if lang}}]] | ||
| Line 775: | Line 856: | ||
| style="background:#F9D483;" | {{item name|Siberian}} | | style="background:#F9D483;" | {{item name|Siberian}} | ||
| style="background:#F9D483;" | {{item name|Polar - Misha's Maw}} | | style="background:#F9D483;" | {{item name|Polar - Misha's Maw}} | ||
| + | |- | ||
| + | | rowspan="2" style="background-color:#FFDDAD;" | '''{{item link|Ol' Reliable}}''' | ||
| + | | [[File:RED Ol' Reliable.png|60px|link=Ol' Reliable{{if lang}}]] | ||
| + | | [[File:RED Ol' Reliable Solid.png|60px|link=Ol' Reliable{{if lang}}]] | ||
| + | | [[File:RED Ol' Reliable Taiga.png|60px|link=Ol' Reliable{{if lang}}]] | ||
| + | |- | ||
| + | | style="background:#F9D483;" | {{style name|Arctic - Ol' Reliable}} | ||
| + | | style="background:#F9D483;" | {{style name|Solid - Ol' Reliable}} | ||
| + | | style="background:#F9D483;" | {{style name|Taiga - Ol' Reliable}} | ||
|- | |- | ||
| rowspan="2" style="background-color:#FFDDAD;" | '''{{item link|Brother Mann}}''' | | rowspan="2" style="background-color:#FFDDAD;" | '''{{item link|Brother Mann}}''' | ||
| Line 784: | Line 874: | ||
| style="background:#F9D483;" | {{item name|Style 2}} | | style="background:#F9D483;" | {{item name|Style 2}} | ||
| style="background:#F9D483;" | {{item name|Style 3}} | | style="background:#F9D483;" | {{item name|Style 3}} | ||
| + | |- | ||
| + | | rowspan="2" style="background-color:#FFDDAD;" | '''{{item link|Heavy Heating}}''' | ||
| + | | [[File:Heavy Heating Arctic.png|60px|link=Heavy Heating{{if lang}}]] | ||
| + | | [[File:Heavy Heating Solid.png|60px|link=Heavy Heating{{if lang}}]] | ||
| + | | [[File:Heavy Heating Taiga.png|60px|link=Heavy Heating{{if lang}}]] | ||
| + | |- | ||
| + | | style="background:#F9D483;" | {{item name|Arctic - Heavy Heating}} | ||
| + | | style="background:#F9D483;" | {{item name|Solid - Heavy Heating}} | ||
| + | | style="background:#F9D483;" | {{item name|Taiga - Heavy Heating}} | ||
| + | |- | ||
| + | | rowspan="2" style="background-color:#FFDDAD;" | '''{{item link|Two Punch Mann}}''' | ||
| + | | [[File:RED Two Punch Mann KGB.png|100px|link=Two Punch Mann{{if lang}}]] | ||
| + | | [[File:RED Two Punch Mann GRU.png|100px|link=Two Punch Mann{{if lang}}]] | ||
| + | |- | ||
| + | | style="background:#F9D483;" | {{item name|KGB}} | ||
| + | | style="background:#F9D483;" | {{item name|GRU}} | ||
|- | |- | ||
<!-- Engineer --> | <!-- Engineer --> | ||
| − | ! rowspan=" | + | ! rowspan="46" style="background-color:#ffbd7e;" | {{class link|Engineer|br=yes}} |
| rowspan="2" style="background-color:#FFDDAD;" | '''{{item link|Big Country}}''' | | rowspan="2" style="background-color:#FFDDAD;" | '''{{item link|Big Country}}''' | ||
| [[File:Painted Big Country UNPAINTED.png|60px|link=Big Country{{if lang}}]] | | [[File:Painted Big Country UNPAINTED.png|60px|link=Big Country{{if lang}}]] | ||
| Line 824: | Line 930: | ||
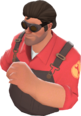
| rowspan="2" style="background-color:#FFDDAD;" | '''{{item link|Barnstormer}}''' | | rowspan="2" style="background-color:#FFDDAD;" | '''{{item link|Barnstormer}}''' | ||
| [[File:RED Barnstormer.png|60px|link=Barnstormer{{if lang}}]] | | [[File:RED Barnstormer.png|60px|link=Barnstormer{{if lang}}]] | ||
| − | | [[File:RED | + | | [[File:RED Barnstormer Bugscreen Down.png|60px|link=Barnstormer{{if lang}}]] |
|- | |- | ||
| style="background:#F9D483;" | {{item name|Bugscreen Up}} | | style="background:#F9D483;" | {{item name|Bugscreen Up}} | ||
| Line 830: | Line 936: | ||
|- | |- | ||
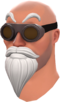
| rowspan="2" style="background-color:#FFDDAD;" | '''{{item link|Peacenik's Ponytail}}''' | | rowspan="2" style="background-color:#FFDDAD;" | '''{{item link|Peacenik's Ponytail}}''' | ||
| − | | [[File:RED Peacenik' | + | | [[File:RED Peacenik's Ponytail.png|60px|link=Peacenik's Ponytail{{if lang}}]] |
| − | | [[File:RED Peacenik' | + | | [[File:RED Peacenik's Ponytail Helmet.png|60px|link=Peacenik's Ponytail{{if lang}}]] |
|- | |- | ||
| style="background:#F9D483;" | {{item name|No Helmet - Peacenik's Ponytail}} | | style="background:#F9D483;" | {{item name|No Helmet - Peacenik's Ponytail}} | ||
| Line 925: | Line 1,031: | ||
| style="background:#F9D483;" | {{item name|Style 4}} | | style="background:#F9D483;" | {{item name|Style 4}} | ||
|- | |- | ||
| − | <!-- Medic --> | + | | rowspan="2" style="background-color:#FFDDAD;" | '''{{item link|Arctic Mole}}''' <sup>‡</sup> |
| − | ! rowspan=" | + | | [[File:Painted Arctic Mole E6E6E6.png|60px|link=Arctic Mole{{if lang}}]] |
| + | | [[File:Painted Arctic Mole E6E6E6 Paint Fur.png|60px|link=Arctic Mole{{if lang}}]] | ||
| + | | [[File:Painted Arctic Mole E6E6E6 Paint Eyes.png|60px|link=Arctic Mole{{if lang}}]] | ||
| + | |- | ||
| + | | style="background:#F9D483;" | {{item name|Paint Hat - Arctic Mole}} | ||
| + | | style="background:#F9D483;" | {{item name|Paint Fur}} | ||
| + | | style="background:#F9D483;" | {{item name|Paint Eyes - Arctic Mole}} | ||
| + | |- | ||
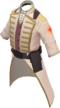
| + | | rowspan="2" style="background-color:#FFDDAD;" | '''{{item link|Cool Warm Sweater}}''' | ||
| + | | [[File:Cool Warm Sweater Normal.png|60px|link=Cool Warm Sweater{{if lang}}]] | ||
| + | | [[File:Cool Warm Sweater Under Overalls.png|60px|link=Cool Warm Sweater{{if lang}}]] | ||
| + | |- | ||
| + | | style="background:#F9D483;" | {{style name|Normal - Cool Warm Sweater}} | ||
| + | | style="background:#F9D483;" | {{style name|Under Overalls}} | ||
| + | |- | ||
| + | | rowspan="2" style="background-color:#FFDDAD;" | '''{{item link|Train of Thought}}''' | ||
| + | | [[File:RED Train of Thought.png|60px|link=Train of Thought{{if lang}}]] | ||
| + | | [[File:RED Train of Thought Southern.png|60px|link=Train of Thought{{if lang}}]] | ||
| + | |- | ||
| + | | style="background:#F9D483;" | {{item name|North Pole - Train of Thought}} | ||
| + | | style="background:#F9D483;" | {{item name|Southern}} | ||
| + | |- | ||
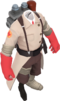
| + | | rowspan="2" style="background-color:#FFDDAD;" | '''{{item link|Underminer's Overcoat}}''' <sup>‡</sup> | ||
| + | | [[File:Painted Underminer's Overcoat FF69B4.png|60px|link=Underminer's Overcoat{{if lang}}]] | ||
| + | | [[File:Underminer's Overcoat Paint All.png|60px|link=Underminer's Overcoat{{if lang}}]] | ||
| + | | [[File:Underminer's Overcoat No Sweater.png|60px|link=Underminer's Overcoat{{if lang}}]] | ||
| + | |- | ||
| + | | style="background:#F9D483;" | {{style name|Paint Sweater}} | ||
| + | | style="background:#F9D483;" | {{style name|Paint All - Underminer's Overcoat}} | ||
| + | | style="background:#F9D483;" | {{style name|No Sweater}} | ||
| + | |- | ||
| + | | rowspan="2" style="background-color:#FFDDAD;" | '''{{item link|Clue Hairdo}}''' | ||
| + | | [[File:Painted Clue Hairdo UNPAINTED.png|81px|link=Clue Hairdo{{if lang}}]] | ||
| + | | [[File:Painted Clue Hairdo UNPAINTED Case Cracked.png|81px|link=Clue Hairdo{{if lang}}]] | ||
| + | | [[File:Painted Clue Hairdo UNPAINTED Case Dropped.png|81px|link=Clue Hairdo{{if lang}}]] | ||
| + | |- | ||
| + | | style="background:#F9D483;" | {{item name|Case Open}} | ||
| + | | style="background:#F9D483;" | {{item name|Case Cracked}} | ||
| + | | style="background:#F9D483;" | {{item name|Case Dropped}} | ||
| + | |- | ||
| + | <!-- Medic --> | ||
| + | ! rowspan="34" style="background-color:#ffbd7e;" | {{class link|Medic|br=yes}} | ||
| rowspan="2" style="background-color:#FFDDAD;" | '''{{item link|Blighted Beak}}''' | | rowspan="2" style="background-color:#FFDDAD;" | '''{{item link|Blighted Beak}}''' | ||
| [[File:Painted Blighted Beak UNPAINTED.png|60px|link=Blighted Beak{{if lang}}]] | | [[File:Painted Blighted Beak UNPAINTED.png|60px|link=Blighted Beak{{if lang}}]] | ||
| Line 1,000: | Line 1,147: | ||
| style="background:#F9D483;" | {{item name|Phony Physician}} | | style="background:#F9D483;" | {{item name|Phony Physician}} | ||
| style="background:#F9D483;" | {{item name|Baleful Barber}} | | style="background:#F9D483;" | {{item name|Baleful Barber}} | ||
| + | |- | ||
| + | | rowspan="2" style="background-color:#FFDDAD;" | '''{{item link|Oktoberfester}}'''<sup>‡</sup> | ||
| + | | [[File:Painted Oktoberfester E7B53B.png|60px|link=Oktoberfester{{if lang}}]] | ||
| + | | [[File:Painted Oktoberfester E7B53B Paint Moustache.png|60px|link=Oktoberfester{{if lang}}]] | ||
| + | | [[File:Painted Oktoberfester E7B53B No Moustache.png|60px|link=Oktoberfester{{if lang}}]] | ||
| + | |- | ||
| + | | style="background:#F9D483;" | {{style name|Paint Hat - Oktoberfester}} | ||
| + | | style="background:#F9D483;" | {{style name|Paint Moustache}} | ||
| + | | style="background:#F9D483;" | {{style name|No Moustache}} | ||
|- | |- | ||
| rowspan="2" style="background-color:#FFDDAD;" | '''{{item link|Wooly Pulli}}''' | | rowspan="2" style="background-color:#FFDDAD;" | '''{{item link|Wooly Pulli}}''' | ||
| Line 1,032: | Line 1,188: | ||
| style="background:#F9D483;" | {{item name|Supercharged}} | | style="background:#F9D483;" | {{item name|Supercharged}} | ||
| style="background:#F9D483;" | {{item name|Grounded}} | | style="background:#F9D483;" | {{item name|Grounded}} | ||
| + | |- | ||
| + | | rowspan="2" style="background-color:#FFDDAD;" | '''{{item link|Night Ward}}''' | ||
| + | | [[File:RED Night Ward.png|60px|link=Night Ward{{if lang}}]] | ||
| + | | [[File:RED Night Ward Stripes.png|60px|link=Night Ward{{if lang}}]] | ||
| + | |- | ||
| + | | style="background:#F9D483;" | {{item name|Crosses}} | ||
| + | | style="background:#F9D483;" | {{item name|Stripes}} | ||
| + | |- | ||
| + | | rowspan="2" style="background-color:#FFDDAD;" | '''{{item link|Frigid Fashion}}''' | ||
| + | | [[File:RED Frigid Fashion.png|60px|link=Frigid Fashion{{if lang}}]] | ||
| + | | [[File:RED Frigid Fashion Style 2.png|60px|link=Frigid Fashion{{if lang}}]] | ||
| + | |- | ||
| + | | style="background:#F9D483;" | {{style name|Style 1}} | ||
| + | | style="background:#F9D483;" | {{style name|Style 2}} | ||
|- | |- | ||
<!-- Sniper --> | <!-- Sniper --> | ||
| − | ! rowspan=" | + | ! rowspan="28" style="background-color:#ffbd7e;" | {{class link|Sniper|br=yes}} |
| rowspan="2" style="background-color:#FFDDAD;" | '''{{item link|Villain's Veil}}''' | | rowspan="2" style="background-color:#FFDDAD;" | '''{{item link|Villain's Veil}}''' | ||
| [[File:Painted Villain's Veil UNPAINTED.png|60px|link=Villain's Veil{{if lang}}]] | | [[File:Painted Villain's Veil UNPAINTED.png|60px|link=Villain's Veil{{if lang}}]] | ||
| Line 1,117: | Line 1,287: | ||
| style="background:#F9D483;" | {{item name|Bold - Tropical Camo}} | | style="background:#F9D483;" | {{item name|Bold - Tropical Camo}} | ||
| style="background:#F9D483;" | {{item name|Bowling}} | | style="background:#F9D483;" | {{item name|Bowling}} | ||
| + | |- | ||
| + | | rowspan="2" style="background-color:#FFDDAD;" | '''{{item link|Cranium Cover}}''' | ||
| + | | [[File:RED Cranium Cover.png|60px|link=Cranium Cover{{if lang}}]] | ||
| + | | [[File:RED Cranium Cover Visor Up.png|60px|link=Cranium Cover{{if lang}}]] | ||
| + | |- | ||
| + | | style="background:#F9D483;" | {{style name|Visor Down - Cranium Cover}} | ||
| + | | style="background:#F9D483;" | {{style name|Visor Up - Cranium Cover}} | ||
|- | |- | ||
| rowspan="2" style="background-color:#FFDDAD;" | '''{{item link|Scruffed 'n Stitched}}''' <sup>‡</sup> | | rowspan="2" style="background-color:#FFDDAD;" | '''{{item link|Scruffed 'n Stitched}}''' <sup>‡</sup> | ||
| Line 1,133: | Line 1,310: | ||
|- | |- | ||
<!-- Spy --> | <!-- Spy --> | ||
| − | ! rowspan=" | + | ! rowspan="28" style="background-color:#ffbd7e;" | {{class link|Spy|br=yes}} |
| rowspan="2" style="background-color:#FFDDAD;" | '''{{item link|Distinguished Rogue}}''' | | rowspan="2" style="background-color:#FFDDAD;" | '''{{item link|Distinguished Rogue}}''' | ||
| [[File:RED Distinguished Rogue.png|60px|link=Distinguished Rogue{{if lang}}]] | | [[File:RED Distinguished Rogue.png|60px|link=Distinguished Rogue{{if lang}}]] | ||
| Line 1,222: | Line 1,399: | ||
| style="background:#F9D483;" | {{item name|Paint All - Cleaner's Cap}} | | style="background:#F9D483;" | {{item name|Paint All - Cleaner's Cap}} | ||
| style="background:#F9D483;" | {{item name|No Shades}} | | style="background:#F9D483;" | {{item name|No Shades}} | ||
| + | |- | ||
| + | | rowspan="2" style="background-color:#FFDDAD;" | '''{{item link|Gruesome Gourd}}''' <sup>†</sup> | ||
| + | | [[File:Painted Gruesome Gourd 141414.png|60px|link=Gruesome Gourd{{if lang}}]] | ||
| + | | [[File:Painted Gruesome Gourd 141414 Glow.png|60px|link=Gruesome Gourd{{if lang}}]] | ||
| + | |- | ||
| + | | style="background:#F9D483;" | {{item name|Paint Flesh}} | ||
| + | | style="background:#F9D483;" | {{item name|Paint Glow}} | ||
| + | |- | ||
| + | | rowspan="2" style="background-color:#FFDDAD;" | '''{{item link|Strasbourg Scholar}}''' | ||
| + | | [[File:RED Strasbourg Scholar.png|60px|link=Strasbourg Scholar{{if lang}}]] | ||
| + | | [[File:RED Strasbourg Scholar Plain.png|60px|link=Strasbourg Scholar{{if lang}}]] | ||
| + | |- | ||
| + | | style="background:#F9D483;" | {{style name|Patterned}} | ||
| + | | style="background:#F9D483;" | {{style name|Plain - Strasbourg Scholar}} | ||
|- | |- | ||
<!-- Multiple Classes --> | <!-- Multiple Classes --> | ||
| Line 1,278: | Line 1,469: | ||
! rowspan="2" style="background-color:#ffbd7e;" | {{class link|Soldier}}<br>{{class link|Demoman}}<br>{{class link|Heavy}}<br>{{class link|Engineer}}<br>{{class link|Medic}}<br>{{class link|Sniper}} | ! rowspan="2" style="background-color:#ffbd7e;" | {{class link|Soldier}}<br>{{class link|Demoman}}<br>{{class link|Heavy}}<br>{{class link|Engineer}}<br>{{class link|Medic}}<br>{{class link|Sniper}} | ||
| rowspan="2" style="background-color:#FFDDAD;" | '''{{item link|All-Father}}''' | | rowspan="2" style="background-color:#FFDDAD;" | '''{{item link|All-Father}}''' | ||
| − | | [[File: | + | | [[File:Painted All-Father UNPAINTED.png|60px|link=All-Father{{if lang}}]] |
| − | | [[File: | + | | [[File:Painted All-Father UNPAINTED Thunderstruck.png|60px|link=All-Father{{if lang}}]] |
|- | |- | ||
| style="background:#F9D483;" | {{item name|Classic - All-Father}} | | style="background:#F9D483;" | {{item name|Classic - All-Father}} | ||
| Line 1,291: | Line 1,482: | ||
| style="background:#F9D483;" | {{item name|Too Pompous to Describe}} | | style="background:#F9D483;" | {{item name|Too Pompous to Describe}} | ||
| style="background:#F9D483;" | {{item name|Classical}} | | style="background:#F9D483;" | {{item name|Classical}} | ||
| + | |- | ||
| + | ! rowspan="2" style="background-color:#ffbd7e;" | {{class link|Soldier}}<br>{{class link|Pyro}}<br>{{class link|Demoman}} | ||
| + | | rowspan="2" style="background-color:#FFDDAD;" | '''{{item link|Trickster's Treats}}''' | ||
| + | | [[File:Trickster's Treats Naughty.png|60px|link=Trickster's Treats{{if lang}}]] | ||
| + | | [[File:Trickster's Treats Nice.png|60px|link=Trickster's Treats{{if lang}}]] | ||
| + | |- | ||
| + | | style="background:#F9D483;" | {{item name|Naughty}} | ||
| + | | style="background:#F9D483;" | {{item name|Nice}} | ||
|- | |- | ||
! rowspan="4" style="background-color:#ffbd7e;" | {{class link|Pyro}}<br>{{class link|Engineer}} | ! rowspan="4" style="background-color:#ffbd7e;" | {{class link|Pyro}}<br>{{class link|Engineer}} | ||
| Line 1,336: | Line 1,535: | ||
| style="background:#F9D483;" | {{item name|Sleeping}} | | style="background:#F9D483;" | {{item name|Sleeping}} | ||
| style="background:#F9D483;" | {{item name|Villainous}} | | style="background:#F9D483;" | {{item name|Villainous}} | ||
| + | |- | ||
| + | ! rowspan="2" style="background-color:#ffbd7e;" | {{class link|Scout}}<br>{{class link|Soldier}}<br>{{class link|Demoman}}<br>{{class link|Heavy}}<br>{{class link|Engineer}}<br>{{class link|Medic}}<br>{{class link|Sniper}}<br>{{class link|Spy}} | ||
| + | | rowspan="2" style="background-color:#FFDDAD;" | '''{{item link|Particulate Protector}}''' | ||
| + | | [[File:RED Particulate Protector.png|60px|link=Particulate Protector{{if lang}}]] | ||
| + | | [[File:RED Particulate Protector No Hat.png|60px|link=Particulate Protector{{if lang}}]] | ||
| + | |- | ||
| + | | style="background:#F9D483;" | {{item name|Hat - Particulate Protector}} | ||
| + | | style="background:#F9D483;" | {{item name|No Hat - Particulate Protector}} | ||
|- | |- | ||
<!-- All Classes --> | <!-- All Classes --> | ||
| − | ! rowspan=" | + | ! rowspan="188" style="background-color:#ffbd7e;" | {{class link|All Classes|br=yes}} |
| rowspan="2" style="background-color:#FFDDAD;" | '''{{item link|Ghastly Gibus}}''' | | rowspan="2" style="background-color:#FFDDAD;" | '''{{item link|Ghastly Gibus}}''' | ||
| [[File:Painted Ghastly Gibus UNPAINTED.png|60px|link=Ghastly Gibus{{if lang}}]] | | [[File:Painted Ghastly Gibus UNPAINTED.png|60px|link=Ghastly Gibus{{if lang}}]] | ||
| Line 1,640: | Line 1,847: | ||
| rowspan="2" style="background-color:#FFDDAD;" | '''{{item link|Dark Falkirk Helm}}''' | | rowspan="2" style="background-color:#FFDDAD;" | '''{{item link|Dark Falkirk Helm}}''' | ||
| [[File:RED Dark Falkirk Helm.png|60px|link=Dark Falkirk Helm{{if lang}}]] | | [[File:RED Dark Falkirk Helm.png|60px|link=Dark Falkirk Helm{{if lang}}]] | ||
| − | | [[File:RED Dark Falkirk | + | | [[File:RED Dark Falkirk Helm Closed.png|60px|link=Dark Falkirk Helm{{if lang}}]] |
|- | |- | ||
| style="background:#F9D483;" | {{item name|Open}} | | style="background:#F9D483;" | {{item name|Open}} | ||
| Line 1,646: | Line 1,853: | ||
|- | |- | ||
| rowspan="2" style="background-color:#FFDDAD;" | '''{{item link|TF2Maps 72hr TF2Jam Participant}}''' | | rowspan="2" style="background-color:#FFDDAD;" | '''{{item link|TF2Maps 72hr TF2Jam Participant}}''' | ||
| − | | [[File: | + | | [[File:RED TF2Maps 72hr TF2Jam Summer Participant.png|60px|link=TF2Maps 72hr TF2Jam Participant{{if lang}}]] |
| − | | [[File: | + | | [[File:RED TF2Maps 72hr TF2Jam Summer Participant Pin.png|60px|link=TF2Maps 72hr TF2Jam Participant{{if lang}}]] |
|- | |- | ||
| style="background:#F9D483;" | {{item name|Medal}} | | style="background:#F9D483;" | {{item name|Medal}} | ||
| Line 1,653: | Line 1,860: | ||
|- | |- | ||
| rowspan="2" style="background-color:#FFDDAD;" | '''{{item link|TF2Maps Charitable Heart}}''' | | rowspan="2" style="background-color:#FFDDAD;" | '''{{item link|TF2Maps Charitable Heart}}''' | ||
| − | | [[File: | + | | [[File:RED TF2Maps Charitable Heart.png|60px|link=TF2Maps Charitable Heart{{if lang}}]] |
| − | | [[File: | + | | [[File:RED TF2Maps Charitable Heart Pin.png|60px|link=TF2Maps Charitable Heart{{if lang}}]] |
|- | |- | ||
| style="background:#F9D483;" | {{item name|Medal}} | | style="background:#F9D483;" | {{item name|Medal}} | ||
| Line 1,660: | Line 1,867: | ||
|- | |- | ||
| rowspan="2" style="background-color:#FFDDAD;" | '''{{item link|TF2Maps Ray of Sunshine}}''' | | rowspan="2" style="background-color:#FFDDAD;" | '''{{item link|TF2Maps Ray of Sunshine}}''' | ||
| − | | [[File: | + | | [[File:RED TF2Maps Ray of Sunshine.png|60px|link=TF2Maps Ray of Sunshine{{if lang}}]] |
| − | | [[File: | + | | [[File:RED TF2Maps Ray of Sunshine Pin.png|60px|link=TF2Maps Ray of Sunshine{{if lang}}]] |
|- | |- | ||
| style="background:#F9D483;" | {{item name|Medal}} | | style="background:#F9D483;" | {{item name|Medal}} | ||
| Line 1,799: | Line 2,006: | ||
|- | |- | ||
| rowspan="2" style="background-color:#FFDDAD;" | '''{{item link|TF2VRH}}''' | | rowspan="2" style="background-color:#FFDDAD;" | '''{{item link|TF2VRH}}''' | ||
| − | | [[File: | + | | [[File:TF2VRH Off.png|60px|link=TF2VRH{{if lang}}]] |
| − | | [[File: | + | | [[File:RED TF2VRH VR Mode.png|60px|link=TF2VRH{{if lang}}]] |
|- | |- | ||
| style="background:#F9D483;" | {{item name|Off}} | | style="background:#F9D483;" | {{item name|Off}} | ||
| Line 1,900: | Line 2,107: | ||
| style="background:#F9D483;" | {{item name|Glasses - Starlight Sorcerer}} | | style="background:#F9D483;" | {{item name|Glasses - Starlight Sorcerer}} | ||
| style="background:#F9D483;" | {{item name|No Glasses - Starlight Sorcerer}} | | style="background:#F9D483;" | {{item name|No Glasses - Starlight Sorcerer}} | ||
| + | |- | ||
| + | | rowspan="2" style="background-color:#FFDDAD;" | '''{{item link|Battle Bear}}''' | ||
| + | | [[File:RED Battle Bear.png|60px|link=Battle Bear{{if lang}}]] | ||
| + | | [[File:RED Battle Bear Bare.png|60px|link=Battle Bear{{if lang}}]] | ||
| + | |- | ||
| + | | style="background:#F9D483;" | {{style name|Flair}} | ||
| + | | style="background:#F9D483;" | {{style name|Bare - Battle Bear}} | ||
|- | |- | ||
| rowspan="2" style="background-color:#FFDDAD;" | '''{{item link|Festive Rack}}''' | | rowspan="2" style="background-color:#FFDDAD;" | '''{{item link|Festive Rack}}''' | ||
| Line 1,907: | Line 2,121: | ||
| style="background:#F9D483;" | {{item name|Normal - Festive Rack}} | | style="background:#F9D483;" | {{item name|Normal - Festive Rack}} | ||
| style="background:#F9D483;" | {{item name|Paintable Lights}} | | style="background:#F9D483;" | {{item name|Paintable Lights}} | ||
| + | |- | ||
| + | | rowspan="2" style="background-color:#FFDDAD;" | '''{{item link|Trapper's Flap}}''' | ||
| + | | [[File:Trapper's Flap Wool Dye For.png|100px|link=Trapper's Flap{{if lang}}]] | ||
| + | | [[File:Trapper's Flap To Dye Fur.png|100px|link=Trapper's Flap{{if lang}}]] | ||
| + | |- | ||
| + | | style="background:#F9D483;" | {{style name|Wool Dye For}} | ||
| + | | style="background:#F9D483;" | {{style name|To Dye Fur}} | ||
|- | |- | ||
| rowspan="2" style="background-color:#FFDDAD;" | '''{{item link|Festive Fascinator}}''' | | rowspan="2" style="background-color:#FFDDAD;" | '''{{item link|Festive Fascinator}}''' | ||
| Line 1,937: | Line 2,158: | ||
| style="background:#F9D483;" | {{item name|No Hat - Clown's Cover-Up}} | | style="background:#F9D483;" | {{item name|No Hat - Clown's Cover-Up}} | ||
| style="background:#F9D483;" | {{item name|Hat - Clown's Cover-Up}} | | style="background:#F9D483;" | {{item name|Hat - Clown's Cover-Up}} | ||
| + | |- | ||
| + | | rowspan="2" style="background-color:#FFDDAD;" | '''{{item link|Festive Frames}}''' | ||
| + | | [[File:RED Festive Frames.png|60px|link=Festive Frames{{if lang}}]] | ||
| + | | [[File:RED Festive Frames Festivized (No Hat).png|60px|link=Festive Frames{{if lang}}]] | ||
| + | | [[File:RED Festive Frames Festive (Hat).png|60px|link=Festive Frames{{if lang}}]] | ||
| + | | [[File:RED Festive Frames Festivized (Hat).png|60px|link=Festive Frames{{if lang}}]] | ||
| + | |- | ||
| + | | style="background:#F9D483;" | {{item name|Festive (No Hat)}} | ||
| + | | style="background:#F9D483;" | {{item name|Festivized (No Hat)}} | ||
| + | | style="background:#F9D483;" | {{item name|Festive (Hat)}} | ||
| + | | style="background:#F9D483;" | {{item name|Festivized (Hat)}} | ||
| + | |- | ||
| + | | rowspan="2" style="background-color:#FFDDAD;" | '''{{item link|Gnome Dome}}''' | ||
| + | | [[File:Gnome Dome Smissmas.png|60px|link=Gnome Dome{{if lang}}]] | ||
| + | | [[File:Gnome Dome Yard.png|60px|link=Gnome Dome{{if lang}}]] | ||
| + | | [[File:Gnome Dome Classic.png|60px|link=Gnome Dome{{if lang}}]] | ||
| + | | [[File:Gnome Dome Elf.png|60px|link=Gnome Dome{{if lang}}]] | ||
| + | |- | ||
| + | | style="background:#F9D483;" | {{item name|Smissmas}} | ||
| + | | style="background:#F9D483;" | {{item name|Yard}} | ||
| + | | style="background:#F9D483;" | {{item name|Classic - Gnome Dome}} | ||
| + | | style="background:#F9D483;" | {{item name|Elf}} | ||
| + | |- | ||
| + | | rowspan="2" style="background-color:#FFDDAD;" | '''{{item link|Oh Deer!}}''' | ||
| + | | [[File:RED Oh Deer! Nose.png|60px|link=Oh Deer!{{if lang}}]] | ||
| + | | [[File:RED Oh Deer! Noseless.png|60px|link=Oh Deer!{{if lang}}]] | ||
| + | |- | ||
| + | | style="background:#F9D483;" | {{item name|Nose}} | ||
| + | | style="background:#F9D483;" | {{item name|Noseless}} | ||
| + | |- | ||
| + | | rowspan="2" style="background-color:#FFDDAD;" | '''{{item link|Manndatory Attire}}''' | ||
| + | | [[File:RED Manndatory Attire Hobbyist Scout.png|60px|link=Manndatory Attire{{if lang}}]] | ||
| + | | [[File:RED Manndatory Attire Specialist Scout.png|60px|link=Manndatory Attire{{if lang}}]] | ||
| + | | [[File:RED Manndatory Attire Generalist.png|60px|link=Manndatory Attire{{if lang}}]] | ||
| + | |- | ||
| + | | style="background:#F9D483;" | {{style name|Hobbyist}} | ||
| + | | style="background:#F9D483;" | {{style name|Specialist}} | ||
| + | | style="background:#F9D483;" | {{style name|Generalist}} | ||
| + | |- | ||
| + | |||
| + | |||
| + | | rowspan="2" style="background-color:#FFDDAD;" | '''{{item link|Eyequarium}}''' | ||
| + | | [[File:Eyequarium Spring Water (No Hat).png|60px|link=Eyequarium{{if lang}}]] | ||
| + | | [[File:Eyequarium Soda Pop (No Hat).png|60px|link=Eyequarium{{if lang}}]] | ||
| + | | [[File:Eyequarium Spring Water.png|60px|link=Eyequarium{{if lang}}]] | ||
| + | | [[File:Eyequarium Soda Pop.png|60px|link=Eyequarium{{if lang}}]] | ||
| + | |- | ||
| + | | style="background:#F9D483;" | {{item name|Spring Water (No Hat)}} | ||
| + | | style="background:#F9D483;" | {{item name|Soda Pop (No Hat)}} | ||
| + | | style="background:#F9D483;" | {{item name|Spring Water}} | ||
| + | | style="background:#F9D483;" | {{item name|Soda Pop}} | ||
| + | |- | ||
| + | | rowspan="2" style="background-color:#FFDDAD;" | '''{{item link|Goalkeeper}}''' | ||
| + | | [[File:Goalkeeper Slasher.png|60px|link=Goalkeeper{{if lang}}]] | ||
| + | | [[File:Goalkeeper Slapshot.png|60px|link=Goalkeeper{{if lang}}]] | ||
| + | | [[File:Goalkeeper Slasher (No Hat).png|60px|link=Goalkeeper{{if lang}}]] | ||
| + | | [[File:Goalkeeper Slapshot (No Hat).png|60px|link=Goalkeeper{{if lang}}]] | ||
| + | |- | ||
| + | | style="background:#F9D483;" | {{item name|Slasher}} | ||
| + | | style="background:#F9D483;" | {{item name|Slapshot}} | ||
| + | | style="background:#F9D483;" | {{item name|Slasher (No Hat)}} | ||
| + | | style="background:#F9D483;" | {{item name|Slapshot (No Hat)}} | ||
| + | |- | ||
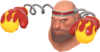
| + | | rowspan="2" style="background-color:#FFDDAD;" | '''{{item link|Hat Outta Hell}}''' | ||
| + | | [[File:Hat Outta Hell Damned.png|60px|link=Hat Outta Hell{{if lang}}]] | ||
| + | | [[File:RED Hat Outta Hell Demon.png|60px|link=Hat Outta Hell{{if lang}}]] | ||
| + | | [[File:RED Hat Outta Hell Devil.png|60px|link=Hat Outta Hell{{if lang}}]] | ||
| + | |- | ||
| + | | style="background:#F9D483;" | {{style name|Damned}} | ||
| + | | style="background:#F9D483;" | {{style name|Demon}} | ||
| + | | style="background:#F9D483;" | {{style name|Devil}} | ||
| + | |- | ||
| + | | rowspan="2" style="background-color:#FFDDAD;" | '''{{item link|Second-Head Headwear}}''' | ||
| + | | [[File:Second-head Headwear Bowler.png|60px|link=Second-Head Headwear{{if lang}}]] | ||
| + | | [[File:Second-head Headwear Top Hat.png|60px|link=Second-Head Headwear{{if lang}}]] | ||
| + | |- | ||
| + | | style="background:#F9D483;" | {{item name|Bowler}} | ||
| + | | style="background:#F9D483;" | {{item name|Top Hat}} | ||
| + | |- | ||
| + | | rowspan="2" style="background-color:#FFDDAD;" | '''{{item link|Bone Cone}}''' | ||
| + | | [[File:RED Bone Cone Bone Chilling.png|60px|link=Bone Cone{{if lang}}]] | ||
| + | | [[File:RED Bone Cone Skin Aching.png|60px|link=Bone Cone{{if lang}}]] | ||
| + | |- | ||
| + | | style="background:#F9D483;" | {{item name|Bone Chilling}} | ||
| + | | style="background:#F9D483;" | {{item name|Skin Aching}} | ||
| + | |- | ||
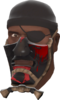
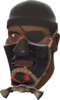
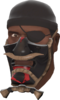
| + | | rowspan="2" style="background-color:#FFDDAD;" | '''{{item link|Spooky Head-Bouncers}}''' | ||
| + | | [[File:Spooky Head-Bouncers Monoculus.png|60px|link=Spooky Head-Bouncers{{if lang}}]] | ||
| + | | [[File:Spooky Head-Bouncers Pumpkin Pouncers.png|60px|link=Spooky Head-Bouncers{{if lang}}]] | ||
| + | | [[File:Spooky Head-Bouncers Floating Phantoms.png|60px|link=Spooky Head-Bouncers{{if lang}}]] | ||
| + | |- | ||
| + | | style="background:#F9D483;" | {{item name|Monoculus}} | ||
| + | | style="background:#F9D483;" | {{item name|Pumpkin Pouncers}} | ||
| + | | style="background:#F9D483;" | {{item name|Floating Phantoms}} | ||
| + | |- | ||
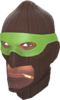
| + | | rowspan="2" style="background-color:#FFDDAD;" | '''{{item link|Scariest Mask EVER}}''' | ||
| + | | [[File:Scariest Mask EVER No Hat.png|60px|link=Scariest Mask EVER{{if lang}}]] | ||
| + | | [[File:Scariest Mask EVER Hat.png|60px|link=Scariest Mask EVER{{if lang}}]] | ||
| + | |- | ||
| + | | style="background:#F9D483;" | {{item name|No Hat - Scariest Mask EVER}} | ||
| + | | style="background:#F9D483;" | {{item name|Hat - Scariest Mask EVER}} | ||
| + | |- | ||
| + | | rowspan="2" style="background-color:#FFDDAD;" | '''{{item link|Creepy Crawlers}}''' | ||
| + | | [[File:RED Creepy Crawlers Redback.png|60px|link=Creepy Crawlers{{if lang}}]] | ||
| + | | [[File:Creepy Crawlers False Widow.png|60px|link=Creepy Crawlers{{if lang}}]] | ||
| + | |- | ||
| + | | style="background:#F9D483;" | {{item name|Redback}} | ||
| + | | style="background:#F9D483;" | {{item name|False Widow}} | ||
| + | |- | ||
| + | | rowspan="2" style="background-color:#FFDDAD;" | '''{{item link|Candy Cantlers}}''' | ||
| + | | [[File:RED Candy Cantlers Hat.png|60px|link=Candy Cantlers{{if lang}}]] | ||
| + | | [[File:RED Candy Cantlers No Hat.png|60px|link=Candy Cantlers{{if lang}}]] | ||
| + | |- | ||
| + | | style="background:#F9D483;" | {{item name|Hat - Candy Cantlers}} | ||
| + | | style="background:#F9D483;" | {{item name|No Hat - Candy Cantlers}} | ||
| + | |- | ||
| + | | rowspan="2" style="background-color:#FFDDAD;" | '''{{item link|Cozy Cover-Up}}''' | ||
| + | | [[File:RED Cozy Cover-Up.png|60px|link=Cozy Cover-Up{{if lang}}]] | ||
| + | | [[File:RED Cozy Cover-Up Muffed Up.png|60px|link=Cozy Cover-Up{{if lang}}]] | ||
| + | | [[File:RED Cozy Cover-Up Wrapped Up.png|60px|link=Cozy Cover-Up{{if lang}}]] | ||
| + | |- | ||
| + | | style="background:#F9D483;" | {{style name|Covered Up}} | ||
| + | | style="background:#F9D483;" | {{style name|Muffed Up}} | ||
| + | | style="background:#F9D483;" | {{style name|Wrapped Up}} | ||
|- | |- | ||
! colspan="2" style="background-color:#ffbd7e;" | {{Common string|itt notes}} | ! colspan="2" style="background-color:#ffbd7e;" | {{Common string|itt notes}} | ||
Latest revision as of 01:56, 16 April 2024
| Cosmetic styles list | ||||||||||||||||
|---|---|---|---|---|---|---|---|---|---|---|---|---|---|---|---|---|
| Batter's Helmet | 
|

|

| |||||||||||||
| Hat and Headphones | No Hat and No Headphones | No Hat | ||||||||||||||
| Troublemaker's Tossle Cap | 
|

|

|

| ||||||||||||
| New School | Old School | Older School | Oldest School | |||||||||||||
| Hero's Tail† | 
|

| ||||||||||||||
| Pigmentation Lost | Pigmentation Gained | |||||||||||||||
| Bonk Boy | 
|

| ||||||||||||||
| Aerodynamic Classic | Tuned In | |||||||||||||||
| Backwards Ballcap | 
|

| ||||||||||||||
| I Can't Hear You | Headphones Disengaged | |||||||||||||||
| Fast Learner‡ | 
|

| ||||||||||||||
| Summer | Winter | |||||||||||||||
| Front Runner | 
|

| ||||||||||||||
| Stylin' | Indifferent | |||||||||||||||
| Digit Divulger | 
|

|

|

| ||||||||||||
| Leather Open | Suede Open | Leather Closed | Suede Closed | |||||||||||||
| Hanger-On Hood | 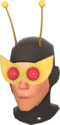
|
| ||||||||||||||
| Without Headphones | With Headphones | |||||||||||||||
| Bacteria Blocker | 
|

| ||||||||||||||
| With Headphones | Without Headphones | |||||||||||||||
| Bolt Boy | 
|

| ||||||||||||||
| No Hat | Hat | |||||||||||||||
| Greased Lightning | 
|

| ||||||||||||||
| No Headset | Headset | |||||||||||||||
| Sidekick's Side Slick† | 
|

|

|

| ||||||||||||
| Style 1 No Hat | Style 1 With Hat | Style 2 No Hat | Style 2 With Hat | |||||||||||||
| Caffeine Cooler | 
|

| ||||||||||||||
| Sharing is Caring | Sharing is for Wusses | Crit-a-Cooler | ||||||||||||||
| Big Elfin Deal | 
|

| ||||||||||||||
| North Pole | South Pole | |||||||||||||||
| Bootie Time | 
|

| ||||||||||||||
| North Pole | South Pole | |||||||||||||||
| Catcher's Companion | 
|

| ||||||||||||||
| Default | Hat | |||||||||||||||
| Juvenile's Jumper | 
|

|

| |||||||||||||
| Ugly | Modern | Plain | ||||||||||||||
| Millennial Mercenary | 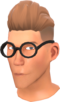
|

|
|

| ||||||||||||
| 2Much2Fort! | Streaming 2Fort | 2Much2Fort! (paint glasses) | Playing 2Fort | |||||||||||||
| Bottle Cap | 
|

| ||||||||||||||
| Bonk | Crit-a-Cola | |||||||||||||||
| Speedy Scoundrel | 
|

|

| |||||||||||||
| Marooned | Landlubber | Lion of the Seas | ||||||||||||||
| Fuel Injector | 
|

| ||||||||||||||
| Side-Valve | Outta Gas | Runnin On Fumes | ||||||||||||||
| Soda Specs | ||||||||||||||||
| Bonk | Crit-a-Cola | |||||||||||||||
| Boston Brain Bucket | 
|

|

| |||||||||||||
| Class Logo | Baseball | Bonk! | Chicken | |||||||||||||

| ||||||||||||||||
| Blank | ||||||||||||||||
| Pest's Pads | 
|

|

| |||||||||||||
| Class Logo | Baseball | Bonk! | Chicken | |||||||||||||

| ||||||||||||||||
| Blank | ||||||||||||||||
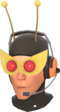
| Throttlehead | 
|

| ||||||||||||||
| Glasses | No Glasses | |||||||||||||||
| Masked Fiend | 
|

| ||||||||||||||
| Headphones | No Headphones | |||||||||||||||
| Bonk Beanie | 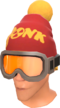
|

| ||||||||||||||
| Radio-Active Protection | Pro-Active Protection | |||||||||||||||
| Last Laugh | 
|

| ||||||||||||||
| Jester | Juggler | |||||||||||||||
| Seasonal Employee | 
|

| ||||||||||||||
| North Pole | South Pole | |||||||||||||||
| Lord Cockswain's Novelty Mutton Chops and Pipe | 
|

| ||||||||||||||
| Helmet | No Helmet | |||||||||||||||
| Battle Bob | 
|

| ||||||||||||||
| Without Helmet | With Helmet | |||||||||||||||
| Tin Pot | 
|

| ||||||||||||||
| Battered | Standard Issue | |||||||||||||||
| War Pig | 
|

| ||||||||||||||
| Uninhibited | Conspicuous | |||||||||||||||
| Soldier's Slope Scopers | 
|

| ||||||||||||||
| Amateur | Pro | |||||||||||||||
| Doe-Boy | 
|

| ||||||||||||||
| Peek-a-boo... | I see you! | |||||||||||||||
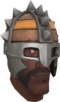
| War on Smissmas Battle Hood | 
|

| ||||||||||||||
| No Helmet | Helmet | |||||||||||||||
| Killer's Kit | 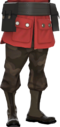
|
| ||||||||||||||
| Style 1 | Style 2 | |||||||||||||||
| Caped Crusader | 
|

| ||||||||||||||
| Vigilante | Team Playa | |||||||||||||||
| Patriot's Pouches | 
|

| ||||||||||||||
| Normal | Camo | |||||||||||||||
| Calamitous Cauldron | 
|

| ||||||||||||||
| Slime | No Slime | |||||||||||||||
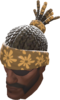
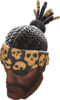
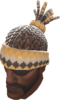
| Semi-Tame Trapper's Hat† | 
|

| ||||||||||||||
| Paint: Eyes | Paint: Coat | |||||||||||||||
| War Dog | 
|

| ||||||||||||||
| No Helmet | Helmet | |||||||||||||||
| Chaser | 
|

| ||||||||||||||
| No Grenades | Grenades | |||||||||||||||
| Detective† | 
|

| ||||||||||||||
| Paint Hair | Paint Hat | |||||||||||||||
| Cranial Cowl | 
|

| ||||||||||||||
| Bones | Boneless | |||||||||||||||
| Stealth Bomber‡ | 
|

| ||||||||||||||
| Adaptive Camo | Woodland Camo | |||||||||||||||
| Wanderer's Wool | 
|

|

|

| ||||||||||||
| Merry..? | Merry..? - Bloodless | Backcountry | Backcountry - Bloodless | |||||||||||||

|

| |||||||||||||||
| Streets | Streets - Bloodless | |||||||||||||||
| Shortness Of Breath | 
|

| ||||||||||||||
| No Helmet | Helmet | |||||||||||||||
| Close Quarters Cover | 
|

|

|
|||||||||||||
| Caution (Paint Bandana) | Caution (Paint Hair) | Alert | Evasion | |||||||||||||
| Bulb Bonnet | 
|

| ||||||||||||||
| Festive | Blank | |||||||||||||||
| Thousand-Yard Stare | 
|

| ||||||||||||||
| Awed | Shocked | |||||||||||||||
| Pyromancer's Mask‡ | 
|

|

| |||||||||||||
| Original | Full Color Paint | Stylish Paint | ||||||||||||||
| Triclops | 
|

| ||||||||||||||
| Roasting | Blazing | |||||||||||||||
| Plutonidome | 
|

| ||||||||||||||
| Functioning | Broken | |||||||||||||||
| DethKapp | 
|

|

|

| ||||||||||||
| Grim | Stark Raving Mad | Stern | Slightly Off | |||||||||||||
| Nose Candy | 
|

| ||||||||||||||
| Horrific | Happy | |||||||||||||||
| Winter Wonderland Wrap | 
|

| ||||||||||||||
| With Stripes | Without Stripes | |||||||||||||||
| Bone Dome | 
|

| ||||||||||||||
| Style 1 | Style 2 | |||||||||||||||
| Fear Monger | 
|

| ||||||||||||||
| Style 1 | Style 2 | |||||||||||||||
| Pyro in Chinatown | 
|

| ||||||||||||||
| Full | Compact | |||||||||||||||
| Pocket Pardner | 
|

| ||||||||||||||
| Default | Mining Light | |||||||||||||||
| Head of the Dead | 
|

| ||||||||||||||
| Decorated | Plain | |||||||||||||||
| Fire Fighter | 
|

| ||||||||||||||
| Ultra | Arcade | |||||||||||||||
| Seared Sorcerer | 
|

| ||||||||||||||
| Normal | Hat and Cape Only | |||||||||||||||
| Flame Warrior | 
|

| ||||||||||||||
| Style 1 | Style 2 | |||||||||||||||
| Fiercesome Fluorescence | 
|

| ||||||||||||||
| Fearsome | Friendly | |||||||||||||||
| Impact Impaler | 
|

| ||||||||||||||
| Style 1 | Style 2 | |||||||||||||||
| Masked Loyalty | 
|

|

| |||||||||||||
| Style 1 | Style 2 | Style 3 | ||||||||||||||
| Elf Ignition | 
|

| ||||||||||||||
| Untucked | Tucked | |||||||||||||||
| Scotsman's Stove Pipe† | 
|

| ||||||||||||||
| Tasteful and Refined | Garish and Overbearing | |||||||||||||||
| Reggaelator | 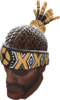
|
|
|
| ||||||||||||
| Original | Burst | Bones | Designer | |||||||||||||
| Liquor Locker | 
|

|

|

| ||||||||||||
| Classic | Front | Right Hip | Left Hip | |||||||||||||
| Bird-Man of Aberdeen | 
|

|

| |||||||||||||
| Essential | Distinguished | Imbued | ||||||||||||||
| Bearded Bombardier | 
|

| ||||||||||||||
| Whatever | Formal | |||||||||||||||
| Dynamite Abs | 
|

| ||||||||||||||
| Grenades | No Grenades | |||||||||||||||
| Spiky Viking | 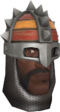
|
| ||||||||||||||
| Ye Sticketh Style | Ye Olde Style | |||||||||||||||
| Hawaiian Hangover | 
|

| ||||||||||||||
| No Grenades | Grenades | |||||||||||||||
| Alcoholic Automaton | 
|

| ||||||||||||||
| Spark | Steam | |||||||||||||||
| Bombard Brigadier‡ | 
|

| ||||||||||||||
| Fusilier | Grenadier | |||||||||||||||
| Blast Bowl | 
|

| ||||||||||||||
| Sticky | Jumper | |||||||||||||||
| Mad Lad | 
|

| ||||||||||||||
| Tank Trasher | Car Crasher | |||||||||||||||
| Thunder Dome | 
|

|

| |||||||||||||
| Bombin' | Chargin' | Jumpin' | ||||||||||||||
| Stunt Suit | 
|

|

| |||||||||||||
| Airman | Daredevil | Roadworker | ||||||||||||||
| Shrapnel Shell | 
|

| ||||||||||||||
| Sticky | Jumper | |||||||||||||||
| Plaid Lad | 
|

|

| |||||||||||||
| Bushy | Burns | Bland | ||||||||||||||
| Glasgow Bankroll | 
|

|

| |||||||||||||
| Plaid | Pinstripes | Plain | ||||||||||||||
| Nightcap | 
|

| ||||||||||||||
| Sleepin' | Snoozin' | |||||||||||||||
| Large Luchadore | 
|

|

| |||||||||||||
| El Macho | El Amor Ardiente | El Picante Grande | ||||||||||||||
| Copper's Hard Top | 
|

| ||||||||||||||
| Peacekeeper | Lawless | |||||||||||||||
| Apparatchik's Apparel | 
|

|

|

| ||||||||||||
| Outdoorsmen | Blood Bin | Investor | J.R. Gyle | |||||||||||||
| Samson Skewer | 
|

| ||||||||||||||
| Menacing | Threatening | |||||||||||||||
| Soviet Gentleman | 
|

| ||||||||||||||
| Normal | Camo | |||||||||||||||
| Eliminator's Safeguard | 
|

| ||||||||||||||
| Visor Up | Visor Down | |||||||||||||||
| One-Man Army‡ | 
|

| ||||||||||||||
| Style 1 | Style 2 | |||||||||||||||
| Starboard Crusader | 
|

| ||||||||||||||
| Casual | Professional | |||||||||||||||
| Cool Capuchon | 
|

| ||||||||||||||
| Paint Decorations | Paint Scarf | |||||||||||||||
| Mediterranean Mercenary | 
|

| ||||||||||||||
| Normal | Defiant Dey | |||||||||||||||
| Convict Cap | 
|

| ||||||||||||||
| Scars | No Scars | |||||||||||||||
| Soviet Strongmann | 
|

|

| |||||||||||||
| Barbed Wire | Anchor | Bare | ||||||||||||||
| Momma Kiev | 
|

| ||||||||||||||
| Comrade | Casual | |||||||||||||||
| Combat Casual | 
|

| ||||||||||||||
| Plaid | Leather | |||||||||||||||
| Squatter's Right | 
|

| ||||||||||||||
| Plaid | Leather | |||||||||||||||
| Horror Shawl | 
|

| ||||||||||||||
| Mask | No Mask | |||||||||||||||
| Misha's Maw | 
|

| ||||||||||||||
| Siberian | Polar | |||||||||||||||
| Ol' Reliable | 
|

|

| |||||||||||||
| Arctic | Solid | Taiga | ||||||||||||||
| Brother Mann | 
|

|

| |||||||||||||
| Style 1 | Style 2 | Style 3 | ||||||||||||||
| Heavy Heating | 
|

|

| |||||||||||||
| Arctic | Solid | Taiga | ||||||||||||||
| Two Punch Mann | 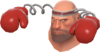
|
| ||||||||||||||
| KGB | GRU | |||||||||||||||
| Big Country | 
|

| ||||||||||||||
| Nelson | Brooks | |||||||||||||||
| Brainiac Hairpiece | 
|

| ||||||||||||||
| With Helmet | Without Helmet | |||||||||||||||
| Googly Gazer | 
|

| ||||||||||||||
| Mad Science | Machine in the Man | |||||||||||||||
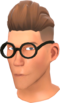
| Professor's Peculiarity | 
|

| ||||||||||||||
| Manic | Tamed | |||||||||||||||
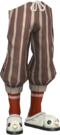
| Texas Half-Pants | 
|

| ||||||||||||||
| Tan | Midnight | |||||||||||||||
| Barnstormer | 
|

| ||||||||||||||
| Bugscreen Up | Bugscreen Down | |||||||||||||||
| Peacenik's Ponytail | 
|

| ||||||||||||||
| No Helmet | Helmet | |||||||||||||||
| Sheriff's Stetson‡ | 
|

| ||||||||||||||
| Style 1 | Style 2 | |||||||||||||||
| Trencher's Topper | 
|

| ||||||||||||||
| Style 1 | Style 2 | |||||||||||||||
| Aim Assistant | 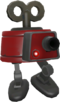
|

| ||||||||||||||
| Normal | Mini | |||||||||||||||
| Wise Whiskers | 
|
| ||||||||||||||
| Hat | No Hat | |||||||||||||||
| Head of Defense | 
|

| ||||||||||||||
| Enforcer | Protector | |||||||||||||||
| Goblineer | 
|

| ||||||||||||||
| Normal | Zombie | |||||||||||||||
| Pug Mug‡ | 
|

| ||||||||||||||
| Paint: Collar | Paint: Lense | |||||||||||||||
| Lawnmaker | 
|

| ||||||||||||||
| Hobby | Job | |||||||||||||||
| More Gun Marshal | 
|

|

|

| ||||||||||||
| Wrangler | Tangler | Strangler | Mangler | |||||||||||||
| Sleuth Suit | 
|

|

|

| ||||||||||||
| Dayshift | Off Duty | Overtime | Graveyard | |||||||||||||
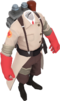
| Hazard Handler | 
|

|

|

| ||||||||||||
| Style 1 | Style 2 | Style 3 | Style 4 | |||||||||||||
| Arctic Mole ‡ | 
|

|

| |||||||||||||
| Paint Hat | Paint Fur | Paint Eyes | ||||||||||||||
| Cool Warm Sweater | 
|

| ||||||||||||||
| Normal | Under Overalls | |||||||||||||||
| Train of Thought | 
|

| ||||||||||||||
| North Pole | Southern | |||||||||||||||
| Underminer's Overcoat ‡ | 
|

|

| |||||||||||||
| Paint Sweater | Paint All | No Sweater | ||||||||||||||
| Clue Hairdo | 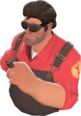
|

|
| |||||||||||||
| Case Open | Case Cracked | Case Dropped | ||||||||||||||
| Blighted Beak | 
|

| ||||||||||||||
| Yersinia Pestis | Vibrio Cholerae | |||||||||||||||
| Nine-Pipe Problem | 
|

| ||||||||||||||
| Afternoon | Evening | |||||||||||||||
| Foppish Physician | 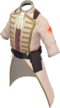
|
| ||||||||||||||
| Tie | Epaulettes | |||||||||||||||
| Der Wintermantel | 
|

| ||||||||||||||
| Gramma's Sweater Showing | Gramma's Sweater Hidden | |||||||||||||||
| Doc's Holiday | 
|

|

| |||||||||||||
| Fever | Flu | Virus | ||||||||||||||
| Medical Monarch | 
|

| ||||||||||||||
| Style 1 | Style 2 | |||||||||||||||
| Pocket-Medes | 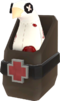
|

| ||||||||||||||
| Strap | ||||||||||||||||
| Fizzy Pharmacist | 
|

| ||||||||||||||
| Bubbly | Flat | |||||||||||||||
| Soda Cap | 
|

| ||||||||||||||
| Moustache | Clean-Shaven | |||||||||||||||
| Victorian Villainy | 
|

|

| |||||||||||||
| Deranged Doctor | Phony Physician | Baleful Barber | ||||||||||||||
| Oktoberfester‡ | 
|

|

| |||||||||||||
| Paint Hat | Paint Moustache | No Moustache | ||||||||||||||
| Wooly Pulli | 
|

|

| |||||||||||||
| Festive | Fashionable | Formal | ||||||||||||||
| Medical Mummy | 
|

| ||||||||||||||
| Patient | Ancient | |||||||||||||||
| Main Cast | 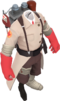
|
|
| |||||||||||||
| Critical | Life-Threatening | Non-Urgent | ||||||||||||||
| Power Spike | 
|

| ||||||||||||||
| Supercharged | Grounded | |||||||||||||||
| Night Ward | 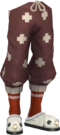
|
| ||||||||||||||
| Crosses | Stripes | |||||||||||||||
| Frigid Fashion | 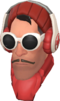
|
| ||||||||||||||
| Style 1 | Style 2 | |||||||||||||||
| Villain's Veil | 
|

|

| |||||||||||||
| Hired Gun | Smooth Assassin | Trained Killer | ||||||||||||||
| Fruit Shoot | 
|
|

| |||||||||||||
| Deadly | Dangerous | Tasty | ||||||||||||||
| Koala Compact | 
|

| ||||||||||||||
| Twins | Poor and Irish | |||||||||||||||
| Sir Hootsalot | 
|
| ||||||||||||||
| Wilderness | Snowy | |||||||||||||||
| Brim-Full of Bullets | ||||||||||||||||
| Good | Bad | Ugly | ||||||||||||||
| Five-Month Shadow† | 
|

| ||||||||||||||
| Style 1 | Style 2 | |||||||||||||||
| Your Worst Nightmare† | 
|

| ||||||||||||||
| Style 1 | Style 2 | |||||||||||||||
| Conspicuous Camouflage | 
|

| ||||||||||||||
| Open | Closed | |||||||||||||||
| Glow from Below† | 
|

| ||||||||||||||
| Paint: Fins | Paint: Body | |||||||||||||||
| Hawaiian Hunter | 
|

| ||||||||||||||
| Bold | Boring | |||||||||||||||
| Tropical Camo | 
|

| ||||||||||||||
| Bold | Bowling | |||||||||||||||
| Cranium Cover | 
|

| ||||||||||||||
| Visor Down | Visor Up | |||||||||||||||
| Scruffed 'n Stitched ‡ | 
|
| ||||||||||||||
| Paint Beard | Paint Hat | |||||||||||||||
| Sightseer | 
|

| ||||||||||||||
| Beard | No Beard | |||||||||||||||
| Distinguished Rogue | 
|

| ||||||||||||||
| Tie | Epaulettes | |||||||||||||||
| Lurker's Leathers | 
|
| ||||||||||||||
| Wasteland | Wall Street | |||||||||||||||
| Escapist† | 
|

| ||||||||||||||
| Style 1 | Style 2 | |||||||||||||||
| Shutterbug‡ | ||||||||||||||||
| Paint: Rim | Paint: Full | Paint: Lens | ||||||||||||||
| Bird's Eye Viewer | 
|

| ||||||||||||||
| Informant | Civilian | |||||||||||||||
| Monsieur Grenouille‡ | 
|

| ||||||||||||||
| Paint Frog | Paint Hat | |||||||||||||||
| Dapper Dickens | 
|

| ||||||||||||||
| Glasses | No Glasses | |||||||||||||||
| Concealed Convict | 
|

| ||||||||||||||
| Completely Striped | Not Striped Enough | |||||||||||||||
| Classic Criminal | 
|

|
|
| ||||||||||||
| Paint Balaclava | Paint Mask | Paint Balaclava - No Hat | Paint Mask - No Hat | |||||||||||||

| ||||||||||||||||
| Only Mask | ||||||||||||||||
| Le Professionnel | 
|

| ||||||||||||||
| Turtleneck | Singlet | |||||||||||||||
| Cleaner's Cap | 
|

|

| |||||||||||||
| Paint Hat | Paint All | No Shades | ||||||||||||||
| Gruesome Gourd † | 
|

| ||||||||||||||
| Paint: Flesh | Paint: Glow | |||||||||||||||
| Strasbourg Scholar | 
|

| ||||||||||||||
| Patterned | Plain | |||||||||||||||
| Crafty Hair | 
|

| ||||||||||||||
| Yellow | Brown | |||||||||||||||
| Wilson Weave | 
|

| ||||||||||||||
| No Hat | No Hat and No Headphones | |||||||||||||||
| Triad Trinket | 
|

| ||||||||||||||
| Bare | Bear | |||||||||||||||
| Frenchman's Formals | 
|

| ||||||||||||||
| Dashing | Dastardly | |||||||||||||||
| Deadliest Duckling | 
|

| ||||||||||||||
| Capone | Luciano | |||||||||||||||
| Menpo | 
|
|
|
| ||||||||||||
| Yuurei | Obake | Youkai | Azukiarai | |||||||||||||
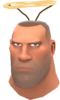
| All-Father | 
|

| ||||||||||||||
| Classic | Thunderstruck | |||||||||||||||
| Powdered Practitioner | 
|

| ||||||||||||||
| Too Pompous to Describe | Classical | |||||||||||||||
| Trickster's Treats | ||||||||||||||||
| Naughty | Nice | |||||||||||||||
| Cute Suit | 
|

| ||||||||||||||
| Hat | No Hat | |||||||||||||||
| Special Eyes | 
|

| ||||||||||||||
| Suspicious | Bored | |||||||||||||||
| HazMat Headcase | 
|
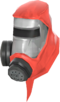
|
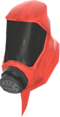
|
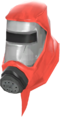
| ||||||||||||
| Safety First | Reinforced | Streamlined | A Serious Absence of Fear | |||||||||||||
| Toowoomba Tunic | 
|

| ||||||||||||||
| Knight | Peasant | |||||||||||||||
| Harry | ||||||||||||||||
| Default | Sleeping | Villainous | ||||||||||||||
| Particulate Protector | 
|

| ||||||||||||||
| Hat | No Hat | |||||||||||||||
| Ghastly Gibus | 
|

| ||||||||||||||
| Ghastly | Ghostly | |||||||||||||||
| Ghastlier Gibus | 
|
|
| |||||||||||||
| Ghastlier | Ghastly | Ghostly | ||||||||||||||
| Ghastlierest Gibus | 
|
|
|
| ||||||||||||
| Ghastlierest | Ghastlier | Ghastly | Ghostly | |||||||||||||
| Hat of Undeniable Wealth And Respect | ||||||||||||||||
| H.O.U.W.A.R. | Treasure Hat | Bounty Hat | ||||||||||||||
| Treasure Hat | ||||||||||||||||
| Treasure Hat | Bounty Hat | |||||||||||||||
| Aperture Labs Hard Hat | 
|
|||||||||||||||
| [classified] | Aperture Logo | |||||||||||||||
| Summer Hat | 
|

| ||||||||||||||
| A Day at the Beach | Carefree Summer Nap | |||||||||||||||
| Spine-Chilling Skull 2011 | 
|

| ||||||||||||||
| Spine-Tingling | Spine-Cooling | Spine-Twisting | ||||||||||||||
| Brown Bomber | 
|

| ||||||||||||||
| Hunter | Hipster | |||||||||||||||
| Robot Chicken Hat | 
|

| ||||||||||||||
| Normal | Beakless | |||||||||||||||
| Human Cannonball | 
|

|

| |||||||||||||
| Crash | Burn | Override | ||||||||||||||
| Marxman | 
|

| ||||||||||||||
| No Cigar | Yes, Cigar | |||||||||||||||
| Heroic Companion Badge | ||||||||||||||||
| Russian | German | |||||||||||||||
| Boo Balloon | 
|

|

|

| ||||||||||||
| Haunting | Please Help | Hey Guys, What's Going On? | Bone Party | |||||||||||||
| Cockfighter | 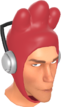
|

| ||||||||||||||
| Max | Lilly | |||||||||||||||
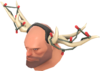
| Antlers | 
|

| ||||||||||||||
| Hat | No Hat | |||||||||||||||
| Tough Stuff Muffs | 
|

|

|

| ||||||||||||
| Montreal Style | Montreal Style (No Earmuffs) | Boston Style | Boston Style (No Earmuffs) | |||||||||||||
| Tux | 
|

|

| |||||||||||||
| Normal | Demoman | Pyro | ||||||||||||||
| Brütal Bouffant | 
|

| ||||||||||||||
| No Hat | No Hat and No Headphones | |||||||||||||||
| ETF2L Tournament Medals: 6vs6 Highlander 2012 6v6 (Season 17) Highlander (Season 5) |

|

|

|

| ||||||||||||
| ETF2L | Scout | Soldier | Pyro | |||||||||||||

|

|

|

| |||||||||||||
| Demoman | Heavy | Engineer | Medic | |||||||||||||

|

| |||||||||||||||
| Sniper | Spy | |||||||||||||||
| Conspiracy Cap | 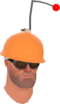
|
|||||||||||||||
| Hat | No Hat | |||||||||||||||
| Public Accessor | 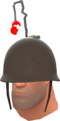
|
|||||||||||||||
| Hat | No Hat | |||||||||||||||
| Brimstone | 
|

| ||||||||||||||
| Hat | No Hat | |||||||||||||||
| Pocket Raiders | 
|

|

|

| ||||||||||||
| Lara | Carter | Horus | Isis | |||||||||||||
| A Well Wrapped Hat‡ | 
|

| ||||||||||||||
| Style 1 | Style 2 | |||||||||||||||
| Cheater's Lament | 
|
| ||||||||||||||
| Hat | No Hat | |||||||||||||||
| Mustachioed Mann | 
|

| ||||||||||||||
| Style 1 | Style 2 | |||||||||||||||
| Cotton Head‡ | 
|

| ||||||||||||||
| Style 1 | Style 2 | |||||||||||||||
| Rotation Sensation‡ | 
|

| ||||||||||||||
| Style 1 | Style 2 | |||||||||||||||
| Dead of Night | 
|

|

|

| ||||||||||||
| Dark - Hide Grenades | Light - Hide Grenades | Dark | Light | |||||||||||||
| Graybanns | ||||||||||||||||
| Style 1 | Style 2 | Style 3 | ||||||||||||||
| Bruiser's Bandanna | 
|

|

| |||||||||||||
| Original | Clean | Skulls | ||||||||||||||
| Patriot Peak | 
|
| ||||||||||||||
| With Headphones | Without Headphones | |||||||||||||||
| Crosslinker's Coil | 
|

| ||||||||||||||
| No Hat | No Hat and No Headphones | |||||||||||||||
| Salty Dog | 
|

| ||||||||||||||
| Salty | Smoky | |||||||||||||||
| Dark Falkirk Helm | 
|

| ||||||||||||||
| Open | Closed | |||||||||||||||
| TF2Maps 72hr TF2Jam Participant | 
|
|||||||||||||||
| Medal | Pin | |||||||||||||||
| TF2Maps Charitable Heart 2017 | 
|

| ||||||||||||||
| Medal | Pin | |||||||||||||||
| TF2Maps Ray of Sunshine 2018 | 
|

| ||||||||||||||
| Medal | Pin | |||||||||||||||
| Deadbeats | 
|

| ||||||||||||||
| Hat | No Hat | |||||||||||||||
| Memes vs. Machines Baked Potato 2019 | 
|

| ||||||||||||||
| Style 1 | Style 2 | |||||||||||||||
| Memes vs. Machines PotatOS Server 2019 | 
|

| ||||||||||||||
| Style 1 | Style 2 | |||||||||||||||
| Madness vs Machines Burnished Beryl 2019 | 
|

| ||||||||||||||
| Normal | Gem Only | |||||||||||||||
| Madness vs Machines Grandiose Garnet 2019 | 
|

| ||||||||||||||
| Normal | Gem Only | |||||||||||||||
| Madness vs Machines Tempered Tourmaline 2019 | 
|

| ||||||||||||||
| Normal | Gem Only | |||||||||||||||
| Madness vs Machines Royal Rhodonite 2019 | 
|
|||||||||||||||
| Normal | Gem Only | |||||||||||||||
| Madness vs Machines Chaotic Crystal 2019 | 
|

| ||||||||||||||
| Normal | Gem Only | |||||||||||||||
| Madness vs Machines Pinnacle of Ingenuity 2019 | 
|

| ||||||||||||||
| Normal | Gem Only | |||||||||||||||
| Madness vs Machines Hopeful Heart 2019 | 
|

| ||||||||||||||
| Normal | Gem Only | |||||||||||||||
| Madness vs Machines Boundless Heart 2019 | 
|

| ||||||||||||||
| Normal | Gem Only | |||||||||||||||
| Polar Pal | 
|

|

| |||||||||||||
| Polar | Bamboo Muncher | Liberty Edition | ||||||||||||||
| BINOCULUS!‡ | ||||||||||||||||
| Paint Eyelid | Paint Iris | |||||||||||||||
| Pocket Halloween Boss | 
|

|

|

| ||||||||||||
| Pocket Merasmus | Pocket Zepheniah | Pocket Monoculus | Pocket Skeleton King | |||||||||||||
| Horrible Horns | 
|

| ||||||||||||||
| No Hat | Hat | |||||||||||||||
| Citizen Cane | 
|

| ||||||||||||||
| Glasses | No Glasses | |||||||||||||||
| Gingerbread Mann | 
|

| ||||||||||||||
| Candied Resemblance | Sugar Saxton | |||||||||||||||
| Globetrotter | 
|

| ||||||||||||||
| Snow | Dust | |||||||||||||||
| TF2VRH | ||||||||||||||||
| Off | On | |||||||||||||||
| Titanium Tank Gilded Giver 2020 | 
|

| ||||||||||||||
| Normal | Gem Only | |||||||||||||||
| Loaf Loafers | 
|

| ||||||||||||||
| Freshly Teleported | Freshly Baked | |||||||||||||||
| Hypno-Eyes | ||||||||||||||||
| Spinning | Shining | |||||||||||||||
| A Handsome Handy Thing | 
|

| ||||||||||||||
| Fresh | Expired | |||||||||||||||
| Handsome Devil | 
|

| ||||||||||||||
| No Hat | Hat | |||||||||||||||
| Wrap-A-Khamon | 
|

| ||||||||||||||
| Showy | Shy | |||||||||||||||
| Eye-See-You | 
|

| ||||||||||||||
| Hat | No Hat | |||||||||||||||
| Impish Ears | 
|

| ||||||||||||||
| Hat | No Hat | |||||||||||||||
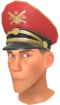
| Decorated Veteran | 
|

|

| |||||||||||||
| Elite | Commando | Civilian | ||||||||||||||
| Beaten and Bruised | 
|

|

|

| ||||||||||||
| Too Young To Die | Hey, Not Too Rough | Hurt Me Plenty | Ultra Violence | |||||||||||||
| ||||||||||||||||
| Nightmare | ||||||||||||||||
| Onimann‡ | 
|

|

| |||||||||||||
| Normal | Shinobi | Raging Demon | ||||||||||||||
| Starlight Sorcerer | 
|

| ||||||||||||||
| Glasses | No Glasses | |||||||||||||||
| Battle Bear | 
|

| ||||||||||||||
| Flair | Bare | |||||||||||||||
| Festive Rack | 
|
| ||||||||||||||
| Normal | Paintable Lights | |||||||||||||||
| Trapper's Flap | 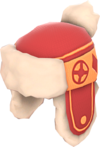
|
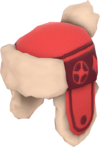
| ||||||||||||||
| Wool Dye For | To Dye Fur | |||||||||||||||
| Festive Fascinator | 
|

| ||||||||||||||
| Merry | Happy | |||||||||||||||
| Boarder's Beanie | 
|

|

| |||||||||||||
| Personal | Brand | Classic | ||||||||||||||
| Twisted Topper | 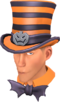
|

| ||||||||||||||
| Bow Tie | No Bow Tie | |||||||||||||||
| Clown's Cover-Up | 
|

| ||||||||||||||
| No Hat | Hat | |||||||||||||||
| Festive Frames | 
|

|

|

| ||||||||||||
| Festive (No Hat) | Festivized (No Hat) | Festive (Hat) | Festivized (Hat) | |||||||||||||
| Gnome Dome | 
|
|
|
| ||||||||||||
| Smissmas | Yard | Classic | Elf | |||||||||||||
| Oh Deer! | 
|

| ||||||||||||||
| Nose | Noseless | |||||||||||||||
| Manndatory Attire | 
|
|
| |||||||||||||
| Hobbyist | Specialist | Generalist | ||||||||||||||
| Eyequarium | 
|

|

|

| ||||||||||||
| Spring Water (No Hat) | Soda Pop (No Hat) | Spring Water | Soda Pop | |||||||||||||
| Goalkeeper | 
|

|

|

| ||||||||||||
| Slasher | Slapshot | Slasher (No Hat) | Slapshot (No Hat) | |||||||||||||
| Hat Outta Hell | 
|

|

| |||||||||||||
| Damned | Demon | Devil | ||||||||||||||
| Second-Head Headwear | 
|

| ||||||||||||||
| Bowler | Top Hat | |||||||||||||||
| Bone Cone | 
|

| ||||||||||||||
| Bone Chilling | Skin Aching | |||||||||||||||
| Spooky Head-Bouncers | 
|

|

| |||||||||||||
| Monoculus | Pumpkin Pouncers | Floating Phantoms | ||||||||||||||
| Scariest Mask EVER | 
|

| ||||||||||||||
| No Hat | Hat | |||||||||||||||
| Creepy Crawlers | 
|

| ||||||||||||||
| Redback | False Widow | |||||||||||||||
| Candy Cantlers | 
|

| ||||||||||||||
| Hat | No Hat | |||||||||||||||
| Cozy Cover-Up | 
|

|

| |||||||||||||
| Covered Up | Muffed Up | Wrapped Up | ||||||||||||||
| Notes |
† Changing the style of this item has no effect on its appearance unless it is painted. ‡ Changing the style of this item has very little effect on its appearance unless it is painted. | |||||||||||||||
| To be used on the Styles page. |
| For weapons: Template:List of weapon styles |
| For action items: Template:List of action item styles |
| This template uses translation switching. The correct language will be displayed automatically. Localized versions of this template (e.g. Template:List of cosmetic styles/ru) are not necessary. Add your translations directly to this template by editing it. Supported languages for this template: en, cs, da, de, es, fi, fr, ja, ko, pl, pt-br, ru, sv, tr, zh-hant, zh-hans (add) |