Difference between revisions of "Operation Canteen Crasher"
MCandRBfan (talk | contribs) (→Approved Maps and Missions) |
MCandRBfan (talk | contribs) m (→Approved Maps and Missions) |
||
| Line 33: | Line 33: | ||
! class="header" style="text-align: center;" | Difficulty | ! class="header" style="text-align: center;" | Difficulty | ||
|- | |- | ||
| − | ! style="text-align: center;" rowspan= | + | ! style="text-align: center;" rowspan=4 | [[Area 52]] |
| style="text-align: center;" | [[Extraterrestrial Epidemic (mission)|Extraterrestrial Epidemic]] | | style="text-align: center;" | [[Extraterrestrial Epidemic (mission)|Extraterrestrial Epidemic]] | ||
| style="text-align: center;" | 1 | | style="text-align: center;" | 1 | ||
| style="text-align: center;" | {{common string|mission advanced}} ({{common string|endurance}}) | | style="text-align: center;" | {{common string|mission advanced}} ({{common string|endurance}}) | ||
| + | |- | ||
| + | | style="text-align: center;" | [[Interstellar Intervention (mission)|Interstellar Intervention]] | ||
| + | | style="text-align: center;" | 6 | ||
| + | | style="text-align: center;" | {{common string|mission advanced}} ({{common string|invasion}}) | ||
|- | |- | ||
| style="text-align: center;" | [[Tech Mechs (mission)|Tech Mechs]] | | style="text-align: center;" | [[Tech Mechs (mission)|Tech Mechs]] | ||
| Line 69: | Line 73: | ||
| style="text-align: center;" | {{common string|mission advanced}} ({{common string|invasion}}) | | style="text-align: center;" | {{common string|mission advanced}} ({{common string|invasion}}) | ||
|- | |- | ||
| − | ! style="text-align: center;" rowspan= | + | ! style="text-align: center;" rowspan=3 | [[Coastrock]] |
| style="text-align: center;" | [[Coastal Calamity (mission)|Coastal Calamity]] | | style="text-align: center;" | [[Coastal Calamity (mission)|Coastal Calamity]] | ||
| style="text-align: center;" | 4 | | style="text-align: center;" | 4 | ||
| Line 75: | Line 79: | ||
|- | |- | ||
| style="text-align: center;" | [[Coral Crusher (mission)|Coral Crusher]] | | style="text-align: center;" | [[Coral Crusher (mission)|Coral Crusher]] | ||
| + | | style="text-align: center;" | 6 | ||
| + | | style="text-align: center;" | {{common string|mission intermediate}} ({{common string|invasion}}) | ||
| + | |- | ||
| + | | style="text-align: center;" | [[Off-Coast Invasion (mission)|Off-Coast Invasion]] | ||
| style="text-align: center;" | 6 | | style="text-align: center;" | 6 | ||
| style="text-align: center;" | {{common string|mission intermediate}} ({{common string|invasion}}) | | style="text-align: center;" | {{common string|mission intermediate}} ({{common string|invasion}}) | ||
| Line 114: | Line 122: | ||
| style="text-align: center;" | {{common string|mission nightmare}} ({{common string|endurance}}) | | style="text-align: center;" | {{common string|mission nightmare}} ({{common string|endurance}}) | ||
|- | |- | ||
| − | ! style="text-align: center;" | [[Giza]] | + | ! style="text-align: center;" rowspan=2 | [[Giza]] |
| − | | style="text-align: center;" | [[Pyramid Peril]] | + | | style="text-align: center;" | [[Pyramid Peril (mission)|Pyramid Peril]] |
| style="text-align: center;" | 6 | | style="text-align: center;" | 6 | ||
| style="text-align: center;" | {{common string|mission advanced}} ({{common string|invasion}}) | | style="text-align: center;" | {{common string|mission advanced}} ({{common string|invasion}}) | ||
| + | |- | ||
| + | | style="text-align: center;" | [[Wrath of the Pharaoh (mission)|Wrath of the Pharaoh]] | ||
| + | | style="text-align: center;" | 1 | ||
| + | | style="text-align: center;" | {{common string|mission nightmare}} ({{common string|endurance}}) | ||
|- | |- | ||
! style="text-align: center;" rowspan=2 | [[Hideout]] | ! style="text-align: center;" rowspan=2 | [[Hideout]] | ||
| Line 128: | Line 140: | ||
| style="text-align: center;" | {{common string|mission intermediate}} ({{common string|invasion}}) | | style="text-align: center;" | {{common string|mission intermediate}} ({{common string|invasion}}) | ||
|- | |- | ||
| − | ! style="text-align: center;" rowspan= | + | ! style="text-align: center;" rowspan=3 | [[Isolation]] |
| + | | style="text-align: center;" | [[Icecold Insurgency (mission)|Icecold Insurgency]] | ||
| + | | style="text-align: center;" | 6 | ||
| + | | style="text-align: center;" | {{common string|mission advanced}} ({{common string|invasion}}) | ||
| + | |- | ||
| style="text-align: center;" | [[Mannstorm (mission)|Mannstorm]] | | style="text-align: center;" | [[Mannstorm (mission)|Mannstorm]] | ||
| style="text-align: center;" | 6 | | style="text-align: center;" | 6 | ||
| Line 155: | Line 171: | ||
| style="text-align: center;" | {{common string|mission advanced}} ({{common string|invasion}}) | | style="text-align: center;" | {{common string|mission advanced}} ({{common string|invasion}}) | ||
|- | |- | ||
| − | ! style="text-align: center;" rowspan= | + | ! style="text-align: center;" rowspan=3 | [[Oxidize]] |
| + | | style="text-align: center;" | [[Corroding Cadavers (mission)|Corroding Cadavers]] | ||
| + | | style="text-align: center;" | 1 | ||
| + | | style="text-align: center;" | {{common string|mission nightmare}} ({{common string|endurance}}) | ||
| + | |- | ||
| style="text-align: center;" | [[Frosted Furnace (mission)|Frosted Furnace]] | | style="text-align: center;" | [[Frosted Furnace (mission)|Frosted Furnace]] | ||
| style="text-align: center;" | 7 | | style="text-align: center;" | 7 | ||
| Line 169: | Line 189: | ||
| style="text-align: center;" | {{common string|mission intermediate}} ({{common string|invasion}}) | | style="text-align: center;" | {{common string|mission intermediate}} ({{common string|invasion}}) | ||
|- | |- | ||
| − | ! style="text-align: center;" rowspan= | + | ! style="text-align: center;" rowspan=3| [[Quetzal]] |
| style="text-align: center;" | [[Oaxaca Offense (mission)|Oaxaca Offense]] | | style="text-align: center;" | [[Oaxaca Offense (mission)|Oaxaca Offense]] | ||
| + | | style="text-align: center;" | 6 | ||
| + | | style="text-align: center;" | {{common string|mission intermediate}} ({{common string|invasion}}) | ||
| + | |- | ||
| + | | style="text-align: center;" | [[Sunset Sacrilege (mission)|Sunset Sacrilege]] | ||
| style="text-align: center;" | 6 | | style="text-align: center;" | 6 | ||
| style="text-align: center;" | {{common string|mission intermediate}} ({{common string|invasion}}) | | style="text-align: center;" | {{common string|mission intermediate}} ({{common string|invasion}}) | ||
|- | |- | ||
| style="text-align: center;" | [[Tlacopan Tenacity (mission)|Tlacopan Tenacity]] | | style="text-align: center;" | [[Tlacopan Tenacity (mission)|Tlacopan Tenacity]] | ||
| + | | style="text-align: center;" | 7 | ||
| + | | style="text-align: center;" | {{common string|mission advanced}} ({{common string|invasion}}) | ||
| + | |- | ||
| + | ! style="text-align: center;" rowspan=2 | [[Radar]] | ||
| + | | style="text-align: center;" | [[Recruits Recognition (mission)|Recruits Recognition]] | ||
| + | | style="text-align: center;" | 7 | ||
| + | | style="text-align: center;" | {{common string|mission intermediate}} ({{common string|invasion}}) | ||
| + | |- | ||
| + | | style="text-align: center;" | [[Rocky Ravage (mission)|Rocky Ravage]] | ||
| style="text-align: center;" | 7 | | style="text-align: center;" | 7 | ||
| style="text-align: center;" | {{common string|mission advanced}} ({{common string|invasion}}) | | style="text-align: center;" | {{common string|mission advanced}} ({{common string|invasion}}) | ||
| Line 211: | Line 244: | ||
| style="text-align: center;" | [[Hell Overdrive (mission)|Hell Overdrive]] | | style="text-align: center;" | [[Hell Overdrive (mission)|Hell Overdrive]] | ||
| style="text-align: center;" | 1 | | style="text-align: center;" | 1 | ||
| − | | style="text-align: center;" | {{common string|mission nightmare}} ({{common string| | + | | style="text-align: center;" | {{common string|mission nightmare}} ({{common string|endurance}}) |
|- | |- | ||
| − | ! style="text-align: center;" rowspan=2 | [[ | + | ! style="text-align: center;" rowspan=2 | [[Snowpine]] |
| − | | style="text-align: center;" | [[ | + | | style="text-align: center;" | [[Alpine Assault (mission)|Alpine Assault]] |
| style="text-align: center;" | 7 | | style="text-align: center;" | 7 | ||
| + | | style="text-align: center;" | {{common string|mission intermediate}} ({{common string|invasion}}) | ||
| + | |- | ||
| + | | style="text-align: center;" | [[Permafrost Panic (mission)|Permafrost Panic]] | ||
| + | | style="text-align: center;" | 6 | ||
| style="text-align: center;" | {{common string|mission advanced}} ({{common string|invasion}}) | | style="text-align: center;" | {{common string|mission advanced}} ({{common string|invasion}}) | ||
| + | |- | ||
| + | ! style="text-align: center;" rowspan=3 | [[Spacepost]] | ||
| + | | style="text-align: center;" | [[Dead Space (mission)|Dead Space]] | ||
| + | | style="text-align: center;" | 1 | ||
| + | | style="text-align: center;" | {{common string|mission nightmare}} ({{common string|endurance}}) | ||
|- | |- | ||
| style="text-align: center;" | [[Regolith Rampage (mission)|Regolith Rampage]] | | style="text-align: center;" | [[Regolith Rampage (mission)|Regolith Rampage]] | ||
| style="text-align: center;" | 6 | | style="text-align: center;" | 6 | ||
| + | | style="text-align: center;" | {{common string|mission advanced}} ({{common string|invasion}}) | ||
| + | |- | ||
| + | | style="text-align: center;" | [[Symphony of Space Machines (mission)|Symphony of Space Machines]] | ||
| + | | style="text-align: center;" | 7 | ||
| style="text-align: center;" | {{common string|mission advanced}} ({{common string|invasion}}) | | style="text-align: center;" | {{common string|mission advanced}} ({{common string|invasion}}) | ||
|- | |- | ||
| Line 236: | Line 282: | ||
| style="text-align: center;" | {{common string|mission advanced}} ({{common string|invasion}}) | | style="text-align: center;" | {{common string|mission advanced}} ({{common string|invasion}}) | ||
|- | |- | ||
| − | ! style="text-align: center;" | [[Trainyard]] | + | ! style="text-align: center;" rowspan=2 | [[Trainyard]] |
| style="text-align: center;" | [[Driving Training (mission)|Driving Training]] | | style="text-align: center;" | [[Driving Training (mission)|Driving Training]] | ||
| style="text-align: center;" | 6 | | style="text-align: center;" | 6 | ||
| style="text-align: center;" | {{common string|mission intermediate}} ({{common string|invasion}}) | | style="text-align: center;" | {{common string|mission intermediate}} ({{common string|invasion}}) | ||
|- | |- | ||
| − | ! style="text-align: center;" rowspan= | + | | style="text-align: center;" | [[Railroad Ravage (mission)|Railroad Ravage]] |
| + | | style="text-align: center;" | 4 | ||
| + | | style="text-align: center;" | {{common string|mission advanced}} ({{common string|endurance}}) | ||
| + | |- | ||
| + | ! style="text-align: center;" rowspan=4 | [[Underground]] | ||
| + | | style="text-align: center;" | [[Mineral Masher (mission)|Mineral Masher]] | ||
| + | | style="text-align: center;" | 5 | ||
| + | | style="text-align: center;" | {{common string|mission advanced}} ({{common string|invasion}}) | ||
| + | |- | ||
| + | | style="text-align: center;" | [[Mining Machines (mission)|Mining Machines]] | ||
| + | | style="text-align: center;" | 7 | ||
| + | | style="text-align: center;" | {{common string|mission intermediate}} ({{common string|invasion}}) | ||
| + | |- | ||
| style="text-align: center;" | [[Subterranean Skirmish (mission)|Subterranean Skirmish]] | | style="text-align: center;" | [[Subterranean Skirmish (mission)|Subterranean Skirmish]] | ||
| style="text-align: center;" | 7 | | style="text-align: center;" | 7 | ||
| Line 259: | Line 317: | ||
| style="text-align: center;" | {{common string|mission advanced}} ({{common string|invasion}}) | | style="text-align: center;" | {{common string|mission advanced}} ({{common string|invasion}}) | ||
|- | |- | ||
| − | ! style="text-align: center;" | [[Yucatan]] | + | ! style="text-align: center;" rowspan=2 | [[Waterlogged]] |
| + | | style="text-align: center;" | [[Cold Shoulder (mission)|Cold Shoulder]] | ||
| + | | style="text-align: center;" | 6 | ||
| + | | style="text-align: center;" | {{common string|mission advanced}} ({{common string|invasion}}) | ||
| + | |- | ||
| + | | style="text-align: center;" | [[Flu Fight (mission)|Flu Fight]] | ||
| + | | style="text-align: center;" | 6 | ||
| + | | style="text-align: center;" | {{common string|mission intermediate}} ({{common string|invasion}}) | ||
| + | |- | ||
| + | ! style="text-align: center;" rowspan=2 | [[Yucatan]] | ||
| style="text-align: center;" | [[Fallout Frenzy (mission)|Fallout Frenzy]] | | style="text-align: center;" | [[Fallout Frenzy (mission)|Fallout Frenzy]] | ||
| style="text-align: center;" | 6 | | style="text-align: center;" | 6 | ||
| style="text-align: center;" | {{common string|mission advanced}} ({{common string|invasion}}) | | style="text-align: center;" | {{common string|mission advanced}} ({{common string|invasion}}) | ||
| + | |- | ||
| + | | style="text-align: center;" | [[Ruins Rumble (mission)|Ruins Rumble]] | ||
| + | | style="text-align: center;" | 3 | ||
| + | | style="text-align: center;" | {{common string|mission advanced}} ({{common string|endurance}}) | ||
|- | |- | ||
|} | |} | ||
Revision as of 04:46, 21 December 2018
| “You are so small! Is funny to me!” This article is a stub. As such, it is not complete. You can help Team Fortress Wiki by expanding it. Notes: more information when available. |
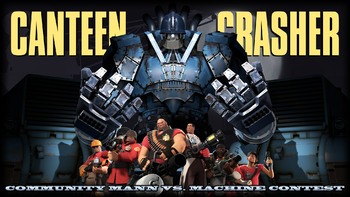
Operation Canteen Crasher is a hybrid community Mann vs Machine event organized and hosted by Potato's Custom MvM Servers that was announced on April 9, 2018.
Contents
The Contest
The first part of the event is a contest that began on April 9, 2018, with guaranteed support until December 9, 2018. Before August 15, 2018, players could create maps, items, and MvM missions, and submit them to the judges for review. If the submission received enough votes from the judges, the submission will be added to the campaign. New submissions were no longer accepted after August 15th; however, re-submissions of existing entries were allowed past the August 15th deadline. Medal points will be credited to the authors of accepted submissions. There was no limit on the amount of submissions one could create for the event; however, pop files for missions were restricted to two per map, one intermediate mission and one advanced mission for each mission maker. Judgement on submissions will continue until the judges deem necessary, with no definite deadline at this time.
On September 4th, it was announced that the contest would be extended to include submissions for Halloween-themed maps, missions and items. These submissions followed the same judgement guidelines as non-Halloween submissions.
The Campaign
The second part of the event is the campaign, which launched in public beta on August 22nd, 2018. Just like with the contest, players can earn medal points, up to a maximum of 225, for completing missions and contracts.
Unlike Operation Titanium Tank, Operation Canteen Crasher offers both advanced and intermediate missions, instead of only advanced difficulty missions. This allows players who struggle with advanced missions to still have fun and experience the campaign.
Contracts
The campaign also features contracts for all nine classes, as well as an all-class section and team section. The class contracts range from beginner to advanced in difficulty, with extra contracts based around specific weapons or actions. The all-class contracts contain broader objectives that can be completed by any class, such as collecting credits or destroying tanks. The team contracts requires the whole team's cooperation to be completed, such as completing a mission with everyone being a Medic, completing an advanced mission with no failures and under 30 minutes of wave time or completing a mission with only default quality weapons. (Decorated, Unusual, Vintage, Reskins, Community, Self-made, Festives, Collector's, Killstreak variants of default weapons do not count; cosmetics are fine and does not hinder the contract's progress.)
To check your contract's progress while in a game, simply type the command !contract in chat or contract on console. One can also check the list of valid and failed team contracts with !teamcontract or !teamcontract_failed
(sm_teamcontract or sm_teamcontract_failed in console)
Upon completion, the player is awarded up to three medal points for a Basic class contract, up to four medal points for an Advanced class contract, and up to five medal points for an Expert class contract. Medal point values for the all-class and extra class-specific contracts vary between three to five points and is based on how many bonuses are completed.
Approved Maps and Missions
This table shows the missions and maps currently in rotation in the Canteen Crasher campaign. Each mission awards the player a set amount of points upon completion. Note that this is not a complete list at this time, as more maps will be added to the campaign at a later date.
| Map | Mission | Number of Waves | Difficulty |
|---|---|---|---|
| Area 52 | Extraterrestrial Epidemic | 1 | Advanced (Endurance) |
| Interstellar Intervention | 6 | Advanced (Invasion) | |
| Tech Mechs | 6 | Advanced (Invasion) | |
| Unusual Onslaught | 5 | Advanced (Invasion) | |
| Barren | Dusty Dilemma | 7 | Advanced (Invasion) |
| Robotic Landscape | 8 | Advanced (Invasion) | |
| Calico | Scabby Subordination | 7 | Advanced (Invasion) |
| Casino City | Cashgrab Chaos | 6 | Intermediate (Invasion) |
| Poker Pummel | 7 | Advanced (Invasion) | |
| Coastrock | Coastal Calamity | 4 | Advanced (Endurance) |
| Coral Crusher | 6 | Intermediate (Invasion) | |
| Off-Coast Invasion | 6 | Intermediate (Invasion) | |
| Condemned | Unholy Undead | 5 | Advanced (Invasion) |
| Thriller Terror | 5 | Intermediate (Invasion) | |
| Dockyard | Systematic Swarm | 7 | Advanced (Invasion) |
| Doppler | Force Restart | 6 | Advanced (Invasion) |
| Shortwave | 6 | Intermediate (Invasion) | |
| Downtown | Downgrading System | 6 | Advanced (Invasion) |
| Robocentralization | 7 | Advanced (Invasion) | |
| One Down | 1 | Nightmare (Endurance) | |
| Giza | Pyramid Peril | 6 | Advanced (Invasion) |
| Wrath of the Pharaoh | 1 | Nightmare (Endurance) | |
| Hideout | Advanced | 5 | Advanced (Invasion) |
| Intermediate | 6 | Intermediate (Invasion) | |
| Isolation | Icecold Insurgency | 6 | Advanced (Invasion) |
| Mannstorm | 6 | Advanced (Invasion) | |
| Turbulence Tumult | 6 | Intermediate (Invasion) | |
| Metro | Evil Eye | 4 | Advanced (Endurance) |
| Steel Skyline | 6 | Intermediate (Invasion) | |
| Outlands | Backwood Blockade | 7 | Intermediate (Invasion) |
| Midnight Mutiny | 7 | Advanced (Invasion) | |
| Oxidize | Corroding Cadavers | 1 | Nightmare (Endurance) |
| Frosted Furnace | 7 | Advanced (Invasion) | |
| Snowy Slaughter | 6 | Intermediate (Invasion) | |
| Powerplant | Generator Gambit | 6 | Intermediate (Invasion) |
| Quetzal | Oaxaca Offense | 6 | Intermediate (Invasion) |
| Sunset Sacrilege | 6 | Intermediate (Invasion) | |
| Tlacopan Tenacity | 7 | Advanced (Invasion) | |
| Radar | Recruits Recognition | 7 | Intermediate (Invasion) |
| Rocky Ravage | 7 | Advanced (Invasion) | |
| Sequoia | Arboreal Assault | 6 | Advanced (Invasion) |
| Doubletrouble | 7 | Advanced (Invasion) | |
| Fiber-Ops | 7 | Advanced (Invasion) | |
| Uproot Upgrade | 7 | Advanced (Invasion) | |
| Shiver Peak | Coldfront Colition | 7 | Intermediate (Invasion) |
| Ice Breaker | 7 | Advanced (Invasion) | |
| Smissmas Slay | 6 | Advanced (Invasion) | |
| Skullcove | Hell Overdrive | 1 | Nightmare (Endurance) |
| Snowpine | Alpine Assault | 7 | Intermediate (Invasion) |
| Permafrost Panic | 6 | Advanced (Invasion) | |
| Spacepost | Dead Space | 1 | Nightmare (Endurance) |
| Regolith Rampage | 6 | Advanced (Invasion) | |
| Symphony of Space Machines | 7 | Advanced (Invasion) | |
| Steep | Cliffside Clashing | 7 | Intermediate (Invasion) |
| Mountainous Malware | 6 | Advanced (Invasion) | |
| Teien | Onsen Onslaught | 6 | Advanced (Invasion) |
| Trainyard | Driving Training | 6 | Intermediate (Invasion) |
| Railroad Ravage | 4 | Advanced (Endurance) | |
| Underground | Mineral Masher | 5 | Advanced (Invasion) |
| Mining Machines | 7 | Intermediate (Invasion) | |
| Subterranean Skirmish | 7 | Advanced (Invasion) | |
| Ultra Uplink | 7 | Advanced (Invasion) | |
| Waterfront | Short Circuit | 7 | Intermediate (Invasion) |
| Whirly Wallop | 7 | Advanced (Invasion) | |
| Waterlogged | Cold Shoulder | 6 | Advanced (Invasion) |
| Flu Fight | 6 | Intermediate (Invasion) | |
| Yucatan | Fallout Frenzy | 6 | Advanced (Invasion) |
| Ruins Rumble | 3 | Advanced (Endurance) |
Rewards
During the event, six unlockable medals of different tiers are up for grabs. These medals are automatically granted once the player reaches the medal points threshold required for them. The medals are separate items, unlike campaign tokens; so it is possible to obtain all six at once; however, the Platinum Crit Canteen Medal cannot be obtained during the campaign phase of Canteen Crasher, as the campaign maxes out at 225 medal points. One could only obtain the Platinum Crit Canteen Medal by also submitting content that was accepted into the campaign.
Medal Points system
Medal Points can be gained from creating a map, mission, item or gameday testing.
| Objective | Property | Points | Comments |
|---|---|---|---|
| Map submission | All maps | +350 | A map entry must have a functioning bsp file with a proper nav file, 2 pop files, and any needed bot icons for full credit |
| Item submission | New Items Pre-existing |
+150 +40 |
Items created during the contest will receive 150 points. Items created before the contest will earn 40 points. |
| Mission submission | Advanced Intermediate |
+75 +60 |
These are missions that have passed judging that has been made for approved pre-existing community MvM maps. |
| Gameday testing | Advanced Intermeidate |
+2 +1 |
Play or watch every wave in a mission during beta testing and leave helpful feedback for participants (max 30 points) |
Alternatively, another way to gain points is by playing during the Canteen Crasher campaign phase. The point system is shown below here:
| Contest Objective | Difficulty | Points | Comments |
|---|---|---|---|
| Completed contract | — | +1-5 | Turn in a finished MvM contract on wave complete; contracts are automatically turned in on wave end. The medal point value depends on the contract and the amount of completed bonuses. |
| Completed team contract | — | +1-5 | Turn in a finished MvM team contract on wave complete; team contracts are automatically turned in on wave end. |
| Completed mission | Advanced Intermediate |
+4 +2 |
Complete every wave in a mission in full. Completing an advanced difficulty mission grants 4 points, and an intermediate mission grants 2 points.
(Same completion logic as the Titanium Tank Tour.) |
| Gameday testing | Advanced Intermediate |
+2 +1 |
Play or watch every wave in a mission during beta testing and leave helpful feedback (max 30 points) |
For map submissions, Canteen Crasher gives partial credit consolation medal points to maps that do not pass the judging based on how many passing votes the map earns by the deadline. The map entry must have a functional bsp file, nav file, and 2 pop files to be eligible for a partial credit, or it will receive no credit.
| Votes | Points | Medal |
|---|---|---|
| 2 | +100 | Silver |
| 1 | +50 | Bronze |
| 0 | +20 | Iron |
Below is the list of rewards and points required for them.
Awardable Medals
There are six different medals that can be obtained by playing the Canteen Crasher community campaign event or participating in the Canteen Crasher contest.
| Image | Name | Description |
|---|---|---|

|
Canteen Crasher Rust Starter Medal 2018 | A rusted replica of the Power Up Canteen from MvM, without any buffs stored in it. It is awarded to players who successfully obtain 1 medal point. |

|
Canteen Crasher Iron Recall Medal 2018 | An iron-forged replica of the Power Up Canteen from MvM with the "Return to Base" buff stored in it. It is awarded to players who successfully obtain 30 medal points. |

|
Canteen Crasher Bronze Ammo Medal 2018 | A bronze replica of the Power Up Canteen from MvM with the "Refill Clips and Ammo" buff stored in it. It is awarded to players who successfully obtain 75 medal points. |

|
Canteen Crasher Silver Building Medal 2018 | A silver replica of the Power Up Canteen from MvM with the "Upgrade Buildings" buff stored in it. It is awarded to players who successfully obtain 150 medal points. |

|
Canteen Crasher Gold Uber Medal 2018 | A golden replica of the Power Up Canteen from MvM with the "Übercharge" buff stored in it. It is awarded to players who successfully obtain 225 medal points. |

|
Canteen Crasher Platinum Crit Medal 2018 † | A platinum replica of the Power Up Canteen from MvM with the "Critical Hit Boost" buff stored in it. It is awarded to content creators who successfully obtain 300 medal points, with at least 60 points from accepted content submissions during the contest phase. |
| Notes |
† Only obtainable to contest participants. | |
Trivia
- Originally, Mannstorm and Turbulence Tumult (Tumult had yet to pass judging at the time) were made for the Maelstrom map. The map was removed from Canteen Crasher due to bugs that could not be fixed as its the author had long since dropped support.
- Both of these missions are now in the map Isolation.
- Hillside, a medieval MvM map, was once in the campaign. It had an Advanced Invasion mission named Outdated Processing. Tanks on the map would explode upon capturing the gate, but this could not be fixed as the had author dropped support for the map. It was removed on the November 28 Patch, as players were able to earn over a hundred stars in a short time grinding team contracts.
See also
External links
- First announcement
- Canteen Crasher contest guide
- Contest Participants: Get back to work!
- A big apology to CC contest participants
- Out of beta!
- Canteen Crasher out of beta blog post
- Canteen Crasher website