|
|
| Line 114: |
Line 114: |
| | |class="small" align="center" valign="center" style="padding:0.5em" | {{Table icon|Fan O'War}} | | |class="small" align="center" valign="center" style="padding:0.5em" | {{Table icon|Fan O'War}} |
| | | | | | |
| − | *Stay away from enemies if the Scout marks you with the Fan O' War, as all damage dealt to you for 10 seconds will be Mini-Crits. | + | *Stay away from enemies if the Scout marks you with the Fan O' War, as all damage dealt to you for 15 seconds will be Mini-Crits. |
| | |} | | |} |
| | | | |
Revision as of 14:31, 17 April 2011
The Scout is a very fast and maneuverable class, capable of hit-and-run attacks that make up for his low amount of health. He packs a high amount of firepower at close range. Scouts excel when they have a lot of room to maneuver as they can change their direction in midair with their double jump ability. Keep in mind that Scouts, depending on their loadout, have the ability to stun enemy players, heal themselves and their allies, as well as become invulnerable to damage for a short period of time. Attacking them from a distance is usually the best way to deal with them due to their lack of effective long-range weaponry.
General
 Role Role
|
- When you spot a Scout trying to get across a battlefield to reach an objective or cart, always keep an eye out for him until you have time to hunt him down.
- A Scout carrying the intelligence will likely try and avoid direct combat on the way back to his base by taking a quieter route or one better suited to his double-jump abilities. Try to block these routes or use weapons with a knockback effect to push him towards your teammates.
- If a Scout is trying to ambush an unsuspecting ally, always warn the ally in order to fend off or eliminate the Scout.
|
 Health Health
|
- His tiny amount of health can be nearly depleted with a hit from a rocket or grenade.
- If a Scout has been severely injured, switching to a hitscan weapon may help you finish him off and/or conserve ammunition.
|
 Speed Speed
|
- Always think one step ahead of the Scout before attacking; he can run more quickly than the other classes.
- Try to predict where the Scout will land when using projectiles.
|
 Power Power
|
- The Scout is quite devastating at close range with his primary weapons, so try to fight the Scout at mid-to-long range in order to avoid taking large amounts of damage.
- Less experienced Scouts tend to overcompensate when turning to aim at you while running in circles. Sometimes you can stand in one place while firing and the Scout will fire bullets around you.
- Engaging a Scout in close quarters can be risky, as he can deal large amounts of damage but has less room to move around. Take advantage of this before he does.
- A class which deals splash damage can often take less damage from it's own attacks than a Scout, making spamming rockets or stickies a viable strategy. However, this is often compensated for by the Scout's mobility, and can end up easily backfiring.
|
Weapon Specific
A list of useful tidbits about the Scout's tools, and how to counter them.
Primary Weapons
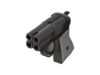
Scattergun
|
- The Scattergun has more damage ramp-up at close range than other weapons, so it may be best to keep Scouts at mid range.
- The Scattergun is much less effective if only a few pellets hit its target. If a Scout is attacking you, jump around and move erratically to minimize the damage that you take.
|
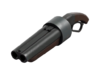
Force-A-Nature
|
- The Force-A-Nature has only two shots to a clip and takes a while to reload. Take advantage of this and attack the Scout between reloads.
- The Force-A-Nature has a knock back ability, meaning he can push enemy players into environmental hazards such as saw blades, trains and off cliffs. Avoid this by trying to flank around him and away from said hazard.
|
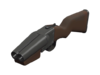
Shortstop
|
- The Shortstop has a tight spread suited to medium range. If you close the distance, the Scout may find it more difficult to hit you.
|
Secondary Weapons
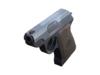 
Pistol / Lugermorph
|
- The Pistol can only hold 4 full magazines of ammo. If you catch a Scout who is low on Pistol ammunition, fight at long-range to take advantage of his inability to use his secondary weapon.
|

Bonk! Atomic Punch
|
- Bonk! is designed to get a Scout past choke points. Impede his movement until the effect runs out by just body blocking him, Knockback, Stun, or Slowdown.
|

Crit-a-Cola
|
- Crit-a-Cola is designed for ambushing and killing unprepared enemies. However, if you are watchful, the attacking Scout's advantage will disappear.
- Take advantage of the fact that Crit-a-Cola will also deal Mini-Crits to the Scout as well, quickly depleting the Scout's low health.
|
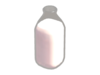
Mad Milk
|
- If you get hit by Mad Milk, try to retreat or deal with your assailant quickly, as he will have the advantage in a protracted battle.
- The Scout can use the Mad Milk to extinguish himself or his teammates.
|
Melee Weapons
- The Scout's mobility makes it difficult to retreat from or fend off a melee attack. Try to keep the Scout in your view, and use your own melee/close-range weapons to deal with him. Weapons with knock back effects may prove useful in dispatching your assailant.
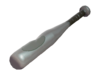 
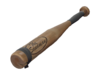
Bat / Holy Mackerel
|
- The Bat deals less damage than most other melee weapons. Just be careful and watch for Scouts who may try to circle-strafe you while attacking with the Bat.
|
Sandman
|
- While stunned, try to stay alive and keep your aim on the Scout so that you can immediately counter-attack once the effect wears off.
- You can still attempt a Taunt Kill if stunned, surprising and killing the Scout.
- A Scout with the Sandman has considerably less health than usual. Use this to your advantage.
|
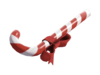
Candy Cane
|
- When equipped with this weapon, the Scout has a 25% explosion damage vulnerability. Switch to an explosive weapon for additional damage.
- With this weapon equipped, enemies killed or assisted in being killed by the Scout will drop small Health kits. Try to steal them before the Scout or his teammates can take them.
|
Boston Basher
|
- Jump away from Scouts rushing forward with the Boston Basher. If you're lucky, the Scout will miss his swing, take damage from the miss, and be distracted by the bleeding effect.
|
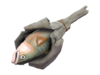
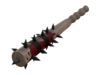
Sun-on-a-Stick
|
- Avoid Scouts using this when on fire, as the Sun-on-a-Stick Mini-Crits on burning players. Stay away from him, and attack him with ranged weapons.
- Try to find a nearby Medic or Health kit to extinguish the fire first before dealing with the Scout, as the Sun-on-a-Stick does less base damage.
|
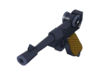
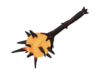
Fan O'War
|
- Stay away from enemies if the Scout marks you with the Fan O' War, as all damage dealt to you for 15 seconds will be Mini-Crits.
|
Class Set

The Special Delivery
|
- Be aware of the extra 25 health granted by the item set, and fight accordingly. The Mad Milk increases the Scout's chances for survival even further, so attack him with as much firepower as you can muster.
|
See also


