Difference between revisions of "Anti-Medic strategy"
Wintergreen (talk | contribs) |
|||
| Line 4: | Line 4: | ||
{{Quotation|'''The Sniper'''|Sorry there nurse, I mistook ya for an actual threat!|sound=Sniper_DominationMedic05.wav}} | {{Quotation|'''The Sniper'''|Sorry there nurse, I mistook ya for an actual threat!|sound=Sniper_DominationMedic05.wav}} | ||
| − | [[Image:MedicHumiliation.png|right| | + | [[Image:MedicHumiliation.png|right|100px]] |
The [[Medic]] moves quickly and has a decent amount of health, but is poor at self-defense, requiring the protection of his healing partner and team to survive. | The [[Medic]] moves quickly and has a decent amount of health, but is poor at self-defense, requiring the protection of his healing partner and team to survive. | ||
| Line 22: | Line 22: | ||
| class="small" align="center" valign="center" style="padding:0.5em" |[[Image:Leaderboard_class_medic.png|40px]] [[Health]] | | class="small" align="center" valign="center" style="padding:0.5em" |[[Image:Leaderboard_class_medic.png|40px]] [[Health]] | ||
| | | | ||
| − | + | *The Medic heals overtime, so remember that while you are after the Medic. He is guaranteed to be in better shape if you leave him alone. | |
|- | |- | ||
| class="small" align="center" valign="center" style="padding:0.5em" |[[Image:Leaderboard_class_scout.png|40px]] [[Speed]] | | class="small" align="center" valign="center" style="padding:0.5em" |[[Image:Leaderboard_class_scout.png|40px]] [[Speed]] | ||
| | | | ||
| − | + | *The Medic is the second fastest class (with buffs), so he will be harder to hit. Take heed of this, and try to take him down using splash damage. | |
|- | |- | ||
| class="small" align="center" valign="center" style="padding:0.5em" |[[Image:Leaderboard_class_soldier.png|40px]] [[Weapons|Power]] | | class="small" align="center" valign="center" style="padding:0.5em" |[[Image:Leaderboard_class_soldier.png|40px]] [[Weapons|Power]] | ||
| | | | ||
| − | + | *The Medic is quite weak when trying to defend himself, but his needles are accurate enough to kill if you remain in a straight line. | |
|} | |} | ||
| Line 36: | Line 36: | ||
A list of useful tidbits about the Medic's tools, and how to counter them. | A list of useful tidbits about the Medic's tools, and how to counter them. | ||
| − | + | ||
===Primary Weapons=== | ===Primary Weapons=== | ||
| Line 57: | Line 57: | ||
*The bolts fired from this crossbow heal the Medic's allies, and a long-range hit can fully heal most classes. Consider taking a shot if it means denying another enemy a quick heal. | *The bolts fired from this crossbow heal the Medic's allies, and a long-range hit can fully heal most classes. Consider taking a shot if it means denying another enemy a quick heal. | ||
|} | |} | ||
| − | + | ||
===Melee Weapons=== | ===Melee Weapons=== | ||
| Line 84: | Line 84: | ||
*The Amputator requires the Medic to taunt to heal his allies. This makes him an easy target, especially for enemy Snipers and Spies. | *The Amputator requires the Medic to taunt to heal his allies. This makes him an easy target, especially for enemy Snipers and Spies. | ||
|} | |} | ||
| − | + | ===Class Set=== | |
| − | ==Class Set== | ||
{| class="wikitable grid" cellpadding="0" cellspacing="0" | {| class="wikitable grid" cellpadding="0" cellspacing="0" | ||
| Line 96: | Line 95: | ||
*The Medic's extra health regeneration allows him to recover from attacks quickly; try to take out an injured Medic before he can recuperate.e. | *The Medic's extra health regeneration allows him to recover from attacks quickly; try to take out an injured Medic before he can recuperate.e. | ||
|} | |} | ||
| − | + | ||
==[[ÜberCharge]]== | ==[[ÜberCharge]]== | ||
Revision as of 03:34, 31 December 2010
 | Notice: Please take a moment to read the Anti-Class Strategy Standard before editing this page. |
| “You are so small! Is funny to me!” This article is a stub. As such, it is not complete. You can help Team Fortress Wiki by expanding it. |
| “ | Sorry there nurse, I mistook ya for an actual threat!
Click to listen
— The Sniper
|
” |
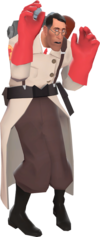
The Medic moves quickly and has a decent amount of health, but is poor at self-defense, requiring the protection of his healing partner and team to survive.
Contents
General
| Attributes | Anti Medic Strategy |
|---|---|
| |
| |
| |
|
Weapon Specific
A list of useful tidbits about the Medic's tools, and how to counter them.
Primary Weapons
| Weapon | Anti Medic Strategy |
|---|---|
Syringe Gun |
|
Blutsauger |
|
Crusader's Crossbow |
|
Melee Weapons
Class Set
| Set | Anti Medic Strategy |
|---|---|

|
|
ÜberCharge
See also
|
