The Spy is a cunningly swift espionage agent bent on stabbing everyone's back. The Spy's primary attack is his backstab ability which allows him to instantly kill any class in one hit from behind. The best defense against a Spy is good observational skills; Spies only have so many ways to infiltrate your team and experienced players can usually detect them if there is little to no combat occurring at the time. When caught, most Spies will try and escape rather than engage in a fight because of their limited attack capability. Keep in mind that Spies have different ways of cloaking and backstabbing, including the ability to fake their own death. Pyros are generally considered the first defense against enemy Spies due to their great Spy checking ability.
General
 Role Role
|
- Spies will usually try to get behind your team with his ability to Cloak and disguise. Check around corners and behind props in order to catch any nearby Spies. If you do find an enemy Spy, alert your team and try to chase him down before he does any damage.
- Disguised Spies will not act like your teammates do. Spy-check often to avoid becoming the victim of an unnoticed enemy Spy.
|
 Health Health
|
- The Spy is quite weak, with only 125 health points. Once he is spotted, he should not be difficult to kill.
|
 Speed Speed
|
- Spies will move at the speed of the class that they are disguised as, unless that class is faster than they are.
|
 Power Power
|
- The Spy is quite weak by himself, but if he passes by undetected, he can kill players instantly with a backstab.
- The Spy has the ability to see the health of enemy players, a smart Spy will use this to pick off weak enemies with his Revolver.
|
Weapon Specific
A list of useful tidbits about the Spy's tools, and how to counter them.
Primary Weapons
- Each Revolver makes its own, distinct sound upon being fired; figuring out the distinctions can help you adapt against enemy Spies.
 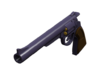
Revolver / Big Kill
|
- The Revolver has a quick firing speed, so move and jump at the same time so you can avoid getting hit.
- Strafing is a good tactic to use here, as you can move over quite a large area without losing aim.
- The Revolver does more damage the closer the target is, so keep your distance, if possible.
|
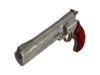
Ambassador
|
- When confronting a Spy with the Ambassador, always move in an erratic way to avoid being hit with his headshots. The weapon requires approximately one second of cooldown in order to perform another headshot; take advantage of this opportunity and kill him before he fires again.
- Most often, a Spy using the Ambassador will act like a Sniper, taking shots at players' heads from a safe distance; keep moving to reduce his accuracy, and work with your teammates to locate him.
- Also like a Sniper, the Spy will likely be heavily focused on scoring a headshot, making him susceptable to ambush.
|

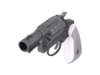
L'Etranger
|
- A Spy equipped with the L'Etranger will gain some Cloak on each hit. Kill him as soon as you see him while avoiding his shots.
- Because the L'Etranger does 20% less damage, a Spy using it is more likely to try a hit-and-run strategy. If he cloaks in mid-battle, spray the area nearby and let your team know.
- If you are shot by a Spy who used the L'Etranger and then lose sight of him, assume that he will try to sneak up on you or your teammates shortly. Warn them, and Spy-check.
|
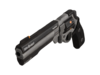
Enforcer
|
- A Spy equipped with the Enforcer must wait an extra 0.5 seconds to cloak; this can make the difference between killing the Spy and losing track of him.
- The Enforcer deals 20% more damage, which can make close combat with a Spy using it rather dangerous; keep moving to deny the Spy a hit, and dispatch him quickly.
|
Diamondback
|
- Similar to the Frontier Justice, The Diamondback will not get crits when the buildings being sapped are destroyed after the Spy that attached the Sappers is killed.
- Protect your Teleporters. Not only will having them destroyed cripple your team's mobility, but their destruction will also give the Spy 2 two free critical bullets.
- Keep in mind that removing an Electro Sapper from one end of the teleporter will remove the one on the other end as well.
|
Secondary Weapons
Sapper
|
- Spies can hold down Mouse1 to repeatedly place Electro Sappers. Kill the Spy before removing the Sappers if no teammates are around to help.
- If you need to leave your Buildings, have fellow Engineers or Pyros using the Homewrecker defend them. The Homewrecker can remove Sappers in one hit.
- Keep an eye on the Teleporters of you and your teammates. Left unguarded, a Spy can place an Electro Sapper on one end and continue to replace those that are removed by the other end, eventually sapping more health that an Engineer can repair and destroying both ends. This can deal a huge blow to your team.
|
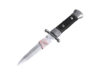
Melee Weapons
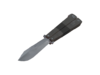
Knife
|
- A backstabbed teammate will let out a death cry, and the kill will be displayed in the kill feed. Turn around and fight the Spy as quickly as possible to avoid being his next victim.
- The Knife is a rather weak melee weapon compared to those of most other classes, so don't be afraid to rush the Spy, as he will usually be too busy fleeing to switch to his gun.
- If a Spy confronts you with his knife, keep your eyes on him. One look away could result in him landing a Backstab.
|
Your Eternal Reward
|
- Unlike the Spy's other melee weapons, Your Eternal Reward does not produce a death cry from its victim and doesn't appear in the kill feed. Be wary of this when travelling in groups as it's easy to fall victim to a chainstab.
- Your Eternal Reward allows a Spy to rapidly disguise as his victim after a backstab, but disables the use of the Disguise Kit, making him more vulnerable after spawning or after attacking. Try to find the Spy early and kill him before he can make that first Backstab.
- If he has already made a successful backstab before approaching you, it can be hard to tell if your teammate is a Spy or not. Watch your back every now and then, attack teammates who approach from behind, and run into nearby teammates; if you can't pass through one, you've just identified a Spy.
- If a Spy kills you or you witness him killing a teammate, be sure to communicate this to your team so they can act. Notify the name of the victim and/or the victim's class. Speaking to your team will likely yield faster results.
- If you change class after being backstabbed, the Spy who killed you would still be disguised as your previous class; if you let your teammates know you've changed class, or if they checked the Scoreboard and encounter you as your previous class, they'll know that they've encountered a Spy.
- A Spy who is using Your Eternal Reward will be forced to rely on their Invisibility Watch more due to their inability to disguise. Listen carefully for the distinctive uncloaking sound - even if you can't see the Spy uncloak, spycheck people near you to be safe.
|
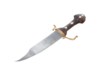
Conniver's Kunai
|
- The Conniver's Kunai reduces a Spy's max health to 60 HP, but it allows the Spy to receive the health of whomever the Spy backstabs - up to an overheal of 180 Hit Points. If he has just left his team's base, he should be relatively easy to kill; if left unchecked, he could become a more formidable foe.
- A Spy who has overhealed through the Conniver's Kunai will appear as such - even if his disguise has lost health. If you see a teammate who looks overhealed but only has full health or less, he is probably a Spy in disguise.
|
Big Earner
|
- The Big Earner reduces the max health by 25, lowering the Spy's maximum hit points to 100. Try to use this as an advantage by engaging the Spy in close combat.
- The Big Earner will earn +30% Cloak on kill. So if a Spy kills you or you witness him killing a teammate and cloaks, notify your team immediately of his approximate location.
|
PDA Weapon
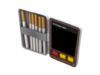
Disguise Kit
|
- Walk into your teammates when possible. Disguised Spies will try to steer clear of you, as they can not pass through you like a teammate would.
- On occasion, fire at and strike teammates when they approach you from behind, lurk near Buildings, and linger in the back of a group. Many disguised Spies will either turn to face whoever is hurting them or attempt to flee, while most actual teammates will continue (or idle) uninterrupted. Pursue the Spy and you should have little difficulty killing him.
- As a Medic, spycheck your next heal target before you actually heal him. You may end up assisting a disguised Spy in killing your teammates.
- As a Pyro, use your Flamethrower on teammates; you may ignite a disguised Spy. Continue burning him, as he cannot escape your reach.
- Throwing Jarate or Mad Milk can mark a disguised Spy. It's best to do so if you need help killing him.
- The Disguise Kit also allows a Spy to disguise as another member of his team, to conceal his presence from the enemy. Always assume that there is at least one Spy on the opposing team.
- Spies can mimic the weapon switching and reloading actions of their disguises. However, they cannot attack, or their disguise is lost. Teammates (even enemies) who do not attack when they should and wield a weapon inappropriate for the situation may very well be a Spy in disguise.
- A disguised Spy can use Dispensers and Teleporters of the opposing team. Move off or stay off of teleporter exits, or you may get telefragged.
|
Cloaking Devices
- Cloaked Spies can be revealed if soaked, burned, or they bleed. Try using Jarate, Mad Milk, Flamethrowers, and melee weapons that cause bleed damage in areas where you suspect a Spy is hiding.
- Emerging from water also compromises a Spy's invisibility. Try chasing a Spy in and out of water.
- The Invisibility Watch and Dead Ringer can be recharged by picking up ammo; Spies can pick up ammo even while they're cloaked. If health kits and ammo boxes are mysteriously disappearing nearby, there may be a cloaked Spy trying to elude you.
- The Invisi Watch and the Cloak and Dagger will show a silohette of a cloaked Spy if he bumps into an enemy or is hurt (even by a fall); if a Spy's silohette is revealed, press against him and/or attack to keep him visible until he is killed.
- Disguised Spies can recieve health and ammo from enemy Dispensers, even while they are cloaked. Check near and on top of Dispensers occasionally.
- If you hear an excessive amount of voice responses near you from an unknown source, check the area around you for Spies trying to spook you while cloaked.
- Spies make a fairly loud, distinct noise when they uncloak. Be sure to scan the area around you if you hear it, and spycheck teammates that appear shortly after the sound was made.
- If you see a Spy disappear, alert your team and tell them (in team-only chat, so the Spy won't notice and flee) exactly where you are. If there are teammates nearby, call for help and spycheck them just in case.
Invisibility Watch / Enthusiast's Timepiece
|
- If a Spy tries to flee with the Invisibility Watch, grab all surrounding ammunition boxes and dropped weapons in order to shorten the cloaking time so that you can catch up to his position.
|
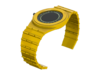
Cloak and Dagger
|
- Spies using the Cloak and Dagger will often wait in corners or secluded areas to recharge their Cloak. Check those areas if you think a Spy is nearby.
- A Spy may also choose to hide near you, yet at a different elevation; anywhere you can reach, a Spy may be lying in wait there to try to catch you off guard.
- The Cloak and Dagger cannot pickup ammo to replenish cloak; while this limits the distance he can travel, it can also make it harder for you to notice a Spy's presence.
|
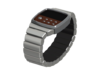
Dead Ringer
|
- The Spy has huge damage reduction while cloaking with the Dead Ringer. Try to isolate and/or out-damage him before he gets away.
- An easy way to follow the Spy is to set him on fire, use Jarate, or use Mad Milk, and follow the trail he leaves, which doesn't disappear on "death"
- When dueling someone, if you are not given a dueling point after they die, then they died with the Dead Ringer activated.
- If you are having a shoot out with a Spy and he suddenly stops firing despite looking at you, he is probably waiting for you to trigger his Dead Ringer. Be extra careful if you're staying in the surrounding area.
- Likewise, when a Spy dies in one hit, you can be very sure you triggered his Dead Ringer.
- If a Scout activates the Cloak with the Candy Cane, the free medikit won't drop. If he uses the Holy Mackerel, the FISH KILL! symbol will not be displayed, instead showing the FISH HIT x1 symbol (unless he primed it after you hit him, then hit him again).
- The Dead Ringer can only be activated when it's fully charged. When a Spy wielding the Dead Ringer uncloaks the charge is at least half-empty, so finish him off as quickly as you can and be sure he doesn't take any ammunition crates.
- Killing a Spy with a primed Dead Ringer will not activate effects on certain weapons, such as the overheal of the Conniver's Kunai, or the quick-disguise of Your Eternal Reward.
|
Class Set
See also
