Difference between revisions of "Anti-Scout strategy"
The Neotank (talk | contribs) (→Weapon Specific: Bleh.) |
The Neotank (talk | contribs) m (→Weapon Specific: I wish to be buried with subst:sp on my gravestone...) |
||
| Line 47: | Line 47: | ||
=== [[Mad Milk]] === | === [[Mad Milk]] === | ||
{{Icon weapon|weapon=Mad Milk|icon-size=100x100px}} | {{Icon weapon|weapon=Mad Milk|icon-size=100x100px}} | ||
| − | If you get hit by Mad Milk, try to retreat or deal with your assailant quickly, as he will have the advantage in a protracted battle. | + | *If you get hit by Mad Milk, try to retreat or deal with your assailant quickly, as he will have the advantage in a protracted battle. |
=== [[Bat]] / [[Holy Mackerel]] === | === [[Bat]] / [[Holy Mackerel]] === | ||
{{Icon weapon|weapon=Bat|icon-size=100x100px}}{{Icon weapon|weapon=Holy Mackerel|icon-size=100x100px}} | {{Icon weapon|weapon=Bat|icon-size=100x100px}}{{Icon weapon|weapon=Holy Mackerel|icon-size=100x100px}} | ||
| − | The Bat deals damage more slowly than most other melee weapons. Just be careful and watch for Scouts who may try to circle-strafe you while attacking with the Bat. | + | *The Bat deals damage more slowly than most other melee weapons. Just be careful and watch for Scouts who may try to circle-strafe you while attacking with the Bat. |
=== [[Sandman]] === | === [[Sandman]] === | ||
| Line 67: | Line 67: | ||
===[[Item sets#Scout|The Special Delivery]]=== | ===[[Item sets#Scout|The Special Delivery]]=== | ||
[[File:Backpack Scout Bundle.png|100px|The Special Delivery]] | [[File:Backpack Scout Bundle.png|100px|The Special Delivery]] | ||
| − | Be aware of the extra 25 health granted by the item set, and fight accordingly. The Mad Milk increases the Scout's chances for survival even further, so attack him with as much firepower as you can muster. | + | *Be aware of the extra 25 health granted by the item set, and fight accordingly. The Mad Milk increases the Scout's chances for survival even further, so attack him with as much firepower as you can muster. |
== See also== | == See also== | ||
Revision as of 23:55, 28 December 2010
| “You are so small! Is funny to me!” This article is a stub. As such, it is not complete. You can help Team Fortress Wiki by expanding it. |
| “ | Never send a boy to fight a man's war.
Click to listen
— The Soldier
|
” |
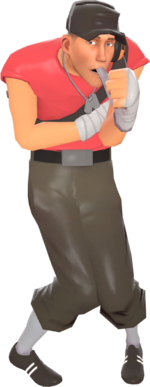
The Scout is a fast, jumping recon who can deal fast, powerful hits and run away, but he has a poor amount of health and can easily be separated from his teammates.
Contents
General
- Always think one step ahead of the Scout before attacking. He is much faster than the other classes.
- His tiny amount of health means he can be easily be killed with a rocket or grenade.
- When a Scout is airborne, wait until his double-jump is exhausted before attempting an airshot.
- Try to predict where the Scout will land when using projectiles such as Rockets.
- If you land a direct hit on a Scout with the Rocket Launcher, switch to your Shotgun to finish him off and save primary ammunition.
Weapon Specific
A list of useful tidbits about the Scout's toys, and how to counter them.
Scattergun
- The Scattergun has more damage ramp-up at close range than other weapons, so it may be best to keep Scouts at mid range.
- The Scattergun is much less effective if few pellets hit its target. If a Scout is attacking you, jump around and move erratically to minimize the damage that you take.
Force-A-Nature
- The Force-A-Nature has only two shots to a clip and takes a while to reload. Take advantage of this and attack the Scout while he's helpless.
The Shortstop
- Getting really close to the Scout when he has this weapon will impede him due to the lesser damage ramp-up.
- The Shortstop has a tight spread suited to medium range. If you close the distance, the Scout may find it more difficult to out-damage you.
Pistol / Lugermorph
- When a Scout uses his Pistol, his primary weapon may be out of ammo. Move in and attack, as the Pistol is less effective at close range.
Bonk! Atomic Punch
- Bonk! is designed to get a Scout past choke points. Impede his movement with a compression blast or by juggling until the effect runs out.
Crit-a-Cola
- Crit-a-Cola is excellent for ambushing; however, if you are watchful, then the attacking Scout's advantage will disappear.
Mad Milk
- If you get hit by Mad Milk, try to retreat or deal with your assailant quickly, as he will have the advantage in a protracted battle.
Bat / Holy Mackerel
- The Bat deals damage more slowly than most other melee weapons. Just be careful and watch for Scouts who may try to circle-strafe you while attacking with the Bat.
Sandman
- While stunned, try to stay alive and keep your aim on the Scout so that you can immediately counter-attack once the effect wears off.
Candy Cane
- When equipped the Scout has a 25% explosion damage vulnerability. Soldiers and Demomen can take advantage of this and kill Scouts with one shot.
Boston Basher
- Jump away from Scouts rushing forward with the Boston Basher. If you're lucky, the Scout will miss his swing, take damage from the miss, and be distracted by the bleeding effect.
The Special Delivery
- Be aware of the extra 25 health granted by the item set, and fight accordingly. The Mad Milk increases the Scout's chances for survival even further, so attack him with as much firepower as you can muster.
See also
|

