The Scout is a very fast, maneuverable class that packs a high amount of firepower at close range, making him extremely effective in one-on-one combat. He excels in open environments, where his speed and double jump allow him to easily maneuver around a map, close long distances, and ambush the most vulnerable enemies. He can use his mobility to completely avoid damage, more than making up for his lack of health. Depending on his loadout, a Scout can bring along weapons with additional utility that help him pick off individual targets with even more ease. If you can restrict a Scout's manueverability, you can easily dispose of him. Sticking with your team will also limit an enemy Scout's success against you.
General
 Role Role
|
- A Scout carrying the intelligence will likely try and avoid direct combat on the way back to his base by taking a quieter route or one better suited to his double-jump abilities. Try to block these routes or use weapons with a knockback effect to push him towards your teammates.
- If a Scout is trying to ambush an unsuspecting ally, always warn the ally in order to fend off or eliminate the Scout.
|
 Health Health
|
- His tiny amount of health can be nearly (or even completely) depleted with a hit from a rocket or grenade.
- If a Scout has been severely injured, switching to a hitscan weapon may help you finish him off and/or conserve ammunition.
|
 Speed Speed
|
- Always think one step ahead of the Scout before attacking; he can run more quickly than the other classes.
- Try to predict where the Scout will land when using projectiles. If he is airborne, wait until his double-jump has been exhausted before trying to land airshots.
|
 Power Power
|
- The Scout is quite devastating at close range with his primary weapons, so try to fight the Scout at mid-to-long range in order to avoid taking large amounts of damage.
- Less experienced Scouts tend to overcompensate when turning to aim at you while running in circles. Sometimes you can stand in one place while firing and the Scout will fire bullets around you.
- Engaging a Scout in close quarters can be risky, as he can deal large amounts of damage, but he now less room to move around. Take advantage of this before he does.
- A class which deals splash damage can often take less damage from it's own attacks than a Scout, making spamming rockets or stickies a viable strategy. However, this is often compensated for by the Scout's mobility and can end up easily backfiring.
|
- In open spaces, it is best to avoid combat with the Scout altogether. Wide open areas are their natural environment, and they can take down many enemies here with little trouble. If you are forced into combat here, your best bet is to bait the Scout into going where you want him to - run round corners calling for Medic, and jump out, or if you have an explosive weapon, shoot it to one side to herd him into an enclosed space.
- The Scout is extremely frail, even under the influence of the Milkman's set bonus. Two point blank direct hits from the Shotgun alone can put down a Scout. Remember, the Scout's main ability is that he can pick and choose his fights- unless you are certain of victory, do not attempt to pursue a Scout, as he can run away a lot faster than you expect. Utilise splash damage from explosives, or the Pyro's airblast to control the Scout's movement - unless of course, you yourself are a Scout, in which prioritise on your own movement. Jump around and be difficult to hit, make sure the Scout has a hard time locking onto you. For fighting other Scouts, it is best to completely disregard the Force-A-Nature, as the weapon's small clip means it is very difficult to kill an enemy.
Primary Weapons
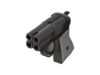
Scattergun
|
- The Scattergun deals immense damage at point-blank range and will allow a Scout to stay in combat for a modest amount of time. Although he is faster than you, do your best to stay at medium range to minimize the damage you may take while trading blows.
- It takes considerably longer for a Scout to reload his Scattergun than it is for him to fire it; if he uses most or all of his six shots, keep pressuring him into firing his gun so he cannot fully reload, severely reducing his rate of fire.
|
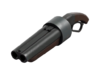
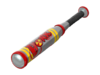
Force-A-Nature
|
- The Force-A-Nature deals even more damage than the Scattergun up close, but must be reloaded every two shots. If the Scout insists on staying in close combat, pick him off during his frequent reloading periods. Its knock back effects let him easily reposition or disorient you for a follow-up shot, so avoid lingering near walls or field hazards where you can quickly be cornered.
|
Shortstop
|
- Unlike the Scattergun, the Shortstop has a tight bullet spread suited for medium range. By closing the distance, the Scout may find it more difficult to hit you.
- Because the Shortstop and the Pistol draw from the same ammuntion, it is highly unlikely that a Scout will use both, giving him one less weapon to attack you with.
|
Soda Popper
|
- Like the Force-A-Nature, the Soda Popper must frequently be reloaded, which will often leave the Scout vulnerable. You’ll need to quickly eliminate a Scout with a full Hype charge, as his speed ensures that you won’t be able to escape from his Mini-Crits.
- In exchange for the Hype bonus, the Soda Popper cannot randomly crit, making close combat slightly less dangerous.
- Keep in mind that the Mini-Crit bonus applies to all the Scout's weapons, not just the Soda Popper.
- A Scout with the Soda Popper will often almost completely fill his Hype meter, then switch to another weapon to stall it until he reaches the enemy, to control when he gets his Mini-Crits; try to ambush him as he makes his way to your team.
|
Secondary Weapons
Pistol / Lugermorph
|
- While the Scout might use his Pistol to harass you from a distance, its damage is minor. Keep a distance from him to take advantage of his weak long range capabilities.
- The Scout does not carry a lot of ammuntion for the Pistol; he can only fire 4 clips before it's completely empty, and they are used up quickly. If you keep your distance and dodge his shots, and he'll soon have to resort to another weapon.
|

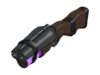
Bonk! Atomic Punch
|
- Bonk! Atomic Punch is designed to help a Scout get past dangerous areas, such as chokepoints or Sentry Gun nests. He can’t fight while under its effects, so impede his movement by body blocking or using knock back.
- A Medic with the Ubersaw may find blocking a Scout under the effects of Bonk! Atomic Punch beneficial; though hitting the Scout deals no damage, 25% Ubercharge is still gained.
- A Scout may use Bonk! Atomic Punch to defend a capture point or a cart; have Pyros, Soldiers or Demomen blast him off the point before his reinforcements arrive.
|

Crit-a-Cola
|
- While Crit-a-Cola will allow a Scout to deal Mini-Crits to you, you can deal Mini-Crits right back at him. He’ll often consume it when preparing for an ambush, so stay alert and pick him off first.
- A Sniper could try hitting a Scout who has consumed Crit-a-Cola with the Bushwhacka, which would turn the Mini-Crit into a fatal critical hit.
|
Mad Milk
|
- The healing provided by Mad Milk will let an accurate Scout stay in a fight for a prolonged period of time. If you’re covered by it, you’ll either need to retreat or take him out very quickly.
|
Winger
|
- The Winger is similar to the Pistol, but its increased damage makes it slightly more effective at both harassment and finishing enemies off. It only has 5 shots compared to the Pistol's 12, so try dodging a Scout's shots and then attacking him as he reloads.
|
Melee Weapons
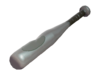 
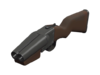
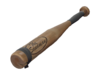
Bat / Holy Mackerel
|
- A Scout that insists on using the Bat/Holy Mackerel can easily deal more damage at close range with any of his primary weapons, actually giving you a slight advantage in melee combat.
- However, he may compensate by circling and jumping around you erratically as he strikes you; try to keep your aim on him, and move to where he has less manueverability.
- If your team has good communication, you can easily locate a Scout that hits one of you with the Holy Mackerel.
- As a Spy, take caution activating the Dead Ringer if you are struck by the Holy Mackerel; the kill feed will show how many times you were struck by it instead of showing "FISH KILL!".
|
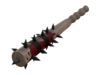
Sandman
|
- The Sandman makes a distinct batting sound when hitting a stunball; if you hear it nearby, stay alert.
- If you are stunned by the Sandman's baseball, retreat towards your teammates so that they can protect you. Keep your aim on the Scout so that you can immediately retaliate once the effect wears off.
- If a stunball flies far enough, it will completely stun you, preventing you from moving; try sticking with your teammates just in case this happens, as being alone makes you absolutely vulnerable.
- A Scout may, out of jest or desperation, use the Sandman's taunt kill to ambush careless, unsuspecting enemies; be careful turning a blind corner in enemy territory, especially after you've won a round.
- A Scout may taunt with the Sandman after drinking Bonk! Atomic Punch, making him invulnerable while he performs it. Approach him from anywhere but the front, and attack once the effect ends.
|
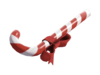
Candy Cane
|
- If possible, switch to an explosive weapon to take advantage of the increased explosive vulnerability a Scout wielding the Candy Cane is penalized with. Try to steal the small health kits dropped by teammates that the Scout aided in killing.
|
 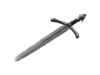
Boston Basher / Three-Rune Blade
|
- Continuously evade a Scout that is attacking you with the Boston Basher/Three-Rune Blade so that he damages himself.
|
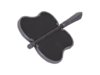
Sun-on-a-Stick
|
- The Sun-on-a-Stick does less base damage than the standard Bat. If you are set on fire, you should always be trying to extinguish yourself, retreating from any Scout that may try to pick you off.
|
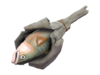
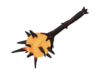
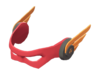
Fan O'War
|
- If you are marked by the Fan O’War, the Scout will likely try to chase you down with his primary weapon. Adjust your one-on-one tactics to his chosen weapon accordingly, and try to move to where your teammates are so they can help.
- A Scout that has marked you with the Fan O'War may also let his teammates finish you off; leave the battlefield while teammates cover your retreat until the mark wears off.
- A Scout can only mark one target at a time, which can prove inconvenient if the target becomes inaccessible for the duration.
|
Atomizer
|
- While a Scout might never use the Atomizer in actual combat, the triple jump greatly increases his mobility. Performing the third jump costs 10 HP, however, which can expedite killing him.
- The more damaged the Scout is, the less likely he'll use the Atomizer's third jump out of fear he will be killed faster or he will kill himself performing it.
- If you see a Scout with the Atomizer trying to retreat, try dealing damage to him, even if it's minimal; he may kill himself triple jumping.
- The Atomizer can also use the Home Run taunt, so be careful not to be ambushed at blind turns.
|
Item sets
|
The Special Delivery
|
This item set increases the Scout's survivability, particularly in large firefights. A Scout using this set is best keeping a moderate distance, where he can readily harass enemies with both the Shortstop and Mad Milk. He is restricted to only using the Shortstop as a strong source of damage, so close the distance, where he may find it more difficult to hit you.
|
|
The #1 Fan
|
This item set builds on the Scout’s amazing one-on-one prowess. React to the individual weapons, particularly the Soda Popper’s Hype and the Atomizer’s triple jump, accordingly.
|
See also
