團隊策略
| “ | 好個大開殺戒... 被別隊大開殺戒啦!
點擊試聽
— 火箭兵不恰當的團隊策略。
|
” |
在 Team Fortress 2 裡,若是每個人都各打各的,根本沒辦法和敵隊抗衡,更不可能憑一己之力阻止敵方。和自己隊伍中的其他職業合作是邁向成功重要的一環。這篇文章裡列的「團隊策略」將可協助你和你的隊伍進行任務。若想改善自己的單兵技術,可以參照策略頁面。查看地圖列表中各個地圖的頁面以得到每張地圖中可運用的策略。
內容
通用策略
溝通
因為 TF2 裡沒有內建小地圖,且又是職業導向的遊戲,良好的溝通和合作便是達成勝利的關鍵元素。隊伍內各個玩家的協調以及職業的均衡總是影響了隊伍是否能得勝。若不看單兵技巧,溝通是這款遊戲的玩家最重要且需要學的技巧。無論是藉由語音通訊或是內建語音指令,只要是有著良好溝通與默契的隊伍一定能輕鬆擊敗沒有良好團隊合作的高手玩家。有效率的團隊溝通及協調更是競技取向遊戲必備的要素。
語音指令和文字訊息都是用來溝通的好方法;然而遊戲中有許多音效,發出語音指令玩家的位置也不一定能讓隊友聽到,何況有些隊友可能不會注意到文字訊息,因此使用麥克風會是比較值得信賴的溝通手段。舉例來說,偽裝過的敵方間諜、敵方步哨防禦槍陣和黏彈陷阱等的位置,以及發動 ÜberCharge 進攻的時機(無論是敵方或己方)都很難不用語音通訊進行。
然而,有些伺服器會使用 Alltalk 指令,讓全伺服器的任意玩家都能聽到其他玩家的語音通訊,包括敵隊成員,因此最好將這點謹記在心。在這種情況下,若要傳遞重要訊息最好改成用私頻打字溝通,否則敵方會根據所聽到的己方語音通訊內容做好應對措施並反擊。大部分的公開伺服器都會啟用 AllTalk,好讓遊戲過程變得較能讓所有玩家不論隊伍地進行社交互動,而非讓玩家以嚴肅的競技心態進行遊戲。
隊伍組成
Team Fortress 2 是一款以特色各異的職業為基礎的團隊遊戲,隊伍中的玩家必須互相合作並協調以獲勝。九種不同的職業各有他們的職業策略、弱點以及獨特的打法,並據之將自己的長處發揮至極限、且能將自己短處的影響降至最低。然而,任何一位玩家都不可能僅以高超的技巧來完美地補償他所扮演的職業的短處。雖然一個玩家的技巧可能比其他的更不純熟,但他還是可以在自己的職業佔有特定方面的優勢時在遭遇戰中擊敗對手(例如一個初心者火焰兵可以輕易用火焰傷害擊敗一個老手間諜)。這點讓選擇何種職業成了非常重要的課題,也可以讓玩家從遊戲中了解不同職業的特色而受益,同時也讓合作益顯重要。你可以把這些特色想像成複雜的猜拳遊戲。
許多新手可能會有一個錯誤觀念,就是只顧著鑽研他們喜愛扮演的職業,並只想到在一對一遭遇戰時有哪些可用的策略,完全忽視了這款遊戲強調的「團隊」元素。然而,TF2 裡的大多數遭遇戰都是包含幾種不同職業的數個小隊間的混戰。因此,若想取勝,玩家必須以團隊合作為基礎來思考與行動,而不是只顧著單兵作戰。這包含了時常注意己方與敵方的隊伍有著哪些職業,也就是要隨時注意雙方的「隊伍組成」。藉由讓隊員多選幾種能夠抵抗敵方隊伍組成的職業較有可能讓己方隊伍獲得優勢(例如,使用爆破兵和醫護兵的兩人小組,來對抗敵方的工程師海及他們的步哨防禦槍陣)。然而,也不要矯枉過正,搞得整個隊上全都針對性地換成某個特定職業(例:屢次受敵方間諜騷擾之苦的隊伍裡的隊員們為了給間諜一點顏色瞧瞧而通通換成了火焰兵,但此舉有可能反而因換成火焰兵而出現其他職業空缺,暴露出本來沒有的弱處,像是一堆火焰兵遇到重裝兵便較難以招架)。最理想的便是每隔一段時間就查看計分板,持續追蹤自己隊伍的組成狀態,並據此給予隊上調整職業的建議。但記得如果狀況需要你換職業的話,也不要吝於更換,以利團隊作戰。
練習
精通多種職業總是好過只懂一種職業的玩法。了解你扮演的職業的強處與弱點讓你能知道何時該換成其他職業。另外,同時也要了解其他職業所扮演的各種角色:像是在情報地圖中,要求隊上唯一的工程師換成醫護兵來協助己方推進敵方據點好奪得敵方情報並不算是個好主意,因為在情報地圖中,防禦自家情報和奪得敵方情報是一樣重要的。總的來說,與其在那邊哀哀叫說「怎麼沒人玩醫生」,不如就你自己換醫生吧,除非你現在在隊上是扮演著左右著戰局的關鍵攻擊/防守角色。
另一方面,試圖專精每個職業也不是個好主意;至少,在你玩上一年左右讓自己資歷夠深以前這不是什麼好主意。這不僅是個非常困難的任務,在遊戲進行中扮演自己不會玩的職業也很容易扯隊伍的後腿,很難給隊上幫助。倒不如專精兩、三種職業,然後「略懂」另外兩、三種職業就夠了。如此一來比較能幫上隊伍的忙,且也能應付大部分的狀況,而不是當個樣樣懂卻樣樣不精通的傢伙。
試著找出符合你的遊戲風格的戰鬥策略,並練習使用能夠符合這些策略的職業。舉例來說,並非所有人都能玩好間諜,或有著夠穩定的槍法來狙擊手。有些玩家覺得自己比較適合在後勤部隊活躍,為自己的隊伍從後方進行援助;有些玩家覺得自己對於從一段距離外解決敵人較為拿手;還有一些玩家認為自己天生是塊近接戰的料。找出你的長處,發展能夠讓自己技巧進步的玩法與策略並精通之。你最需要練習增進技巧的職業是那些玩得還算可以但不精通的職業。如果你覺得自己一直抓不到某個職業的手感,那就別勉強自己練習該職業,先把那些你玩得好和技巧還可以的職業練熟吧。
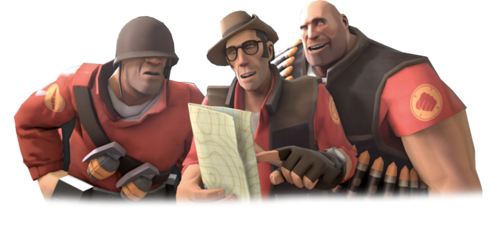
職業
Team Fortress 2 的遊戲主旨是以九種不同的職業和敵我間的互動構成的。即使你只玩其中的一兩種職業,了解遊戲中每種職業的定位與功能還是相當有幫助的。每種職業都有決定了自身長處和短處的獨特屬性能力:生命值、移動速度、武裝和一些固有能力(像是醫護兵的自動回血或偵查兵的二重跳躍等能力)。這個章節將各種職業分成幾種不同的類別,旨在告訴各位各種職業間可以如何合作並藉由互助而變得比獨自作戰更為強力。
註:下述的分類和 Valve 給的官方職業分類-攻擊組、防守組和支援組不同;這些分類是用來突顯職業的策略和玩法相似處,讓玩家能不被官方的職業分類侷限住玩法。
分組 1 - 一般戰鬥職業
- 特徵:這個分組內的成員大都著強大的火力、存活能力、或機動性,某些情況下還能同時擁有這幾種強處。除了偵查兵以外,這個分組的成員不需要過量治療便有著 175 - 300 的生命值區間,同時也因為他們裝備的主要武器的高傷害輸出和較常出現在前線等緣故成為 ÜberCharge 的主要對象。這個分組的另一個特徵便是幾乎每個人都有能夠妨害敵方行動的武器及能力,諸如重裝兵的娜塔莎、偵查兵的自然之力和睡魔、火箭兵和爆破兵用火箭與黏彈的半空制敵能力、以及火焰兵的壓縮氣爆。這些能力也有著(在沒有傳送裝置的時候)能增加行動力的情況。這五種職業都是一重生就隨時可以投入戰鬥,並不太需要特殊的攻擊/防守位置或準備時間。
- 在團隊上的角色:這五種職業是大部分隊伍的主力,並能在前線以最強大的火力直接交戰。這個分組的職業一般而言是負責打前鋒進攻敵方領土並確保任務目標,在情況允許時做最具侵略性的攻擊。這些職業的貢獻取決於死前造成的傷害以及殺敵數的多寡。他們在一對一遭遇時通常能存活下來,也因此一個完全只由分組 1 成員構成的隊伍不會有什麼致命的缺陷,且在短時間內的表現都很不錯,但若遇到過強的防禦便會造成長時間僵持的交火卻無法突破防線。這時候分組 2 和分組 3 的幫助便顯得重要了。這個分組的成員還有一個重要的職責,便是保護其他職業,特別是支援型的職業:只有在醫護兵和工程師存活時才能真正地幫助到隊友,而分組 1 和 3 的敵對成員會持續且針對地對這兩種職業當成首要目標。雖然工程師負責建造並維護建築,但這些建築能幫助整個隊伍,因此請將它們當成「公共財」來好好保護它們。盡可能把醫藥包和彈藥箱留給這些支援型職業便是其他職業對他們最好的支援動作。
砲擊組

- 強項:這兩種職業都有造成高傷害的潛力、能進行遠距攻擊、職業功能較有彈性、機動性高,同時持有相似的武裝。火箭、黏彈和榴彈都是能造成同時傷害數名敵人的擴散傷害的高傷害彈藥。這些武器,特別是爆破兵的武器,是遊戲中唯一稱得上間接攻擊的武器,能夠在和目標間沒呈一直線的情況下傷害並殺死目標。這同時讓火箭兵和爆破兵擁有了「射後不理」的能力,讓他們能有效活用掩護來將他們已經夠難纏的火力壓制變得更令人頭痛。他們也精通炸掉工程師的機槍陣地。同時,兩者也都有著以犧牲少許生命值為代價來快速進行能移動相當程度的距離與高度的跳躍,讓他們能以意外的角度突襲並進行毀滅性轟炸,或是在戰況不利時快速脫逃用。
- 弱點:儘管砲擊組本身沒有明顯的弱點,他們的武器還是有著一些缺點的。火箭兵和爆破兵都很容易因為對近處開火而把自己炸死。而且最重要的是這些「發射器」類的武器都有著較小的彈匣和較長的彈藥裝填時間。管理重新裝填的時機便是扮演砲擊組的重點技能:無腦扣扳機很可能會害死自己。在沒有其他援助的情況下,在固守據點並抵抗源源不絕的敵軍時進行裝填彈藥的話問題就大條了。同時很重要的一點是,爆破投射體在發射後在擊中目標前都有飛行時間。不管你發射的時候瞄得再準,在中距離或遠距離外的敵人還是可以輕鬆閃躲這些爆裂物的。
- 職責:對中距離的敵人製造大量傷害,將敵人逼出掩體外並轟炸步哨防禦槍,以及給喜歡聚在一起的敵人一點苦頭;也因此這兩個職業常常被說太過 IMBA。然而在任何情況下,製造穩定的傷害輸出是他們的主要職責所在,否則敵人還是可以毫無顧忌地堅守或進攻。但除此之外,火箭兵和爆破兵的主要強處便是他們沒有其他職業有的明顯弱點。
近接戰組
- 特色:雖然他們也屬於「一般戰鬥職業」的分組 1,近接戰組的成員卻有幾個不同之處。也就是說,和砲擊組比起來他們有著較多的明顯強處、但同時也有著明顯的弱點。也因此他們分別有著特別的職責,像是間諜檢查和獨自達成任務目標。重裝兵有著全職業中最高的生命值,但也是移動速度最慢的職業,特別是在開火時。火焰兵在近距離-特別是近距離突襲-時的殺傷力最為可怕,但反過來說他們在中、遠距離的傷害表現便不理想,而且如果不用出奇不意攻擊的方式所造成的威脅也不高。偵查兵則是速度最快的職業,但也是分組 1 中生命值最低的職業。這三種職業都可以隨著時間經過造成更大的傷害,但要達成這點則必須:(1)以近距離交戰,和(2)與目標間沒有障礙。這代表了他們可以輕易造成大量傷害,但也可能受到大量的傷害,因此他們必須要了解一些職業專屬戰術來提升存活率。對火焰兵來說,他必須先埋伏並趁敵方分心時攻擊;偵查兵則是必須利用他的高機動性來閃避敵方攻擊;重裝兵則是必須倚靠分組 2 的治療與傳送能力好提早上戰場並存活久一點。而近接戰組只能發動直接攻擊的特點也讓他們在對付步哨防禦槍時的效率比砲擊組低些。火焰兵是隊上進行間諜檢查最有效率的職業,他的火焰能輕易揪出隱形中和偽裝中的間諜。火焰兵和重裝兵的主要武器(火焰放射器和格林機槍)也有著不需要重新裝填彈藥的特性,所以他們可以持續開火,直至彈藥用盡。這點可以讓他們對其他隊友在敵人源源不絕湧進的持久戰中提供相當有效的支援。這同時也讓重裝兵和火焰兵成了理想的 Übercharge 對象,因為他們可以讓無敵時間發揮最大的效益。
- 職責:近接戰組很容易就被敵方的步哨防禦槍陣圍攻而動彈不得。若隊伍太過依賴近接戰組的話很可能難以破解很龜或防守中的敵陣。不過一旦機槍陣被破解後,他們就可以自由地進入敵方陣營大肆破壞了。近接戰組也是保護己方支援型職業的理想人選:工程師有火焰兵搭檔便幾乎無懈可擊了,而火焰兵和重裝兵在也是醫護兵的合作理想人選。近接戰組也能打得沒有足夠醫護兵或工程師機槍陣的隊伍叫媽媽。若沒有足夠的醫療資源,火焰可以以餘火造成相當大的傷害,且瞄準能力佳的重裝兵和偵查兵發射的「即時命中判定」的子彈也能快速削減敵方生命直,且相當難以閃躲。最後,這三種職業在達成各種任務目標也都相當有用。重裝兵有足夠的能力死守掉落的情報、己方控制點和彈頭車,並能輸出持續的火力壓制。 火焰兵的能力讓他們可以讓間諜不敢靠近任務目標,並能用壓縮氣爆來吹走敵人,阻止他們接近任務目標物件。偵查兵則是能用他天生的快速度和較快的佔領速度來比其他職業更快速的達成任務目標。
分組 2 - 支援組
- 共通特點:By far the most team-oriented classes, the Engineer and Medic are the only classes that can provide reliable healing to their allies, often several at once, greatly reducing team losses due to simple attrition. For this reason alone, almost any team of any size greater than one on any map will benefit from having at least one support class, however the usefulness of the support classes increases as team size increases. They largely lack powerful combat abilities of their own, having low hitpoints (125-150) average mobility and weak ranged weaponry, and therefore must contribute to their team's success through their support skills. These skills are very powerful however, and have a huge impact on the game – Medics and Engineers are much more than simply glorified Health and Ammunition pickups for the other classes. The Engineer's support skills take the form of his Buildings, while the Medic's take the form of the ability to provide overhealing buffs to multiple teammates, and the game-changing ÜberCharge. For both classes, bringing these assets to bear in a game takes time – both Übercharges and fully upgraded Buildings can take quite some time to reach their full potential, often a minute or more of game time. In a game as fast-paced as Team Fortress 2, that's a small eternity. Many game-types have a Setup time to accommodate the support classes and allow them to contribute at full power right from the beginning of the mission. Good Engineers and Medics will do everything they can to speed up the process of building their Übers and buildings. The long "build" times of the Medic and Engineer define the success of their gameplay in terms of their own survival and not in getting kills. Both classes must play very cautiously to avoid death, to survive long enough to provide Übercharges and maintain buildings. A support class who dies at a critical moment can cost their team victory.
- 職責:Providing healing and resupply to allies in the field, reducing team losses due to attrition, and allowing teammates to hold positions while under constant enemy pressure, or apply constant pressure of their own. Sentry Guns and overhealed/invulnerable teammates are very good at absorbing and shrugging off damage. Support is given to any and all teammates, but is most effective when given to the general combat classes of Group 1 who will usually take the brunt of enemy attacks, and often die and need to return to the battle quickly upon respawning. Medics and Engineers can support each other quite effectively as well and should do so whenever the opportunity arises. For example, Medics can provide Übercharges to allied Kritzkrieg Medics or Engineers under heavy fire, while Engineers can repair, build, and upgrade the Buildings of other friendly Engineers. The support classes need to watch out for the attacks of enemy Group 3 classes, the Sniper and Spy, since they are often the priority targets of these enemies. Help from Group 1 and 3 is often necessary to stay alive. Finally, the support classes can break the back of the enemy team on the attack or ensure a successful defense of an objective through a well executed Übercharge or well-placed Sentry Gun. In terms of team composition, an reliance on a large number of support classes is almost never a good idea. While they can provide very powerful support abilities, Medics and Engineers themselves don't actually fight all that well, and every player who plays a support class is not playing a class that can fight off the enemy, and increases the burden proportionately on the smaller number of teammates who are playing a class from Groups 1 or 3. Engineer or Medic heavy teams can also be a dream come true for enemy Snipers and Spies, whose skills are quite capable of countering the support classes. The power of the support classes is their ability to help out a large number of their teammates easily, and to take fullest advantage of this it is wise not to have too many team spots devoted to Support.
分組 3 - 暗殺組

- 特色:While both possessing similarly low Health (60-150) and average movement speed, the most obvious similarity of these two classes is their shared ability to instantly kill any opponent with a single attack, largely regardless of target health. They both rely on good positioning, skillful aim, and patience to get their kills. While the success of the Group 3 classes is also to some extent measured by how many enemies they kill before they themselves die, unlike Group 1, who they kill is usually more important than how many. A Spy that reveals his position and sacrifices his life to stab an enemy Soldier is of questionable value – but taking out an enemy Medic with full Über can be game-changing and is well worth dying for. Both the Sniper and Spy avoid the front lines due to their low health, and instead operate behind the lines – the Sniper behind his allies' lines, and the Spy behind his enemies'. Both classes are also better than any other class at picking off opponents who are trying to hide behind their allies, such as Medics.
- 職責:Precision elimination of key enemy targets. These can be very talented enemy players that your team is having trouble with, or they can be resilient targets such as Heavies, or they can be high value targets such as Medics and Engineers. The assassin classes are at their most valuable at countering the influence of the Group 2 support classes. Headshots and Backstabs can cut right through the healing and overhealing of Medics and eliminate Engineers hiding behind their Sentry Guns. The Spy in particular is designed with the ability to disable and destroy Engineers and their buildings. The support classes also try to stay alive at all costs so that they can build up their power and provide constant benefit to their team. Death is a much bigger setback to Engineers and Medics than it is for any other class, and the assassins from Group 3 are sometimes the only classes capable of killing them even when they are surrounded by formidable defenses. The Sniper and Spy also tend to end up locking horns with their counterparts from Group 3 due to where and how they fight. The ability to pick off key enemies can break stalemates, and the psychological effect of Snipers and Spies can split the concentration of enemies and make them reluctant to push forward. The ability of Spies in particular to attack enemies in areas where they expect to be secure can have a huge overall impact on enemy defenses. A team with very effective Snipers and Spies, if left unchecked, can easily run away with a game. However there are several reasons why having too many of Group 3 classes on a team is a very bad idea. Snipers and Spies operate "behind the lines" or at arms length and rely on not being the immediate target of the enemy to kill distracted players who are not expecting them. However, not having enough general combat classes means the enemy team will be less occupied and much more able focus on eliminating Snipers and Spies. Not only that, but having a lot of Spies quickly becomes counterproductive as the enemy team becomes aware of it. One Spy that still has the element of surprise is much more effective than several that are constantly getting discovered and killed. If you are playing as the Spy or Sniper and not having a very good day, it may not be your fault. It may be the fault of your team's composition.
職業專屬策略
參見下方。
團隊戰術
These are strategies in Team Fortress 2 that most players should learn and understand to help their team achieve victory. Using these in combat will allow your team to possibly have an advantage in a match.
- Find alternate routes and use them to get behind the enemy, but keep in mind how much extra time this will take. Do not take the same flanking route too often to avoid becoming predictable, as the enemy will quickly learn from their mistakes and anticipate your strategy.
- Wait around corners and surprise your enemy. Your team could wait around corners and ambush any enemies that walk by as a defensive or offensive tactic.
- Communicate with your Medic buddy. Try not to waste your ÜberCharge, but remember that it is better to spend your charge and survive than to die with a charge ready. Have a plan for what you will do when ÜberCharged.
彈幕
- 概觀: An advancing push involving heavy usage of explosives by Artillerymen to clear the way for the rest of the team.
- 細節: Demomen and Soldiers will continually blast explosives into an area to make it a no man's land in order for the opposing team to lose ground. Normally, close combatants will follow the barrage by moving into the cleared area and holding it. The Demomen and Soldiers will continue to spread out across the intended area to ensure it is all cleared.
連續 Über 推進
- Overview: A series of ÜberCharges which are used to clear an area.
- Details: Two or more Medics will build up separate ÜberCharges. The first Medic activates his charge and enters the area; after 9 seconds, the second Medic follows in suit. If the situation turns for the worst, the second Medic will follow immediately and take advantage of the distraction provided by the first ÜberCharged pair. The second Medic will proceed to move deeper into enemy territory before activating the second charge. Communicating who will ÜberCharge first is key.
雷區
- Overview: A series of stickybombs over an open area laid by Demomen.
- Details: Several Demomen will spread out a carpet of Stickybombs over an open area in sequence. When attackers push forward, they will detonate each set of Stickybombs at certain key points to kill multiple waves of attackers. It is important that the other Demomen wait for the previous set to be detonated before detonating the next set. Using the Scottish Resistance makes this strategy more efficient, easier to pull off, and somewhat lessens the need for multiple Demomen since a single Demoman can have up to 14 stickies and selectively detonate them.
協調步哨癱瘓
- Overview: The sapping of Sentry Gun emplacements to enable an attack by teammates by Spies.
- Details: Team of Spies will conjure together to sap Sentry Gun emplacements just before an offensive push which enables teammates to safely attack the disabled Sentry Guns and Engineers. The Spies will then communicate when they have sapped the Sentry Gun to enable the attack to commence immediately. They will continue to sap to enable the rest of their teammates to take out the Engineer first. Alternately, the Spies may take out the Engineers while they are being distracted by the attack.
引誘醫護兵
- Overview: When a Spy, disguised as a Medic buddy, lures Medics into ambush points.
- Details: Instead of attempting to kill an enemy Medic, the Spy will disguise as an enemy assault class. He will attempt lure an unaware Medic into an ambush. Thinking he is a member of his own team, the Medic may follow you into your team's base, allowing your team to ambush him with a Sentry Gun or a group of allies. Remember that Spies look less suspicious when they appear to be trying to help the team.
職業衝鋒
- Overview: All players select the same class to overwhelm the enemy.
- Details: All players choose only one class or a majority of one class. The class usually depends on the situation. For example, a Scout rush allows your team to reach and capture the first point very quickly, hopefully before the entire enemy team arrives.
戰術進攻方向
- Overview: In certain maps, your team will have to decide whether to go one path or another.
- Details: This decision usually comes into play in 3-CP maps such as Gravel Pit.
重裝兵海
- Overview: A large amount of Heavies that will clear and defeat enemies due to their enormous amount of firepower and Health.
- Details: A "Heavy" train is useful in many game modes especially capture point modes because this allows them to capture points with ease and provide a barrage of fire power in order to protect their own capture points.
法式合流
- Overview: Two Spies that walk together to minimize suspicion by the enemy team.
- Details: This is very useful for clearing a group of enemies pushing the cart on Payload, or taking out an advancing group assuming you are coming from the enemy's direction, or clearing out a sentry nest. Because there are two (seemingly) teammates walking together, and thus not bumping into each other (a primary way to know if there is a disguised Spy about), there is less chance that the enemy will shoot you to spycheck. With two Spies, often after finding one, enemy players will suspect they've found the only Spy in the area and stop Spy-checking.
參見
|