Difference between revisions of "Community Vanguard strategy"
m |
(Tag: Undo) |
||
| Line 1: | Line 1: | ||
| − | {{ | + | {{community strategy stub|Article is largely empty. Please add more content.}} |
| − | + | ||
{{Map infobox | {{Map infobox | ||
| − | |||
| map-strategy = yes | | map-strategy = yes | ||
| game-type = Control Point | | game-type = Control Point | ||
| file-name = cp_vanguard | | file-name = cp_vanguard | ||
| map-image = Cp vanguard.png | | map-image = Cp vanguard.png | ||
| − | | release-date = | + | | release-date = December 17th, 2015 |
| − | | last-updated = | + | | last-updated = February 29th, 2016 |
| link = | | link = | ||
| developer = [https://steamcommunity.com/id/fubar_xs Maxime "Fubar" Dupuis]<br/>[http://steamcommunity.com/id/ravidge Kevin "Ravidge" Brook]<br/> [http://steamcommunity.com/id/equinoxo Gavin "Equinoxo" Sawford] | | developer = [https://steamcommunity.com/id/fubar_xs Maxime "Fubar" Dupuis]<br/>[http://steamcommunity.com/id/ravidge Kevin "Ravidge" Brook]<br/> [http://steamcommunity.com/id/equinoxo Gavin "Equinoxo" Sawford] | ||
| − | | map-environment = | + | | map-environment = Construction |
| − | | map-setting = | + | | map-setting = Daytime |
| map-health-pickups-small = 14 | | map-health-pickups-small = 14 | ||
| map-health-pickups-medium = 4 | | map-health-pickups-medium = 4 | ||
| Line 19: | Line 18: | ||
| map-bots = 1 | | map-bots = 1 | ||
}} | }} | ||
| − | |||
| − | ''' | + | This article is about '''Community Vanguard strategy'''. |
| + | |||
| + | '''Note''': It is recommended to read the main [[Vanguard]] article first to become familiar with the names of key map locations used in this article. | ||
{{TOC limit|3}} | {{TOC limit|3}} | ||
| − | == | + | == General strategy == |
| − | == | + | == Class-specific strategy == |
=== {{class link|Scout}} === | === {{class link|Scout}} === | ||
| Line 39: | Line 39: | ||
=== {{class link|Engineer}} === | === {{class link|Engineer}} === | ||
| − | * | + | |
| + | * The elevators for Control Point 2 & 4 are excellent teleporter hiding places. Alternatively, you can place a teleporter underneath the scaffolding bridge. | ||
=== {{class link|Medic}} === | === {{class link|Medic}} === | ||
=== {{class link|Sniper}} === | === {{class link|Sniper}} === | ||
| + | |||
| + | * The map is full of vantage points that overlook each area. An example is the suspended board above Control Point 3. | ||
=== {{class link|Spy}} === | === {{class link|Spy}} === | ||
| − | * | + | |
| + | * Spies should focus on destroying Sentry Guns that are defending points and taking out Engineer bases that are set up outside Control points, as well as Snipers on the high ground. | ||
{{Map strategy}} | {{Map strategy}} | ||
Revision as of 18:31, 14 July 2022
| “Sun Tzu's got nothing on us!” This article is a Community strategy stub. As such, it is not complete. You can help the Team Fortress Wiki Community Strategy Project by expanding it. Notes: Article is largely empty. Please add more content. |
| Community Vanguard strategy | |
|---|---|

| |
| Basic Information | |
| Developer(s): | {{{map-developer}}} |
| Map Info | |
| Environment: | Construction |
| Setting: | Daytime |
| Map Photos | |
This article is about Community Vanguard strategy.
Note: It is recommended to read the main Vanguard article first to become familiar with the names of key map locations used in this article.
General strategy
Class-specific strategy
 Scout
Scout
 Soldier
 Pyro
Pyro
 Demoman
 Heavy
Heavy
 Engineer
- The elevators for Control Point 2 & 4 are excellent teleporter hiding places. Alternatively, you can place a teleporter underneath the scaffolding bridge.
 Medic
Medic
 Sniper
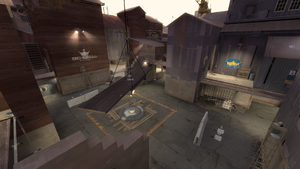
- The map is full of vantage points that overlook each area. An example is the suspended board above Control Point 3.
 Spy
Spy
- Spies should focus on destroying Sentry Guns that are defending points and taking out Engineer bases that are set up outside Control points, as well as Snipers on the high ground.
