Community Snowycoast strategy
| “Sun Tzu's got nothing on us!” This article is a Community strategy stub. As such, it is not complete. You can help the Team Fortress Wiki Community Strategy Project by expanding it. Notes: There is more that can be said about tactics on this map. |
| Snowycoast | |
|---|---|

| |
| Basic Information | |
| Map type: | Payload |
| File name: | pl_snowycoast
|
| Released: | December 17, 2015 Patch (Tough Break Update) |
| Developer(s): | E-Arkham FissionMetroid101 |
| Map Info | |
| Environment: | Snow |
| Setting: | Snowing, Nighttime |
| Hazards: | Pitfall |
| Map Items | |
| Map Photos | |
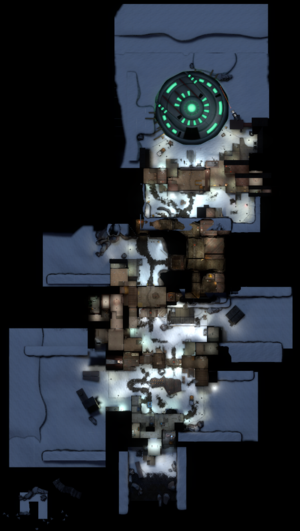
| Map Overview | |
This article is about Community Snowycoast strategy.
Note: It is recommended to read the main Snowycoast article first to become familiar with the names of key map locations used in this article.
General strategy
See also: Community Payload strategy
- The map has two gates in which the cart remains immobile until the gates open. RED can use this time to set up a proper defense. However, although the cart can't pass until the gate opens, BLU players can from the side entrances.
Class-specific strategy
 Scout
Scout
- Scouts can excel on the first and last points, especially on defense, but should be extra careful in the tunnels. On the first point, use the fences and rocks to keep yourself airborne and avoid explosive spam. Once BLU has captured the first point, use your speed for hit and run attacks between the flanks. Scouts should avoid lingering in the caves. Hold back on your team's side of the entrances and pick off stragglers from the enemy team that push through.
 Soldier
- After capturing the first Checkpoint, Engineers can start to jeopardize further pushes from your team by setting up on one side or the other past the Checkpoint. By rocket jumping high into the air with the B.A.S.E. Jumper and Air Strike, you can easily rain down rockets at the nest from a safe distance.
- Be mindful of Snipers, you are vulnerable while you perform this stunt. Either attempt a barrage attack at the Sentry while RED's Snipers are respawning, or have them distracted by your teammates.
 Pyro
Pyro
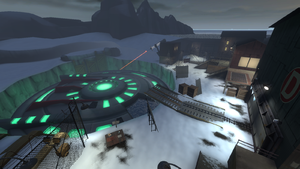
- During the last stretch by the Flying Saucer crash site, Pyros can use their airblast to push enemies off the cliff to their deaths. This is especially useful for the RED team for the final cart ramp is small and over the cliff, allowing for easy environmental kills.
- RED Pyro might get a better ambush angle on BLU cart pushers near the final Checkpoint by using the Escape Hole exit from Spawn.
 Demoman
- Past Checkpoint A, the map is extremely close quarters, making Grenade Launchers extremely effective.
 Heavy
Heavy
- Camping the cart should not be recommended in outside areas of the map, due to large sightlines which Snipers may use to their advantage.
- The Caves have many close quarter corridors, which can be used for possible ambushing of the opposing team if hidden.
 Engineer
- There are numerous "good but not great" Sentry Gun spots throughout the map. Learn which ones work best with your loadout and playstyle. Watch out for locations that appear to be a good spot but can outranged by the enemy.
- There are a lot of opportunities for sneaky Teleporter Exit locations; use this to help move your team forward.
- When capture of the second point is imminent, use the rear exit out of spawn to set up your next defense past the Kennels.
 Medic
Medic
- Keep in mind the large airspace that Snowycoast has. Soldiers and Demomen have plenty of room to dive bomb you from above, so Watch the skies, everywhere!
 Sniper
- Many of the outdoor areas of the map are wide open and have great sightlines, making Sniper a very useful class during most of the map.
- After Checkpoint B is captured, on RED, your team will be respawning inside the tunnel near Checkpoint C; at least for a brief moment if the cart continues moving smoothly past the Kennels. Equipping the Huntsman and/or Jarate will assist you much more while defending inside the tunnel instead of the Sniper Rifle.
 Spy
Spy
- Spies should be able to make their way through key areas of the map while completely cloaked thanks to the abundance of ammo packs. After the second point is captured, both RED and BLU Spies should make use of the small tunnel entrance from the kennels to get behind the enemy team.
- As your BLU team is about to capture the second Checkpoint, use the Hallway to get a head start sneaking deep into RED's rear area.

