User:Lolimsogreat21/Sandbox1
< User:Lolimsogreat21
Revision as of 00:58, 27 November 2021 by Lolimsogreat21 (talk | contribs) (→Class-specific strategy)
| “Sun Tzu's got nothing on us!” This article is a Community strategy stub. As such, it is not complete. You can help the Team Fortress Wiki Community Strategy Project by expanding it. Notes: Expand the "General strategy" section to cover map locations in more detail. Expand the mostly-empty class-specific strategies as well. |
| Lolimsogreat21 | |
|---|---|

| |
| Basic Information | |
| Developer(s): | {{{map-developer}}} |
| Map Info | |
| Environment: | Halloween |
| Setting: | Nighttime, overcast |
| Hazards: | Bubbling Cauldron, Saw blades, Pumpkin bombs, Ghosts, Skeletons, MONOCULUS, Pitfall, Horseless Headless Horseman, Visual effects only: Steam, Shake |
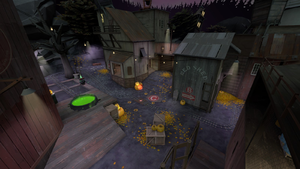
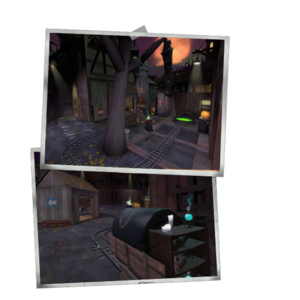
| Map Photos | |
This article is about Community Gravestone strategy.
Note: It is recommended to read the main Gravestone article first to become familiar with the names of key map locations used in this article.
General strategy
See also: Community Payload strategy
See also: Community Skeletons strategy
This Halloween map features pumpkin bombs, Halloween pumpkins, magic spells, and the Ghosts; see Community Halloween maps strategy.
- General Community Payload strategy applies, but with the added complication of scheduled monster spawns.
- As disruptive as they can be, the infrequent monster spawns are generally a neutral factor.
- Attack only those Skeletons that chase your team; waste no fire on any other monster.
- There are only Rare Magic Spells are available only through the Island and Graveyard Underworlds; know where they are and when they unlock.
- The Underworld Island rare spell respawns in just 10 seconds, easily more than 10 times during a Witching Hour.
- There are 5 rare spells in the Graveyard when MONOCULUS dies. If looks like other team is about to defeat MONOCULUS, attack those enemies close to the portal that is about to open and get the spells yourself.
Class-specific strategy
 Scout
Scout
Offense
- Make use of the Scout's mobility on the Tick Tock Cloak Hill, which is entirely open.
- You can jump onto the Shack from Blu's middle spawn exit, stealing High ground advantage from enemy Soldiers.
- The Jim Jam is excellent for flanking around Red's Sentry Gun positions on the first checkpoint.
- Flanking through the Kitchen is not recommended, as its one-way gate can easily trap you in an unfavourable position.
- The close-quarters nature of Binski logging increases the effectiveness of your Scattergun, but also limits your maneuverability.
- Area surrounding the final checkpoint is usually filled with Sentry Guns and other defensive entrenchments. So tread carefully!
- However, defenders can be lured away from their positions and into the Backyard, where you can engage them on your terms.
Defense
- Open areas, such as the ones found on checkpoints A, C and D, are excellent grounds for the [[Shortstop].
- Launching Wrap Assassins and Flying Guillotines down the Loading Dock will discourage any Blu members from traversing it.
- When inside the Binski logging sawmill, you can use the Force-A-Nature's increased knockback to push approaching attackers into the Haunted Sawblades.
- Also, attackers attempting to capture checkpoint B will be forced to clump up together, leaving them vulnerable to your Mad Milk.
- There are plenty of obstacles and platforms within the Pumpking Patch, on which you can jump on and make yourself a harder target.
 Soldier
Offense
- When pushing out of spawn, your first priority should be to take over the Shack, as it offers valuable High ground advantage.
- The Loading Dock and the Red Barn often contain contain enemy Sentry Gun emplacements, which you can easily destroy from within the Jimi Jam.
- There is a platform which overviews the entire Binski Logging sawmill, thus allowing you to rain down rockets on its defenders. It can be accessed via the Loading Dock.
- As a Blu member, pushing into the Binski Logging sawmill can prove to be quite difficult, sometimes requiring the use of the Battalion's Backup for a successful push.
- Also, the Direct Hit shines really well inside the said Binski Logging, mostly due to it's close-quarters nature and sentry-busting potential.
- The area of the final checkpoint, that being the Pumpkin Patch, opens up quite a lot of Rocket Jumping potential, for both the Red and the Blu Soldiers.
Defense
- Blu Soldiers and Demomen are likely to try and capture the Shack's roof after exiting the spawn, so be ready for an incoming swarm of blast-jumping attackers.
- In this situation, the Direct Hit's ability to Mini-Crit airborne players can come in handy.
- In the case that you have been pushed back from the Shack, you can still occupy the building adjacent to the Jimi Jam and continue bombarding the Cart from there.
- On the final checkpoint, carefully patrolling the Alleys, as wells as spamming down the Binski Logging sawmill, should be your main priority.
 Pyro
Pyro
- Your relative stamina and speed gives you a little time to linger in the Underworld Island and Air Blast enemy into the Deadly Waters, if you get there first.
- Having the Overheal Spell definitely gives you more time to ambush here.
- Be sure to cut and run with a rare spell before you die and give up the buff and the Respawn delay.
 Demoman
 Heavy
Heavy
- Your Health and Lunchbox Items give you extended persistence in the Underworld Island.
- Your Second Banana recharges and heals you faster than the Underworld Health Drain.
- You can use this time to farm for the best rare spells or you can just keep picking them up to deny them from the enemy.
- You can shoot the enemy, denying them both the Rare Spell and a Respawn time, saving the rare spell respawns for yourself or your teammates.
- About 90 seconds after the portals open, the Underworld Island kills everyone there, so don't stay there that long -- get out before it kills you and you lose the buff and Respawn time.
 Engineer
 Medic
Medic
 Sniper
 Spy
Spy
Offense
- The left spawn exit, as well as the Jimi Jam flank, should be your main infiltration route on the first checkpoint.
- Jimi Jam also contains a large Ammo pack. An useful thing to keep in mind when using the stock Invis Watch.
- A cheeky strategy you can employ would be to sit in the Loading Dock, below the Shortcut, and wait for spawning defenders to practically drop "onto" your Knife.
- Of course, this tactic can only be utilized before the first point is captured and the Shortcut sealed off.
- Noise produced by the Haunted Sawblades (found inside the Sawmill) can temporarily mask your decloak and backstabs.
- Not to mention that they can quickly dispose of any opponents blindly chasing you.
- There are a couple of boxes within the Pumpkin Patch on which you can sit with the Cloak and Dagger and wait for an opportune target.
- The Backyard and the Alley are your best friends when it comes to sneaking behind the Red lines on the final checkpoint.
Defense
- There is little ammo to be found on the Tick Tock Cloak hill, other then inside the cramped and frequently-used Shack. Due to this, the L'Etranger is recommended here.
- Once checkpoint A is captured, attackers will usually use the Loading Dock and the Cart's tracks as their main route, leaving Jimi Jam flank unattended.
- Inside the Sawmill, you can outsmart any potential Blu flankers by camping besides the Kitchen.
