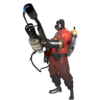
Community Hellstone strategy

From Team Fortress Wiki
Revision as of 03:01, 5 September 2016 by Dr. Scaphandre (talk | contribs) (Beginning work on the page.)
Jump to: navigation, search
This article discusses community strategy for Hellstone.
Community Hellstone strategy
Pl millstone event.jpg
Basic Information
Developer(s): {{{map-developer}}}
Map Info
Environment: Halloween
Setting: Nighttime, overcast
Hazards: Pitfall, Pumpkin bombs,
Skeletons, Horseless Headless Horseman,
Monoculus, Ghost
Map Photos
Loading screen photos.

General strategy

Class-specific strategy

Leaderboard class scout.png Scout

Leaderboard class soldier.png Soldier

Leaderboard class pyro.png Pyro

Leaderboard class demoman.png Demoman

Leaderboard class heavy.png Heavy

Leaderboard class engineer.png Engineer

Leaderboard class medic.png Medic

Leaderboard class sniper.png Sniper

Leaderboard class spy.png Spy

General Horseless Headless Horsemann Strategy

See also: Horseless Headless Horsemann match-ups
  • When you are IT and the spots above aren't nearby, look for enemies to either run around or hit with your melee weapon (the latter will pass the IT status to them). Doing so gives you a better chance of surviving being IT.
  • Wearing a Saxton Hale Mask or Horseless Headless Horsemann's Head will prevent you from getting stunned by the Horsemann's taunt.
  • The Horsemann runs at Scout speed, so do not attempt to outrun him unless you are a Demoman and have a shield with you.
  • A strategy for the player designated IT is to act as bait for the Horsemann, while all other players inflict as much damage as they can.
  • The Horsemann cannot jump, but he will walk off of ledges and fall down to reach those marked as IT.


Class Strategy
Scout.png
Scout
vs HHH.png
Horseless Headless Horsemann
Pictogram info.png Playing as Scout allows you to evade the Horsemann's attacks more easily than other classes with your jumping and running abilities.

Pictogram info.png Hit-and-run tactics are a necessity when attacking Horseless Headless Horsemann.

Pictogram plus.png Bonk! Atomic Punch will allow you to survive the Horsemann's melee attack. Just stay at a distance so as to not get killed while consuming it.

Pictogram plus.png  The Winger can be used for extra damage. The frequent reloading can be negated by staying at a distance.

Pictogram plus.png  The Force-A-Nature, while it may not be used for direct combat, also makes for a mobility weapon if you are good with force jumps.

Pictogram plus.png  The Atomizer and Soda Popper are an upgrade in terms of evasion. You're not likely to engage in melee combat with the Horsemann anyway, so it's downsides are negligible. Watch out for your health if you triple jump constantly.

Pictogram minus.png The following weapons may be less effective against the Horsemann, due to his immunity to fire, stun, bleeding, mini-crits, on-hit and on-kill attributes:, Pretty Boy's Pocket Pistol, Flying Guillotine Crit-a-Cola, Mad Milk, Sandman, Candy Cane, Boston Basher / Three-Rune Blade, Sun-on-a-Stick, Fan O'War and Wrap Assassin.
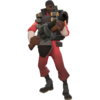
Soldier.png
Soldier
vs HHH.png
Horseless Headless Horsemann

Pictogram info.png  Rocket jumping is a viable method of retreating if the Horsemann is chasing you. Jumping from the different heights around Control Point B will force the Horsemann to take long routes, and he may give up chasing you.

Pictogram plus.png  A Kritzkrieg ÜberCharge will allow a skilled Soldier to make short work of the Horsemann, as a pack of critical rockets and Shotgun shells will take a large chunk of its health away. This can be combined with rocket jumping to stay clear of the Horsemann's melee attack.

Pictogram plus.png  The Direct Hit is probably the Soldier's best primary weapon to use against the Horsemann. The projectiles are fast and do high damage, and the Horsemann is large enough for you not to worry too much about missing it.

Pictogram plus.png  The Shotgun can be effective against the Horsemann as base damage remains the same when attacking him. This will allow you to do more damage from a longer range than normal.

Pictogram plus.png  While the Cow Mangler 5000 might not deal much damage, it is good as an escape weapon due to the extra ammo loaded and infinite ammo carried. You can preform better escapes from the Horsemann, especially with the Gunboats equipped for survivability.

Pictogram plus.png  The Disciplinary Action can help classes escape from the Horsemann, especially Heavies and other Soldiers.

Pictogram minus.png Charging the Horsemann with the Equalizer at very low health will only be effective if the enemy team is not around and the Horsemann is very distracted, as your crits will deal around 300 damage. Otherwise, it's a risky strategy.

Pictogram minus.png The following weapons may be less effective against the Horsemann, due to his immunity to fire, stun, bleeding, mini-crits, on-hit and on-kill attributes: Black Box, Buff Banner, Battalion's Backup, Concheror, Reserve Shooter and Half-Zatoichi.

Pyro.png
Pyro
vs HHH.png
Horseless Headless Horsemann

Pictogram info.png Because the Horsemann does not suffer afterburn damage, using the Pyro against the Horsemann is inadvisable. In addition, the Pyro's short range of effectiveness and the Horsemann's resistance to Flamethrowers makes attacking head-on a very deadly prospect.

Pictogram plus.png The Backburner can be moderately effective if the Horsemann is distracted.

Pictogram plus.png Using the Phlogistinator's Mmmph is useful as well, since the crits will inflict a great deal of damage to the Horsemann.

Pictogram plus.png The Shotgun can be effective against the Horsemann as base damage remains the same when attacking him. This will allow you to do more damage from a longer range than normal.

Pictogram minus.png Airblasts will not work on the Horsemann as he cannot be knocked back.

Pictogram minus.png The following weapons may be less effective against the Horsemann, due to his immunity to fire, stun, bleeding, mini-crits, on-hit and on-kill attributes: Flare Gun, Detonator, Scorch Shot, Manmelter, Reserve Shooter, Axtinguisher / Postal Pummeler, Powerjack and Sharpened Volcano Fragment.

Demoman.png
Demoman
vs HHH.png
Horseless Headless Horsemann

Pictogram info.png You can try to retreat by charging with the Chargin' Targe or Splendid Screen in a single direction across open ground.

Pictogram plus.png Direct hits with the Grenade Launcher or Loch-n-Load will deal large amounts of damage to the Horsemann, so it is advisable to lead your shots slightly to ensure they connect. This strategy is especially effective with a Kritzkrieg ÜberCharge.

Pictogram plus.png Stickybomb traps are very effective against the Horsemann, as he will not try to avoid them; it just requires having the IT player lure the Horsemann onto the trap. This works even better with the Scottish Resistance, since it has 6 extra bombs and a faster fire rate at the cost of a slower arming time. Plan your traps well.

Pictogram plus.png  Convincing a Medic to use a Kritzkrieg charge on you to lay sticky bombs can deal huge damage in a single hit. A cluster of critical stickybombs will take a huge chunk of its health away and can kill it very quickly.

Pictogram minus.png Playing as a Demoknight is risky as the Horsemann attacks if he feels something is blocking his movement, and a player will be made IT if they are closest when the Horsemann changes target.

Pictogram minus.png The following weapons may be less effective against the Horsemann, due to his immunity to fire, stun, bleeding, mini-crits, on-hit and on-kill attributes: Eyelander / Horseless Headless Horsemann's Headtaker / Nessie's Nine Iron, Persian Persuader, Claidheamh Mòr, and Half-Zatoichi.
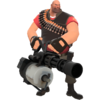
Heavy.png
Heavy
vs HHH.png
Horseless Headless Horsemann

Pictogram info.png The Heavy is one of the best classes to go head-on against the Horsemann. Despite his resistance to Minigun bullets, any Minigun will shred the boss in a matter of seconds at short range, even without crits.

Pictogram info.png The Heavy is slow, thus vulnerable, if he does not have a Medic pocketing him ready to pull an Über if the Horsemann picks either of them as his next target. The G.R.U and the Buffalo Steak Sandvich give some time to prepare for escapes, especially if he is still firing if he is marked as IT.

Pictogram plus.png  A Heavy under the effects of a Kritzkrieg can shred the boss in mere seconds, and since the Horsemann targets those who are closest to him, and critical hits have no damage falloff, this can be done quite safely.

Pictogram plus.png  The Tomislav has good use for hit and run strategies, due to its faster spin-up time. Just remember that the fire rate is lower than the other Miniguns.

Pictogram minus.png The Shotgun should rarely be used, as the time between shots and damage spread mean you will always get more damage from your primary weapon. Nonetheless, if you have run out of ammunition for your primary weapon, remember that base damage remains constant while attacking the Horsemann, so you can use the Shotgun effectively from further ranges than normal.

Pictogram minus.png  The Brass Beast, even under a Kritzkrieg charge, is only recommended if the Horsemann is distracted and you are far away, since you are very slow while revving and moving with it, which gives the Horsemann and even the enemy team a good reason to attack you.

Pictogram minus.png The following weapons may be less effective against the Horsemann, due to his immunity to fire, stun, bleeding, mini-crits, on-hit and on-kill attributes: Natascha, Buffalo Steak Sandvich, Killing Gloves of Boxing, Fists of Steel, Warrior's Spirit, Eviction Notice, and Holiday Punch.

Engineer.png
Engineer
vs HHH.png
Horseless Headless Horsemann

Pictogram info.png Since the Horsemann is not affected by knock back, the player should never rely on his Sentry Gun to keep the monster away.

Pictogram info.png The Horsemann will attack anything he walks into - this includes players and buildings. He generally won't pay attention to them unless the player who is IT is alongside a building.

Pictogram plus.png Sentry Guns will target the Horsemann even when he is outside their normal range.

Pictogram plus.png Because Sentry Guns never deal critical hits (except mini-crits, which do not affect the Horsemann), your Sentry Gun can be an effective way to deal damage to the Horsemann without risking being marked as IT. Use the Wrangler for maximum damage.

Pictogram plus.png The Shotgun and Pistol can both be effective against the Horsemann as their base damage remains the same when attacking it. This will allow you to do more damage from a longer range than normal.

Pictogram minus.png The following weapons may be less effective against the Horsemann, due to his immunity to fire, stun, bleeding, mini-crits, on-hit and on-kill attributes: Widowmaker and Southern Hospitality.

Medic.png
Medic
vs HHH.png
Horseless Headless Horsemann

Pictogram info.png If you do not have an ÜberCharge ready, it is best advised to stay away and build one up, as the Horsemann attacks in order of whoever is closest.

Pictogram info.png Most of the Medic's weapons are relatively ineffective, so the Medic should be reserved to a support role. Use your ÜberCharge on teammates so they can attack the Horsemann.

Pictogram plus.png  If you are really aggressive against the Horsemann, then the Vita-Saw can allow you to deploy ÜberCharges more quickly. The health penalty is negligible since the Horsemann's axe is an instant kill anyway.

Pictogram minus.png It is risky to use the Quick-Fix or the Kritzkrieg against the Horsemann, as The Horsemann's melee attack takes 80% of the target's base (not current) health except against Übered players and Dead Ringer Spies. However, at a distance, the Kritzkrieg charge is effective at dispatching the Horsemann.

Pictogram minus.png The following weapons may be less effective against the Horsemann, due to his immunity to fire, stun, bleeding, mini-crits, on-hit and on-kill attributes: Blutsauger and Ubersaw.

Sniper.png
Sniper
vs HHH.png
Horseless Headless Horsemann

Pictogram info.png The basic Sniper Rifle has medium effectiveness against the Horsemann, as headshots do not deal extra damage. However, charging shots is still worthwhile as the damage will properly scale against the Horsemann. The Machina will deal slightly more damage in this regard.

Pictogram plus.png The Sydney Sleeper's faster charge rate makes it more useful than the standard Sniper Rifle, since the Sniper Rifle can not score headshots on the Horsemann.

Pictogram plus.png Additionally, the Huntsman is the only Sniper weapon that can cause critical hits upon headshotting the Horsemann.

Pictogram plus.png  The SMG is viable as a last resort weapon if the Horsemann is actively chasing you. You'll probably use up the three clips it has by the time he kills you anyway.

Pictogram minus.png The following weapons may be less effective against the Horsemann, due to his immunity to fire, stun, bleeding, mini-crits, on-hit and on-kill attributes: Bazaar Bargain, Cleaner's Carbine, Jarate, Tribalman's Shiv and Bushwacka.
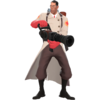
Spy.png
Spy
vs HHH.png
Horseless Headless Horsemann

Pictogram info.png The Dead Ringer's feign death ability will allow you to survive one hit; however, the Horsemann will continue to follow you even when cloaked.

Pictogram plus.png The Revolver and the Enforcer are the most viable weapons to use, although they should only be used against the Horsemann if he is focused on another player.

Pictogram minus.png The Spy is rather ineffective against the Horsemann as a Backstab only does normal knife damage, rendering its primary function useless.

Pictogram minus.png The following weapons may be less effective against the Horsemann, due to his immunity to fire, stun, bleeding, mini-crits, on-hit and on-kill attributes: Ambassador, L'Etranger, Your Eternal Reward / Wanga Prick, Conniver's Kunai and Big Earner.

General MONOCULUS Strategy

  • Do not use melee weapons. MONOCULUS flies and/or hovers across sections of the map out of the range of almost all melee weapons.
  • Unlike on Eyeaduct, MONOCULUS does not prevent the BLU team from pushing the cart.
  • Stay away from MONOCULUS when it begins to rapid fire its projectiles. Use cover from buildings if you are close to it when it gets angry.
  • A large group attacking at once can drain MONOCULUS' health rapidly by at the risk of enemy team crossfire and less room to evade its projectiles.
  • A critical hit on MONOCULUS with make him angry, causing him to fire three critical projectiles in a row that move at the speed of Liberty Launcher rockets. When possible, stun him while he is angry to give yourselves breathing room.


Class Strategy
Scout.png
Scout
vs Monoculus normal.png
MONOCULUS
Pictogram info.png Playing as Scout allows you to evade MONOCULUS's attacks more easily than other classes due to your agility and ability to double and triple jump.

Pictogram info.png Hit-and-run tactics are a necessity when attacking MONOCULUS.

Pictogram info.png The Scout's agility, double and triple jumps allow him to enter into and survive the underworld with more ease than other classes.

Pictogram plus.png Bonk! Atomic Punch will allow you to survive MONOCULUS' eyeball projectiles for a short time, and can use knock back to escape.

Pictogram plus.png Because base damage is retained at all ranges when attacking MONOCULUS, the Scattergun will deal the most damage to it, provided you can move to around medium range to ensure you don't partially miss your shots.

Pictogram plus.png The Pistol can be effective against MONOCULUS as base damage remains the same when attacking it. This will allow you to do more damage from a longer range than normal.

Pictogram plus.png The Shortstop allows you to deal a good amount of damage at medium-range.

Pictogram plus.png The Soda Popper is an good weapon to use as MONOCULUS as you have higher mobility with the extra jumps.

Pictogram minus.png Do not use Crit-a-Cola against MONOCULUS. Your attacks will deal no extra damage and will make it easier for MONOCULUS to kill you.

Pictogram minus.png The Sandman baseball, The Wrap Assassin bauble and Fan O'War are ineffective against MONOCULUS as it cannot be stunned by baseballs, cannot bleed or marked for death, respectively.

Pictogram minus.png The Pretty Boy's Pocket Pistol is not recommended, as even with the bonus health you will be killed in one shot, and the fall damage resistance is negligible.

Pictogram minus.png The Scout's health is low enough that a single hit from MONOCULUS' projectiles will likely result in death, even with the Pretty Boy's Pocket Pistol.

Soldier.png
Soldier
vs Monoculus normal.png
MONOCULUS

Pictogram info.png  Rocket jumping is a viable method of evading MONOCULUS' projectiles.

Pictogram info.png  The Battalion's Backup and Concheror will charge while doing damage to MONOCULUS.

Pictogram plus.png  A Kritzkrieg ÜberCharge will allow a skilled Soldier to make short work of MONOCULUS, as a pack of critical rockets and Shotgun shells will take a large chunk of its health away.

Pictogram plus.png  The Direct Hit is probably the Soldier's best primary weapon to use against MONOCULUS. The projectiles are fast and do high damage, and MONOCULUS is large enough for you not to worry too much about missing it.

Pictogram plus.png  The Shotgun can be effective against MONOCULUS as base damage remains the same when attacking it. This will allow you to do more damage from a longer range than normal.

Pictogram minus.png Charging MONOCULUS with the Equalizer at very low health will only be effective if the enemy team is not around and MONOCULUS is stunned, as your crits will deal around 300 damage. Otherwise, it's a risky strategy.

Pictogram minus.png The Buff Banner will charge when doing damage to MONOCULUS, but MONOCULUS is not affected by mini-crits so using it is not recommended.

Pictogram minus.png The Reserve Shooter will not mini-crit against MONOCULUS so this is not recommended.

Pictogram minus.png The Black Box does not award health upon hitting MONOCULUS and is a considerable drawback when its reduced ammo is taken into account.

Pyro.png
Pyro
vs Monoculus normal.png
MONOCULUS

Pictogram info.png Because MONOCULUS does not suffer afterburn damage, using the Pyro against MONOCULUS is inadvisable. In addition, the Pyro's short range of effectiveness and MONOCULUS' resistance to Flamethrowers makes attacking head-on a very deadly prospect.

Pictogram info.png  A skilled Pyro may be able to effectively attack MONOCULUS by using air blasts to reflect MONOCULUS's projectiles back at it. However, unless MONOCULUS is angry these projectiles will travel slowly and will often miss their target.

Pictogram info.png The Pyro can take up a support role, keeping projectiles from hitting teammates

Pictogram plus.png The Backburner can be moderately effective if MONOCULUS is distracted.

Pictogram plus.png The Shotgun can be effective against MONOCULUS as base damage remains the same when attacking it. This will allow you to do more damage from a longer range than normal.

Pictogram plus.png When emerging from the underworld, you can use a crit-boosted Flare Gun, Detonator, or Scorch Shot to tag MONOCULUS from a distance, stunning him for others to attack. If MONOCULUS is close enough, you can rush in while he's stunned and attack with your flamethrower, then jump in the portal he leaves behind and repeat.

Pictogram minus.png  The Phlogistinator is not recommended, as the -10% damage penalty and lack of airblast makes it a bad choice.

Pictogram minus.png The Reserve Shooter will not mini-crit against MONOCULUS so this is not recommended.

Pictogram minus.png The Flare Gun and the Detonator are possibly some of the worst weapons to use against MONOCULUS as he cannot catch on fire. Only the minimal flare impact damage will register.

Demoman.png
Demoman
vs Monoculus normal.png
MONOCULUS

Pictogram info.png It is possible to briefly dodge MONOCULUS' projectiles by charging with the Chargin' Targe or Splendid Screen in a single direction across open ground.

Pictogram plus.png Direct hits with the Grenade Launcher or Loch-n-Load will cause large amounts of damage to MONOCULUS, so it is advisable to lead your shots slightly to ensure they connect. This strategy is especially effective with a Kritzkrieg ÜberCharge.

Pictogram minus.png Stickybombs are almost rendered completely ineffective against MONOCULUS as it is generally flying too high or teleporting too quickly to set up a trap. However, a skilled Demoman may be able to arc his shot so it can be detonated to do max damage.

Pictogram minus.png Using the Sticky Jumper and trying to hit MONOCULUS from above is VERY risky. This can be done with the Ullapool Caber as a suicide bombing, but is not recommended.

Pictogram minus.png Attempting the above strategy with the Scottish Resistance is extremely difficult due to the slower arming time of the bombs. It is definitely not recommended.

Pictogram minus.png Demoknights are not recommended as they cannot effectively reach MONOCULUS unless it has been stunned or is near the ground.


Heavy.png
Heavy
vs Monoculus normal.png
MONOCULUS

Pictogram info.png The Heavy is one of the best classes to go head-on against MONOCULUS. Despite its resistance to Minigun bullets, any Minigun will shred the boss in a matter of seconds at short range, even without crits.

Pictogram info.png Be aware that the Heavy has no real means of effectively dodging MONOCULUS' projectiles, but can withstand at least one direct hit from a critical projectile (granting the player the Crock Block achievement). Nonetheless, the Heavy should be relying on the Gloves of Running Urgently to escape in such situations.

Pictogram plus.png A Heavy/Medic pair can camp the control point while building up a Kritzkrieg ÜberCharge. The damage resulting from such an attack is usually enough to deal extremely high levels of damage to MONOCULUS. Be ready to escape though, as MONOCULUS will not only be angered, but it will make you both its primary target.

Pictogram plus.png The Sandvich is recommended, as it can save your teammates, and especially your Medic.

Pictogram minus.png The Buffalo Steak Sandvich is not recommended except to attempt quick getaways.

Pictogram minus.png The Shotgun should rarely be used, as the time between shots and damage spread mean you will always get more damage from your primary weapon. Nonetheless, if you have run out of ammunition for your primary weapon, remember that base damage remains constant while attacking MONOCULUS, so you can use the Shotgun effectively from further ranges than normal.

Pictogram minus.png The Brass Beast, even with a Kritzkrieg ÜberCharge, is only recommended if MONOCULUS is already busy, as your extremely sluggish movement will tempt even the enemy team to focus on you and make you an easy target for an angry MONOCULUS' projectiles.

Engineer.png
Engineer
vs Monoculus normal.png
MONOCULUS

Pictogram info.png Since MONOCULUS is not affected by knock back, the player should never rely on his sentry to keep the monster away.

Pictogram info.png MONOCULUS will attack anything within his range - this includes players and buildings. Keep in mind that wrangled Sentry Guns can survive a few projectile hits, allowing you and your team to profit from the distraction. Don't rely on them too much though; it only takes one or two salvos of MONOCULUS' projectiles to destroy an entire sentry nest.

Pictogram plus.png Sentry Guns will target MONOCULUS even when it is outside their normal range.

Pictogram plus.png Because Sentry Guns never deal critical hits (except mini-crits, which do not affect MONOCULUS), your Sentry Gun can be an effective way to deal damage to MONOCULUS without angering it. Use the Wrangler for maximum damage.

Pictogram plus.png The Shotgun and Pistol can both be effective against MONOCULUS as their base damage remains the same when attacking it. This will allow you to do more damage from a longer range than normal.

Pictogram plus.png  The Short Circuit is able to protect the Engineer as it is able to destroy MONOCULUS's projectiles.

Pictogram minus.png The Widowmaker does not return metal for damage done to MONOCULUS.

Medic.png
Medic
vs Monoculus normal.png
MONOCULUS

Pictogram info.png Use your ÜberCharge on a teammate so they can attack MONOCULUS. While MONOCULUS will ignore invulnerable individuals for as long as possible, keep in mind that it will attempt to target you if you are in range.

Pictogram info.png If you do not have an ÜberCharge ready, it is best advised to stay away and build one up.

Pictogram info.png If using a Kritzkrieg ÜberCharge to attack MONOCULUS, be ready for a quick escape, as MONOCULUS will not only be angered but it will make you and your buddy its primary targets.

Pictogram info.png Most of the Medic's weapons are relatively ineffective, so the Medic should be reserved to a support role.

Pictogram minus.png It is not very helpful to use the Quick-Fix against MONOCULUS. Its enhanced healing power will not be enough to survive MONOCULUS' deadly eyeball projectiles.

Pictogram minus.png An ÜberCharged pair can be rendered largely ineffective by a wandering ghost.

Sniper.png
Sniper
vs Monoculus normal.png
MONOCULUS

Pictogram info.png The basic Sniper Rifle has medium effectiveness against MONOCULUS, as headshots do not deal extra damage. However, charging shots is still worthwhile as the damage will properly scale against MONOCULUS. The Machina will deal slightly more damage in this regard.

Pictogram info.png The extra range that the Sniper class exhibits can allow the player to attack while far outside MONOCULUS' attack range. This however, will make it more difficult to travel to the Underworld to acquire the Bombinomicon or the speed, strength, and health boosts.

Pictogram plus.png The Sydney Sleeper's faster charge rate makes it more useful than the standard Sniper Rifle, as MONOCULUS is immune to headshots.

Pictogram minus.png Jarate does not affect MONOCULUS.

Spy.png
Spy
vs Monoculus normal.png
MONOCULUS

Pictogram info.png The Dead Ringer's feign death ability will allow you to survive one hit per use, giving the Spy more survivability against MONOCULUS.

Pictogram plus.png The Revolver and the Enforcer are the most viable weapons to use, although it should only be used against MONOCULUS if it is focused on another player.

Pictogram minus.png The Spy is rather ineffective against MONOCULUS as a Backstab is near impossible to land and will not result in an instant death or a critical hit, and does not contribute significant damage.

Pictogram minus.png As with any other on-hit effect weapons, Your Eternal Reward, Conniver's Kunai and the Big Earner will not grant you a bonus upon getting the last hit on MONOCULUS and should be avoided.