Difference between revisions of "Spy weapons (competitive)"
(old info) |
(Cleanup. Also need confirmation for the C/D values.) |
||
| Line 1: | Line 1: | ||
{{Competitive}} | {{Competitive}} | ||
| − | |||
| − | The '''Spy''' is a class highly dependent on his stealth abilities to | + | The '''Spy''' is a class highly dependent on his stealth abilities to take out enemies behind cover with a backstab. |
== Primary Weapons == | == Primary Weapons == | ||
| − | + | The Spy's primary weapons provide him with his only long-range damage, and are mostly used to cover a retreat. All of the Spy's primary weapons will be perfectly accurate if unfired for 1.25 seconds. | |
=== Revolver === | === Revolver === | ||
| Line 12: | Line 11: | ||
[[File:Revolver IMG.png|100px|right]] | [[File:Revolver IMG.png|100px|right]] | ||
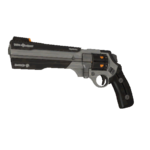
| − | The Revolver | + | The stock Revolver deals low damage, and can be good to pick of a low-health enemy at range. |
| − | The [[Big Kill]] | + | The [[Big Kill]] has the same stats as the Revolver. |
{| class="wikitable grid" | {| class="wikitable grid" | ||
| Line 24: | Line 23: | ||
|- | |- | ||
! style="background-color:#FFF4CC;" | [[Revolver]] <br>[[Image:Revolver IMG.png|link=Revolver|70x39px]] | ! style="background-color:#FFF4CC;" | [[Revolver]] <br>[[Image:Revolver IMG.png|link=Revolver|70x39px]] | ||
| − | | style="background-color:#FFF4CC;" | Point-Blank: 60 | + | | style="background-color:#FFF4CC;" | |
| − | | style="background-color:#FFF4CC;" | Critical: 120 | + | * '''Point-Blank:''' 60 |
| − | | style="background-color:#FFF4CC;" | Attack: 0.58s | + | * '''512 units:''' 40 |
| − | | style="background-color:#FFF4CC;" | | + | * '''Over 1024 units:''' 21 |
| + | | style="background-color:#FFF4CC;" | | ||
| + | * '''Critical:''' 120 | ||
| + | * '''Point-Blank Mini-crit:''' 81 | ||
| + | * '''Over 512 units Mini-crit:''' 54 | ||
| + | | style="background-color:#FFF4CC;" | | ||
| + | * '''Attack:''' 0.58s | ||
| + | * '''Reload:''' 1.16s | ||
| + | | style="background-color:#FFF4CC;" | | ||
| + | * Stock primary weapon. | ||
|} | |} | ||
<br> | <br> | ||
| Line 35: | Line 43: | ||
[[File:Ambassador.png|100px|right]] | [[File:Ambassador.png|100px|right]] | ||
| − | + | The Ambassador deals reduced damage, but deals critical damage on a headshot. | |
{| class="wikitable grid" | {| class="wikitable grid" | ||
| Line 45: | Line 53: | ||
|- | |- | ||
! style="background-color:#FFF4CC;" | [[Ambassador]] <br>[[Image:Ambassador.png|link=Ambassador|70x39px]] | ! style="background-color:#FFF4CC;" | [[Ambassador]] <br>[[Image:Ambassador.png|link=Ambassador|70x39px]] | ||
| − | | style="background-color:#FFF4CC;" | Point-Blank: 51 | + | | style="background-color:#FFF4CC;" | |
| − | | style="background-color:#FFF4CC;" | Critical: 102 | + | * '''Point-Blank:''' 51 |
| − | | style="background-color:#FFF4CC;" | Attack: 0.696 | + | * '''512 units:''' 34 |
| − | | style="background-color:#FFF4CC;" | Accuracy based on time since last shot. | + | * '''Over 1024 units:''' 18 |
| + | | style="background-color:#FFF4CC;" | | ||
| + | * '''Critical:''' 102 | ||
| + | * '''Point-Blank Mini-crit:''' 69 | ||
| + | * '''Over 512 units Mini-crit:''' 46 | ||
| + | | style="background-color:#FFF4CC;" | | ||
| + | * '''Attack:''' 0.696 | ||
| + | * '''Reload:''' 1.16 | ||
| + | * '''Cooldown until perfect accuracy:''' 0.95s | ||
| + | | style="background-color:#FFF4CC;" | | ||
| + | * Accuracy is based on the time since the last shot. | ||
| + | * Deals critical damage on an accurate headshot. | ||
| + | * 15% damage penalty. | ||
| + | * 20% slower firing speed. | ||
|} | |} | ||
<br> | <br> | ||
| Line 56: | Line 77: | ||
[[File:L'Étranger.png|100px|right]] | [[File:L'Étranger.png|100px|right]] | ||
| − | The L'Etranger | + | The L'Etranger deals reduced damage, but provides 15% additional cloak on hit. |
{| class="wikitable grid" | {| class="wikitable grid" | ||
| Line 66: | Line 87: | ||
|- | |- | ||
! style="background-color:#FFF4CC;" | [[L'Etranger]] <br>[[Image:L'Étranger.png|link=L'Etranger|70x39px]] | ! style="background-color:#FFF4CC;" | [[L'Etranger]] <br>[[Image:L'Étranger.png|link=L'Etranger|70x39px]] | ||
| − | | style="background-color:#FFF4CC;" | Point-Blank: 48 | + | | style="background-color:#FFF4CC;" | |
| − | | style="background-color:#FFF4CC;" | Critical: 96 | + | * '''Point-Blank:''' 48 |
| − | | style="background-color:#FFF4CC;" | Attack: 0.58s | + | * '''512 units:''' 32 |
| − | | style="background-color:#FFF4CC;" | | + | * '''Over 1024 units:''' 17 |
| + | | style="background-color:#FFF4CC;" | | ||
| + | * '''Critical:''' 96 | ||
| + | * '''Point-Blank Mini-crit:''' 65 | ||
| + | * '''Over 512 units Mini-crit:''' 43 | ||
| + | | style="background-color:#FFF4CC;" | | ||
| + | * '''Attack:''' 0.58s | ||
| + | * '''Reload:''' 1.16s | ||
| + | | style="background-color:#FFF4CC;" | | ||
| + | * Adds 15% cloak on hit. | ||
| + | * 20% damage penalty. | ||
|} | |} | ||
<br> | <br> | ||
| Line 77: | Line 108: | ||
[[File:Backpack Diamondback.png|150px|right]] | [[File:Backpack Diamondback.png|150px|right]] | ||
| − | The Diamondback | + | The Diamondback deals reduced damage, but deals stores and deals critical hits for each building sapped. |
{| class="wikitable grid" | {| class="wikitable grid" | ||
| Line 87: | Line 118: | ||
|- | |- | ||
! style="background-color:#FFF4CC;" | [[Diamondback]] <br>[[Image:Backpack Diamondback.png|link=Diamondback|140x78px]] | ! style="background-color:#FFF4CC;" | [[Diamondback]] <br>[[Image:Backpack Diamondback.png|link=Diamondback|140x78px]] | ||
| − | | style="background-color:#FFF4CC;" | Point-Blank: 51 | + | | style="background-color:#FFF4CC;" | |
| − | | style="background-color:#FFF4CC;" | Critical: 102 | + | * '''Point-Blank:''' 51 |
| − | | style="background-color:#FFF4CC;" | Attack: 0.58s | + | * '''512 units:''' 34 |
| − | | style="background-color:#FFF4CC;" | | + | * '''Over 1024 units:''' 18 |
| − | + | | style="background-color:#FFF4CC;" | | |
| − | *Gives one guaranteed critical hit for each building destroyed | + | * '''Critical:''' 102 |
| − | * | + | * '''Point-Blank Mini-crit:''' 69 |
| − | + | * '''Over 512 units Mini-crit:''' 46 | |
| + | | style="background-color:#FFF4CC;" | | ||
| + | * '''Attack:''' 0.58s | ||
| + | * '''Reload:''' 1.16s | ||
| + | | style="background-color:#FFF4CC;" | | ||
| + | * Gives one guaranteed critical hit for each building destroyed. | ||
| + | * 15% damage penalty. | ||
|} | |} | ||
<br> | <br> | ||
| + | |||
| + | === Enforcer === | ||
| + | |||
| + | '''Note: The Enforcer is banned or restricted in some leagues.''' | ||
| + | |||
| + | The Enforcer deals increased damage, at the cost of a longer cloak time. | ||
| + | |||
| + | {| class="wikitable grid" | ||
| + | ! class="header" | Weapon | ||
| + | ! class="header" | Damage | ||
| + | ! class="header" | [[Critical hits|Critical]] Damage | ||
| + | ! class="header" | Function Times | ||
| + | ! class="header" | Special | ||
| + | |- | ||
| + | ! style="background-color:#FFF4CC;" | [[Diamondback]] <br>[[Image:Backpack Diamondback.png|link=Diamondback|140x78px]] | ||
| + | | style="background-color:#FFF4CC;" | | ||
| + | * '''Point-Blank:''' 72 | ||
| + | * '''512 units:''' 48 | ||
| + | * '''Over 1024 units:''' 25 | ||
| + | | style="background-color:#FFF4CC;" | | ||
| + | * '''Critical:''' 144 | ||
| + | * '''Point-Blank Mini-crit:''' 97 | ||
| + | * '''Over 512 units Mini-crit:''' 65 | ||
| + | | style="background-color:#FFF4CC;" | | ||
| + | * '''Attack:''' 0.58s | ||
| + | * '''Reload:''' 1.16s | ||
| + | | style="background-color:#FFF4CC;" | | ||
| + | * 20% damage bonus. | ||
| + | * +0.5 second increase in cloak time. | ||
| + | ** Has no effect on the cloak times of the Dead Ringer. | ||
| + | |} | ||
===Primary Weapon Usage=== | ===Primary Weapon Usage=== | ||
| − | + | The stock Revolver can quickly deal with low-health players. The Ambassador can help put damage on, or even take out certain classes with a headshot. The L'Etranger provides additional cloak for a better get-away. The Diamondback is useful in the presence of Engineers. The Enforcer provides increased damage, useful for taking down classes with more health, but makes it harder for the Spy to escape safely. The Ambassador tends to be used, due to the possibility of increased damage with a headshot, but the stock Revovler sees a lot of use due to consistant damage. | |
== Secondary Weapons == | == Secondary Weapons == | ||
| + | |||
| + | The Spy has only one secondary weapon. | ||
=== Electro Sapper === | === Electro Sapper === | ||
| Line 109: | Line 179: | ||
[[File:Sapper IMG.png|100px|right]] | [[File:Sapper IMG.png|100px|right]] | ||
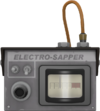
| − | The Spy's only secondary weapon is | + | The Spy's only secondary weapon is the Electro Sapper. |
{| class="wikitable grid" | {| class="wikitable grid" | ||
| Line 118: | Line 188: | ||
! class="header" | Special | ! class="header" | Special | ||
|- | |- | ||
| − | ! style="background-color:# | + | ! style="background-color:#FFF4CC;" | [[Electro Sapper]] <br>[[Image:Sapper IMG.png|link=Electro Sapper|70x39px]] |
| − | | style="background-color:# | + | | style="background-color:#FFF4CC;" | |
| − | | style="background-color:# | + | * '''DPS:''' 25 |
| − | | style="background-color:# | + | | style="background-color:#FFF4CC;" | N/A |
| − | | style="background-color:# | + | | style="background-color:#FFF4CC;" | |
| + | * '''Level 1 Building:''' 6.00s | ||
| + | * '''Level 2 Building:''' 7.20s | ||
| + | * '''Level 3 Building:''' 8.64s | ||
| + | * '''Combat Mini-sentry:''' 4s | ||
| + | | style="background-color:#FFF4CC;" | | ||
| + | * Removed by two hits from a wrench. | ||
| + | * Removed by one hit from the Maul. | ||
| + | * The Spy's revolvers deal less damage to a building which is being sapped. | ||
| + | * Buildings are disabled while being sapped. | ||
|} | |} | ||
<br> | <br> | ||
| + | |||
| + | |||
| + | === Secondary Weapon Usage === | ||
| + | |||
| + | The Spy's Electro Sapper is useful for taking down or disabling an Engineer's buildings to allow the team to advance. | ||
== Melee Weapons == | == Melee Weapons == | ||
| − | The Spy's | + | The Spy's melee weapons are his primary source of damage. Any hit within the 180º range behind an enemy will register a [[Backstab]], dealing six times the player's health. They deal about 60% the damage of another stock melee weapon, (compare to scout). All of the Spy's knives except for the Spy-cicle will perform the [[Fencing]] taunt. |
=== Knife === | === Knife === | ||
| Line 134: | Line 218: | ||
[[File:Knife Weapon.png|100px|right]] | [[File:Knife Weapon.png|100px|right]] | ||
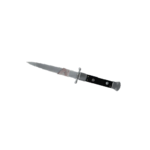
| − | The Knife | + | The stock Knife deals low damage normally, but can backstab for an instant kill. |
| − | The [[Sharp Dresser]] and the [[Black Rose]] | + | The [[Sharp Dresser]] and the [[Black Rose]] have the same stats as the Knife. |
{| class="wikitable grid" | {| class="wikitable grid" | ||
| Line 146: | Line 230: | ||
|- | |- | ||
! style="background-color:#FFF4CC;" | [[Knife]] <br>[[Image:Knife Weapon.png|link=Knife|70x39px]] | ! style="background-color:#FFF4CC;" | [[Knife]] <br>[[Image:Knife Weapon.png|link=Knife|70x39px]] | ||
| − | | style="background-color:#FFF4CC;" | Melee | + | | style="background-color:#FFF4CC;" | |
| − | | style="background-color:#FFF4CC;" | Critical: 120 | + | * '''Melee:''' 40 |
| − | | style="background-color:#FFF4CC;" | Attack: 0.8s | + | * '''Backstab:''' 6 times the target's health |
| − | | style="background-color:#FFF4CC;" | | + | | style="background-color:#FFF4CC;" | |
| + | * '''Critical:''' 120 | ||
| + | * '''Mini-crit:''' 54 | ||
| + | | style="background-color:#FFF4CC;" | | ||
| + | * '''Attack:''' 0.8s | ||
| + | | style="background-color:#FFF4CC;" | | ||
| + | * Stock melee weapon. | ||
|} | |} | ||
<br> | <br> | ||
| Line 157: | Line 247: | ||
[[File:RED Eternal Reward.png|100px|right]] | [[File:RED Eternal Reward.png|100px|right]] | ||
| − | + | The Your Eternal Reward deals identical damage to the stock Knife, but will cause the death of an enemy to be silent, and disguises the Spy as the fallen teammate instantly. The Spy cannot otherwise disguise. | |
| − | |||
| − | |||
| − | The [[Wanga Prick]] | + | The [[Wanga Prick]] has the same stats as the Your Eternal Reward. |
{| class="wikitable grid" | {| class="wikitable grid" | ||
| Line 171: | Line 259: | ||
|- | |- | ||
! style="background-color:#FFF4CC;" | [[Your Eternal Reward]] <br>[[Image:RED Eternal Reward.png|link=Eternal Reward|70x39px]] | ! style="background-color:#FFF4CC;" | [[Your Eternal Reward]] <br>[[Image:RED Eternal Reward.png|link=Eternal Reward|70x39px]] | ||
| − | | style="background-color:#FFF4CC;" | Melee | + | | style="background-color:#FFF4CC;" | |
| − | | style="background-color:#FFF4CC;" | Critical: 120 | + | * '''Melee:''' 40 |
| − | | style="background-color:#FFF4CC;" | Attack: 0.8s | + | * '''Backstab:''' 6 times the target's health |
| − | | style="background-color:#FFF4CC;" | | + | | style="background-color:#FFF4CC;" | |
| + | * '''Critical:''' 120 | ||
| + | * '''Mini-crit:''' 54 | ||
| + | | style="background-color:#FFF4CC;" | | ||
| + | * '''Attack:''' 0.8s | ||
| + | | style="background-color:#FFF4CC;" | | ||
| + | * Disables the Disguise Kit. | ||
| + | * Backstabs are silent. | ||
| + | ** Corpses are hidden. | ||
| + | ** Instant disguise as the killed player. | ||
|} | |} | ||
<br> | <br> | ||
| Line 182: | Line 279: | ||
[[File:Conniver's Kunai.png|100px|right]] | [[File:Conniver's Kunai.png|100px|right]] | ||
| − | The | + | The Conniver's Kunai grants the Spy health on kill, at the cost of initial health. The granted health can provide overheal. |
{| class="wikitable grid" | {| class="wikitable grid" | ||
| Line 192: | Line 289: | ||
|- | |- | ||
! style="background-color:#FFF4CC;" | [[Conniver's Kunai]] <br>[[Image:Conniver's Kunai.png|link=Conniver's Kunai|70x39px]] | ! style="background-color:#FFF4CC;" | [[Conniver's Kunai]] <br>[[Image:Conniver's Kunai.png|link=Conniver's Kunai|70x39px]] | ||
| − | | style="background-color:#FFF4CC;" | Melee | + | | style="background-color:#FFF4CC;" | |
| − | | style="background-color:#FFF4CC;" | Critical: 120 | + | * '''Melee:''' 40 |
| + | * '''Backstab:''' 6 times the target's health | ||
| + | | style="background-color:#FFF4CC;" | | ||
| + | * '''Critical:''' 120 | ||
| + | * '''Mini-crit:''' 54 | ||
| style="background-color:#FFF4CC;" | Attack: 0.8s | | style="background-color:#FFF4CC;" | Attack: 0.8s | ||
| − | | style="background-color:#FFF4CC;" | | + | | style="background-color:#FFF4CC;" | |
| + | * On backstab, grants the Spy health equivalent to the target's health. | ||
| + | * Maximum health reduced to 60 from 125. | ||
| + | ** Maximum overheal reduced from 185 to 90. | ||
| + | ** Maximum overheal from backstab is 180. | ||
| + | * Health provided extinguishes fire and bleeding, similar to a health pack. | ||
|} | |} | ||
<br> | <br> | ||
| Line 203: | Line 309: | ||
[[File:Backpack Big Earner.png|150px|right]] | [[File:Backpack Big Earner.png|150px|right]] | ||
| − | The Big Earner | + | The Big Earner provides the Spy with 30% cloak on backstab, but reduces his maximum health by 25. |
{| class="wikitable grid" | {| class="wikitable grid" | ||
| Line 213: | Line 319: | ||
|- | |- | ||
! style="background-color:#FFF4CC;" | [[Big Earner]] <br>[[Image:Backpack Big Earner.png|link=Big Earner|210x117px]] | ! style="background-color:#FFF4CC;" | [[Big Earner]] <br>[[Image:Backpack Big Earner.png|link=Big Earner|210x117px]] | ||
| − | | style="background-color:#FFF4CC;" | Melee | + | | style="background-color:#FFF4CC;" | |
| − | | style="background-color:#FFF4CC;" | Critical: 120 | + | * '''Melee:''' 40 |
| − | | style="background-color:#FFF4CC;" | Attack: 0.8s | + | * '''Backstab:''' 6 times the target's health |
| + | | style="background-color:#FFF4CC;" | | ||
| + | * '''Critical:''' 120 | ||
| + | * '''Mini-crit:''' 54 | ||
| + | | style="background-color:#FFF4CC;" | | ||
| + | * '''Attack:''' 0.8s | ||
| style="background-color:#FFF4CC;" | | | style="background-color:#FFF4CC;" | | ||
| − | * | + | * 30% cloak granted on kill. |
| − | * | + | * Maximum health reduced to 100 from 125. |
| + | ** Maximum overheal reduced from 185 to 150. | ||
|} | |} | ||
<br> | <br> | ||
| + | |||
| + | === Spy-cicle === | ||
| + | |||
| + | [[File:Backpack Spy-cicle.png|150px|right]] | ||
| + | |||
| + | '''Note: The Spy-cicle is banned or restricted in some leagues.''' | ||
| + | |||
| + | The Spy-cicle kills players silently, but freezes their bodies in ice, akin to the [[Saxxy]]. If the Spy is lit on fire, or taking afterburn with it active, it will extinguish the fire, prevent additional fire damage for two seconds, but disable the knife for 15 seconds. | ||
| + | |||
| + | {| class="wikitable grid" | ||
| + | ! class="header" | Weapon | ||
| + | ! class="header" | Damage | ||
| + | ! class="header" | [[Critical hits|Critical]] Damage | ||
| + | ! class="header" | Function Times | ||
| + | ! class="header" | Special | ||
| + | |- | ||
| + | ! style="background-color:#FFF4CC;" | [[Spy-cicle]] <br>[[Image:Backpack Spy-cicle.png|link=Spy-cicle|210x117px]] | ||
| + | | style="background-color:#FFF4CC;" | | ||
| + | * '''Melee:''' 40 | ||
| + | * '''Backstab:''' 6 times the target's health | ||
| + | | style="background-color:#FFF4CC;" | | ||
| + | * '''Critical:''' 120 | ||
| + | * '''Mini-crit:''' 54 | ||
| + | | style="background-color:#FFF4CC;" | | ||
| + | * '''Attack:''' 0.8s | ||
| + | * '''Fire prevention time:''' 2s | ||
| + | * '''Recharge time:''' 15s | ||
| + | | style="background-color:#FFF4CC;" | | ||
| + | * Kills silently. | ||
| + | ** Leaves ice statues rather than corpses. | ||
| + | * Will stop and prevent fire damage while active. | ||
| + | ** Can prevent afterburn. | ||
| + | ** Disables the knife after doing so. | ||
| + | * Uses the Revovler taunt as opposed to the [[Fencing]] taunt. | ||
| + | |} | ||
===Melee Weapon Usage=== | ===Melee Weapon Usage=== | ||
| − | |||
| − | The Eternal Reward | + | The stock Knife has no health penalty, and allows the disguise kit. The Your Eternal Reward allows for a Spy to take out enemies silently, but voice communication can supersede this. The Conniver's Kunai can help a Spy survive after a backstab, but makes the Spy highly vulnerable. The Big Earner is useful for a better getaway, and the Spy-cicle is helpful to avoid fire damage. The stock Knife tends to be a favorite choice for its lack of downsides, although some confident players may use the Conniver's Kunai to help extinguish fire damage. |
== PDA Items == | == PDA Items == | ||
| Line 233: | Line 379: | ||
[[File:PDA disguise.png|100px|right]] | [[File:PDA disguise.png|100px|right]] | ||
| − | The Disguise Kit | + | The Disguise Kit allows the Spy to disguise as any other player in the game. |
{| class="wikitable grid" | {| class="wikitable grid" | ||
| Line 242: | Line 388: | ||
! class="header" | Special | ! class="header" | Special | ||
|- | |- | ||
| − | ! style="background-color:# | + | ! style="background-color:#FFF4CC;" | [[Disguise Kit]] <br>[[Image:PDA disguise.png|link=Disguise Kit|70x39px]] |
| − | | style="background-color:# | + | | style="background-color:#FFF4CC;" | N/A |
| − | | style="background-color:# | + | | style="background-color:#FFF4CC;" | N/A |
| − | | style="background-color:# | + | | style="background-color:#FFF4CC;" | |
| − | | style="background-color:# | + | * '''Disguise Time:''' 2s |
| + | * '''Smoke Duration:''' 3s | ||
| + | | style="background-color:#FFF4CC;" | | ||
| + | * Smoke will be invisible if disguising while cloaked. | ||
| + | * Disguising as a friendly Spy will drop any disguise. | ||
| + | * Speed will be reduced to match a slower speed disguised class. | ||
| + | ** This occurs when disguising as a Heavy, Demoman, or Soldier. | ||
| + | ** Cannot speed up the Spy to match the speed of a Medic or Scout. | ||
| + | ** Speed is not affected by weapons such as the [[Eyelander]], [[Gloves of Running Urgently]], or the [[Buffalo Steak Sandvich]]. | ||
| + | * By re-disguising as the same class, the spy will adjust his apparently active weapon to match the slot of the one he is using. | ||
| + | ** The Electro Sapper or any PDA items cannot be mimicked in this way. | ||
|} | |} | ||
<br> | <br> | ||
| Line 254: | Line 410: | ||
[[File:Invisibilitywatch.PNG|100px|right]] | [[File:Invisibilitywatch.PNG|100px|right]] | ||
| − | The | + | The stock Invisibility Watch provides a rudimentary cloak which can be refueled with ammunition, and drains while active. |
| − | The [[Enthusiast's Timepiece]] | + | The [[Enthusiast's Timepiece]] has the same stats as the Invisibility Watch. |
{| class="wikitable grid" | {| class="wikitable grid" | ||
| Line 268: | Line 424: | ||
| style="background-color:#FFF4CC;" | N/A | | style="background-color:#FFF4CC;" | N/A | ||
| style="background-color:#FFF4CC;" | N/A | | style="background-color:#FFF4CC;" | N/A | ||
| − | | style="background-color:#FFF4CC;" | Cloak | + | | style="background-color:#FFF4CC;" | |
| − | | style="background-color:#FFF4CC;" | | + | * '''Cloak duration:''' 10s |
| + | * '''Recharge time:''' 33.5s | ||
| + | * '''Cloak enable time:''' 1.2s | ||
| + | * '''Cloak disable time:''' 2.2s | ||
| + | | style="background-color:#FFF4CC;" | | ||
| + | * Can be refilled with ammunition. | ||
| + | * If disguising while cloaked, the associated smoke will be hidden. | ||
| + | * Afterburn, bleeding, [[Jarate]], [[Mad Milk]], and water effects will be visible while cloaked. | ||
| + | * Cloak will flicker if the Spy bumps into an enemy player, or takes damage of any kind. | ||
|} | |} | ||
<br> | <br> | ||
| Line 277: | Line 441: | ||
[[File:Cloak and Dagger.PNG|100px|right]] | [[File:Cloak and Dagger.PNG|100px|right]] | ||
| − | The Cloak and Dagger | + | The Cloak and Dagger has less overall cloak than the stock Invisibility Watch, but allows the Spy to regenerate cloak by not moving. |
| − | |||
{| class="wikitable grid" | {| class="wikitable grid" | ||
| Line 290: | Line 453: | ||
| style="background-color:#FFF4CC;" | N/A | | style="background-color:#FFF4CC;" | N/A | ||
| style="background-color:#FFF4CC;" | N/A | | style="background-color:#FFF4CC;" | N/A | ||
| − | | style="background-color:#FFF4CC;" | | + | | style="background-color:#FFF4CC;" | |
| − | | style="background-color:#FFF4CC;" | Cannot be refilled with | + | * '''Walking duration:''' 6.8s |
| + | * '''Crouch-walking duration:''' 66.5s <!--Confirm--> | ||
| + | * '''Recharge time:''' 18.2s <!--Confirm--> | ||
| + | * '''Recharge time while cloaked but not moving:''' ??? | ||
| + | * '''Cloak enable time:''' 1.2s | ||
| + | * '''Cloak disable time:''' 2.2s | ||
| + | | style="background-color:#FFF4CC;" | | ||
| + | * Cannot be refilled with ammunition. | ||
| + | * Cloak duration based on movement speed. | ||
| + | * Cloak will flash identically to the stock Invisibility Watch. | ||
| + | ** If the cloak meter runs out while cloaked, the cloak will flash as if the Spy had been bumped. | ||
|} | |} | ||
<br> | <br> | ||
| Line 311: | Line 484: | ||
| style="background-color:#FFF4CC;" | N/A | | style="background-color:#FFF4CC;" | N/A | ||
| style="background-color:#FFF4CC;" | N/A | | style="background-color:#FFF4CC;" | N/A | ||
| − | | style="background-color:#FFF4CC;" | Supercloak Duration: 6.5s | + | | style="background-color:#FFF4CC;" | |
| − | | style="background-color:#FFF4CC;" | | + | * '''Supercloak Duration:''' 6.5s |
| − | + | * '''Cloak enable time:''' 0s | |
| + | * '''Cloak disable time:''' 2.2s | ||
| + | * '''Recharge time:''' 16s | ||
| + | | style="background-color:#FFF4CC;" | | ||
| + | * Can only be activated at 100% charge. | ||
| + | ** When activated, the Dead Ringer has no immediate effect, but prevents attacks by the Spy. | ||
| + | ** If the Spy is damaged in any way while active, it triggers cloak and drops a fake corpse. | ||
| + | *** The first 6.5 seconds of the cloak are a Supercloak. | ||
| + | **** Supercloak is not subject to flashes, but it will show Jarate, Mad Milk, Afterburn, and water effects. | ||
| + | **** Extinguishes afterburn when activated. | ||
| + | **** Reduces damage taken by 90%. | ||
| + | *** Cloak can be extended with ammunition, but will not be Supercloak. | ||
| + | * Cloak drains 60% faster. | ||
| + | * Decloaking reduces the overall cloak amount to 40% or lower. | ||
| + | * Ammunition pickups cannot refill more than 35% charge. | ||
| + | ** Large and Medium pickups will refill 35%. | ||
| + | ** Small pickups will refill 25%. | ||
| + | * Cloak recharges 80% faster otherwise. | ||
|} | |} | ||
<br> | <br> | ||
| + | ===PDA Items Usage=== | ||
| − | |||
The PDA items were the Spies' essential tool to do his trickery, especially his Disguise kit, or to conceal himself temporarily (Except Cloak & Dagger, which makes the possibility to cloak indefinitely). | The PDA items were the Spies' essential tool to do his trickery, especially his Disguise kit, or to conceal himself temporarily (Except Cloak & Dagger, which makes the possibility to cloak indefinitely). | ||
Revision as of 22:47, 29 February 2012
The community competitive scene changes frequently. Some or all info may be outdated.
The Spy is a class highly dependent on his stealth abilities to take out enemies behind cover with a backstab.
Primary Weapons
The Spy's primary weapons provide him with his only long-range damage, and are mostly used to cover a retreat. All of the Spy's primary weapons will be perfectly accurate if unfired for 1.25 seconds.
Revolver
The stock Revolver deals low damage, and can be good to pick of a low-health enemy at range.
The Big Kill has the same stats as the Revolver.
| Weapon | Damage | Critical Damage | Function Times | Special |
|---|---|---|---|---|
| Revolver |
|
|
|
|
The Ambassador
The Ambassador deals reduced damage, but deals critical damage on a headshot.
| Weapon | Damage | Critical hits|Critical Damage | Function Times | Special |
|---|---|---|---|---|
| Ambassador |
|
|
|
|
L'Etranger
The L'Etranger deals reduced damage, but provides 15% additional cloak on hit.
| Weapon | Damage | Critical Damage | Function Times | Special |
|---|---|---|---|---|
| L'Etranger |
|
|
|
|
Diamondback
The Diamondback deals reduced damage, but deals stores and deals critical hits for each building sapped.
| Weapon | Damage | Critical Damage | Function Times | Special |
|---|---|---|---|---|
Diamondback 
|
|
|
|
|
Enforcer
Note: The Enforcer is banned or restricted in some leagues.
The Enforcer deals increased damage, at the cost of a longer cloak time.
| Weapon | Damage | Critical Damage | Function Times | Special |
|---|---|---|---|---|
Diamondback 
|
|
|
|
|
Primary Weapon Usage
The stock Revolver can quickly deal with low-health players. The Ambassador can help put damage on, or even take out certain classes with a headshot. The L'Etranger provides additional cloak for a better get-away. The Diamondback is useful in the presence of Engineers. The Enforcer provides increased damage, useful for taking down classes with more health, but makes it harder for the Spy to escape safely. The Ambassador tends to be used, due to the possibility of increased damage with a headshot, but the stock Revovler sees a lot of use due to consistant damage.
Secondary Weapons
The Spy has only one secondary weapon.
Electro Sapper
The Spy's only secondary weapon is the Electro Sapper.
| Weapon | Damage | Critical Damage | Function Times | Special |
|---|---|---|---|---|
| Electro Sapper |
|
N/A |
|
|
Secondary Weapon Usage
The Spy's Electro Sapper is useful for taking down or disabling an Engineer's buildings to allow the team to advance.
Melee Weapons
The Spy's melee weapons are his primary source of damage. Any hit within the 180º range behind an enemy will register a Backstab, dealing six times the player's health. They deal about 60% the damage of another stock melee weapon, (compare to scout). All of the Spy's knives except for the Spy-cicle will perform the Fencing taunt.
Knife
The stock Knife deals low damage normally, but can backstab for an instant kill.
The Sharp Dresser and the Black Rose have the same stats as the Knife.
| Weapon | Damage | Critical Damage | Function Times | Special |
|---|---|---|---|---|
| Knife |
|
|
|
|
Your Eternal Reward
The Your Eternal Reward deals identical damage to the stock Knife, but will cause the death of an enemy to be silent, and disguises the Spy as the fallen teammate instantly. The Spy cannot otherwise disguise.
The Wanga Prick has the same stats as the Your Eternal Reward.
| Weapon | Damage | Critical Damage | Function Times | Special |
|---|---|---|---|---|
| Your Eternal Reward |
|
|
|
|
Conniver's Kunai
The Conniver's Kunai grants the Spy health on kill, at the cost of initial health. The granted health can provide overheal.
| Weapon | Damage | Critical Damage | Function Times | Special |
|---|---|---|---|---|
| Conniver's Kunai |
|
|
Attack: 0.8s |
|
The Big Earner
The Big Earner provides the Spy with 30% cloak on backstab, but reduces his maximum health by 25.
| Weapon | Damage | Critical Damage | Function Times | Special |
|---|---|---|---|---|
Big Earner 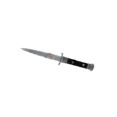
|
|
|
|
|
Spy-cicle
Note: The Spy-cicle is banned or restricted in some leagues.
The Spy-cicle kills players silently, but freezes their bodies in ice, akin to the Saxxy. If the Spy is lit on fire, or taking afterburn with it active, it will extinguish the fire, prevent additional fire damage for two seconds, but disable the knife for 15 seconds.
| Weapon | Damage | Critical Damage | Function Times | Special |
|---|---|---|---|---|
Spy-cicle 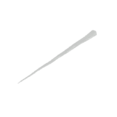
|
|
|
|
|
Melee Weapon Usage
The stock Knife has no health penalty, and allows the disguise kit. The Your Eternal Reward allows for a Spy to take out enemies silently, but voice communication can supersede this. The Conniver's Kunai can help a Spy survive after a backstab, but makes the Spy highly vulnerable. The Big Earner is useful for a better getaway, and the Spy-cicle is helpful to avoid fire damage. The stock Knife tends to be a favorite choice for its lack of downsides, although some confident players may use the Conniver's Kunai to help extinguish fire damage.
PDA Items
Disguise Kit
The Disguise Kit allows the Spy to disguise as any other player in the game.
| Weapon | Damage | Critical Damage | Function Times | Special |
|---|---|---|---|---|
| Disguise Kit |
N/A | N/A |
|
|
Invisibility Watch
The stock Invisibility Watch provides a rudimentary cloak which can be refueled with ammunition, and drains while active.
The Enthusiast's Timepiece has the same stats as the Invisibility Watch.
| Weapon | Damage | Critical Damage | Function Times | Special |
|---|---|---|---|---|
| Invisibility Watch |
N/A | N/A |
|
Cloak and Dagger
The Cloak and Dagger has less overall cloak than the stock Invisibility Watch, but allows the Spy to regenerate cloak by not moving.
| Weapon | Damage | Critical Damage | Function Times | Special |
|---|---|---|---|---|
| Cloak and Dagger |
N/A | N/A |
|
|
Dead Ringer
The Dead Ringer can be a useful tool into tricking the enemy that they have killed you or have gotten an important pick. A pick can be attempted with the enemy fooled that they have killed you, making the second attempt very easy. The Dead Ringer's loud ring can sometimes be muffled down by voice communication, but can still be easily heard by anyone completely aware that a Spy is still around. A common tactic to use with the Dead Ringer is to disguise as an important pick target of your own team, such as a Demoman, or Medic, while playing Gravel Pit offense and run out the spawn gates with it activated to fool an enemy Demoman camping the gates at the start of the round to blow his stickies.
| Weapon | Damage | Critical Damage | Function Times | Special |
|---|---|---|---|---|
| Dead Ringer |
N/A | N/A |
|
|
PDA Items Usage
The PDA items were the Spies' essential tool to do his trickery, especially his Disguise kit, or to conceal himself temporarily (Except Cloak & Dagger, which makes the possibility to cloak indefinitely).
- The Invisibility Watch travels furthest, but the duration is timed, so it's best to pick the route carefully before doing so, and pick up ammo boxes to travel even further / fill up the cloak meter faster.
- The Cloak & Dagger is best used to watch the enemies' movements, while standing by cloaked indefinitely, making this PDA the best choice when paired with Your Eternal Reward.
- The Dead Ringer is best used to fake your deaths, making the enemy confident that you were dead, thus making it easier for a stab. But the loud decloaking sound makes it harder to keep the enemy tricked of your death, so find a safe place to decloak, far from the enemies.
Overall, it is up to each player to pick one that suits them most, and also the situation they were in.
See also
| |||||


