Difference between revisions of "Capping (Control Point: Competitive)"
m |
m |
||
| Line 33: | Line 33: | ||
| cp_5gorge | | cp_5gorge | ||
|- | |- | ||
| − | | [[File:Badlands2.png|100px|link=Badlands]] | + | | [[File:Badlands2.png|100px|link=Badlands (Control Point)]] |
| '''[[Badlands (Control Point)|Badlands]]''' | | '''[[Badlands (Control Point)|Badlands]]''' | ||
| cp_badlands | | cp_badlands | ||
| Line 49: | Line 49: | ||
| cp_freight_final1 | | cp_freight_final1 | ||
|- | |- | ||
| − | | [[File:TF2 Granary Map.jpg|100px|link=Granary]] | + | | [[File:TF2 Granary Map.jpg|100px|link=Granary (Control Point)]] |
| '''[[Granary (Control Point)|Granary]]''' | | '''[[Granary (Control Point)|Granary]]''' | ||
| cp_granary | | cp_granary | ||
Revision as of 21:15, 29 June 2012
 | It has been suggested that this article or section be merged with Control Point (objective). Discussion to support or oppose the merge should be on this article's talk page, usually under the heading "Merge". |
| “You are so small! Is funny to me!” This article is a stub. As such, it is not complete. You can help Team Fortress Wiki by expanding it. |
The community competitive scene changes frequently. Some or all info may be outdated.

Capping is a term that means the act of capturing a control point in the Standard Control Point, King Of The Hill, Territorial Control, Capture The Flag, and Attack/Defend game modes. Control Points are captured when a player of any class stands on a contested control point, and after a certain period of time the control point will convert to the color of the team that captured it if the capturer is not killed or the enemy fails to block the capture. Capping is the primary objective in many modes of Team Fortress 2.
Capping works the same way in every game mode, however the time required to capture a point can vary between modes and maps. In some game modes such as King of the Hill, it is necessary for the team that owns the point to defend it after they have captured it. A point can be captured anywhere within the hazard tape that surrounds it.
Strategy - Control points
The Scout benefits from a capture rate double that of other classes, giving Scouts an advantage in capturing control points. The Scout also has the ability to easily dodge incoming damage due to his double jump ability. This is very useful on certain control points, such as Badlands Spire, where an enemy Demoman can easily spam stickies onto the point. However, the Pain Train, a melee weapon for the Soldier and Demoman classes, improves their cap rates to equal that of the Scout – making these three classes excellent for rapidly capturing a point.
When these classes work together, they can provide a devastating offensive and allow themselves to punch through to the point and hold it just long enough to capture it. However, this is easier with support from other classes such as Pyros and Medics. A Medic's ÜberCharge can be an enormous help when pushing back the defending team, however Übered players cannot themselves cap a point. Additionally, Heavies can provide additional assistance as their high health increases the time a player is on the point.
Engineers can set up Sentries and Teleporters around a control point to help their team fight the defending team, and help get to the control point faster, especially if the control point is far away. Players should remember to check for Demoman sticky bombs on the point and destroy them or the Demoman himself (a recommended class for this is the sniper due to his ability to dispatch bombs and enemies from a long distance) to avoid a failure of a direct assault from your team.
Stealth can also be used to rapidly capture points. Using his cloak and disguise, the Spy can easily slip past the front line undetected and hide on a locked control point further ahead. This means that when the previous point is captured and the next one unlocked, a Spy can capture it before the defending team has time reach the point and set up a good defense. However, a Spy is unable to capture a point while invisible or disguised, so he must expose himself just before the point becomes available for the greatest success. This is called back-capping. This is very successful when your team is losing and they have a slight chance of getting the 1st point. On occasion, the Scout can also do this, but it is usually much harder for a Scout to reach the point and hide there.
Strategy - Intel
In a typical CTF map, the Intel is deep within the enemy base and thus capping the Intel in CTF usually requires team coordination to be able to fight through many enemies.. Occasionally the enemy team may be completely disorganized with no one defending the intel, in which case, a spy or scout can simply run out with it. The most common defense for the Intel is the Engineer's Sentry Gun, combined with the natural barrier of enemies leaving the base and often patrolling around it or covering the sentries blind spots. Heavies equipped with the Brass Beast are also good defenders of Intel due to the small space they have to defend.
Usually, a team will attempt to capture the Intel with a "Push". A Push involves several teammates working together, typically with a Heavy and Medic supporting them to easily cut through the enemy base and the Sentries blocking the way to the Intel. After one of the team members takes the Intel they will often have to fight their way out with survivors from the Push and the teammates coming into the enemy base.
Standard Competitive Control Point maps
Note: Community maps are identified in italics.
| Map | File Name | |
|---|---|---|

|
5Gorge | cp_5gorge |
|
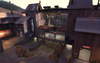
Badlands | cp_badlands |
|
Coldfront | cp_coldfront |
|
Fastlane | cp_fastlane |
|
Freight | cp_freight_final1 |
|
Granary | cp_granary |

|
Well | cp_well |
|
Yukon | cp_yukon_final |