Cтратегия от сообщества для карты Mountain Lab
 | В данный момент статья переводится с английского языка на русский. Если для перевода необходима помощь, напишите об этом на странице обсуждения или обратитесь к участникам, правившим эту статью (просмотрев её историю). |
| «Вы настолько малы, что мне смешно!» Это незавершённая статья. Как таковая, она не завершена. Вы можете помочь Team Fortress Wiki, исправив и дополнив её. |
| Community Mountain Lab strategy | |
|---|---|

| |
| Информация | |
| Автор(-ы): | {{{map-developer}}} |
| Снимки карты | |
 | |
Содержание
Основные
- Финальная точка является очень открытой и, как таковая, восприимчива к комбинированным огню и маневру
 Разведчик
- A good idea when going for the final control point is to wait in a corner or secluded out of sight area near the control point for all the enemies to pass, then start capturing. You may be able to draw the enemies back, allowing your team to advance.
- Be sure to take the secluded routes, to maximize surprise. This way you can have the enemies' health low before they even realize they're being attacked.
- The Sandman may be a good choice for this map, due to the long straightaways.
 Солдат
 Поджигатель
 Подрывник
 Пулемётчик
 Инженер
 Медик
Медик
 Снайпер
 Шпион
Шпион
- One of the safest ways to get through the middle is to Cloak and to go across the top, where there is usually little to no traffic.

- Remember to sap teleporters as it is a long walk to the control point.
- On offense, a good place to hide out at the first control point is inside the building behind it, disguised as a Sniper. Then, when you see an opening in the enemies, perhaps an exposed back, jump through the window and attack. After, Cloak and go back to the window, or escape.
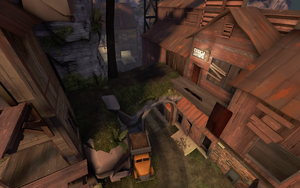 Переход через этот район во время невидемости чтобы свести к минимуму шансы быть обнаруженным.
