Soldier confrontaties
< Soldier match-ups
Revision as of 17:48, 21 July 2011 by Sausage948 (talk | contribs) (Created and translated the Scout and Soldier match-ups.)
 | Deze pagina wordt momenteel vertaald naar het Nederlands. Als je Nederlands kan spreken, laat dan een bericht achter op de praat pagina of neem contact op met diegene die aan de pagina hebben bijgedragen (door het pagina verleden te bekijken). |
| “ | Als god wou dat je in leven bleef, dan had hij mij niet gecreëerd!
— The Soldier over confrontatie strategieën
|
” |
| Klasse | Strategie | ||
|---|---|---|---|
 Soldier/nl |
vs | 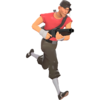 Scout |
Jullie zijn beide sterk van een korte-afstand. Maak een Raketsprong naar een hoger gebied zodat je de Scout kunt volgen en hem kunt beschieten. Gebruik de splashschade van de Raketwerper zodat je de Scout niet direct hoeft te raken. Als hij te ver weg is of te moeilijk om met de Raketwerper te raken, verander dan naar je hitscan Shotgun. Sommige Scouts zullen proberen te wapen hekelen om je te dwingen van wapens te wisselen, maar als je goed kunt mikken, dan kan op korte afstand de Shotgun gebruikt worden in plaats van de Raketwerper. Gebruik alleen je slagwapen als een laatste redmiddel, want zelfs met de snelheidsverhoging van de Gelijkmaker kan je de Scout niet bijhouden. Alhoewel de Directe Inslag een Scout in een keer kan doden op korte afstand, zal het gebrek aan splashschade het moeilijk maken om hem met een Raket te raken. |
Soldier |
vs | Soldier |
Als je het tegen een andere Soldier moet opnemen, dan zal elke raket moeten tellen. Gebruik dichtbijzijnde schuilplekken om splashschade te ontwijken, terwijl je zelf ook voorzichtig richt. Verander naar de Shotgun in plaats van je Raketwerper te herladen om de vijandelijke Soldier af te maken. Het is ook belangrijk dat je een hoogtevoordeel hebt; jezelf beschadigen met een raket is beter dan geraakt worden door twee raketten van je tegenstander. Een raketsprong over de vijandelijke Soldier maken zal het niet alleen mogelijk maken om hem makkelijker met raketten te raken, maar hierdoor moet hij jou direct raken om je te beschadigen, wat vrij lastig is met de raketwerper. Als de vijandelijke Soldier zelf aan het raketspringen is, kun je zelf ook de lucht in springen met een raketsprong en hem in de lucht proberen te raken, of je kan een raket schieten op de plek waar hij zal landen. |
Soldier |
vs | 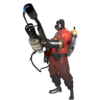 Pyro |
A Pyro who is skilled with the compression blast can render your rockets useless. At medium to long range, harass an enemy Pyro with your Shotgun. Once he gets close, continue to use the Shotgun or shoot rockets at his feet; the closer he is, the harder it is to reflect your rockets. If need be, you can rocket jump to retreat and put some distance between the two of you. Although a Pyro will almost always fight you at close range, using your melee weapon against the class that specializes in close range combat is obviously not a good idea. |
Soldier |
vs | 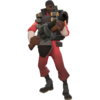 Demoman |
In terms of one-on-one encounters, the two of you are pretty evenly matched when it comes to damage output. At longer distances, a Demoman can easily shell you with grenades and charged Stickybombs. Your Rocket Launcher and Shotgun are easier to aim than his Grenade Launcher or Stickybomb Launcher, so stay within medium range and keep a direct line of sight to maintain the advantage. Like when fighting an enemy Soldier, rocket jump to gain a height advantage while making it difficult for the Demoman to land direct hits. Even if you don’t have the Shotgun equipped, a well placed rocket can move his Sticky traps. If the Demoman decides to rush you down with the Chargin’ Targe, use the knock back from a rocket to pop him into the air and cancel his charge. |
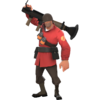
Soldier |
vs | 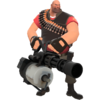 Heavy |
Don’t engage an enemy Heavy if his Minigun is already spun up; you will lose the ensuing one-on-one fight. He is slow, so harass him with your Rocket Launcher from high ground and around obstacles while denying him a direct line of sight. If his Minigun is not already revved up, you should be able to defeat him at close range by unleashing all your rockets and maybe a few Shotgun blasts. He is a relatively large and slow target, so the Direct Hit can be particularly effective against him. Only rocket jump to escape fights with a Heavy; you can’t quite afford the self-damage and the hitscan Minigun can still easily hit you in midair. |
Soldier |
vs |  Engineer |
An Engineer by himself is an easy target. Your Rocket Launcher allows you to destroy Engineer buildings from a safe distance. If the Engineer stays near his nest, target him or his Dispenser first to prevent any repairs. Ensure that you have good cover to duck in and out of, especially if the Engineer is using his Wrangler. Once the Engineer is away or dead, the Sentry Gun is simple to destroy. If you must directly take on a level 3 Sentry Gun, it’d be best to come back with a friendly Medic. |
Soldier |
vs | 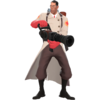 Medic |
A lone Medic is an easy target. The Medic is a high priority target, especially when he’s healing his teammates. Use your Rocket Launcher’s splash damage to attack both him and his patient at once. You can rocket jump above and past the Medic’s allies to dive-bomb him. Even if you just make him retreat, you are denying his team a major source of healing. |
Soldier |
vs | 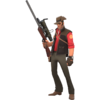 Sniper |
Your slow speed and high damage output make you a prime target for any Sniper. It is best to avoid open areas that Snipers often watch over. If you must directly approach an enemy Sniper, move erratically and harass him with a few rockets to mess up his aim. Rocket jump to quickly close the distance and nab an easy close range kill. |
Soldier |
vs | 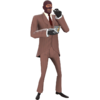 Spy |
Your slow speed and tendency to deal heavy damage make you a prime target for any enemy Spy. Constantly be aware of your surroundings and any suspicious teammates. The splash damage from your Rocket Launcher and the spread of your Shotgun can aid in revealing a Cloaked Spy. Once he is discovered, the fight is simple. |
See also
|