Spineyard
| Spineyard | |
|---|---|

| |
| Basic Information | |
| Map type: | Payload |
| File name: | pl_spineyard
|
| Released: | October 9, 2023 Patch (Scream Fortress XV) |
| Developer(s): | Matthew "Panckakebro" Hiller Elián "iron" Rodríguez Denis "xB33" Varchulik Norman "Mikusch" Masanek |
| Map Info | |
| Environment: | City / Halloween |
| Setting: | Nighttime |
| Hazards: | Pitfalls, pumpkin bombs, skeletons, Payload cart explosion |
| Map Photos | |
 | |
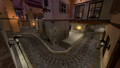
| Map Overview | |
 | |
| Map Stamp | |
| Supporters Leaderboard | |
| “ | Here, you’ll find not only grapes, but also graves! Push a cart full of explosives through a haunted landscape of creepy coffins, eerie effigies, and scariest of all, Italians!
— Spineyard publicity blurb
|
” |
Spineyard is a community-created Payload map. It is set in an Italian coastal city with an ancient castle that holds both a winery and a missile base. It is a Halloween version of the custom map Vineyard.
At certain points during the round, as well as when a point is captured, a bell rings, signaling the appearance of the undead mafia: skeletons dressed in fancy suits and armed with Tommy guns who shoot at players on both teams and drop a magic spell each when defeated.
Spineyard was contributed to the Steam Workshop.
Contents
Locations
Checkpoint A – The City
- First BLU Spawn: A building with three exits, two on the ground level near the cart and an elevated one behind the cart. A single resupply cabinet sit in-between the ground level exits.
- Vino Dalla Vigna: A building right in front of BLU's spawn. Its roof can be easily accessed by a pair of stairs, one on each side.
- The Three Buildings: Three buildings with connected interiors. The doorway behind Vino Dalla Vigna leads to a drop onto the middle building's interior. From here, an exit below the drop takes players just past checkpoint A; the exit on the opposite side leads to the Fountain.
- The Two-Store Building: A building right next to BLU's spawn. The only ground level entrance is close to the cart's starting point, which is right in front of a flight of stairs. Two windows, one with and one without glass, offers a view of the Fountain, the Alley, and the first checkpoint. Turning back reveals another flight of stairs, though much shorter, that leads to a room with another window to the Fountain and a path back to the Vino Dalla Vigna's roof.
- The Fountain: A roundabout with a fountain in its center. The cart must go around the fountain before reaching the final ramp and curve leading to the point.
- The Alley: A path that connects the Fountain to checkpoint A, passing by one of the doors of the second BLU spawn. The area close to the Fountain is in a lower level, while the part close to the point is an elevated ledge. Scouts can easily go up this ledge, but a green car and a trash bag serve as steps for other classes.
- Second BLU Spawn: BLU's spawn once A is captured. It has two exits, each with a resupply cabinet: one in the Alley and one in a corridor that takes players to the Hotel.
- The Point: The area around the point offers a good number of cover options, though mostly for RED.

First spawn area for BLU.

Inside view of BLU's first spawn.

Vino Dalla Vigna front.

The Fountain.

Outside view of BLU's second spawn.

Inside view of the second spawn area for BLU.

First Capture point.


Checkpoint B – The Road
- First RED Spawn: The backyard of a building with a large wine rack right next to point B.
- The Castle Stairs: A flight of stairs that leads to a vantage point over the area just after the ramp the cart must go up once A is captured.
- The Hotel: A white building that leads to a ledge overseeing the area after the ramp following A's capture.
- The Alley: A path that passes behind two buildings. The first area (going from point A to B) is lower than the main path; the second area offers access to a ramp that leads to a vantage point over the Lone Gravestone, the top of the Tunnel, and the Castle's One-Way Gate; and the third area is another vantage point over the Lone Gravestone.
- The Tunnel: An arch the cart must pass under, but dark enough to look like a tunnel. When the car passes by the exclamation mark sign on the wall, the Castle's One-Way Gate becomes accessible.
- The One-Way Gate: A gate that only opens up when going from point A to point B. It leads to the other side of the Tunnel, a small ledge overseeing the Lone Gravestone, an underground passage to the Lone Gravestone, and a drop just before point B.
- The Lone Gravestone: An open area with a single gravestone in its lower part, right in front of the third BLU spawn. It offers a side route to point B.
- Third BLU Spawn: A small room in the Lone Gravestone's area. It has one resupply cabinet and one exit.
- Checkpoint B: Once Checkpoint B has been captured, the cart must advance a bit before the gate in front of it opens. There are side routes through the buildings on each side of the gate.

First spawn area for RED.

The ramp next to the castle stairs, leading to B.

Third BLU spawn.


Checkpoint C – The Restaurant
- Second RED Spawn: An underground storage for wine barrels. It has one resupply cabinet and one exit.
- Third RED Spawn: A room with floral wallpaper and two bookshelves. It has two exits and one resupply cabinet.
- The Lone Coffin: The area right in front of the second RED spawn and just past the gate in front of Checkpoint B, with a lone coffin standing against a wall. When the cart passes by the yellow and black striped signs on the floor, the building directly in front of the cart becomes accessible, granting access to a small platform with an overview of the area.
- The Steep Incline: A short wooden ramp the cart must go up, with yellow and black striped signs on both sides of the track. The cart rolls back if left unattended while going up.
- Final BLU Spawn: A white building right next to Checkpoint C. It has two exits and a resupply cabinet. The exit with the "Exit" sign leads to the rest of the building, which includes a stair to a terrace and part of the remaining cart tracks; the other exit leads to a small room overseeing checkpoint C.

Second RED spawn room.

Outside view of the second RED spawn room.
Outside view of the Third RED spawn room.

Inside view of the third RED spawn room.

Third checkpoint


Checkpoint D – The Winery
- The Building Bridge: Once the cart has made a right turn after checkpoint C was captured, it is possible to see a sign with an arrow pointing right right under a street lamp. The stairs right next to it allow players to go through the Building Bridge - a corridor connecting two buildings that the cart must go under. The building on the right, where the corridor drops players onto, offers an overview of the Second-to-last Yard. The other building also offers an overview of the Second-to-last Yard, as well as a series of flank routes to the Winery Yard.
- The Second-to-last Yard: The white signs with black arrows point to flank routes. The single-headed arrow points to a flank route that can take players either directly to the Pit or to a veranda overseeing the Winery Yard; the double-headed arrow points to that same route (going left) and to a different route (going right) that leads behind to the back of the Winery Yard.
- Final RED Spawn: A big room with two floors, each with an exit and a resupply cabinet. The top floor leads to the catwalks above and around the Pit, and the lower floor leads behind and below the Pit.
- The Winery Yard: The last area of the map, containing BLU's goal - the Pit.
- The Pit: The hole in the ground where BLU must throw the cart into in order to win.

The ramp leading to the final point.

Final point.

Final spawn for RED.

Cliffside View.


Strategy
 | “Sun Tzu's got nothing on us!” This map's Community strategy page is a stub. As such, it is not complete. You can help the Team Fortress Wiki Community Strategy Project by expanding it. Notes: None added |
Update history
- Added Spineyard to the game.
- Replaced some of the materials and models.
- Fixed a missing material.
- Significantly improved skeleton navigation.
- Reduced the health of skeletons to 130 HP.
- Increased the weapon spread of skeletons to reduce their long range damage.
- Increased the number of pumpkin bomb spawns.
- Improved sound effects.
- Various detail fixes.
- Fixed being able to build in the first Blue spawn.
- Fixed an exploit that allowed players to get outside of the map.
- Fixed missing cubemaps.
Bugs
- If a player is killed by a skeleton they have damaged, the deathcam identifies the skeleton as "%killername%" and focuses on their feet.[1]
- Skeletons have trouble navigating the map and can get "stuck" trying to walk against walls in order to reach an enemy.[2]
- Half of the guardrail of the veranda overseeing the Pit is missing collision.[3]
Gallery

A mobster skeleton.

Steam Workshop thumbnail for Spineyard.


References
- ↑ %killername% bug
- ↑ A skeleton unable to reach the player
- ↑ Guardrail partially missing collision
| ||||||||||||||||||||||||||||||||||||||||
| ||||||||||||||||||||||||||||||||||||||||||||||||||||||||||||||||