Spy match-ups
| Class | Strategy | ||
|---|---|---|---|
 Spy |
vs | 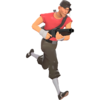 Scout |
The Scout is the second worst class to run up against as the Spy, and they are best avoided where possible. Scouts will often try to chase you down after you've revealed yourself, and with their speed and spread on the Scattergun they can be nightmarish to shake off. The Force-A-Nature also provides blow back to disguised Spies, which allows them to quickly determine if you are an enemy. If you do end up in a firefight with a Scout, backpedal/strafe and shoot at his chest with your Revolver; three shots is enough to kill one. Pick off injured Scouts from behind lines before they have a chance to find health.
With the new, faster backstab, backstabbing Scouts isn't nearly as difficult as it once was; try approaching as he backpedals away from one of your own team-mates. Some Scouts may underestimate how dangerous you actually are in melee range, and may attempt you beat you to death with their bat. If this is the case, take out your knife and start stabbing them, as it is surprisingly likely that you might backstab them. |
Spy |
vs | 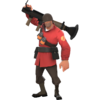 Soldier |
An unaware Soldier is one of the easiest Spy targets after the Heavy and Sniper. A Soldier in the thick of battle or in the middle of a charge is unlikely to hear the sound of you un-cloaking and makes a slow moving victim for your backstab. If the backstab should fail however, don't keep trying- RUN. You should never let an enemy Soldier see you, the splash damage from a Soldier's rocket is anathema to the Spy and a Crit rocket hit, even an indirect one, will take you out of commission in one shot. If exposed at longer range however, use the accuracy of your Revolver to your advantage and avoid their slow moving rockets. You should also avoid engaging an enemy Soldier with you knife if he is fighting another enemy at very close range. He could easily kill you by accident with splash damage from his Rocket Launcher.
The Direct hit is capable of killing you in one hit, and the Equalizer is deadly against Spies foolish enough to attempt whittling down a low-health Soldier with the Knife. If the enemy is running a lot of Soldiers the Dead Ringer is a good choice, as it will prevent Soldiers from easily detecting you with splash damage and give you some chance against those whom your backstab misses. |
Spy |
vs | 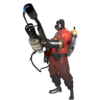 Pyro |
The Pyro is the Spy's natural enemy, so stay away from them at all times. It is their solemn duty to Spy-check every one of their team-mates, so don't let it be you. If they do set you on fire, uncloak immediately (since it will now only impede you) and run for the nearest body of water, Health pack or Dispenser while laying down covering fire with your revolver. If you must fight a Pyro and are out of range of their Flamethrower, keep your distance while using accurate shots from your revolver to take him down. Note that you move slightly slower while backpedaling, and watch out if they switch to their Shotgun. Trying to backstab a Pyro is highly inadvisable, he runs as fast as you do and they may set you on fire by accident even if they are not attacking you personally. In addition, their speed is the same as yours, giving them plenty of time to turn around and notice/check you in the time it takes to catch up with them. Surprise is the best option in this case. One risky but effective tactic you can use on a charging Pyro is to quickly sidestep and backstab them, matador style (also called Corner stab). Note that this is very difficult to pull off.
Careful use of the Dead Ringer can give you additional survivability against Pyros. It can extinguish the flames, but the Pyro can still light you back up again if you're in range of his flamethrower. To avoid this happening, try to get a short distance away from the Pyro (by, for instance, jumping off a ledge) before activating it. If you are still on fire after using the Dead Ringer, do NOT immediately decloak; you can at least try to use the 90% damage buff to get back behind your own lines. You can often use this tactic to draw Pyros onto your own team-mates; they are usually very single-minded about killing Spies. |
Spy |
vs | 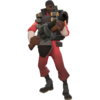 Demoman |
Demomen are relatively easy targets. They move slightly slower than you, allowing you to catch up with them for backstabs, and they often busy themselves laying Sticky mines or charging the front lines. Use your cloak to bypass their sticky bombs but avoid entering with your team-mates as you may be caught in the blast, whether you are seen or not.
As with the Soldier, avoid close range confrontation with a Demoman, where their grenades are likely hit you. Dodge from a distance while shooting with your revolver. If there are Demomen nearby, cloak when passing through doorways to avoid being destroyed by Sticky bombs. Eyelander Demos will regard you as a free walking head. Do not approach them unless they are already engaged with your team-mates; the speed buff, Targe and range of the sword makes them difficult to get away from. Note that activating the Dead Ringer through an Eyelander attack will give the Demo a legitimate head. By contrast Scottish Resistance Demos are often wrapped up in watching their traps, making them excellent targets. |
Spy |
vs | 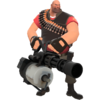 Heavy |
An easy target for a backstab and your natural prey. His incredibly slow speed moving makes backstabbing him simple if you get close. Don't let him catch you, as miniguns cut through you like a hot knife through butter. Remember Heavies turn as quickly as any other class! If noticed by him or your backstab fails you're in trouble. You may as well keep circle strafing him and swinging your knife in the hope of a lucky backstab, as you have next to no chance of escaping unless there is a handy corner or ledge nearby.
Heavies threaten cloaked Spies: The high rate of fire the Minigun has means if you are hit whilst cloaked you are easily tracked, especially with Natascha. This is almost guaranteed death unless you immediately reach cover. Especially beware Heavies alongside Dispensers. Since they never run out of ammunition, they often spray bullets continuously, creating an area that cloaking cannot get you past. |
Spy |
vs |  Engineer |
The Engineer is in many ways the Spies' number one target. Though he is very often a difficult class to tackle, due to his (thoroughly justified) Spy paranoia, the Spy is at his most helpful when he successfully takes down Engineers and their creations. Do not shirk your Spy duties by backstabbing other players in direct view of Sentries; this will get you killed even if you do manage to cloak in time, as the Engineer will certainly try to hunt your injured self down, and anyway it's a very lame thing to do.
A lone Engineer should be a reasonably easy backstab/Revolver kill, as long as you avoid their Shotgun blasts. Unfortunately, the Engineer will almost always be next to or near his Sentry gun. There will be probably be other Sentries and their Engineers as well. If there is one Engineer with his Sentry gun, a good technique for the quick Spy is to backstab the Engineer, then immediately sap his Sentry before it can attack you. This is an effective but difficult strategy and only works if the sentry in question is facing in the opposite direction. Another easier but less graceful strategy is to continually sap the Engineer's buildings while dodging fire. The Engineer will be torn between whether to remove the sappers or kill you. If he decides to take you out, put his Sentry gun between you and him, and try to take him out with your Revolver. If he decides to remove your sappers then continue sapping his buildings; you can sap them faster than he can repair. Eventually, if you are uninterrupted by his team-mates the Sentry should go down and you can either finish off the Engineer or cloak and make a run for it. With multiple Engineers and Sentries the 'stab then sap' strategy will not work, so try to cause chaos by choosing an Engineer with Wrench disguise and sapping as many buildings as you can. This is especially effective in a tightly built Sentry nest, and/or in combination with an strong assault from your own team. A particularly nasty tactic you can adopt against Engineers is to simply not face them at all. Travel to his spawn, sap his teleport entrance, and wait above it. If and when he repairs it at the other end, you will travel through and, unless he was very careful, telefrag him. The normal Invisibility Watch is probably the best anti-Engie device; you can use metal from enemy Engie's own Dispensers and destroyed buildings to power it, and it does not have the loud noise the Dead Ringer makes which will certainly alert the Engineer to your presence. A great weapon against camping Engineers who have wedged themselves into inaccessible corners behind their Sentry is the Ambassador. Simply get a safe distance behind enemy lines, then snipe him without even coming into range of his Sentry. Two headshots, or one headshot and a normal shot, will be enough. Finally, watch out for wrenches. With the kills Engineers can rack up they Crit often. A Crit-wrench will kill you in one hit, and the close quarters and need for repair around a Sentry make it an effective and common weapon. |
Spy |
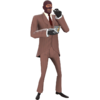
vs | 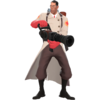 Medic |
When healing a team-mate, Medics usually have their eye on their buddy, making them a reasonably easy target. Take advantage of this to rush in and take both him and then his big friend out quickly and quietly, if that's not possible take out the Medic then run. However, experienced Medics will constantly side-strafe making backstabs much more difficult to pull off. If you miss the backstab on the Medic, keep going and take out his buddy, then deal with the Medic or flee. If the Medic is alone, backstabs are much more difficult as their running speed is slightly higher than yours. Try and take him out with shots from your Revolver while avoiding the less accurate shots from his Syringe gun. Keep some distance between you and the Medic. His Bonesaw is deadly, and Medics wielding the Übersaw often enjoy sawing Spies into pieces. Against some Medics you can disguise as an unusual class like Soldier or Heavy, let him to heal you, and then take him down with your Revolver before he can deal with you. It is possible to trick a Medic to go right into a trap by leading him into it or waste an Über on you. |
Spy |
vs | 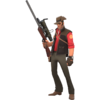 Sniper |
A Sniper can be deadly when you act suspiciously in his sights (running from your own base, at the wrong speed, etc.). A fully charged shot on any part of your body kills you. Cloak past any positions where Snipers may see you. If you think you were spotted, change disguise as he likely reported you to his team. Once behind an enemy Sniper, likely zoomed in and oblivious to everything around them, you can even approach from the side and they won't notice. They are sitting ducks for your backstab. If your backstab fails or you are noticed, either try to finish them with a few Revolver shots or, if you are feeling less brave cloak and run, then return when their suspicion has died down - which is not likely to happen soon. Snipers are (justifiably) paranoid. Don't be afraid to run as the Submachine gun can be deadly at close range and the kukri packs a nasty punch.
Don't backstab Snipers wearing a Razorback. There is absolutely nothing stopping you from simply shooting him. If he's scoped you should be able to get at least two shots in before he even notices what is happening. The revolver should kill a Sniper in 2-3 shots at close range, or if you have the Ambassador, a quick headshot then bodyshot will suffice. If a Sniper has already noticed you, it is possible to weapon heckle them: If they try to use their Kukri, backpeddle away from them while shooting them with your revolver, this will likely cause them to take out their Sniper Rifle/SMG/Huntsman, at which point take out your knife and start stabbing randomly at them. At that range, it should be very hard to shoot you at all as long as you keep strafing around them, and you may even get a backstab in if you're lucky. Beware of Snipers with Jarate. Avoid being soaked at all costs as it will impede your vision, allow enemies to score mini-crits against you, and render your cloaking watches useless. It can also blow your cover whilst disguised, as true teammates should not be affected by a friendly Jarate shower. If you do get splashed with Jarate, run to the nearest water source as soon as possible to remove it. The Tribalman's Shiv is also a potential threat as the delayed damage may kill you whether or not you kill the sniper, and if you are affected by bleeding it may be worth finding a health kit (though small ones will give you health, they will not stop the bleeding) or a medic to patch you up. The bleeding also reveals you while cloaking, so try to take the safest routes possible to these health boosts as you are easily found out regardless of cloak or disguise. |
Spy |
vs | Spy |
Enemy Spies rarely expect to be backstabbed by another Spy in disguise. If his lead on you is too great to allow this, try and take him out with your revolver before he realizes he's been rumbled. When in a firefight with another Spy, simply strafe and kill him with your revolver before he does the same. Of note is the fact that when you are immediately behind a cloaked enemy Spy, your character will raise his knife into the backstab position, just as he would with any other enemy class. Use this to your advantage.
If you are using the Ambassador, remember that disguises don't have matching hitboxes, headshots can be tricky and random on a disguised enemy Spy. An enemy Spy with an active Dead Ringer won't actually die to a backstab unless he was already badly hurt, so watch your back - he may decide to go in for a revenge stab after he rematerializes. |
| Languages: | English · Deutsch · español · suomi · français · italiano · 日本語 · 한국어 · polski · português do Brasil · русский · 中文(简体) · 中文(繁體) |