Community Control Point strategy

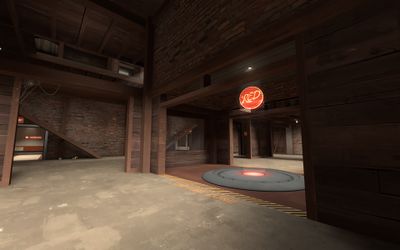
The second-to-last control point on CP Well
This article is the Community Control Point strategy.
Contents
General strategy
- Attacking more than one point at a time is wise, as it can surprise the enemy team, allowing for a greater chance of success. However, this may spread the team too thin for an effective offense, so use only when necessary.
- As defense, defend all points to ensure that there aren't any holes in your defense to be exploited.
- Beware of attackers while on the point as you have to stay still to cap the point. Be prepared to retreat or retaliate to a surprise attack.
Class-specific strategy
 Scout
Scout
- Being a Scout means you have a speed advantage over all the other players. If you see many of your team members capturing one control point, get a head start on the next one. This will enable you to throw off your enemy by quickly capturing points back to back for a fast win.
- You can capture points two times faster than other classes, making you a valuable asset.
- Flank the enemy team and shoot them at point blank range with your Scattergun for maximum damage.
- Use your enemy's blind spots to sneak up on them for an easy kill. It only takes a few close-ranged shots with a Scattergun to kill most classes.
 Soldier
- Use the Pain Train to double your capture rate.
- The splash damage from rockets can be used to clear points quickly either defensively or offensively.
- Rocket Jumping can be used tactically to navigate the map. Use this technique to flank the enemy from above. When done right, this will take them by surprise, and they will be dead before they even know what happened.
 Pyro
Pyro
- You can airblast enemies off of the control point.
- Ambush enemies on the control point and quickly clear the point with your Flamethrower.
- Setting enemies on fire is a great way to induce panic and send them running for health.
 Demoman
- Place Sticky Bombs around and on a control point to defend a capture. The Announcer will tell you when an enemy is capturing the point, so you can know when to activate your stickies without even looking.
- Use the Pain Train to capture points as fast as Scouts.
- Take advantage of a wall behind a Sentry Gun to ricochet grenades and take it out.
- Sticky Jumping is a tactical way to ambush and enemy. When done right, you can drop in on an enemy team from above and easily wipe them out.
 Heavy
Heavy
- Pair up with a Medic and plow through the enemy team.
- The Minigun is excellent pushing power to help get your team on the control points, or for defending already captured control points.
- Having the most health, the Heavy is great for standing ground on a control point and taking damage for the team. Be sure to have a Medic nearby to maximize your advantage.
- Look behind yourself constantly to discourage any potential backstabs; you are a big Spy target after all.
 Engineer
- Place your Sentry Gun near a control point to defend it from enemies. Try to find a hard-to-reach spot that still has a good view of the map.
- Use well-placed Teleporters to allow your team to get into the action much faster. Reinforcements are crucial when in the heat of battle.
- The Gunslinger is very handy for capturing control points, as it allows you to place down a Mini-Sentry very quickly and keep the enemies off as you capture.
 Medic
Medic
- Use your ÜberCharge on a Heavy to quickly dispatch enemy defenders.
- Stay outside of control points your team is capturing to heal team members.
- Use your ÜberCharge to block enemy captures by standing on the point while it is active.
- Healing with the Kritzkrieg will allow you to clear points efficiently, by using the crit buff from its ÜberCharge.
- Spread your healing among teammates that need it. Don't focus too hard on one target because before you know it, it will just be you and him.
 Sniper
- Pick off enemies one by one to stop them from capturing a control point and attacking your teammates.
- Staying at a great range with easy cover and a good view of the point can guarantee kills and slow down the capturing process.
- Aim mainly for Heavies, Medics, and Scouts to stop potential captures.
- Staying in one spot too long can get you killed. Try to find a few good sniping spots and switch between them regularly.
 Spy
Spy
- Use the Electro Sapper to disable or destroy the Sentry Guns around the control point to allow your team to move in and capture it.
- Always kill an enemy team's Heavy/Medic combo to end their push before it can start.
- Destroy the enemy team's Teleporters to ensure that your team has fewer enemies to take care of.
- Disguising as the same class multiple times is very suspicious. Try to change it up every time you disguise.
- A more advanced disguising method is to disguise as an enemy after you pass by them. This can fool the enemy team because you will be exactly where they just saw their teammate go.