Community Bigrock strategy
| “You are so small! Is funny to me!” This article is a stub. As such, it is not complete. You can help Team Fortress Wiki by expanding it. |
| Community Bigrock strategy | |
|---|---|

| |
| Basic Information | |
| Developer(s): | {{{map-developer}}} |
| Map Info | |
| Environment: | Desert |
| Setting: | Day, sunny |
| Hazards: | Pits |
| Map Photos | |
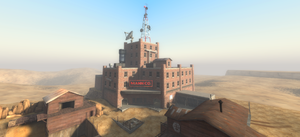
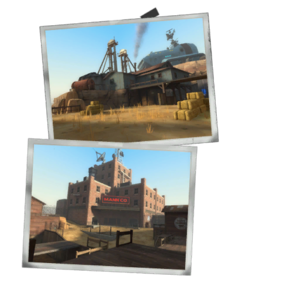
This article is about Community Bigrock strategy.
Contents
General (All Classes)
- Resistance is an ideal upgrade to go with, as there are a lot of Crit Robots and Giants.
- Teamwork is a MUST, without teamwork, you'll most likely always fail.
- When an Engineer Robot comes into the map, quickly find it and kill it, along with destroying its nest. Teleporters can bring Robots closer to the bomb and hatch, and the Teleporter can even teleport Giants.
- If you're having a hard time trying to stay alive and the Dispensers or Medics (if there are any on your team) are not healing fast enough to save you from being killed, try buying "Health on Kill" Upgrades.
- Pairing this upgrade with Resistance will make you useful to your team, as you can act like a tank to them, taking a lot of damage and gaining it back.
Class-specific strategy
 Scout
Scout
- As there's not much space in this map, a Scout has an easier job collecting the cash, due to the fact that it won't be spread out as much.
- It is wise for a Scout to get their Resistances to max or as close to it as they can, as there is a lot of fire, bullets, and explosives, a number of which have crits. If the Scout doesn't have Resistance against these, it'll be a lot harder for them to collect the cash.
- Crit Soldiers pose a big threat to Sentry Guns on this map, but they aren't very mobile. As a Scout, you can easily evade their rockets, making it easier for you to kill one, especially if you bought the increased clip size upgrade, and have bought Crit Canteens.
- If you haven't bought the increased clip size upgrade or Crit Canteens, you can always bait the Giant Robots so that they aim at you, letting your team safely destroy them.
 Soldier
- A Soldier is good for dealing with Engineer Robots, as your rockets are able to move quickly, and the splash damage can help damage the nest.
- It's a good idea to get the faster reload speed and faster firing speed upgrades for your Rocket Launcher, as there are a lot of robots. This will help you damage a lot of them in a short space of time.
- The Righteous Bison can be useful in the chokepoint at the end of the cave, due to the fact the Righteous Bison's projectile penetrates through enemies. It can deal a bit of damage to the Robots if fired from the front or the side, but it can deal a lot more damage if it's fired from behind them, as it'll follow them as they walk.
 Pyro
Pyro
- There is one spot in the map where the bomb can be reset, so it's best for the Pyro to try to air blast the bomb carrier down the gap in the fence in the mine. Upgrading the air blast force will make this job a lot easier.
- It might not be a long reset, but it can help if the Robots have gotten out of the mine, or if there is a Giant Robot.
- Despite there only being one reset spot, you can air blast the bomb carrier into other spots, like the sides of the lanes the Robots go down, and under the bridge near the hatch. This will buy you precious time, as the Robots will have to go around to get to the bomb.
- A Pyro using the Phlogistinator can be very useful against Tanks, as they can get the 'Mmmph' bar filled quickly, allowing Critical Hits to be applied without the using of a Canteen, saving money for other upgrades.
- This can help the rest of the team massively, as they can deal with the other Robots carrying the bomb.
- When a Pyro with the Phlogistinator is low on ammo, their effectiveness is reduced. To counteract this, make sure you have bought the increased ammo upgrades, and know where the Ammo Pickups and the Dispenser is, if there is one on the map.
 Demoman
- It's wise to set up Stickybomb traps at the choke points, as this will stop the Robots getting through easily.
- Some good places for these are the exit of the mine, and the bridge near the hatch.
- Since Engineer Robots build a Sentry Gun to guard their Teleporters, you are one of the best classes to destroy the nest.
- The Scottish Resistance is useful for setting up traps, as you can remotely detonate sets of Stickybombs, rather than all of them at once.
- Setting up a Stickybomb trap where the Robots come out can be useful, especially when there are Medic Robots and Giant Robots. If done correctly, you can destroy the Medic Robots before they get a chance to use their Über.
 Heavy
Heavy
- Since there are a lot of robots on this map, the projectile penetration upgrade can be very useful, as it will let you damage more robots without using more ammo.
- The rage knockback upgrade can work well with this, as you'll be able to push back the bomb carrier a lot more easily due to how much damage you'll be outputting. This is useful if the Robots is near the hatch, or if they are near the reset pit. Don't be afraid to use it at anytime, as pushing the bomb back will always help your team.
- Due to the shape of this map, and the fact that some of the waves have Spy Robots as normal, the Huo-Long Heater will be useful if near a Dispenser or Ammo Pickups, as you'll be able to burn them before they get near.
 Engineer
- You can build your Sentry Gun on the far rocks on your left as you enter the mine. You can then build the Dispenser behind the wire mesh, and either hide behind the wire mesh, or crouch behind the rocks and your Sentry Gun while you repair it.
- Once you have got the disposable Sentry Gun upgrade, a useful place to build it is on the small rock directly facing the entrance. There is a low wire mesh bulkhead that can be used as protection.
- Your Teleporter Exit can be built behind the wire mesh of the entrance of the tunnel. This area is very rarely attacked by Robots, and allows for quick access to the battlefield.
- This area can be easily swarmed if the Robots manage to get out of the mine, especially if there are Scout or Soldier Robots. However, this area can also be used for attacks from behind if you manage to survive.
 Medic
Medic
- With the amount of Robots around, it is best for a Medic to either use the stock Medi Gun with Crit Canteens, or the Kritzkrieg with Über Canteens. This can help increase the chance of survival, as you'll be able to use both Über and Crits.
- If you get your Resistances high, you'll have a higher rate of survival, allowing you to heal your teammates more, increasing their survival rate as well.
- Be careful when there are Spy Robots about, as you might end up healing one of them instead of a teammate. Make sure that you Spy check, but don't stop healing.
- If you have a Pyro on your team, you could stay back and let them burn the robots, and then go back to healing.
 Sniper
- Make sure you use the long stretches of land to your advantage, as it will let you get headshots on the Robots easily, especially the slower moving ones.
- A useful tactic is to use the Sydney Sleeper, and buy the reload speed and recharge speed upgrades.
- If you buy the projectile penetration upgrade on your primary weapon, you can easily take out a lot of Robots if they get to the choke point at the end of the mine.
- The amount of Robots you can kill can be increased if you buy the explosive headshots upgrade.
- A Sniper can be very useful for taking out an Engineer Robot and their nest, as they can deal with them over a longer distance than the other classes. The rest of your team can then clear the rest of the nest.
 Spy
Spy
- As the Robots generally come out in packs on this map, a Spy with an upgraded Sapper can sap some or most of them, allowing your teammates to destroy them quickly.
- Even if you get killed, the Robots are still disabled, and won't be able to do anything until the Sapper comes off.
- The Giant Robots don't get disabled when Sapped, but they do get slowed down, which can allow your team to destroy them a lot more easily, especially if it is Giant Scout Robot.
- It isn't easy to sap the Engineer Robot's buildings, as your Sapper has to recharge between being placed. A way around this would be to sap the Sentry Gun, and then kill the Engineer Robot if it's not already dead, and then shoot the Teleporter with your Revolver.
- Using an Ammo Refill Canteen can get around the Sapper recharging, as it recharges your Sapper instantly.
- An Engineer Robot's Teleporter isn't disabled when you sap it, so more Robots are able to teleport in. If you are nervous about this happening, you can sap the teleporter, and shoot at it with your Revolver to take it down faster.
