Community Badlands (King of the Hill) strategy
| “You are so small! Is funny to me!” This article is a stub. As such, it is not complete. You can help Team Fortress Wiki by expanding it. |
| Community Badlands (King of the Hill) strategy | |
|---|---|

| |
| Basic Information | |
| Developer(s): | {{{map-developer}}} |
| Map Info | |
| Environment: | Desert |
| Setting: | Dusk, cloudy |
| Map Photos | |
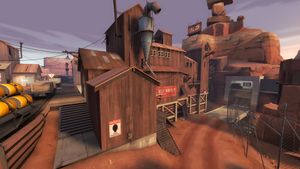
Badlands (KotH) strategy.
Contents
General strategy
Class-specific strategy
 Scout
Scout
- As a Scout, your strategy should be to hit the enemy hard and fast. Use your speed advantage to flank enemies and try to kill Übercharging Medics and Engineers making a nest as soon as possible.
- As this is a King of the Hill mode, it usually starts off like an Arena match before the Capture Point is unlocked. In this time, keep the pressure on the enemy's spawn point to give your team enough time to make a defensive perimeter at the Capture Point
 Soldier
- The Soldier provides the offensive spearhead for any push. In this map, its best to hang around other Soldiers or Heavies as this map, if you were to wander alone towards the enemy, most likely you're going to get outnumbered and overwhelmed.
- As soon as the Capture Point is unlocked, you are one of the most deadly classes as usually most enemies will cluster on the Capture Point to capture as fast as you can. As soon as you know this, you can easily clear the whole point with a ton of rocket spamming towards the Capture Point while waiting for the slower moving Heavies to arrive.
 Pyro
Pyro
- In this map, you are very good at clearing the Capture Point when its being captured and also in ambushing enemies in the tight corners of the buildings.
- Since this map only has two water pits that are usually far away from the fighting, it is very useful in a hit-and-run tactic as you may get overwhelmed by Heavies lurking around with their Medics
 Demoman
 Heavy
Heavy
 Engineer
- Engineers can place Sentry Guns on the inside of a wall with a Dispenser beside them to defend against the enemy using the map as a shield for Spies.
 Medic
Medic
 Sniper
- Snipers can use the windows of the buildings to have a good place to snipe, only showing the top half of themselves can help from damage taken. Though it's an area where Spies can easily backstab you.
 Spy
Spy
- Spies can hide under the bridge outside the respawn of the other team and easily get a backstab. This area is also a good place to hide from Pyros because their flamethrowers won't work under the water.
