Difference between revisions of "Granary (Control Point)/zh-hant"
m (moved Granary/zh-hant to Granary (Control Point)/zh-hant: Redirected) |
m |
||
| Line 83: | Line 83: | ||
</gallery> | </gallery> | ||
| − | == | + | == 策略 == |
| − | {{hatnote| | + | {{hatnote|參見 [[Community Granary (CP) strategy|社群 Granary(控制點)策略]]}} |
| − | == | + | == 佔點所需時間 == |
{{Control Point Timing/Official Map}} | {{Control Point Timing/Official Map}} | ||
| − | == | + | == 相關成就 == |
| − | === [[Image:Achieved.png|20px|link=Achievements{{if lang}}]] [[achievements| | + | === [[Image:Achieved.png|20px|link=Achievements{{if lang}}]] [[achievements/zh-hant|一般成就]] === |
{{Achievement table | {{Achievement table | ||
| {{Show achievement|General|World Traveler}} | | {{Show achievement|General|World Traveler}} | ||
}} | }} | ||
| − | == | + | == 更新紀錄 == |
{{Update history | '''{{Patch name|11|15|2007}}''' | {{Update history | '''{{Patch name|11|15|2007}}''' | ||
* Cover changes to the first capture points of both teams. Reduces some of the sight lines for defenders, and should make the area easier to capture. | * Cover changes to the first capture points of both teams. Reduces some of the sight lines for defenders, and should make the area easier to capture. | ||
Revision as of 11:32, 24 January 2013
 | 這頁目前正處於被翻譯至繁體中文的狀態。 如果你會說繁體中文,請在討論頁中留下你的大名,或透過查看歷史紀錄跟有編輯這頁的用戶聯繫。 |
| Granary (Control Point) | |
|---|---|

| |
| 資訊 | |
| Variants: | 競技場模式 |
| 開發者: | {{{map-developer}}} |
| 地圖資料 | |
| 所處地區: | 農場 |
| 環境設定: | 日間、晴天 |
| 地圖相片 | |
 | |
| 地圖的俯瞰圖 | |
_overview.png) | |
Granary/糧倉(控制點模式)是一個標準 5 控制點佔領模式地圖。 兩隊的目標是佔領全部5個的控制點以贏得回合。回合開始時最接近兩隊的各兩個控制點已經是屬於兩隊的了, 只有已經解鎖的中央控制點尚沒有被佔領。
就像其他標準 5 控制點佔領模式地圖,如Well(控制點模式)一樣,只有最接近對方佔領點的那個控制點才可以被佔領, 其他控制點在HUD上會出現一個鎖的圖案,無法被佔領。(舉例來說:當三號控制點被敵方佔領,我方只能佔領敵方的三號控制點而不能佔領其四號控制點;同樣,敵方也只能佔領我方的二號控制點而不能佔領一號控制點。)
內容
介紹影片
地點
控制點 1&5
在地圖兩邊的邊緣就是雙方的最終控制點,位於兩隊的重生點之外。
- 總部 (重生區): 最初的重生點和補給區 是一個導彈發射井,擁有兩個通往最終控制點的出口。
兩個 補給櫃 分別放在兩個重生點出口的走道牆上。
- 院區: 位於補給基地外的一個開放院區,同時也是最終控制點所在的位置。在控制點後方有一條小樓梯和斜道通往一條橫跨整個區域的管道,可以通往第二/第四控制點所在木屋的二樓。而第二條較高的管道位於第一條管道的右邊,可以藉由上述木屋的二樓或是爆炸性跳躍抵達高管道之上。
- 木屋: 在橫跨整個區域的管道的盡頭是第二/四控制點木屋的二樓。木屋二樓有一個直接連接著較低管道的出口,而較高的管道則在一個可以跳下到院區的窗戶旁邊。
- Cp granary spawn.jpg
重生室的外面
- Granaryspawn.jpg
紅隊的主補給室
- Cp granary cp1a.jpg
控制點一
- Granarylasthouse.jpg
木屋
控制點 2&4
控制點二和四位於中央院區和最終控制點之間的廠房之中。它們是 Granary 的五個控制點中唯一位於室內的控制點。 由於它在擁有七個不同方向的狹窄入口,在這裡很將很有機會發生激烈的戰鬥。
- Left Yard: Beyond the second control point is the yard, or the "forward yard". The left of the yard boasts two entrances to the middle point through the smaller, shorter corridor to the left and ramp room to the right. A small shack left of the yard can be used to establish some height advantage.
- Right Yard:The right of the yard has a small area behind the crate facing the ramp room. The two sides of the yard can be accessed from both the second point and the middle point.
- Z-Connector:Teams pushing onto the point will mainly opt to use the main entrance from yard to the left of the point as well as utilizing the "z-connector", a small corridor opposite to the main entrance.
- Garage:Right of the z-connector is "garage" which connects the far right of yard and runs right behind the enemy from two levels: firstly along the floor which leads to the area of the room behind the control point, just in front of the right door connecting the final cap yard and, through a small stair case, garage also leads to a second level walkway which overlooks the point from behind the defending team; this level is also the only route, bar explosive jumping, that can access the two rooms leading to the final capture point.
- Grain Chute:The staircase also leads an enclosed chute, to the right when the player reaches the top of the staircase, a small hole is located at the end of this chute which drops players down immediately in front of ramp room.
- First Forward Respawn:The first forward respawn room is located near the second control point as well, this is located on the second level in the left of the building with a single entrance leading into yard, the room is only available to the team when a team controls the central control point.
- Cp granary cp2a.jpg
Control Point 2 building
- Cp granary cp2b.jpg
Right Yard
- Granary2ndleftyard.jpg
Left Yard
- Granary2ndgarage.jpg
Garage
- Granary2ndZ.jpg
Z-Connector
- Granarychute.jpg
Chute
- Granarysecondchutehallway.jpg
Chute Hallway
- Granary2ndforwardspawn.jpg
First Forward Spawn
Control Point 3
Control Point 3, or Mid, is located in the center of the map. Being the halfway point and main focus for most battles, the central point has a slightly raised, large capture point area. This capture area is surrounded by cargo containers stacked two high providing vantage points. There is a medium sized health pack at either end of the yard, two small medpacks on top of the containers and four small ammo boxes on the ground at each side of the yard.
- Garage:The main entrance to the mid area is the Garage, which leads out directly to the point. Inside the garage is a set of ramps which lead up to the catwalks. The ramps also lead to a small entrance to Control Point 2/4's Right Yard.
- Catwalks:The catwalks are at the top of the Garage ramps. There is a set on each side which overlook the point area. The catwalks are useful for any class wishing to reach the top of the crates.
- Crates:Surrounding the point are stacked large metal crates which are largely used for their height advantage and cover.
- Choke:The smaller entrance to mid is known as the choke for its tight area, often spammed by explosives. It exits out directly from the crates and is across from the enemy's garage entrance.
- Cp granary cp3b.jpg
Garage
- Cp granary cp3a.jpg
Mid Overview
- Granarymidcatwalks.jpg
Catwalks
- Granarymidchoke.jpg
Choke entrance
- Granarymidgarage.jpg
Garage entrance
策略
佔點所需時間
| 控制點模式 | 玩家人數 | 秒 | ||
|---|---|---|---|---|
| 控制點模式 1 以及 5 | ×1 |
| ||
| ×2 |
| |||
| ×3 |
| |||
| ×4 |
| |||
| 控制點模式 2 以及 4 | ×1 |
| ||
| ×2 |
| |||
| ×3 |
| |||
| ×4 |
| |||
| 控制點模式 3 | ×1 |
| ||
| ×2 |
| |||
| ×3 |
| |||
| ×4 |
|
相關成就
 一般成就
一般成就
|

更新紀錄
- Cover changes to the first capture points of both teams. Reduces some of the sight lines for defenders, and should make the area easier to capture.
- Teams that are holding more points will receive a greater spawn time bonus (spawn timer reduced for the winning team). This should help attacking teams build momentum.
- Minor visual tweaks to the BLU side between capture points 2 and 3.
- Clipped off a super high (demo pipe jump) perch in the middle area.
- Increased base round timer to 10 minutes.
- Added windows overlooking the final cap from the capture point 2 building (via new room next to conveyor route).
- Minor changes to lighting in the middle area.
- Moved the middle spawn points farther forward (saves 6-7 seconds off a Heavy's run from this spawn to enemy capture point 2).
- Reduced spawn advantage/penalty to a total of -/+ 6 seconds when on the final cap (from 10 seconds).
- Fixed material alignment and model interpenetration issues in home spawn rocket rooms.
- Reduced Granary spawn advantage for capping the middle point.
- Removed spawn timing advantage from the middle (from -3 to 0).
- Fixed several model perch exploits (red, blue cp1 gate and blue cp2 gate pipe).
- Fixed a few places where players could get stuck between containers and silos.
- Adjusted playerclips on red container that made it appear like players were floating.
2008年4月29日更新 (Gold Rush Update)
- Added setup time logic, and gates to the middle.
- Fixed an overlay alignment bug on one of blue's gate signs.
- Updated Granary with several exploit fixes.
- Updated Granary to remove the setup time and gates.
- Made a few changes to improve balance based on competitive community feedback.
- Tweaks to the new platforms by the ramproom:
- Extended the length of the platforms
- Made the light models above the platforms symmetrical for RED/BLU
- Made the height of the BLU woodpile near the new platform the same height as RED (for Scouts)
- More playerclips to ease snagging on trim geometry
- Added a new entrance to the mid Red/Blue ramp rooms.
- Clipping, lighting and perf improvements.
- [未記載] Added a "Carrier tank" to this map.
Trivia
- Meet the Soldier takes place in a modified version of Granary. The RED team goes completely around the building that connects the first and second control points into an area that is normally a dead end.
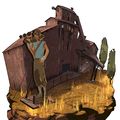
- Granary appears in Worms: Reloaded as one of the forts.
- The image of Gravel Pit that appears in the background of the Main Menu was actually supposed to be Granary.
Gallery
Scout and Granary as a playable fort in Worms: Reloaded.

See also