Difference between revisions of "Community District strategy"
m (Auto: Sync Map infobox) |
|||
| (6 intermediate revisions by 5 users not shown) | |||
| Line 1: | Line 1: | ||
| − | {{ | + | {{community strategy stub|Expand the "General strategy" section to cover map locations in more detail. Potentially look at the class-specific strategies as well.}} |
{{Map infobox | {{Map infobox | ||
| − | | | + | | map-strategy = yes |
| − | | game-type | + | | map-status = official |
| − | | file-name | + | | map-name = District |
| + | | map-game-type = PASS Time | ||
| + | | map-file-name = pass_district | ||
| map-image = Pass_district.jpg | | map-image = Pass_district.jpg | ||
| + | | map-released = {{Patch name|7|7|2016}} | ||
| + | | map-released-major = Meet Your Match Update | ||
| map-environment = Urban | | map-environment = Urban | ||
| map-setting = Night | | map-setting = Night | ||
| map-hazards = [[Train|Subway trains]] | | map-hazards = [[Train|Subway trains]] | ||
| − | | map-health | + | | map-pickups-health-small = 4 |
| − | | map-health | + | | map-pickups-health-medium = 10 |
| − | | map-health | + | | map-pickups-health-large = |
| − | | map-ammo | + | | map-pickups-ammo-small = 2 |
| − | | map-ammo | + | | map-pickups-ammo-medium = 8 |
| − | | map-ammo | + | | map-pickups-ammo-large = 2 |
}} | }} | ||
| + | |||
| + | This article is about '''Community District strategy'''. | ||
| + | |||
| + | '''Note''': It is recommended to read the main [[District]] article first to become familiar with the names of key map locations used in this article. | ||
| + | |||
| + | {{TOC limit|3}} | ||
== General strategy == | == General strategy == | ||
| − | * District multiple different paths to the goal. If one path isn't working, try another. | + | * District has multiple different paths to the goal. If one path isn't working, try another. |
| − | * The subways on both team's sides constantly have trains passing by. You can use this to | + | * The subways on both team's sides constantly have trains passing by. You can use this to your advantage in cutting off any pursuers. |
* Stay in a group with the JACK carrier. Due to the many paths on the map it is very easy for the carrier to get ambushed. | * Stay in a group with the JACK carrier. Due to the many paths on the map it is very easy for the carrier to get ambushed. | ||
== Class-specific strategy == | == Class-specific strategy == | ||
=== {{class link|Scout}} === | === {{class link|Scout}} === | ||
| − | * As with | + | * As is the general case with PASS Time maps, Scouts are the go-to class for carrying the JACK due to their speed. However, be sure to still pass the JACK to your other teammates to take advantage of the speed boost. |
* If the enemy team has the JACK, do your best to chase the carrier down before they score. | * If the enemy team has the JACK, do your best to chase the carrier down before they score. | ||
=== {{class link|Soldier}} === | === {{class link|Soldier}} === | ||
| Line 35: | Line 45: | ||
=== {{class link|Demoman}} === | === {{class link|Demoman}} === | ||
* The JACK spawn is a small overhang that can be useful for sticky traps. | * The JACK spawn is a small overhang that can be useful for sticky traps. | ||
| − | * With how tight the streets and interiors are, your | + | * With how tight the streets and interiors are, your Grenade Launcher is your best weapon. Use it to disperse enemy groups. |
=== {{class link|Heavy}} === | === {{class link|Heavy}} === | ||
* Stay close to the JACK carrier as much as possible. The JACK's speed boost will help you provide cover for the carrier. | * Stay close to the JACK carrier as much as possible. The JACK's speed boost will help you provide cover for the carrier. | ||
| Line 42: | Line 52: | ||
* Due to the open streets, if you choose to assist the JACK carrier, make sure you have a [[Gunslinger]] equipped to slow down enemies trying to steal. | * Due to the open streets, if you choose to assist the JACK carrier, make sure you have a [[Gunslinger]] equipped to slow down enemies trying to steal. | ||
=== {{class link|Medic}} === | === {{class link|Medic}} === | ||
| − | * The tight streets can lead to intense fights between the two teams. Support your team as best you can keeping them healthy, especially when getting near the enemy goal. | + | * The tight streets can lead to intense fights between the two teams. Support your team as best you can by keeping them healthy, especially when getting near the enemy goal. |
* Since the Medic isn't combat savvy, they can make for good passing targets. | * Since the Medic isn't combat savvy, they can make for good passing targets. | ||
=== {{class link|Sniper}} === | === {{class link|Sniper}} === | ||
| − | * Snipers are not particularly useful on this map due to | + | * Snipers are not particularly useful on this map due to its mazelike design. However, they can be used in a defensive role in your team's goal area. |
=== {{class link|Spy}} === | === {{class link|Spy}} === | ||
* With the close quarter areas, you can easily sneak up to enemy groups for backstabs. Look for alternate paths to intercept. | * With the close quarter areas, you can easily sneak up to enemy groups for backstabs. Look for alternate paths to intercept. | ||
* Engineers will set up tight sentry positions by their goal. Destroy them to allow a clear path for the JACK carrier. | * Engineers will set up tight sentry positions by their goal. Destroy them to allow a clear path for the JACK carrier. | ||
{{Map strategy}} | {{Map strategy}} | ||
Latest revision as of 19:29, 20 January 2024
| “Sun Tzu's got nothing on us!” This article is a Community strategy stub. As such, it is not complete. You can help the Team Fortress Wiki Community Strategy Project by expanding it. Notes: Expand the "General strategy" section to cover map locations in more detail. Potentially look at the class-specific strategies as well. |
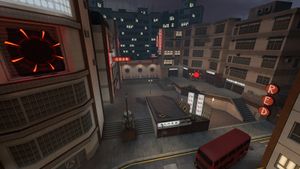
| District | |
|---|---|

| |
| Basic Information | |
| Map type: | PASS Time |
| File name: | pass_district
|
| Released: | July 7, 2016 Patch (Meet Your Match Update) |
| Developer(s): | Valve Bad Robot Escalation Studios |
| Map Info | |
| Environment: | Urban |
| Setting: | Night |
| Hazards: | Subway trains |
| Map Items | |
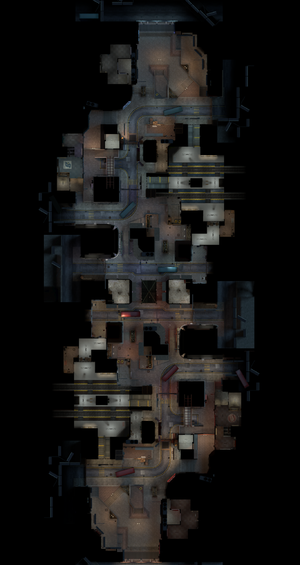
| Map Overview | |
This article is about Community District strategy.
Note: It is recommended to read the main District article first to become familiar with the names of key map locations used in this article.
General strategy
- District has multiple different paths to the goal. If one path isn't working, try another.
- The subways on both team's sides constantly have trains passing by. You can use this to your advantage in cutting off any pursuers.
- Stay in a group with the JACK carrier. Due to the many paths on the map it is very easy for the carrier to get ambushed.
Class-specific strategy
 Scout
Scout
- As is the general case with PASS Time maps, Scouts are the go-to class for carrying the JACK due to their speed. However, be sure to still pass the JACK to your other teammates to take advantage of the speed boost.
- If the enemy team has the JACK, do your best to chase the carrier down before they score.
 Soldier
- With the close quarter yet open streets, soldiers can be devastating in rocket jump attacks. Use the roofs of different structures to your advantage.
- Equip the Disciplinary Action to give slower classes a speedboost. This can be effective when chasing after the JACK.
 Pyro
Pyro
- The map is filled with close quarters areas, making for excellent positions to ambush enemy targets.
- If an enemy JACK carrier is getting near the launch platform to the bonus goal, airblast them away to slow them down.
 Demoman
- The JACK spawn is a small overhang that can be useful for sticky traps.
- With how tight the streets and interiors are, your Grenade Launcher is your best weapon. Use it to disperse enemy groups.
 Heavy
Heavy
- Stay close to the JACK carrier as much as possible. The JACK's speed boost will help you provide cover for the carrier.
 Engineer
- Engineers are best played for defense by setting up a sentry nest protecting the goals.
- Due to the open streets, if you choose to assist the JACK carrier, make sure you have a Gunslinger equipped to slow down enemies trying to steal.
 Medic
Medic
- The tight streets can lead to intense fights between the two teams. Support your team as best you can by keeping them healthy, especially when getting near the enemy goal.
- Since the Medic isn't combat savvy, they can make for good passing targets.
 Sniper
- Snipers are not particularly useful on this map due to its mazelike design. However, they can be used in a defensive role in your team's goal area.
 Spy
Spy
- With the close quarter areas, you can easily sneak up to enemy groups for backstabs. Look for alternate paths to intercept.
- Engineers will set up tight sentry positions by their goal. Destroy them to allow a clear path for the JACK carrier.
