Badwater Basin (competitive)
| Badwater Basin | |
|---|---|

| |
| Basic Information | |
| Map type: | Payload |
| File name: | pl_badwater
|
| Variants: | Halloween |
| Developer(s): | Valve |
| Map Info | |
| Environment: | Desert |
| Setting: | Daylight, sunny |
| Pyrovision Support: | Yes |
| Bot support: | Yes |
| Map Items | |
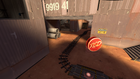
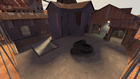
| Map Photos | |
 | |
| Map Overview | |
 | |
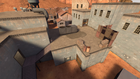
Badwater Basin is a single-stage Payload map with four checkpoints for BLU team to capture. It is a large basin that enters into an open corridor of buildings. Badwater Basin is considered a definitive TF2 map that is played in most Highlander Leagues, and is one of the most popular maps in the competitive community.
Contents
Locations
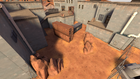
Checkpoint A
- The Ridge: (also called Above or The Cliffs) This high ground spans from BLU's spawn to the first checkpoint. A popular location to launch kritzes from, particularly for Soldiers and Demomen.
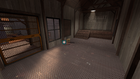
- The Tunnel: This long tunnel cuts underneath the cliffs, and BLU must push the cart through it.
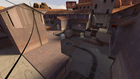
- Sniper Rocks: A U-shaped rock formation that provides cover for Snipers while allowing them to look directly at BLU's spawn. Engineers sometimes build here.
- The Garage: (also The Bunker or The Alcove) A small concrete building sunk into the ground that opens directly onto the checkpoint. RED Engineers build both on top of this building and inside it.
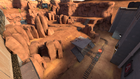
First Checkpoint
The Cliffs
The Tunnel


Checkpoint B
- The Lobby: Underneath the roof is a complex of several rooms. BLU frequently prepares for assaults up the stairs to the roof here.
- The Roof: The top of the building that overlooks B. Similarly to the ridge on A, whoever controls this controls the checkpoint, so Engineers on RED will attempt to secure this area.
- The Front Steps and The Back Steps: The two stairways to The Roof. The front steps approach from the first checkpoint, while the back steps approach from the second checkpoint and the back yard.
- The Back Roof: This large expanse of area features excellent cover and several health kits. It is an ideal place for BLU to launch volleys of spam onto the roof.
- The Back Yard: (also The Courtyard) This is the large area behind the roof.
- The Alcove: This is the open room opposite the checkpoint from the roof.

Second Checkpoint
The Roof
The Back-Roof


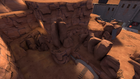
Checkpoint C
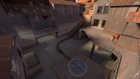
- The Bridge and The Bridge Room: This enclosed bridge cuts across the low checkpoint of the map, forcing BLU to go underneath and face volleys of fire. The room inside is a common site of Engineer nests, owing to its defensibility.
- The Side Room: This room provides a path from B onto the bridge. It lets out onto a deck that is popular with BLU Snipers.
- The Attic: (also The Loft or The Balcony) A two-story building that BLU cannot easily access without capturing C. The heart of RED's defense while on C. The loft generally refers to the back area of the attic, while the balcony generally refers to the front areas of the attic.

Third Checkpoint

The Side Room
The room on the Bridge


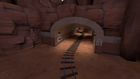
The Final Checkpoint
- The Alley: The last chokepoint before the final checkpoint. Both BLU and RED use this area as a base, and the corners are the focus of the fighting during the assault on the final checkpoint.
- The Pit: The entire lower level is often called this. This is where most of the action takes place.
- The Sniper Hut: (also Sniper Tower) The final Sniper deck for BLU. Demomen and Soldiers often come here as well. Engineers will also occasionally forward-base here.
- The Map Room: (also called the Window Room) These two rooms branch off the alley and lead to open windows that overlook the final checkpoint. The windows are frequently utilized by BLU to avoid the second corner of the alley. The room has a big map on its wall, lending it the name "Map Room." The room between the map room and the third checkpoint is commonly called "The Outer Map Room."
- Overhangs: (also Garages) Underneath the map room and underneath decking across from the map room are two sheltered areas that face the checkpoint. Almost always the site of Engineer nests.
- Spiral: (also Spiral Staircase) A spiral staircase directly connecting the lower part of the checkpoint and the Sniper hut. The entrance on the Sniper hut is elevated, limiting the classes on BLU that can access this area.
- Back Yard: This is the area between the Sniper Hut and the Spiral. Small skirmishes often occur here.
- Chicken Wire Room: This is the room located between the third checkpoint and the Sniper Hut. RED often tries to flank through this room.
Final Checkpoint (Offensive View)
Final Checkpoint (Defensive View)
The Alley
Back Yard (The area behind the Sniper Hut)


Strategy
Attacking
First Point
- The first point is usually defended by a sentry placed on the ridge above the tunnel. The first priority of the offense is capturing the ridge and destroying the sentry.
- The scout and engineer should ride the cart whenever possible, spamming sentries and breaking off if the cart becomes stalled.
- The combo should focus on taking down the sentry. The usually accepted way of accomplishing this is taking the left spawn exit and walking along the ridge to the sentry, and ÜberCharge into it.
- The spy should coordinate with the combo whenever possible, sap the sentry at the beginning of the ÜberCharge push if possible.
- The flank should take the rocks and attempt to clear out any enemies hiding below the ridge-line, while avoiding the sentry's line of sight.
- Once the area is secured, everyone should stack the cart to save time.
Second Point
- Once the first point is clear of enemies, the combo should start to make their way to the roof, and try to intercept the enemy engineer if he hasn't begun to build yet. If a sentry is present, it is prudent to wait for an ÜberCharge before pushing.
- The flank should move the cart as far along the track as possible, though it will likely be stopped once the rooftop has a clear firing line onto it. Once it is halted, the flank should migrate to the building to help secure it and prevent flanking opportunities on the combo while they push.
- As always, the spy should coordinate his picks and saps with the combo, but due to the cramped nature of the roof, it is unlikely a spy will be of significant help beyond distraction.
Third Point
- The third point can often be pushed from momentum of the second point, however a speedy or proactive team may set up a hold on it to waste time. The combo should take the medium health pack room, and push out and destroy the sentry, and the flank should pour out of the side building. Due to the relatively poor defensive nature of this point, a strong team shouldn't be stone walled on this point.
Final Point
- The final point is usually defended by a sentry under one of the overhangs, with most of the classes crowded around it. It can be a very hard position to push if team coordination is lacking.
- The flank should focus on securing the Sniper Hut and surrounding area. A good soldier can harass very well from the stair case that leads down to the under area. During the final push, you should push up top and try to clear it out while the combo does work down below.
- The combo should focus on clearing the map room and ramp area. Once it's cleared, they should ÜberCharge into the sentry and kill everything on the rails. Once the area is clear, you should ride the cart to the end.
Defense
First Point
- The engineer should build a level 3 sentry on top of the ridge over looking the end of the tunnel, with his team mates suiciding metal to him during the setup. Whenever the enemy team begins to push, he should wrangler and attempt to survive as long as possible.
- The combo can hold either in the rocks or on the ridge, and can use either Kritz or Uber depending on circumstance and preference.
- The sniper should hold down the the large strip of land from the garage to the BLU spawn.
- Soldiers and Scouts should coordinate bombs based on the damage that the Demoman and Sniper are calling.
- The Spy should try play for picks when feasible, but there is little to do here beyond a lucky stab.
Second Point
- The Second point is usually held with most of the team on top of the roof. The level 3 can lock down most of the enemies in the if it isn't taken down.
- The combo should hold on the roof and spam down to the cart until the enemy team ÜberCharges in. Once the other team pops in, the defense should focus on protecting the sentry. There is little ability for the Kritzkrieg to be utilized here, as the nature of the building makes pushing out ineffective.
- The flank should holy the back buildings, and try to stop any enemies from walking up the stairs behind the sentry.
Third Point
- Because of the nature of the spawns, it is usually difficult to hold this point.
- If you decide to defend, the engineer should build in front of the Attic's Stairs, with the rest of the team holding either in the attic or near the point.
Final Point
- The engineer should build under either the map room or the walkover next to the ramp. Once the level 3 is up, the rest of the combo can either play defensive, or try to push out in an attempt to lock the enemy team back out near their spawn.
- The flank should hold near the tire and try to pinch any one who extends on to the ramp away from the support. If your team is playing aggressive, you should move up with them to the bridge or to the attic.
Gallery


| |||||||||||||||||||||||||||||||