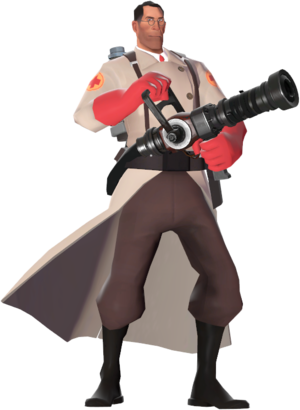
Community Medic strategy
| “ | Ze healing is not as rewarding as ze hurting.
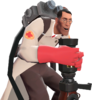
Click to listen
— The Medic on healing his teammates
|
” |
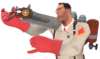
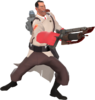
The Medic's primary role is to keep their teammates alive. The Medi Gun is not only able to heal injured teammates, but also overheal them above their usual maximum health. In addition, healing will slowly build the ÜberCharge meter, which can be spent to grant powerful buffs to teammates. Depending on the particular type of Medi Gun equipped, the Medic is able to provide his patient and himself with invulnerability, guaranteed critical hits, boosted healing and knockback immunity, or resistance to one of three damage types, all of which can often completely turn the tide of a battle.
Unfortunately, the Medic is poor at combat, having low damage output and a low maximum health. Because of this, the Medic relies on their team for protection; the team keeps the Medic alive, and in turn the Medic keeps the team alive.
Quick tips
- Heal anyone who needs it, but mainly focus on more high damage-output classes like Soldiers, Pyros, Demomen, and Heavies. These classes are the least likely to die from one or two attacks, and deal high damage, enabling them to protect you from enemies more effectively.
- Regularly overhealing nearby teammates will ensure that your team has the upper hand against the enemy, and will additionally allow you to build ÜberCharge faster.
- ÜberCharge is still built when your healing target is fully overhealed, albiet more slowly, and even slower if the heal target is also being healed by a Dispenser, Payload cart, or another friendly Medic.
- Try to stay with your team at all times. You are not suited to fight any class alone; even a single Spy can easily kill you with his Revolver before you can fight back.
- Move unpredictably and be aware of your surroundings. Medics are a high-priority target for enemies, especially Snipers and Spies.
- Don't be afraid to use an ÜberCharge to save yourself, even if no allies are nearby. It is better to use it too early than to lose it by being killed, and this will allow you to regroup with your team more quickly.
- Always remember that your Medi Gun's heal beam can stretch out a relatively long distance between you and your healing target. This allows you to stay behind cover while continuing to heal teammates.
- A team without any Medics is likely going to lose against a team that does. If your team doesn't have any, switch to Medic to ensure your team has a reliable source of healing and access to ÜberCharges.
General strategy
Survivability
The most important skill for a Medic to learn is how to stay alive. Dying as a Medic deprives your team of their primary source of health, greatly weakening the team as a whole. Not to mention that Medics lose all of their ÜberCharge upon death, requiring yet another 40 seconds to be spent on building up that Über again. This is especially problematic if the enemy Medic has an ÜberCharge of their own. Due to all of this, you are often enemy team's number one target. So take note of the following tips.
- Stay with your team: Medic's self-defense options are very limited. As such, your only defense against hostile attackers are usually your teammates. So make sure to stick to them at all times and all cost. Never allow yourself to be isolated from their support, as this will most likely result in your swift demise. If the group of teammates you've been accompanying die, do not be afraid to retreat.
- Gamesense: Having good teammate support is always desirable, but of what use is it if you are not aware of your surroundings? Certain classes, such as Spy or Sniper are able to completely nullify your team's protection, while certain situations, such as an enemy Kritzkrieg charge, can completely wipe out your team in an instant, and you alongside it. All of these problems can be avoided with good gamesense aka. knowing what is currently happening on the map and where. For example, knowing how much ÜberCharge an enemy Medic has can allow you to predict future pushes, and subsequently not be surprised by them. Knowing what are your team's strengths and weaknesses serves as a good indicator as to where an enemy attack might happen, and thus which areas need to be reinforced or avoided. Gamesense also allows you to decide which positions are best to occupy, and where to strike the next blow. Because of this, being aware of the general situation on the battlefield is very important, especially if you want to increase your survivability.
- Do not overextend: Avoid straying to far past your team's frontline, even if you are with a teammate or two. Pushing too far forwards enables the enemy to either flank you, or cut you off from support. And if those two teammates accompanying you happen to die, then you are right in the middle of hostile territory, completely alone.
- Avoid direct combat: While a Medic is not completely defenseless, he is still heavily outclassed by the other eight classes. Attempting to directly attack your foes will often get you needlessly killed. And even if you miraculously survive, there is still a big chance that another opponent will come around the corner and finish you. Remember, it is always better to retreat, then to stay and fight.
- Always be ready to retreat: No matter where you are, you should always take note of all possible escape routes and be ready to utilize them at a moment's notice. So that when things take a turn for the worse, you can get out alive and save that precious ÜberCharge. In addition, memorizing the locations of Health and Ammo pickups, as well as Sentry Gun emplacements is also useful, as they provide an additional layer of protection during a retreat.
- Additional tips: Here is a list of some other minor, but still quite useful tips for maximizing one's survivability.
- Communication: It's important to maintain a good communication link between you and your teammates. Since you should be constantly turning around and checking your surroundings, you will often be able to catch and see things that your busy teammates may have missed. As you can't deal with enemies yourself, use the voice chat or text chat to alert your team to Spies, Snipers, or enemies trying to flank you, so that they can deal with these problems themselves. In return, your team will be able to effectively protect you, while also staying alive themselves.
- Avoid Sniper sightlines: Snipers are your biggest threat on the battlefield, as their single uncharged Headshot is enough to instantly take you down. Make sure to always respect their sightlines and avoid making yourself visible. If you really need to cross a sightline, move as unpredictably as possible and jump constantly in order to make it more difficult for a Sniper to land his shot. Alternatively, you can wait for the Sniper to fire, and then cross while he is reloading.
- Watch your back: Your Medi Gun does not require you to actively aim at your target to function after the initial connection. Due to this, you should make the effort to constantly be aware of your surroundings at all times and in all situations.
- Rocket surfing: This is a very tricky, albeit rewarding technique to pull off. In essence, Rocket surfing is utilizing the Knockback from an enemy rocket to propel yourself towards a desired direction. To do this, you have to wait for a Soldier to fire a rocket at your feet. Then, just before it explodes underneath you, Crouch-jump forwards and let the explosion launch you away. This can be pulled off by any class, but it is most commonly performed by Medics, who are much better of running away rather then fighting. Once in the air, make sure to let go of the forward (Default: W) key, as this will only slowly you down. If you want to change directions mid-flight, you should use the strafe keys (Default: A and D), accompanied by slight movements of your mouse, in order to steer yourself left or right. For example, if you wish to go left, you hold down the A key and move your mouse slightly to the left.
- Make use of Engineer Buildings: Friendly Sentry nests are often your best friends, since they act as a secure oasis where you can respite and rearm. Unlike your teammates who are subject to human-error, Sentry Guns themselves shoot with 100% accuracy, ensuring that your opponents think twice before chasing you into one of them. Dispensers, on the other hand, are not only useful for healing, but also serve as excellent shields. Their large Hitbox, accompanied by voluminous health pool, mean that you can comfortably hide within one of them, thus buying time for your team to arrive and cleanup your attackers. This works especially well against Scouts. Because of these numerous benefits, make sure to keep your Engineers alive, they will certainly make up for your gratitude in the future.
While there certainly are many things to be aware of while playing Medic, it is also important to not be a coward. Yes, your life is precious and dying can make a difference between a win or a loss. But this does not mean that you should sit at the back of the map, too scared to fight on the frontlines. A good Medic heals as many people as possible, prioritizing those in the biggest need. So its clear that you will have to take certain risks in order to fulfill your duty successfully. You just need to realize when that risk outweighs the reward and vice versa. So keep your eyes open, recognize the flow of the game and make sound decisions. That is all which you need to stay alive.
Healing
As a Medic, you provide the delicacy of being able to heal your team at any time, at any place and for an infinite duration. And while this ability certainly is powerful, it still has its limitations. For one, you can only heal one person at a time, usually at a fixed rate of 24 hp/s. This downside becomes especially apparent in situations where there are multiple injured teammates asking for your help at the same time, requiring you to prioritize the ones in the biggest need.
- When in combat: The golden rule of healing states that when you are in combat, you always heal the person currently taking damage. Doing this will drastically lower their chances of dying, thus accomplishing the Medic's main task of preventing any allied deaths. This rule indiscriminately applies to all your teammates, regardless of which class they are playing. Meaning that even if a Spy, who usually makes for a bad Medic buddy, requires your immediate assistance, you are obliged to help him. However, if multiple teammates are in combat at once, then other factors such as: class, health and proximity to the enemy need to be taken in account. In this case, you will need to balance between healing whoever is in the biggest danger, and healing whoever is the most worthwhile. Sometimes, it might be more valuable to let that Spy die, if it means saving important classes like the: Heavy, Soldier or Demoman from the claws of respawn.
- When out of combat: Of course, you will not always be actively fighting, so the previous heal order cannot always be applied. For situations when you are not engaging the enemy, you will follow the second rule of healing, which states that you should prioritize healing players which will leave you the soonest. For example, if you are travelling to the front lines with a Scout and a Heavy, you should first heal up the Scout, so that he may run away and do his own thing. Meanwhile, the Heavy is probably going to stick with you for far longer, giving you ample of time to top him off on health at a later date.
- Crit Heals: Crit Heals are a powerful mechanic built into all Medi Guns. Similar to how regular Crits allow a weapon to deal 3X the damage, so do Crit Heals allow the Medic to heal 3X faster. As one can imagine, this ability is immensely powerful, since it circumvents the Medic's main downside of being able to heal only one person at a time. However, keep in mind that this effect only takes place when healing a patient which has not taken any damage in the last 10 seconds. Meaning that Crit Heals need to be smartly utilized in order to achieve their fullest potential. For example: while you are healing someone who is in combat, the other teammates, who are currently not in combat, can patiently line up behind you. Then when your original patient dies or wins the fight, you can briefly turn around and quickly heal up the reaminder of the team, making use of Crit Heals which should have been activated by now.
- Additional tips: Some minor strategies to improve one's healing potential
- Overheal: Overhealing is an act where you give an already healthy teammate even more health, buffing them up to 150% of their original healthpool. In most cases, you do not have time for overhealing, since you should prioritize injured teammates first over anything else. But if you are in a non-combat situation, you can take some time to overheal everyone and prepare them for the next team-fight. Of course, do this by first overhealing the classes which will leave you the soonest, as per non-combat heal order. Overheals work great in combination with Crit Heals. Since Crit Heals also apply to freshly spawned teammates, you can use them to instantly overheal any allies coming from spawn, thus giving them a big boost right before they enter battle.
- Communication: Believe it or not, communication can go a long way in maximizing your healing potential. Wounded players can tell you their location, so that you do not have to waste time searching for them. Teammates can also signal you when they are ready to receive Crit Heals, in case keeping track of that yourself was too hard. You can also tell your team when you are temporarily retreating out of an area, indicating to them that they should not expect any healing.
- Other Medics: In general, the best way to keep your team healthy is to simply have another Medic who can spread out the massive workload more evenly. In addition to that, the two Medics can also work together to keep each other alive, ensuring that they are both alive and healing instead of dead and respawning. So if you see another Medic on the battlefield, make sure to fully buff him up, and thank him for his service.
Healing can be a stressful job. Ensuring that your entire team is alive and well, while also keeping yourself from dying requires at least some mental fortitude. Factor in the additional frustration of constantly being let down by your team despite doing your best; and there is real potential for a Salt factory to develop. This is not good for a Medic, who needs to keep a calm head so that he can make sound decisions. If you find yourself being ever increasingly annoyed while playing Medic, it might be wise to take a small break from him. The point of TF2 is having fun, not raging at teammates.
ÜberCharge
ÜberCharge is the Medic's most powerful ability, and is one of the most horrifying tide-turners to pull from your sleeve. A well-timed ÜberCharge can singlehandedly wipe an entire group of enemies, prevent them from passing through a choke point and keep them from taking control of an area. However, ÜberCharge can only be used once your ÜberCharge meter is full (which in most cases takes around 40 seconds); therefore it is very valuable to you and your team.
ÜberCharge effectiveness
- The stock Medi Gun's ÜberCharge is best used on Soldiers, Pyros, Demomen, and Heavies due to their high-damage output allowing them to make short work of the enemy team. Scouts are also a surprisingly effective ÜberCharge target, as the stock uber's complete invincibility negates the Scout's main downside of low maximum health.
- The Kritzkrieg's ÜberCharge works well on Soldiers and Demomen, as crit-boosted explosives can potentially demolish entire enemy positions with only a few well-aimed shots. Pyro's Flame Thrower can also melt through entire clusters of enemies in an instant. However, the Pyro's short range, combined with a lack of invulnerability, usually result in Pyro dying before he can reach his targets. Heavy's already-high maximum health helps with the Kritzkrieg's main downside of not providing full invincibility, and since critical hits do not have damage falloff, the Minigun's normally-short range is greatly extended, making the Heavy a threat to almost every enemy within their line of sight.
- The Quick-Fix's ÜberCharge should be treated as a less powerful stock ÜberCharge, with the additional benefit of full knockback immunity. Heavies work best with the Quick-Fix ÜberCharge due to their high maximum health increasing the amount of damage they can absorb and their slow movement speed making them vulnerable to knockback.
- The Vaccinator's ÜberCharges, due to their quick charge speed and the ability to store up to four, should be used on teammates in combat as needed to keep them alive. Alternatively, you can use all four charges on one teammate to make an offensive push, but it is better to reserve a stock ÜberCharge due to the Vaccinator only providing partial resistance to one damage type.
Über tracking
Über tracking is the act of trying predict an enemy Medic's Über percentage. Mastering this skill is important, since it allows you to predict future enemy pushes, thus preventing any unpleasant surprises. Since both you and the enemy Medic should build Über at a similar pace, you simply need to use your own ÜberCharge meter as reference to his. So if you have 100% Über, then it is likely that the other Medic has 100% as well. If the other Medic dies, wait until he respawns (which you can determine by using the kill reporter at the top of the screen), and then start counting to 40 seconds. At 40 seconds, assume that the other Medic has ÜberCharge, as 40 seconds is the minimal amount of time necessary to build an ÜberCharge. If you die, take the Über percentage which you had at the moment of death, and then assume that the enemy Medic will have at least some percentage more of that when you respawn. This depends on your respawn time; for example, 20 seconds would equate to around 50% of build time, since it takes 40 seconds to gain 100% Über. However, if you have a shorter respawn time, then you should adjust this accordingly - a respawn time of only 10 seconds, for example, will result in your rival gaining "only" 25% additional Über. If both you and the other Medic die, wait until you both respawn and then go back to comparing Über percentages 1:1. Keep in mind that certain weapons, such as the Ubersaw or the Vita-Saw can heavily skew the numbers here; beware of what your opponent is using.
It is also worth noting that whenever you gain 100% Über‚ a voice line will play, indicating you have full charge. To prevent the enemy Medic from tracking your Über with this, play a different voice command to negate this.
Weapon Specific
Primary Weapons
Syringe Gun
| Weapon | Kill Icon | Ammo | Damage | ||||
|---|---|---|---|---|---|---|---|
| Loaded | Carried | Point Blank | Medium Range | Long Range | Critical | ||
Stock Syringe Gun |
40 | 150 | 10-12 | 5-10 | 5-6 | 30 | |
- Despite each individual syringe dealing low damage, the Syringe Gun has a very fast rate of fire and quick reload speed, making it deceptively strong at close range.
- Lead your shots when fighting moving targets, as the Syringe Gun's syringes arc over distance and take time to travel.
- The slow projectile speed can be used to make a "wall" of syringes while retreating. Running around a corner or through a narrow hallway while firing syringes behind yourself can discourage enemies from pursuing.
- Pyros, Engineers, Snipers, and Spies are only slightly faster than you while you're running backwards, and every other class (except Scout) is much slower. Use your speed to keep a respectable distance from enemies.
- You can use the Syringe Gun to weaken enemies so that nearby teammates can defeat them easier. However, keep in mind that your main priority should be keeping your teammates alive. If a teammate is low on health, switch back to the Medi Gun to heal them.
Blutsauger
| Weapon | Kill Icon | Ammo | Damage | Effect | |||||||
|---|---|---|---|---|---|---|---|---|---|---|---|
| Loaded | Carried | Point Blank | Medium Range | Long Range | Critical | Health On Hit | |||||
Unlock Blutsauger |
40 | 150 | 10-12 | 5-10 | 5-6 | 30 | 3 | ||||
Advanced+ Mann Up Reward Australium Blutsauger |
|||||||||||
The Blutsauger is an unlockable primary weapon for the Medic. Whenever a needle hits an enemy, 3 HP is restored to the Medic, up to the normal maximum health of 150. However, passive health regeneration is reduced by 2 HP/sec, with a total of 1 HP/sec to 4 HP/sec regeneration, depending on how recently the Medic has been injured.
- If you are expecting to use your primary weapon to defend yourself regularly, the Blutsauger's extra healing on hit will significantly increase your survivability in a fight.
- With the Blutsauger, a Medic can be a little more aggressive than usual. Use it to engage enemies that sneak up on you, but only if you can afford to stop healing for a moment. Stay close to your teammates and resume healing as soon as possible.
- Make sure to communicate with your teammates so they can assist you in killing the enemy.
- The Blutsauger is useful when pocketing; if your patient dies, you will almost always be the enemy's next target. Retreat while firing syringes to both discourage enemies from pursuing and keep your health topped up.
- The penalty to health regeneration can impact your overall survivability. Take note of the locations of nearby health packs or Dispensers in case you suddenly run low on health.
- The Amputator's increase in health regeneration when held can assist in improving your survivability.
Crusader's Crossbow + reskins
| Weapon | Kill Icon | Ammo | Damage/Healing | ||||
|---|---|---|---|---|---|---|---|
| Loaded | Carried | Point Blank | Medium Range | Long Range | Critical | ||
Craft Crusader's Crossbow |
1 | 38 | 38/75 | 56/112 | 75/150 | 113-225 | |
Uncrate Festive Crusader's Crossbow |
|||||||
The Crusader's Crossbow is a craftable primary weapon for the Medic. Unlike the other, rapid-fire syringe guns, it fires a single bolt that deals more damage to enemies the further it travels. Additionally, shooting teammates will heal them.
- The Crusader's Crossbow is completely different from your other primary weapons, which rely on numerous low-damage projectiles. Aim each individual shot carefully, as the slow reload time can make one shot the difference between life or death.
- The Crossbow is great for healing teammates who are dangerous to reach, or who you cannot reach in time, such as teammates who are on fire or about to die of fall damage.
- The Crusader's Crossbow can provide an instant burst of healing. When the teammate you are healing with your Medi Gun is under heavy fire and your healing rate is not able to keep up with the damage, switch to the Crusader's Crossbow, fire a shot at your teammate to heal them, and then quickly switch back to your Medi Gun and continue healing.
- You can also quickly fire shots at other teammates calling for a Medic, making it easier to keep multiple teammates alive in a fight.
- If you see a cluster of teammates and enemies fighting, shoot into the crowd. Your shot will either heal a teammate or damage an enemy, either way assisting your teammates in the fight.
- The high damage at longer distances can make this weapon a good tool for dealing with enemy Snipers, either forcing them to retreat or killing them outright. Take care not to stand out in the open when attempting this, as the enemy Sniper will likely try to headshot you.
- If need be, you can use this weapon for long-range fire support. The increase in damage over distance can be substantial from a good vantage point, and you can not only deal damage but heal teammates from far away. You may need to ask them to stop moving with voice chat to make it easier to hit your shots.
- Unlike the Huntsman, the Crusader's Crossbow can be fired underwater and in midair.
- Healing from the Crusader's Crossbow cannot overheal teammates, and while the bolt can contribute to your ÜberCharge meter, it will not build nearly as efficiently as using the Medi Gun.
- Due to the Crusader's Crossbow's low rate of fire and reversed damage falloff, it is less efficient at close-quarters combat than your other primary weapons. If enemies manage to ambush you, it's usually better to take out your melee weapon or try to retreat behind a teammate.
- The Crusader's Crossbow should be used to supplement your Medi Gun, not to replace it. Primarily focus on healing with your Medi Gun in order to build ÜberCharge and provide overheal.
Overdose
| Weapon | Kill Icon | Ammo | Damage | Effect | ||||
|---|---|---|---|---|---|---|---|---|
| Loaded | Carried | Point Blank | Medium Range | Long Range | Critical | Speed at 100% ÜberCharge | ||
Craft Overdose |
40 | 150 | 9-11 | 5-9 | 5-6 | 27 | 117.33% | |
The Overdose is a craftable primary for the Medic. It does 15% less damage than the standard Syringe Gun, but will increase the Medic's speed as his ÜberCharge meter increases. The speed boost caps at 20% faster than the Medic's standard movement speed. However, the speed boost only applies while you are actively wielding the Overdose, and not while using your Medi Gun or melee weapons.
- If your heal target gets killed and you need to retreat, you can use the Overdose's speed boost to escape and regroup with your team.
- The speed bonus at full ÜberCharge effectively eliminates the speed penalty for moving backwards (115% instead of the normal 96%), meaning that you can backpedal while firing and still outrun all classes except for the Scout.
- Considering that you should be rarely engaging in direct combat, the Overdose's damage reduction can be considered negligible. If you do not actively pursue combat, consider utilizing the Overdose's speed boost, and instead rely on your teammates for protection.
Secondary Weapons
Medi Gun + reskins
| Weapon | Healing | ÜberCharge | ||||
|---|---|---|---|---|---|---|
| Normal Healing Rate | Maximum Healing Rate | ÜberCharge | ÜberCharge Time | Charge Speed | Maximum Charge Time | |
Stock Medi Gun |
24 health/sec | 72 health/sec | Invulnerability | 8 seconds | 2.5%/sec | 40 seconds (80) |
Uncrate Festive Medi Gun | ||||||
Advanced+ Mann Up Reward Australium Medi Gun | ||||||
- The Medi Gun's base healing rate is 24 HP/sec. If healing a teammate that has not taken damage in the last 10 seconds, the healing rate increases linearly, up to 72 HP/sec on a teammate that has not taken damage in the last 15 seconds or more.
- When healing a heal target, the Medi Gun will stay "locked-on" to the heal target until the primary fire key is released, or your heal target moves out of range, regardless of the direction you are looking.
- If ambushed, remember that it's better to use an ÜberCharge to survive than to die with a full, unused ÜberCharge meter.
- Be aware that not even the stock ÜberCharge will protect you from environmental hazards such as cliffs, saws, or trains. An enemy Pyro may attempt to Airblast you into these hazards, so take note of their locations and avoid deploying your ÜberCharge near them.
Kritzkrieg
| Weapon | Healing | ÜberCharge | ||||
|---|---|---|---|---|---|---|
| Normal Healing Rate | Maximum Healing Rate | ÜberCharge | ÜberCharge Time | Charge Speed | Maximum Charge Time | |
Unlock Kritzkrieg |
24 health/sec | 72 health/sec | Critical hits | 8 seconds | 3.125%/sec | 32 seconds (64) |
Festivizer [[Festivized Kritzkrieg|Template:Dictionary/items/festivized kritzkrieg]] | ||||||
The Kritzkrieg is an unlockable Medi Gun for the Medic. Its ÜberCharge builds 25% faster than the stock Medi Gun's and provides guaranteed Critical hits to the Medic's heal target instead of invulnerability.
- Heavies, Soldiers, and Demomen are among the best classes to deploy a Kritzkrieg ÜberCharge on. Though any class is extremely lethal while crit boosted, these three are far more lethal than the rest. The choice is situational:
- Soldiers and Demomen are very similar: their explosive weaponry can be used to instantly annihilate clusters of enemies, or make the enemy team unable to stand remotely near Control points or Payload carts.
- Heavies are great for large, spread-out groups of enemies, as their ability to fire a continuous stream of bullets and quickly switch between targets allows them to wipe enemies too spread out for explosions to be effective. Critical hits also don't suffer from damage falloff over distance, which significantly increases the effective range of the Minigun.
- Although not as effective as a Soldier, Demoman, or Heavy, a Kritzkrieg ÜberCharged Pyro is very deadly at close ranges, as critical point-blank damage from a Pyro's Flamethrower can kill most classes near-instantly. The Flame Thrower can also damage multiple enemies at once, giving it similar crowd control capabilities to explosives. Consider Kritzing a Pyro when the enemy team is tightly grouped up nearby.
- Scouts have an extremely high movement speed and a high-damage Scattergun, allowing them to quickly move from target to target and kill individual enemies in one or two shots. However, the Scout's low maximum health combined with the Kritzkrieg's ÜberCharge providing no protection from damage at all can result in them dying quickly when dealing with large crowds.
- If there are no powerful offensive classes nearby to Kritzkrieg ÜberCharge, the Sniper can be an improvised Kritzkrieg ÜberCharge target — every body shot while ÜberCharged does the same damage as a headshot, which can kill a non-overhealed Scout, Engineer, Medic, Sniper, or Spy in one hit.
- The Kritzkrieg excels at ambushes. The sheer damage output from critical hits means that most enemies will be dead before they have time to react to a surprise attack.
- The Kritzkrieg's ÜberCharge is useless against a Medi Gun's ÜberCharge due to the stock Medi Gun ÜberCharge providing invulnerability. However, the faster charge rate allows it to be deployed before the enemy's Medi Gun charge, and it can be deployed more frequently.
- Since the Kritzkrieg is the only secondary weapon that does not protect the Medic during a ÜberCharge, it is encouraged to use the Vita-Saw to preserve some of your ÜberCharge meter in the event you die mid-charge.
- Critical hits deal no additional damage to buildings, making the Kritzkrieg the weakest secondary weapon to use against an enemy Engineer's nest. However, a Kritzkrieg ÜberCharge on a Soldier or Demoman allows them to utilize the splash damage from their rockets and grenades to easily kill an Engineer hiding behind their Sentry Gun. Once the Engineer is dead, the Sentry Gun will not be receiving healing and can be easily destroyed with normal weapons.
Oktoberfest
| Weapon | Healing | Duration | Details | |
|---|---|---|---|---|
 Oktoberfest |
Kritzkrieg | 11 health | 4 seconds | The Medic takes a brief whiff out of the barrel of his weapon. |
- Due to the long duration of the taunt, the low amount of health recovered, and the fact that you cannot move or defend yourself for its duration, you should only use this taunt when safely behind cover and while backed up against a wall. In such situations, however, it's usually far better to simply seek out a better source of healing.
- In dire situations, such as being on fire or bleeding, it's possible that using this taunt can prevent death.
Quick-Fix
| Weapon | Healing | ÜberCharge | ||||
|---|---|---|---|---|---|---|
| Normal Healing Rate | Maximum Healing Rate | ÜberCharge | ÜberCharge Time | Charge Speed | Maximum Charge Time | |
Craft Quick-Fix |
33.6 health/sec | 100.8 health/sec | Megaheal | 8 seconds | 2.778%/sec (1.389%/sec) | 36 seconds (72) |
Festivizer [[Festivized Quick-Fix|Template:Dictionary/items/festivized quick-fix]] | ||||||
The Quick-Fix is a craftable secondary for the Medic. It has a 40% faster heal rate and a 10% faster charge rate than the Medi Gun. The Quick-Fix's ÜberCharge is the "Megaheal", which increases healing speed to 300% and negates movement-impairing effects, such as knockback, the Natascha's slowdown and compression blasts. In addition, it will mirror your patient's explosive jumps, shield charges, and, in Mannpower, Grappling Hook grapples. However, it can only overheal teammates to 125% of their max health, as opposed to the other Medi Guns' 150%.
- The Quick-Fix and its Megaheal are meant for keeping many teammates alive at once. It's best to stay with a group of teammates to maximize the Quick-Fix's effectiveness.
- Try not to deploy your Megaheal if you and your heal target are alone and only fighting one or two enemies. The Megaheal is best used to support large pushes and keep teammates alive while under heavy fire. However, don't be afraid to use it to avoid death.
- Because this weapon cannot overheal past 125%, this means you do not hit the threshold for slowing the rate at which you build ÜberCharge (142.5% overheal). With no other factors in play, you will typically build ÜberCharge with this weapon faster than the Medi Gun or the Kritzkrieg, and you can be somewhat laxer in healing surrounding teammates; even sticking to just one patient (pocketing) will still build the ÜberCharge in a short span of time. Keep in mind that keeping all your teammates in good shape is still important, as multiple healthy players are more dangerous than one extremely healthy player.
- The ability to use your teammates' explosive jump can allow you to stay with them when they jump to the front lines or to areas that you could otherwise not access. Your patient will be able to make more jumps than normal due to being healed during flight, and in combat, your presence should keep them alive longer. Be aware that you can easily become separated from your patient, especially if you have little experience with explosive jumping. If you suspect your teammate is going to explosive jump, stand nearby and be ready to air-strafe to control your jump. Keep in mind that although you take no damage from the initial jump, you will still take fall damage.
- A Demoman using the Chargin' Targe, Splendid Screen, or Tide Turner can be a useful class to pocket with the Quick-Fix. The Quick-Fix will allow you to keep pace with the Demoman during his charges, and the extra healing combined with the shields' damage resistance will make him extremely difficult to kill.
Vaccinator
| Weapon | Healing | ÜberCharge | ||||
|---|---|---|---|---|---|---|
| Normal Healing Rate | Maximum Healing Rate | ÜberCharge | ÜberCharge Duration | Charge Speed | Maximum Charge Time | |
Craft Vaccinator |
24 health/sec | 72 health/sec | 75% resistance to a selected damage type | 2.5 seconds/resistance | 4.175%/s | 24 s |
The Vaccinator is a craftable secondary for the Medic. It has a 67% faster ÜberCharge rate while healing non-overhealed players, and using the reload key allows the Medic to cycle through three damage resistance types: Bullet Damage, Explosive Damage, and Fire Damage. Both the Medic and his heal target are provided 10% resistance to the selected damage type passively while the Medic is healing, and the Vaccinator's ÜberCharge provides 75% resistance to the selected damage type for 2.5 seconds, even after the Medic stops healing the patient, as well as immunity to bonus critical damage from the selected damage type. ÜberCharge rate is boosted temporarily when you or your patient are damaged by the currently resisted damage type. As a drawback, it overheals at a 66% slower rate compared to the Medi Gun.
- The Vaccinator builds ÜberCharge at a very fast rate when healing injured players. If paired with the Overdose, you can easily build an ÜberCharge and then use the Overdose's ÜberCharge-based speed boost to your advantage.
- Use the Vaccinator to prevent incoming damage, similarly to a normal ÜberCharge. Judge what is the biggest threat to your patient and apply resistances accordingly.
- Knowing when to change resistances is crucial. A wrong choice can lead to death. Whenever you are not in active combat, use bullet resistance, because all classes except for the Demoman have a bullet weapon in their stock loadouts, and many bullet weapons strike instantly, meaning that it’s too late to switch once the enemy starts firing. If you feel there is a high chance of a Soldier, Pyro, or Demoman ambush, you can switch to explosive or fire resistance while not fighting. During combat, watch your enemies' weapons and switch resistances accordingly.
- Bullet resistance applies not only to literal bullets, but to similar projectiles such as syringes, arrows, or laser beams.
- The Vaccinator can stack multiple ÜberCharges of different types at once, allowing you to protect you and your patient from two or even three types of damage at once. However, keep in mind that this strategy uses significantly more ÜberCharge than just using one resistance at a time.
- Keep in mind that when healing a fully overhealed Heavy with bullet resistance, he can survive a fully-charged headshot from any Sniper not using the Machina. You as a Medic can also survive any fully-charged bodyshot or uncharged headshot.
- Note, however, that having the Vita-Saw equipped still leaves you vulnerable to a fully charged bodyshot and uncharged headshots.
- If an enemy Sniper is causing trouble, considering ÜberCharging a friendly Sniper to safely take care of the threat. As headshots are considered critical hits, the Vaccinator's ÜberCharge can aid your Sniper in killing the enemy. The enemy Sniper will be completely unable to kill yours in a single shot for the duration of the ÜberCharge.
- Activating ÜberCharge on yourself can also ensure a safer escape from enemy Snipers.
- The Vaccinator provides absolutely no protection against melee weapons. While healing a patient, stay away from classes with strong melee weapons like Demoknights and Soldiers with the Market Gardener, who can kill you as normal. Communicate with your healing targets to prevent dying to a melee attack.
- The Vaccinator has great synergy with the Crusader's Crossbow as the resistance bubble created will stay on the patient, regardless of if you continue to heal them. This allows for you to pop uber, switch weapons, fire a healing bolt, then continue to heal them
Melee Weapons
Bonesaw + reskins
| Weapon | Kill Icon | Attack Interval | Damage | |
|---|---|---|---|---|
| Point Blank | Critical | |||
Stock Bonesaw |
0.8 seconds | 65 | 195 | |
Promotional Saxxy |
||||
Drop Conscientious Objector |
||||
Promotional Frying Pan |
||||
Promotional Freedom Staff |
||||
Drop Bat Outta Hell |
||||
Drop Ham Shank |
||||
Achievement Necro Smasher |
||||
Uncrate Crossing Guard |
||||
Uncrate Festive Bonesaw |
||||
- The Bonesaw deals more burst damage than the Syringe Gun but suffers in terms of damage over time. This makes it good for getting in the first strike on a distracted opponent, or to finish off an already-weakened one. Like other melee weapons, it also has a higher critical hit chance than the Syringe Gun, which can potentially result in instantly killing an opponent with the first strike.
- When Spy-checking teammates, using the Bonesaw is more reliable due to the difficulty in aiming with the Syringe Gun. Spies will often try to attack you whenever possible, so always be prepared to take out the Bonesaw in order to deal with them, or other sudden threats.
- You are faster than most other classes; your greater agility can put you at an advantage in melee combat. That being said, your main goal as a Medic should be self-preservation, so avoid engaging in melee combat outside of self-defense.
- Your other melee weapons provide additional helpful effects that the stock Bonesaw just cannot match. Use another weapon if you can.
Ubersaw + reskins
| Weapon | Kill Icon | Attack Interval | Damage | |
|---|---|---|---|---|
| Point Blank | Critical | |||
Unlock Ubersaw |
0.96 seconds | 65 | 195 | |
Uncrate Festive Ubersaw |
0.96 seconds | 65 | 195 | |
The Ubersaw is an unlockable melee weapon for the Medic. It has a 20% slower attack rate than the Bonesaw, but will add 25% to the ÜberCharge meter for each successful hit. In addition, taunting with the Ubersaw will perform the Spinal Tap kill taunt.
- Rather than using the Ubersaw for killing enemies, try to use it with the mindset of building up ÜberCharge. If possible, try to simply land a hit and retreat safely, rather than fighting an enemy to the death.
- If fighting an enemy with the ÜberCharge meter almost full, try to use the Ubersaw to finish up the charge and quickly switch to the Medi Gun to activate it. In desperate situations, the protection of an ÜberCharge can allow you to safely escape from a situation where you would have otherwise died.
- The Ubersaw is especially useful for taking out Spies that may be attempting to backstab teammates, as it will not only kill the Spy in two hits, but also build the ÜberCharge meter more safely than if attempted on other enemies. However, be aware that experienced Spies may attempt to trickstab you if you try to engage in melee combat with them. If you know an enemy Spy is capable of trickstabbing, it is safer to attempt to use your primary weapon to kill him from a safe distance, or alert one of your teammates and ask them to take the Spy out.
- Hitting disguised Spies will not give you ÜberCharge; however, the melee damage will still hurt them.
- Your ÜberCharge meter does not increase upon killing a Spy that is using the Dead Ringer. If a Spy appears to have died, but the hit that killed him provided no ÜberCharge, be aware that the Spy has feigned their death and will likely return shortly.
- The Ubersaw will still add to the ÜberCharge meter if you hit a Scout under the effects of Bonk! Atomic Punch.
- Using the Ubersaw and the stock Medi Gun in conjunction with another Medic with the same loadout can be very effective. (See Chain Über.) The first Medic can ÜberCharge the second while the second approaches an enemy with the Ubersaw equipped. Over the course of the ÜberCharge, the second Medic should aim to get in enough hits to fill his ÜberCharge, allowing himself to grant the first Medic an ÜberCharge so he can do the same thing. However, be aware that the enemy team will usually take quick notice of this, and attempt to counter your strategy, usually with a Pyro's airblast.
- Try not to overuse the Ubersaw. While it is very tempting to run forward into enemy lines and swing wildly in the hopes of gaining a free and easy ÜberCharge, it is not practical and more often than not will get you killed, especially if you run into a Soldier or Heavy before you can begin your rampage.
- Healing teammates with your Medi Gun is more important than the raw ÜberCharge you can gain from using this weapon. If you rely too much on the Ubersaw for gaining charge, that wastes time that could go towards healing a teammate and gaining just as much ÜberCharge across a wider timeframe.
Vita-Saw
| Weapon | Kill Icon | Attack Interval | Damage | |
|---|---|---|---|---|
| Point Blank | Critical | |||
Craft Vita-Saw |
0.8 seconds | 65 | 195 | |
The Vita-Saw is a craftable melee weapon for the Medic. It allows the Medic to retain up to 60% of his ÜberCharge meter upon death. However, it also reduces the Medic's maximum HP by 10, to 140 HP.
- Due to being able to retain up to 60% of the ÜberCharge meter, it's possible to deploy ÜberCharges faster upon respawning. This will allow you and your team to put more pressure on the enemy team.
- This will also allow you to move 12% faster with the Overdose, allowing you to reach your team more quickly after respawning.
- Remember that if you're killed during an ÜberCharge, up to 60% of what charge you had left will still be retained.
- It is best to pair the Vita-Saw with the Kritzkrieg, as the Kritzkrieg is the only Medi Gun that does not protect you at all during an ÜberCharge.
- In game modes without respawning, such as Arena or Sudden Death, the Vita-Saw is a straight downgrade to the default Bonesaw and should not be used.
Amputator
| Weapon | Kill Icon | Attack Interval | Damage | Healing | ||
|---|---|---|---|---|---|---|
| Point Blank | Critical | On Taunt | ||||
Craft Amputator |
0.8 seconds | 52 | 156 | 75 | ||
Festivizer [[Festivized Amputator|Template:Dictionary/items/festivized amputator]] | ||||||
The Amputator is a craftable melee weapon for the Medic. While being actively held, it increases health regeneration by +3 HP/sec. It also allows Medics to perform the Medicating Melody taunt. However, it deals 20% less damage than the stock Bonesaw.
- The extra health regeneration can be used to offset damage from afterburn, giving you more time to find a source of healing to extinguish yourself.
- The Amputator's damage penalty is enough that most classes will take at least one extra swing to kill. This makes the Amputator less reliable as a self-defense tool.
Medicating Melody
| Weapon | Healing | Duration | Details | |
|---|---|---|---|---|
 Medicating Melody |
Amputator | 25-75 health | 4.2 seconds | The Medic brings his weapon up to his shoulder, leans on his right foot, and plays a soothing melody, healing all allies within a certain radius while causing them to emit a team-colored glow around their feet. |
- Upon taunting, all teammates within 450 units of the Medic are each healed for 4 seconds at the same rate as healing as the Medi Gun.
- The purpose of this taunt is to multiply your healing power when several teammates are injured and are in range.
- Since you cannot overheal with this taunt, do not use it when nearby teammates are not injured.
- An ideal situation for the taunt is when several teammates are close together, are receiving heavy damage, and you have a safe place to taunt that can reach them all.
- Unlike with the Crusader's Crossbow and the Medi Gun, you cannot "miss" your teammates; healing is automatic for all teammates in range, including any that enter the range during the taunt.
- During your taunt, the camera will switch to a third-person view, allowing you to better see the battlefield and judge whether you should repeat the taunt, move, and/or switch weapons.
- Only use this taunt when standing in a location where the enemy cannot see (and therefore shoot) you, and where you cannot be ambushed.
- Remember that you cannot heal around corners. Players must have unbroken line of sight to you to receive the healing effect.
- You cannot move for the entire duration of the taunt. If your team is moving as a group, it's better to just keep using the Medi Gun.
- The healing from this taunt builds ÜberCharge substantially slower than your Medi Gun. If you are able to keep your teammates alive by healing them individually, doing so is usually a better choice, as you will build ÜberCharge faster that way.
Solemn Vow
| Weapon | Kill Icon | Attack Interval | Damage | |
|---|---|---|---|---|
| Point Blank | Critical | |||
Craft Solemn Vow |
0.88 seconds | 65 | 195 | |
The Solemn Vow is a craftable melee weapon for the Medic. It allows you to see the opposing team's health and enemy Medics' ÜberCharge meters, at the cost of a 10% slower swing rate.
- The Solemn Vow offers the ability to see enemy health, allowing you to inform teammates whether a retreating enemy is heavily wounded or not.
- If an enemy Medic is spotted, it may be worth communicating how much ÜberCharge they have.
- The Solemn Vow can also be useful for judging whether to flee or fight. Being able to see the health of attackers will let you detemrine whether it's better to go for a few quick melee swings or to focus on making an escape.
- Unlike several other weapons with passive effects, you do not need to be actively holding the Solemn Vow to see enemy health values. Take advantage of this by informing your Medi Gun patient of enemy health values to aid them in combat.
- The Solemn Vow is most useful when actively using a microphone to relay important information your team. Otherwise, it may be better to use an alternative melee weapon with more immediate effects.
- In Mann vs. Machine, all classes can see the health of giant robots. It is therefore advised not to use the Solemn Vow over other choices such as the Ubersaw or Amputator.
Taunt attacks
Spinal Tap
| Kill Icon | Weapon | Damage | Duration | Details | |
|---|---|---|---|---|---|
 Uberslice |
File:Killicon spinaltap.png | Ubersaw | 500 | 4 seconds | The Medic throws his coattails back and enters a combat pose before thrusting his Ubersaw forward and retracting it, killing any enemy player in the way. Gives 100% ÜberCharge if successful. |
- Remember that, like the Skewer taunt, an enemy does not need to be stunned by the initial thrust in order to kill them. They simply need to be in front of you during the retraction part of the animation.
- Similarly, stunning an enemy doesn't necessarily guarantee a kill, as explosions, airblasts, or even just your target's existing momentum may move you or the target outside of the kill zone before the retraction.
- The initial thrust can be used to stun ÜberCharged enemies and waste their time. The taunt won't kill the ÜberCharged player, but it will still give you 100% ÜberCharge.
- If you find an unguarded, active Teleporter exit, then you can use this taunt in front of it to kill the next player to use the Teleporter and get full ÜberCharge. Be careful when positioning yourself, or you could be telefragged instead.
- This taunt can synergise well with the Heavy's the Holiday Punch, as critical hits from that weapon will force the enemy to perform the Schadenfreude taunt, giving you a chance to perform this without interruption. Try to do this on enemies separated from the rest of their team.
- Giving the Heavy a Kritzkrieg ÜberCharge will ensure every single punch is critical, and a successful Spinal Tap will refill your ÜberCharge meter instantly.
- Due to the length of the taunt, Spinal Tap is ineffective unless enemies are unaware of your presence, such as enemy Snipers focused on distant targets.
- The Medic will loudly announce "I'm going to saw through your bones!" before the thrust, which can alert foes to your presence.
Weapon combinations
| Example Combinations | |||
|---|---|---|---|
| Combo | Usage | ||
|
One of the most commonly used setups, and generally the best for most situations. A Medic with this setup should focus on healing teammates and keeping them in combat, rather than fighting the enemy directly. The stock Medi Gun is the most versatile of the 4 Medi Guns, as it gives the team access to default ÜberCharges. Because you won't be focusing on direct combat, the stock Syringe Gun and Crusader's Crossbow are good choices, as unlike the Blutsauger, they do not lower your health regeneration rate, and the Crusader's Crossbow provides the additional ability to heal at long range. In a last-ditch scenario, you can use your melee for a baseline level of defense. Using the Ubersaw for this purpose means you will even get 25% uber per hit as compensation. | |||
|
This setup is ideal for Medics whose priority is on survivability and building ÜberCharges. Holding up to 60% charge after death makes up for the Medi Gun's relatively slower charge speed compared to other secondaries. While the Vita-Saw reduces the Medic's maximum health by 10 HP, it allows you to preserve some of your ÜberCharge after death, which allows you to build ÜberCharge back faster after a death. However, having reduced maximum health can result in you dying faster and more often, so stick with the stock Bone Saw if you wish to avoid the health penalty. The Overdose ensures that you'll be able to move faster when your ÜberCharge meter is filled, enabling you to move faster to stay with your team or to escape if the situation goes south. | |||
|
This combination is more suited to an offensive Medic, though not necessarily for offensive pushes. The Kritzkrieg builds up its charge 25% faster, allowing you to use its effect more often than other ÜberCharges, or to rebuild charge faster after a death. The Blutsauger provides healing during combat and is thus more useful to a Medic who engages in fights regularly. Because the Kritzkrieg already charges fast, the Solemn Vow's faster swing speed makes it more viable for direct combat than the Ubersaw, as well as allowing you to identify weakened enemies to finish off. However, players who wish to focus even more on offensive combat can use the Ubersaw to build up ÜberCharge faster. In Mann vs. Machine, most of the Medi Guns are considered superfluous, as the stock Medi Gun's ÜberCharge can be purchased as a canteen effect (and shared with your teammates via the Canteen Specialist upgrade), and the Quick-Fix's healing rate can be easily matched with Healing Mastery, without the detriment of having reduced overheal. One of the few ÜberCharges that can't be easily duplicated via upgrades is that of the Kritzkrieg, due to its increased recharge rate and ability to give a decently long duration of critical hits. Since your primary and melee weapons are often left un-upgraded, their use is more based on versatility. As such, the Blutsauger can be used in a pinch to quickly regain lost health, with the reduced passive health regeneration of the Blutsauger being negated by the Healing Mastery upgrade for the Medi Gun. For the melee slot, the Ubersaw is by far preferred to the Solemn Vow, since striking an enemy returns 25% ÜberCharge, allowing the Medic to give his team critical hits more often, especially given the relative obliviousness of MvM bots compared to real players. However, the Ubersaw is best used against robots that are not in a group, as the sheer number of robots in MvM will likely result in you dying extremely quickly. | |||
|
This combination is suited to a Medic who wants protection against lone enemies. The Ubersaw, on hit, will give you one Vaccinator ÜberCharge immediately, which can be used to protect yourself from an ambushing class's main damage type. The Blutsauger can be used to protect yourself during a retreat. The main downside to this strategy is that you can struggle to protect yourself from multiple damage types at once, due to each additional protection requiring an additional 25% of your ÜberCharge meter. | |||
|
This setup is ideal for greatly enhancing the firepower of your team while allowing Medics to focus on healing rather than combat. The combination of the Syringe Gun and Vita-Saw gives players survivability and the ability to retain part of an ÜberCharge meter. The faster charge rate of the Kritzkrieg and the ability to retain charge on the ÜberCharge meter after death allows Medics to deploy Kritzkrieg ÜberCharges very quickly. If the player is killed in the middle of a Kritzkrieg ÜberCharge, the remainder (up to 60%) will still be retained, allowing enterprising Medics to quickly build the next ÜberCharge faster as well. | |||
| The Clinical Trial
This is the Clinical Trial setup, good for an adventurous Medic who wishes to be somewhat independent. The Quick-Fix's fast uber build means the Overdose will frequently give you a meaningfully large speed boost while active, allowing you to run away from a fight or reach an injured teammate more easily. The Solemn Vow allows you to see the enemies' health and point out weakened enemies for your patient to kill. The fun part comes when your team is all healed up, which happens more often with the Quick-Fix than with other mediguns thanks to the faster heal rate. The Solemn Vow allows you to tell whether an enemy is hurt or not, and the Overdose can easily make you the second-fastest class in the game. Together, they allow you to pinpoint weakened targets, run out to finish them off, then run back to your team. This is a bad idea if you have hurt teammates around, but with the Quick-Fix, that won't happen as often. | |||
| The Medieval Medic - with Quick-Fix
This setup is useful for an offensive, mobile Medic who focuses on healing as many teammates as possible using all three of his weapons. The Crusader's Crossbow, while weak in direct combat, provides an extremely useful secondary source of healing that will help you keep the entire team alive; you will not need to defend yourself at close range if you are surrounded by your teammates. When your patient is at full health, you can take the opportunity to shoot a few crossbow bolts at long range toward your teammates and then resume healing your pocket. Taunting with the Amputator can provide healing for everyone nearby at the expense of ÜberCharge build speed. The Quick-Fix gives you a significantly increased healing rate and the ability to explosive-jump with your patient, so you can support even your fastest teammates. | |||
|
This setup is for a support Medic who focuses on healing and deploying ÜberCharges as quickly as possible, at the cost of minimized personal defense. The Medic can hit enemies a few times with the Ubersaw, before switching to the Overdose to use the speed boost to escape. Once your Übercharge is built, this is the preferred setup for a Chain ÜberCharge. One Medic can ÜberCharge another, which attacks enemies with his Ubersaw to build up his ÜberCharge, and then the medics switch roles. The Overdose is helpful, as during a Chain ÜberCharge you are likely to have some charge built, so you can switch to it to chase down fleeing enemies. | |||
|
This setup focuses entirely on speed, not granting a Medic much direct strength or survivability. The Quick-Fix rapidly gains ÜberCharge, incidentally healing allies much faster than other Medi Guns, as well as pulling you alongside explosive-jumping Soldiers and Demomen. The Overdose allows you a higher degree of mobility, complimented by the Quick-Fix's rapid ÜberCharge build speed. Should you perish, the Vita-Saw will allow you to roll out faster by retaining up to 60% of your unused ÜberCharge to power your Overdose. This can make you a good companion for a Scout, as the Overdose and Quick-Fix allow you to keep pace with him, and the Vita-Saw potentially allows you to catch back up to him faster upon respawning. | |||
|
This set up focuses on defense from a specific damage type. The Vaccinator provides the Medic and its teammate a 10% resistance from a select damage type, a 75% resistance when ÜberCharged, and a 25% heal from the matched damage taken. Having the ability to build an ÜberCharge at a 50% faster rate then normally, paring this weapon with the Overdose enables you to efficiently use the speed boost provided to quickly get to teammates. Having 4 separate ÜberCharge times, a Medic is able to quickly deploy an ÜberCharge at any time if the meter is filled over 25%. This provides an immediate defense from any enemies that may be lurking. The Solemn Vow allows you to see enemy health, thereby enabling you to make a decision whether a short or long ÜberCharge is necessary. However, if the ability to see enemy health is not your priority, simply stick with the Bonesaw, as it lacks the 10% slower firing speed the Solemn Vow is stuck with. | |||
|
This set up relies heavily on voice communication for its maximum potentional. The Vaccinator paired with the Solemn Vow allows the Medic to decide whether or not an ÜberCharge is required depending on the enemy's health, if said enemy is at low health, the Medic can use voice communication with his team regarding low-health enemies, so they can finish them off. The Crusader's Crossbow is incredibly powerful with the Vaccinator, due to the ÜberCharge effects not leaving the patient when switching weapons, letting you take advantage by healing teammates that are taking damage from different sources than the one ÜberCharged with, preserving important ÜberCharges for later. However, when doing this, the Medic will lose the resistance effect, so it's important to stay a bit far away from the patient you just ÜberCharged. Having a pocket Heavy buddy with this set can be devastating to the other team, as the Heavy's large health pool let him deal a lot of damage, while tanking all incoming damage, including resistances you may ÜberCharge with. His larger player model also means it's easier to land arrows from far away, and the more far away you hit your arrows, the more heal your teammates will receive. | |||
| Unless marked with a †, all weapons can be substituted with reskins. | |||
Class Cooperation Strategies
 Scout
Scout
Scouts tend to make very poor pockets due to their tendency to strictly fight 1-on-1 and being in and out of battle very quickly. However, there are some ideal situations where it may hurt the enemy team to ÜberCharge your Scout more than it would you.
- Healing a Scout tends to be lower priority, as in the time that it takes to heal him, he likely can find health packs to patch himself up.
- When healing a Scout, your base speed is raised to whatever his speed is. A Scout can help a Medic get to the front lines quickly.
- With Scout's natural speed advantage on the battlefield, Medics can rely on him to aid in escaping. Because of his frailness in general combat, a good Scout will know the 'tells' for when a situation looks bleak. They will often be the first ones to fall back, usually with a Medic in tow.
- The Scout's multiple different unlocks can ready him for just about any situation and by extension give you both a speed advantage and situational advantages when healing him.
- With access to mini-crits from the Crit-a-Cola or Fan O'War, a stock Medi Gun ÜberCharge can turn the Scout into a very mobile class shredder with no downside after the effect has worn off, provided there is no significant knockback to hinder this attack.
- Using the Kritzkrieg on Scout gives the Medic a speed advantage and a power advantage, as one good shot from Scout's Scattergun will kill most classes.
- Scouts equipped with the Back Scatter and/or Mad Milk are some of the more efficient spy-checkers on their team, and should be sure to make use of this to protect their team's Medic(s).
- Scouts using the Boston Basher/Three-Rune Blade can intentionally miss their melee swings to help you gain ÜberCharge far quicker than usual.
 Soldier
The Soldier, with his higher than average health and wealth of different loadout options makes for one of the most flexible picks for an ÜberCharge patient and are one of the more common pocket picks, with good reason.
- A Soldier's high health pool and firepower allow him to protect an allied Medic well.
- By using the Quick-Fix, a Medic can mirror the Soldier's rocket jumps.
- A Soldier will often be taking lots of self-damage from rocket jumps. While this will mean the Medic is crit-healing him less often, it'll also keep him wounded, allowing the Medic to build ÜberCharge faster.
- Soldiers when looking to be pocketed will likely carry one of the three types of Banner for use once they enter into a heated battle, or will make a push.
- ÜberCharging them as they sound off their bugle will keep them protected so the banner's effects will become active during the charge.
- Using the Black Box or Concheror as a pocket is not exactly recommended, as they'll keep the Soldier at full health often and thus make the Medic build ÜberCharge more slowly.
- All mediguns raise the Medic's speed to that of the heal target's; this allows low-health Soldiers using the Escape Plan to get their Medics out of danger quickly.
- The Escape Plan does, however, reduce the amount of healing the user receives (though only while it's active). On the other hand, that also means the target doesn't get overhealed for longer, allowing the Medic to build ÜberCharge quicker.
- It also means that heal targets using the Disciplinary Action don't have to worry about outrunning their Medics.
- The enormous damage dealt by critical rockets makes the Kritzkrieg a favored medigun for Medics following Soldiers.
- Kritzkrieg ÜberCharges are especially effective on Air Strike, Beggar's Bazooka, or Liberty Launcher Soldiers whose primaries don't need to reload often (or, in the case of the Bazooka, can keep up a reasonable rate of fire anyway). On the other hand, the Cow Mangler 5000 and the Rocket Jumper are 'very. subpar launchers for Kritz über targets, as the Kritzkrieg's criticals will be downgraded to mini-crits for the former and will deal no damage for the latter.
- The Beggar's Bazooka can unleash a barrage of rockets that most Pyros will be unable to reflect in their entirety at the cost of accuracy. This can be very effective with both the stock Medi Gun or the Kritzkrieg against large groups of enemies on a Control Point.
- Of the Soldier's secondaries, the Medic will benefit most from a shotgun or the Battallion's Backup. Shotguns allow the Soldier to defend his Medic even when rockets would be a poor option (e.g., against airblasting Pyros), while the Backup gives the Medic much-needed resiliency.
- Soldiers under the effects of the Vaccinator will take less damage from rocket jumping, though the Medic will probably not be able to follow the Soldier after the first jump.
- With a Vaccinator ÜberCharge, however, the Soldier may be able to get a second jump in before the resistances wear off.
 Pyro
Pyro
As usual, the Pyro is pretty much the best bodyguard in the game, between reasonable health, efficient spychecking, and airblast.
- Sticking around a Pyro may slow the Medic down. This can be alleviated if the Pyro uses the Powerjack to increase his speed, which will actually increase the Medic's speed as well.
- As airblasting is part of why the Pyro is a good bodyguard, the Dragon's Fury and Phlogistinator are subpar flamethrowers for bodyguarding Pyros. The Backburner also is not very useful, unless ammo packs are plentiful.
- Pyros are the near-perfect pocket in one situation: Control Point rushing. A good Pyro will be able to jump onto the point and break up big groups of enemies by setting them on fire or killing them outright with their wide cone of flame damage.
- Generally, Pyros are a decent über target, but not a high-priority one. That said, there are a couple special things to note:
- The Pyro's flamethrowers have the somewhat unique attribute of never needing to reload, allowing the Pyro to put out a constant stream of damage for the entirety of an über.
- A Pyro using the Phlogistonator with full Mmmph! can taunt to gain 8 seconds of guaranteed critical hits. While this is redundant with the Krtizkrieg, any other medigun turns such a Pyro into a crit-boosted and resilient waking nightmare for your enemies.
- A Pyro with the Homewrecker can take out Sentry Guns fairly efficiently while übered. The sentry will inflict significant knockback, though, making it advisable to approach from around a corner. Alternatively, even a level 3 Sentry Gun's DPS won't outmatch a Quick-Fix über's heal rate, making that medigun viable for taking out lone Sentry Guns in this manner.
- Pyro is useful for counteracting Vaccinator-wielding Medics with afterburn's resistance piercing effects. Combining this with a Kritzkrieg or Stock ÜberCharge can whittle down a healthy or protected group of opponents with ease.
- While they can be very effective in an offensive ÜberCharge, Pyros have little to no power outside of the Flamethrower's medium-range on the defensive. Unless the Pyro is using a Phlogistinator with a full 'Mmph' bar and you know your opponents must pass through you, prioritize your Stock ÜberCharge on other classes with greater range or power.
- Pyros wielding the Back Scratcher will increase the amount of ÜberCharge you build relative to their lessened healing and will allow you to more unleash more charges in a shorter amount of time.
 Demoman
Demoman makes a good pocket under the correct circumstances, such as protecting the cart or at a point where he can easily fire grenades and stickybombs into the crowd.
- The Demoman's damage output is high enough that he doesn't really 'need' damage boosts to become terrifying, he just needs resiliency.
- That said, a Demoman under the effects of a Kritzkrieg über is still one of the most terrifying sights in the game.
- With the Quick-Fix, a Medic can mirror a Demoman's explosive jumps or a Demoknight's charges.
- An explosive jumping Demoman will take less self-damage from the explosions while being healed by the Vaccinator.
- It's worth noting that, although a Demoman is great at dealing damage, he's less effective at protecting the Medic at close range, since he himself is weak there.
- Demoknights are less efficient pockets for Medics than normal Demomen, as they are less able to dish out outright carnage; however, a Demoknight can help a Quick-Fix Medic get to the front lines at blinding speed.
- While this can technically work for any class, Demoman's multiple unlockables dedicated to melee combat can pair well with a Kritskrieg's ÜberCharge if you manage to get the drop on enemies.
- Charging a Scotsman's Skull Cutter-wielding Demoknight with the Kritzkrieg generally is a bad idea against a well organized team, but may give you the edge in raw damage and can immediately kill any class, even one who is significantly overhealed, excluding the Heavy and Soldier.
- In general, it is a better idea to charge a Soldier than a Demoman with the stock Medi Gun due to their more reliable fire rate and accuracy with their Rocket Launcher of choice.
- However, do not underestimate the power of a Demoman's Stickybomb Launcher when using a Kritzkrieg's ÜberCharge. It's large explosion radius and near instant detonation at the press of a button can be a far better Control Point clearing tool than any of the Soldier's launchers.
 Heavy
Heavy
The Heavy is the most iconic Medic patient and for good reason-- He has a large amount of health, a large hitbox to hide behind and can mow down a disorganized team with little effort.
- A Heavy can protect a Medic with nothing but his large hitbox and equally large health pool, simply by standing in front of the Medic.
- The stock Medi Gun is the best gun in most situations and that goes double for planning to work with the Heavy. The invulnerability the stock Medi Gun grants supplements the Heavy's superior firepower perfectly.
- A Heavy's minigun is effective enough at mid-range to deter most opponents, and can take out any class (even another Heavy) at close range. A Medic next to a competent Heavy has little to fear from anybody other than a Sniper.
- A Tomislav Heavy with good aim and the effects of a Kritzkrieg ÜberCharge can pose a threat to Snipers from unreasonably far away.
- The Kritzkrieg used with the Brass Beast is the most damaging option in the game, even shredding other overhealed Heavies.
- The Heavy's miniguns don't need to reload, allowing him to put out a constant stream of damage for the entirety of an ÜberCharge.
- Other than that, though, a Heavy has trouble taking advantage of a Kritzkrieg ÜberCharge the way a Demoman or Soldier can.
- A Heavy with the Fists of Steel being pocketed by a Vaccinator Medic is nigh-impossible to take out with bullets.
- A Heavy with a Medic buddy will do well to bring along a Sandvich or Buffalo Steak Sandvich to keep his buddy topped up on health. At 150 health, a Medic doesn't benefit significantly from the small health pack dropped by other lunchbox items - only gaining 30 health. The Sandvich and Steak Sandvich, however, drop a medium health pack, which will restore a sizeable 75 health to the Medic. The Heavy doesn't really need the Sandvich for himself, as the medigun will generally keep him topped up.
- However, in situations where you only need a small boost due to continuous light pressure, the aforementioned lunchbox items work well, especially to stop afterburn or bleeding, which afflict Medics rather often.
- Heavy's Killing Gloves of Boxing give him the advantage of guaranteed Critical hits. Using this with the Stock ÜberCharge can be very effective in wiping out an entire team by yourself.
- With the Gloves of Running Urgently, the Heavy can be used to easily and efficiently overwhelm an opposing Medic using the Vaccinator with a Bullet resistance.
- Like with the Pyro's Back Scratcher, the Heavy's Fists of Steel will allow you to gain more ÜberCharge relative to the healing they receive and allow for more charges in a shorter amount of time.
 Engineer
Engineers generally make for a situational, but usually effective pocket due to relying on mainly Hitscan weaponry, an average speed and his very powerful Sentry Gun.
- Engineers can fit the role of an 'infantry' class with their generic, yet capable weapons and can deal with immediate threats efficiently.
- ÜberCharging an Engineer while he is repairing his Sentry Gun is highly effective and could make the difference between a Level-Three Sentry wiping out a team, or the both of you dead.
- Gunslinger Engineers will be around your team more often to help protect you and can take advantage of the weapon's combo perk to deal guaranteed critical hits.
- Teleporters are useful for allowing the Medic to get to the front lines quickly.
- The Engineer is generally a subpar heal target, as he usually won't be on the front lines and will have a Dispenser with him.
 Medic
Medic
Medics are similar to Scouts in which it is not very useful to ÜberCharge them. Try prioritizing other classes over other Medics.
- Other Medics typically work separately with their own patients, but they should heal each other if they're injured.
- Medics should protect each other as best as they can when on the retreat. Using an ÜberCharge to aid in retreating will allow the two Medics to survive and return to their team safely and quickly build ÜberCharge for the next assault.
- A particularly bold strategy is to ÜberCharge a Medic with the Ubersaw, gain Über with four hits, and deploy that charge on the other Medic. (See ÜberCharge strategy)
 Sniper
With their tendency to stay far from enemy lines and a lack of reliable close-quarters combat tools, Snipers make for a comparably worse pocket than most.
- Overhealing your Sniper to at least above 150 health allows them to deal with the enemy Sniper much more comfortably, as they can resist a headshot. However, he is not the highest priority healing target.
- The Sniper can kill classes like the Heavy and Soldier to help protect a Medic should he be threatened by an enemy.
- The Sniper's SMG can be highly effective when paired with the Kritzkrieg. It can make the Sniper a more mobile 'Heavy', bringing heftier classes to very severe damage in a matter of seconds.
- A Sniper using the Jarate will deal mini-crits (Full criticals in tandem with the Bushwacka) on opponents sodden with the weapon. Therefore, the Kritzkrieg's ÜberCharge becomes less effective overall and could be considered unnecessary.
- Huntsman-wielding Snipers will stay closer to the battle and will be readily available as a pocket if needed. A Huntsman bodyshot will deal 120 damage flat which will hinder most classes significantly, and deal up to 360 on a headshot which will even kill partially overhealed Heavies.
 Spy
Spy
Much like Sniper or Medic, the Spy is a less than ideal pocket. Because he will take alternate routes and be disguised or invisible most of the time, healing or ÜberCharging Spies could blow their cover and will generally be a waste.
- The Spy can be healed behind enemy sight to help him survive an enemy encounter should he be caught.
- A way to heal the Spy in a less conspicuous way is to fire a bolt from the Crusader's Crossbow at him. If he is disguised, it will look to the enemy like you are attacking their teammate, where in reality you are healing yours.
- If possible, quickly flash your charge on the Spy so he may backstab a high priority target such as enemy Medics without worry of retaliation.
- Spies using the Ambassador can already earn critical hits with proper aim. The Kritzkrieg becomes useless to them as a result.
See also
|